

It’s no secret that technology is advancing faster than ever before, and one of the newest pieces of tech taking the world by storm is Halo Lock. This biometric lock system uses state-of-the-art fingerprint recognition technology to keep your home, office, and valuables safe from unauthorized access.
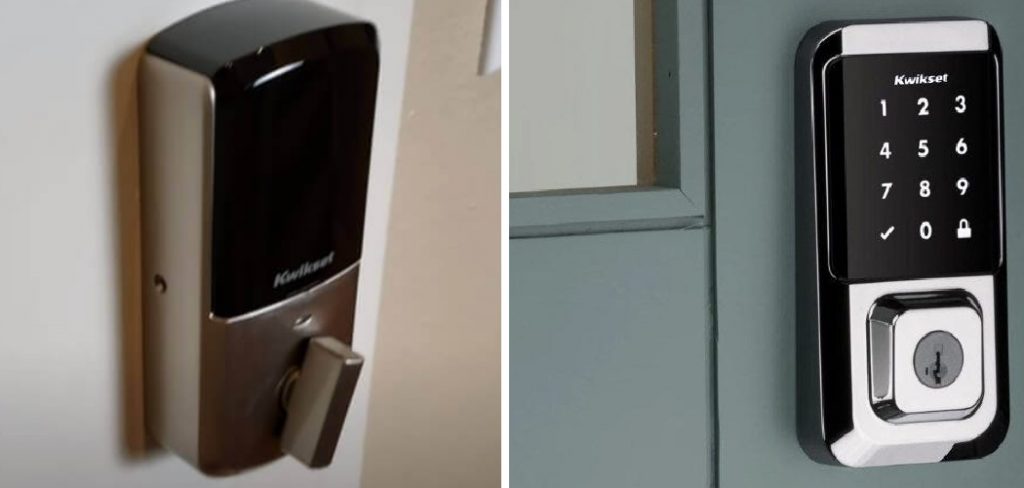
While these devices are incredibly secure and easy to use, at some point you may find yourself wanting or needing to factory reset your Halo lock in order for it to function correctly again. Don’t worry – if you’re wondering how this procedure works, then this article is just what you need!
We’ll walk you through step by step how to factory reset Halo Lock while ensuring that all of your settings stay intact. By the end, you’ll have a fully functioning security system ready for whatever life throws at it next! So let’s dive in and get started on the process of resetting your Halo Lock.
What is a Factory Reset?
A factory reset, also known as a hard reset, is the process of restoring all settings and configurations to their original state. This means that any customizations or personal data will be erased and your Halo Lock will return to its default settings.
It’s important to note that this should only be done as a last resort if you encounter any issues with your lock. It is also recommended to back up your data before proceeding with a factory reset, as it will be permanently erased.
Equipment You Will Need to Factory Reset Halo Lock
- Halo Lock device
- USB cable (included in the box)
- Laptop or computer with internet access
- Access to the Halo Lock app (if using WiFi)
Step-by-step Guidelines on How to Factory Reset Halo Lock
Step 1: Disconnect the Halo Lock From the Power
The first step is to disconnect your Halo Lock from power. If it is battery-operated, remove the batteries. If you’re using a plug-in power source, unplug it from the wall outlet. This is a crucial step to ensure that the reset process goes smoothly. So make sure the device is completely disconnected from any power source before proceeding to the next step.
Step 2: Prepare Your Laptop or Computer
Now it’s time to prepare your laptop or computer for the factory reset process. You will need a USB cable and an internet connection. Make sure your device has enough battery life or is connected to a power source, as this process may take some time. Laptop users should also make sure that their computer is not set to sleep or hibernate during the process.
Step 3: Install the Halo Lock Firmware Update
In order to reset your Halo Lock, you’ll need to install the latest firmware update from the manufacturer’s website. This can be done on your laptop/computer by visiting the Halo Lock website and navigating to the “Support” or “Installs” section. Look for the firmware update that corresponds to your specific Halo Lock model and install it onto your computer.
Step 4: Connect Your Halo Lock to Your Laptop/Computer
Using the USB cable, connect your Halo Lock to your laptop or computer. Once connected, launch the installed firmware update and follow the on-screen instructions. This process may take a few minutes, so be patient and do not disconnect the device during this time. Sometimes the update may fail, in which case you will need to repeat this step again.
Step 5: Factory Reset Your Halo Lock
Once the firmware update is complete, disconnect your Halo Lock from your laptop/computer and reconnect it to power. Depending on your specific model, there may be a physical reset button that needs to be pressed for a few seconds, or you may need to use the Halo Lock app to initiate the reset process. Make sure to follow the instructions provided by the manufacturer for your specific model.
Step 6: Reconnect Your Halo Lock to WiFi (if applicable)
If you were using WiFi before, you will need to reconnect your Halo Lock to your home network or a new network. Follow the instructions in the app or on the lock’s screen to reconnect. If you were not using WiFi before, skip this step. But if you do plan on using WiFi in the future, make sure to set it up now.
Step 7: Test Your Halo Lock
Once you have successfully completed the factory reset process, test your Halo Lock by attempting to access it with your fingerprint or using the app. If everything is working correctly, then congratulations – you have successfully factory reset your Halo Lock. Make sure to set up any customizations or personal data again, and enjoy your fully functional security system!
Following these steps will ensure that your Halo Lock is reset to its original state and working properly. Remember, a factory reset should only be done as a last resort and if you are experiencing issues with your lock. By following these guidelines, you can easily reset your Halo Lock with minimal stress or hassle.
So don’t let any technical difficulties stop you from enjoying the convenience and security of your Halo Lock. Keep this guide handy, and you’ll never have to worry about how to factory reset your Halo Lock again!
Additional Tips and Tricks to Factory Reset Halo Lock
- Ensure that you have access to the lock’s programming code or key – Before attempting to factory reset your Halo Lock, ensure that you have the necessary programming code or key. This will allow you to reprogram the lock after the reset is complete.
- Use a high-quality and reliable power source – The factory reset process requires a constant power supply. Therefore, it is important to use a high-quality and reliable power source, such as a fresh set of batteries or a direct plug-in power adapter.
- Follow the correct sequence of steps – The process for factory resetting a Halo Lock may vary depending on the model and manufacturer. It is crucial to follow the specific instructions provided by the manufacturer to ensure a successful reset.
- Remove all existing codes and fingerprints – Before initiating the factory reset, make sure to remove all existing access codes and fingerprints from the lock. This will prevent any unwanted access or complications during the reset process.
- Reset multiple locks at once – If you have multiple Halo Locks that need to be reset, it is recommended to do them all at once. This will save time and ensure that all locks are on the same programming code.
- Keep a record of the new programming code – After completing the factory reset, make sure to keep a record of the new programming code in a safe and easily accessible place. This will allow you to reprogram the lock if necessary in the future.
- Consult with customer support – If you encounter any difficulties or have any questions during the factory reset process, do not hesitate to contact the manufacturer’s customer support for assistance. They will be able to provide further guidance and troubleshooting tips.
- Regularly check for firmware updates – To ensure that your Halo Lock is functioning properly, it is recommended to regularly check for firmware updates. This will also help prevent any potential issues that may require a factory reset in the future.
- Consider hiring a professional – If you are not confident in your ability to successfully factory reset your Halo Lock, consider hiring a professional locksmith or contacting the manufacturer for assistance. This will ensure that the reset is done correctly and avoid any potential damage to the lock.
- Keep all necessary tools and materials handy – Before starting the factory reset process, make sure to have all necessary tools and materials within reach. This includes the programming code or key, power source, and any additional instructions or resources provided by the manufacturer.

Adding these tips and tricks to your knowledge can help you confidently perform a successful factory reset on your Halo Lock. Remember to always follow the specific instructions provided by the manufacturer for your particular model, and do not hesitate to seek assistance if needed.
Keeping your Halo Lock properly maintained and updated will ensure its longevity and reliable performance. So, be sure to regularly check for updates and perform any necessary resets or reprogramming as needed. With these additional tips, you can easily navigate the process of factory resetting your Halo Lock without any complications.
Things You Should Consider to Factory Reset Halo Lock
1. Backup Your Current Settings and Data:
Before proceeding with a factory reset, it is important to make sure that you have a backup of your current settings and data. This will help you restore your lock to its previous state if needed. Make sure to save any settings, codes, or access permissions that are currently saved on your Halo Lock.
2. Know Your Device’s Model Number:
Halo Locks come in different models and each model may have a slightly different factory reset process. Before attempting a factory reset, make sure you know the model number of your lock. This information can usually be found on the packaging or on the back of the lock itself. This will ensure that you follow the correct reset process for your specific model.
3. Disconnect Any Other Devices:
If your Halo Lock is connected to any other devices, such as a smart home hub or a virtual assistant, make sure to disconnect them before proceeding with a factory reset. This will prevent any potential conflicts during the reset process. This step is especially important if you have customized your lock’s settings through these devices.
4. Use the Reset Button:
Most Halo Locks come with a reset button that can be used to perform a factory reset. This button is usually located on the back or bottom of the lock and may require a paperclip or a small tool to press it. Refer to your lock’s manual for specific instructions on how to use the reset button. Sometimes, pressing and holding the button for a few seconds will initiate the reset process.
5. Follow the Manufacturer’s Instructions:
It is important to follow the manufacturer’s instructions when performing a factory reset on your Halo Lock. These instructions can usually be found in the lock’s manual or on the manufacturer’s website. Following these instructions will ensure that you perform the reset correctly and avoid any potential damage to your lock.
Following these considerations will help you safely and effectively perform a factory reset on your Halo Lock. It is important to note that a factory reset will erase all data and settings on your lock, so make sure to have a backup before proceeding.
Once the reset is complete, you can set up your lock from scratch or restore it using the backup if needed. So, follow these steps carefully and you will be able to reset your Halo Lock with ease. Happy locking!
Frequently Asked Questions
What Does Factory Resetting a Halo Lock Do?
Factory resetting a Halo Lock restores it back to its original factory settings, essentially wiping out any customizations or changes that have been made.
This includes deleting all user codes, removing connected devices, and resetting any personalized settings. It is similar to how a computer can be reset to its factory settings, erasing any changes made by the user.
Why Would I Need to Factory Reset My Halo Lock?
There are a few reasons why you might need to factory reset your Halo Lock. One common reason is if you have forgotten your master code or user codes and are unable to unlock the lock. Another reason could be that you are experiencing technical issues with the lock and need to troubleshoot by starting from scratch.
Additionally, if you are selling or giving away your lock, it is recommended to factory reset it so that the new owner can set it up with their own personalized settings.
What Happens After I Factory Reset My Halo Lock?
After you have successfully factory reset your Halo Lock, all user codes will be deleted along with any connected devices and personalized settings. This means that you will need to set up your lock again as if it were brand new, including creating a new master code and user codes.
If you have any connected devices, such as a smart home hub or virtual assistant, you will need to reconnect them to the lock after setting it back up. Any personalized settings, such as auto-lock or privacy mode, will also need to be reconfigured.
Are There Any Risks to Factory Resetting My Halo Lock?
There are no major risks associated with factory resetting your Halo Lock, but it is important to note that all user codes and personalized settings will be permanently deleted. This means that you should only factory reset the lock if necessary, as you will need to set it up again from scratch.
Additionally, if you have any connected devices, you will need to reconnect them after the reset. If you are unsure about what a factory reset will do to your lock, it is recommended to consult the instruction manual or contact customer support for assistance.
Conclusion
Now you have a clear knowledge of how to factory reset halo lock. It is important to only do this if necessary, as it will delete all user codes and personalized settings. If you are experiencing issues with your lock or need to set it up for a new owner, factory resetting can be a useful solution.
Just be sure to have the necessary information and instructions on hand before proceeding with the reset. With these tips in mind, you can confidently reset your Halo Lock and get it back to its original factory settings. Remember to always prioritize safety and security when it comes to your lock.
About
Safety Fic is a distinguished figure in the world of Diy design, with a decade of expertise creating innovative and sustainable Diy solutions. His professional focus lies in merging traditional craftsmanship with modern manufacturing techniques, fostering designs that are both practical and environmentally conscious. As the author of diy, Safety Fic delves into the art and science of Safety Fic-making, inspiring artisans and industry professionals alike.
Education RMIT University
(Melbourne, Australia) Associate Degree in Design (Safety Fic) Focus on sustainable design, industry-driven projects, and practical craftsmanship. Gained hands-on experience with traditional and digital manufacturing tools, such as CAD and CNC software.
Nottingham Trent University
(United Kingdom) Bachelor’s in diyfastly.com and Product Design (Honors) Specialized in product design with a focus on blending creativity with production techniques. Participated in industry projects, working with companies like John Lewis and Vitsoe to gain real-world insights.
Publications and Impact
In diy, Safety Fic his insights on indoor design processes, materials, and strategies for efficient production. His writing bridges the gap between artisan knowledge and modern industry needs, making it a must-read for both budding designers and seasoned professionals.