

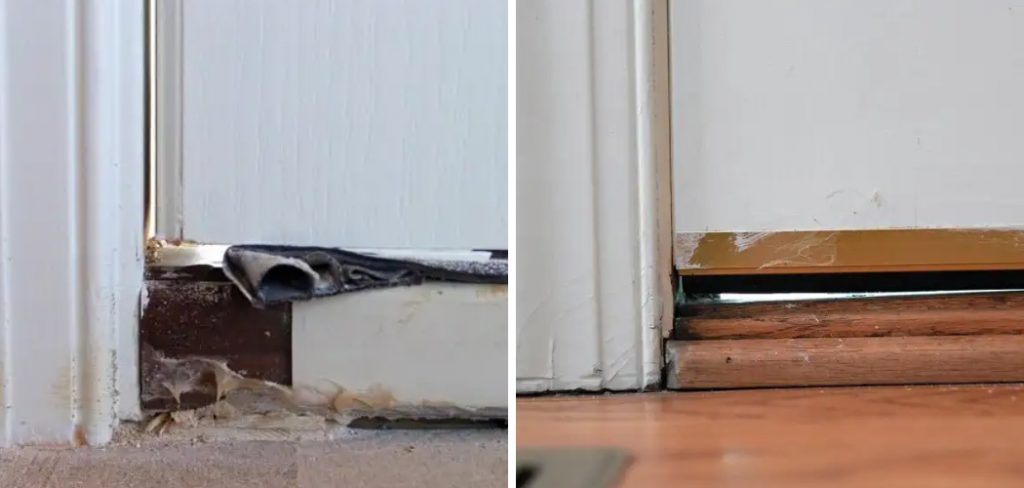
Are you experiencing a draft coming from under your exterior door? Or maybe water is seeping in during heavy rain? A gap under your exterior door threshold can cause these common problems.
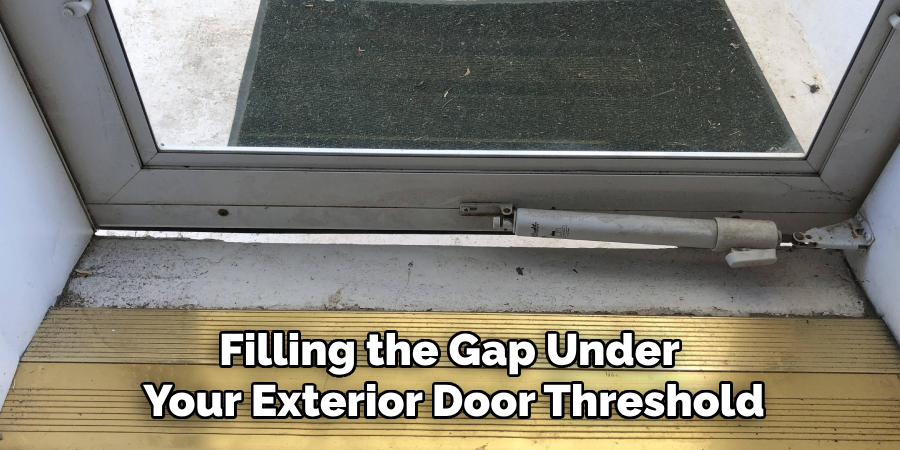
Gaps under exterior door thresholds can lead to various problems, from drafts and energy inefficiency to unwanted pests and moisture entering your home. Addressing these gaps is essential for maintaining a comfortable, efficient, and secure living environment. This guide will walk you through the necessary steps on how to fill gap under exterior door threshold, ensuring a snug fit that will protect your home from external elements.
Whether you’re a seasoned DIY enthusiast or a beginner, our step-by-step instructions will provide you with the knowledge and confidence needed to complete this task efficiently.
What are the Causes of Gaps Under Exterior Door Thresholds?
Before we dive into the steps, it’s important to understand why gaps under exterior door thresholds occur in the first place. Here are some common causes:
- Uneven or Sloping Foundation: An uneven or sloping foundation can cause the door frame to shift, leaving a gap between the bottom of the door and the threshold.
- Worn Weatherstripping: Over time, weatherstripping can become worn or damaged, creating gaps that allow air and moisture to enter.
- Shrinking Wood: Wood is prone to shrinking when exposed to changes in temperature and humidity. This can cause a once snug-fitting door to have gaps underneath.
- Improper Installation: If your exterior door is not installed correctly, it may not sit flush with the threshold, resulting in gaps.
Now that you know some common causes of gaps under exterior door thresholds, let’s move onto the steps on how to fill them.
What Will You Need?
Before you begin filling the gap under your exterior door threshold, gathering all the necessary tools and materials is essential. Here is a list of items that you will need:
- Measuring tape
- Utility knife or saw
- Caulk gun
- Silicone caulk or weatherstripping foam tape
- Pry bar or hammer (if removing old threshold)
- Screwdriver (if replacing old threshold)
- Wood shims (if installing new threshold)
- Paintbrush and paint (optional)
Make sure to check the instructions provided by the manufacturer for any additional tools or materials needed specific to your door threshold.
10 Easy Steps on How to Fill Gap Under Exterior Door Threshold
Step 1. Measure the Gap:
Begin by thoroughly measuring the gap under your exterior door threshold. Using a measuring tape, determine the gap’s length, width, and depth. Precise measurements are critical for selecting the right materials to fill the gap effectively. For accurate results, measure the gap at multiple points along the threshold as it might not be uniform. Take note of the largest measurements to ensure the materials cover the entire gap without leaving any spaces uncovered.
Step 2. Clean the Area:
Next, clean the area around and beneath the threshold. Remove any debris, dirt, or old sealant to ensure a smooth surface when applying new materials. Use a brush or vacuum cleaner to clear out all loose particles, and if necessary, use a damp cloth to wipe down the area. Cleaning ensures better adhesion for the sealant or weatherstripping materials and helps avoid future issues. If there is existing caulk or old foam tape, carefully remove it with a utility knife or scraper before proceeding. A clean surface is paramount for achieving a snug, long-lasting fit.
Step 3. Prepare the Materials:
Once the area is clean, prepare your materials for filling the gap. If you are using weatherstripping foam tape, cut it to length according to your measurements. For silicone caulk, ensure your caulk gun is ready and the tip is cut to an appropriate size to fill the gap adequately. If you’re replacing an old threshold or adding wood shims, have them ready along with any necessary tools like a saw or utility knife for precise cutting. Preparation helps streamline the process and minimizes interruptions once you begin.
Step 4. Apply the First Layer of Caulk or Foam Tape:
If you are using silicone caulk, load it into the caulk gun and apply a continuous bead along the entire length of the gap. Start from one end and move steadily to the other, ensuring even coverage. For foam tape, firmly press it into the gap, stretching it gently to ensure it seals tightly. If the gap is particularly wide or deep, you might need to apply the materials in layers, making sure each layer adheres properly before adding the next. This step forms the initial barrier against drafts and moisture.
Step 5. Insert Wood Shims (if necessary):
For larger gaps, inserting wood shims can provide additional support. After the initial layer of caulk or foam tape, place the wood shims into the gap, spacing them evenly for optimal support. Ensure the shims are snug but not too tight, to prevent warping the threshold. Once positioned, they should sit just below the surface of the threshold, ready for a final sealing layer. Use a utility knife or saw to trim any excess length from the shims, ensuring a flush fit with the surrounding framework.
Step 6. Apply a Second Layer of Caulk or Foam Tape:
After placing the wood shims, apply a second layer of caulk or foam tape over them. This layer seals the shims in place and provides an additional barrier against external elements. Smooth the caulk with a putty knife, ensuring it penetrates all crevices around the shims. Press it firmly into place for foam tape, ensuring it adheres well at all points. This step enhances insulation and blocks any remaining drafts or moisture threats.
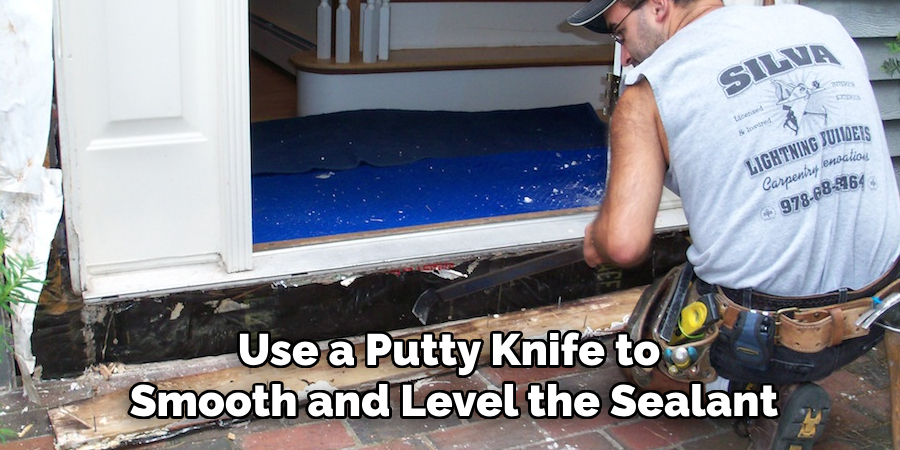
Step 7. Smooth and Level the Sealant:
Once the second layer is applied, use a putty knife to smooth and level the sealant. This ensures an even surface and helps the caulk adhere better to the threshold. For a professional finish, dip the putty knife in water before smoothing; this prevents the caulk from sticking and allows for a cleaner edge. For foam tape, press down with your fingers or a flat tool to ensure it sits evenly along the length of the gap. Proper smoothing ensures a tight seal and an aesthetically pleasing finish.
Step 8. Let it Cure:
Allow the caulk or foam tape to cure completely according to the manufacturer’s instructions. This may take several hours to a full day. Avoid using or placing weight on the threshold during this time to ensure the sealant sets properly. Curing time is essential for the durability of the repair, guaranteeing it remains effective against drafts, moisture, and pests. Patience during this step ensures a long-lasting solution.
Step 9. Test for Gaps:
After the sealant has cured, inspect the area for any remaining gaps. Close the door and check for drafts by running your hand along the threshold. Use a flashlight to identify any light coming through for a more thorough test. If small gaps remain, apply additional caulk or foam tape as needed. Ensuring a thorough seal prevents future issues and preserves the comfort and efficiency of your home.
Step 10. Paint and Finish (optional):
For a final touch, you may choose to paint the threshold area to blend seamlessly with your door frame. Use a paintbrush to apply a coat of paint that matches your existing décor. Painting improves the aesthetic and adds an extra layer of protection against moisture and wear. Allow the paint to dry according to the manufacturer’s instructions before using the door. Finishing the job with paint provides a professional appearance and ensures the longevity of your repair.

5 Additional Tips and Tricks
- Use Expanding Foam Sealant: For wider gaps, apply expanding foam sealant. Ensure the area is clean and dry before spraying the foam evenly into the gap. Once the foam hardens, trim any excess with a utility knife and cover it with a weather-resistant caulk or threshold plate.
- Install a Door Sweep: Attach a door sweep to the bottom edge of your exterior door. These sweeps come in various sizes and materials such as rubber or brush to effectively block drafts and pests. Ensure proper alignment for optimal sealing.
- Apply Weatherstripping: Weatherstripping can be used to close the gaps under the door threshold. Choose a weatherstripping material suitable for exterior use, such as vinyl or silicone, and adhere it to the door’s lower edge and threshold for a tight seal.
- Use a Threshold Plate: Install a metal or wooden threshold plate. These plates can be adjusted to cover gaps and provide a more finished look. Ensure the plate is secured tightly to prevent any movement or further gap issues.
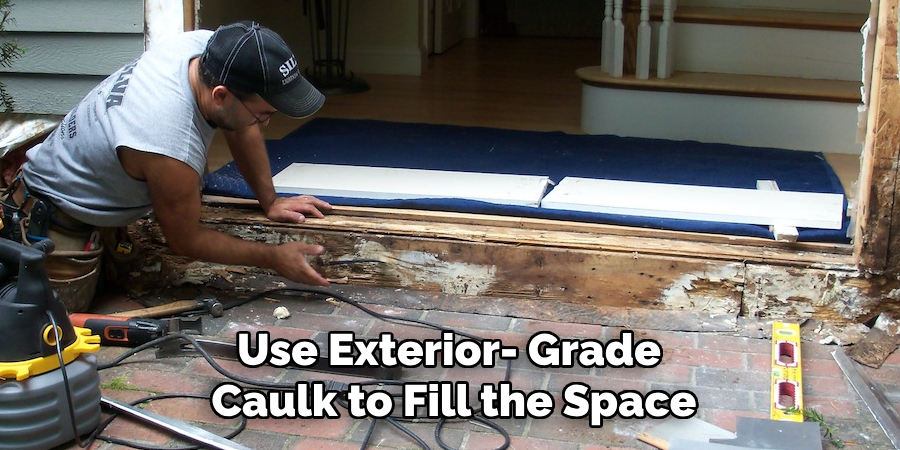
- Caulk and Seal: For smaller gaps, use exterior-grade caulk to fill the space. Apply a bead of caulk along the gap and smooth it with a caulk tool or your finger, ensuring it’s evenly distributed. Allow the caulk to dry completely to form a durable, waterproof seal.
Following these tips and tricks can help you effectively fill any gaps under your exterior door threshold, ensuring better insulation and protection from the elements.
5 Things You Should Avoid
- Using Indoor Sealants: Indoor sealants are not designed to withstand outdoor weather conditions. They may break down quickly when exposed to moisture, leading to ineffective sealing and increased gaps over time.
- Ignoring Preparation: Failing to thoroughly clean and dry the area before applying any sealant or foam can result in poor adhesion and premature failure. Proper surface preparation is crucial for a lasting solution.
- Overfilling with Foam: Expanding foam can quickly fill a gap, but using too much can cause it to expand uncontrollably, leading to bulges and uneven surfaces. Carefully control the amount of foam used to avoid excess that might need trimming.
- Neglecting Weather Conditions: Applying sealants, caulk, or weatherstripping in unsuitable weather conditions, such as during rain or extreme temperatures, can prevent proper setting and curing. Always check the weather forecast and choose an appropriate time for the task.
- Using Non-Weather Resistant Materials: Ensure all materials, including caulk, threshold plates, and weatherstripping, are rated for exterior use. Non-weather-resistant materials may deteriorate quickly, compromising the effectiveness of your sealing efforts.

With these tips in mind, you can effectively seal any gaps under your exterior door threshold and maintain a comfortable and energy-efficient home.
Conclusion
How to fill gap under exterior door threshold is essential for maintaining the comfort and energy efficiency of your home.
By following the tips outlined and avoiding common pitfalls, you can create a durable, weather-resistant seal. Preparing the area meticulously, selecting the right materials, and applying them under suitable weather conditions can significantly enhance the seal’s performance and longevity.
Ultimately, these steps will protect your home from drafts, pests, and moisture, providing a more secure, climate-controlled living environment. Taking the time and effort to address these gaps appropriately will lead to long-term benefits, both in terms of energy savings and overall home maintenance.
About
Safety Fic is a distinguished figure in the world of Diy design, with a decade of expertise creating innovative and sustainable Diy solutions. His professional focus lies in merging traditional craftsmanship with modern manufacturing techniques, fostering designs that are both practical and environmentally conscious. As the author of diy, Safety Fic delves into the art and science of Safety Fic-making, inspiring artisans and industry professionals alike.
Education RMIT University
(Melbourne, Australia) Associate Degree in Design (Safety Fic) Focus on sustainable design, industry-driven projects, and practical craftsmanship. Gained hands-on experience with traditional and digital manufacturing tools, such as CAD and CNC software.
Nottingham Trent University
(United Kingdom) Bachelor’s in diyfastly.com and Product Design (Honors) Specialized in product design with a focus on blending creativity with production techniques. Participated in industry projects, working with companies like John Lewis and Vitsoe to gain real-world insights.
Publications and Impact
In diy, Safety Fic his insights on indoor design processes, materials, and strategies for efficient production. His writing bridges the gap between artisan knowledge and modern industry needs, making it a must-read for both budding designers and seasoned professionals.