
Are you having trouble with the lock button on your BMW key fob? You’re not alone. Many BMW owners have experienced issues with their key fobs, especially regarding the lock button.

A malfunctioning BMW key fob lock button can be frustrating, especially when it compromises the convenience and security of your vehicle. Fortunately, how to fix a BMW key fob lock button is often simpler than it seems and can be done without expensive trips to a dealership. This guide will walk you through the steps to diagnose the problem and perform basic repairs so you can restore your key fob’s functionality quickly and efficiently.
Whether the issue lies with a worn-out button, a drained battery, or an internal fault, you’ll find helpful tips and solutions to get your BMW key fob working like new again.
What Causes a Malfunctioning Lock Button on a BMW Key Fob?
Before we dive into the solutions, it’s important to understand what could be causing your BMW key fob lock button to malfunction. Here are some common reasons why the lock button may not be working properly:
- Worn-out Button: Over time, the buttons on your key fob can wear out from repeated use, leading to reduced functionality or complete failure.
- Dead Battery: If the battery in your key fob is low or completely drained, it can cause issues with all of the buttons on your key fob.
- Internal Fault: Sometimes, there may be an internal issue within the key fob that is preventing the lock button from working correctly. This could be due to damage or a manufacturing defect.
Knowing the possible causes can help you better diagnose and fix the problem with your BMW key fob lock button. Now, let’s move on to some potential solutions.
What Will You Need?
Before attempting any repairs on your key fob, ensure you have the necessary tools and materials. Here’s a list of items that may come in handy:
- A small screwdriver (depending on the type of key fob)
- Replacement button (if needed)
- New battery (if required)
- Electrical contact cleaner (if an internal fault is suspected)
Once you have these items, you can begin troubleshooting and fixing the problem with your BMW key fob lock button.
10 Easy Steps on How to Fix a BMW Key Fob Lock Button
Step 1. Open the Key Fob Casing:
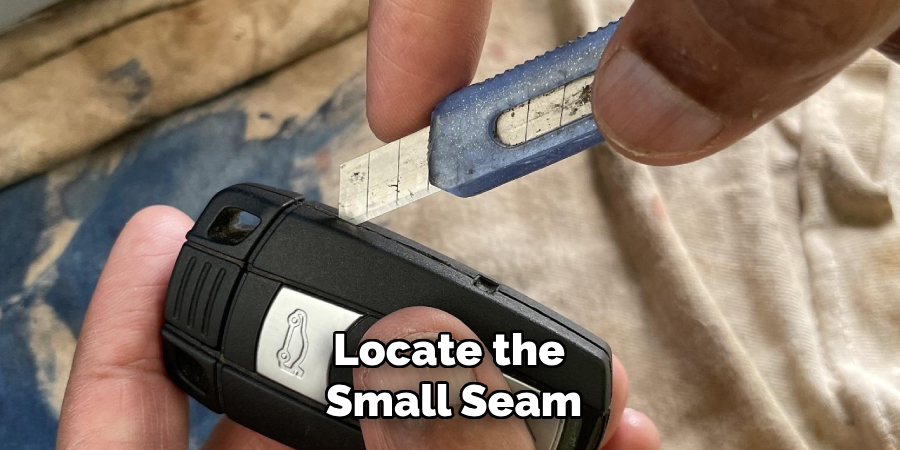
To open the key fob casing, you must locate the small seam or groove that runs along the edge of the fob. This is typically where the two halves of the casing meet. Using a small screwdriver or a similar flat tool, carefully insert it into the groove and gently pry apart the casing.
Be cautious during this step to avoid applying too much force, which could damage the casing or internal components. Once the casing begins to separate, work your way around the edge, gradually opening it. Take care not to lose any small internal parts, as these are essential for the key fob’s functionality. With the casing open, you can access the internal components, such as the battery, buttons, and circuit board.
Step 2. Inspect the Buttons and Circuit Board:
With the key fob casing open, carefully examine the buttons and the circuit board inside. Look for any signs of dirt, debris, or sticky residue that may be causing the lock button to malfunction. Additionally, check for visible wear and tear, such as cracks or dislodged components. Pay close attention to where the lock button connects to the circuit board, as this is a common area for issues to occur. If you notice any grime or buildup, carefully clean the affected areas. Make sure to identify any damage or loose connections, as these must be addressed in subsequent steps.
Step 3. Clean the Internal Components:
To clean the internal components, use a cotton swab lightly dampened with isopropyl alcohol. Gently wipe away any dirt, grime, or residue from the circuit board and the buttons. Ensure you don’t apply excessive moisture, which can damage the delicate electronics. Take extra care around the area where the lock button connects to the circuit board, removing any debris that could interfere with its functionality. Allow all cleaned components to dry completely before reassembling the key fob.
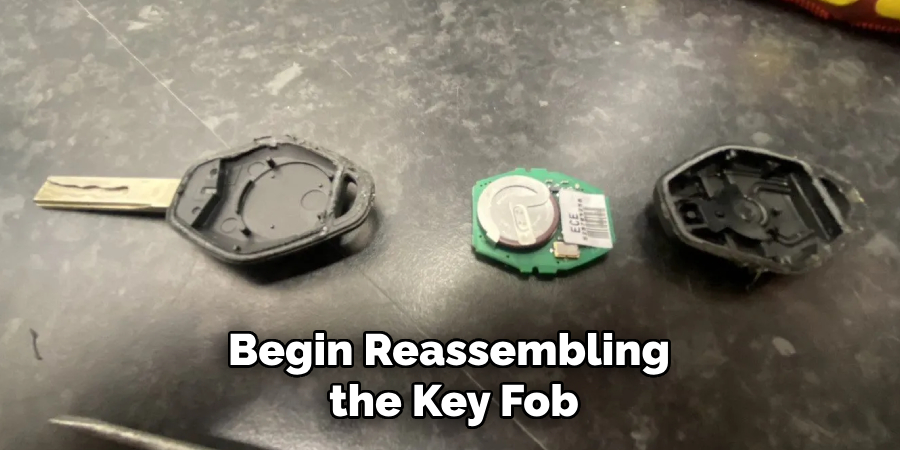
Step 4. Reassemble the Key Fob:
Once all components are dehydrated, begin reassembling the key fob. Carefully position the circuit board back into its designated place within the casing, ensuring it aligns properly. Next, fit the buttons securely into their slots, verifying they are seated correctly. Finally, snap the two halves of the key fob casing together, making sure they close tightly. If your key fob has screws, reinsert and tighten them gently to avoid overtightening, which could damage the casing. After reassembly, test all buttons to confirm the key fob is functioning correctly.
Step 5. Replace the Battery:
If the key fob isn’t functioning after reassembly, the battery may need to be replaced. Open the casing once again, locate the battery slot, and check the type and condition of the battery. Use a compatible replacement, ensuring the positive and negative terminals are aligned correctly as indicated within the slot. Insert the new battery securely, then reassemble the key fob as outlined in Step 4. Test the key fob to ensure it is operating correctly. Consider consulting your vehicle’s manual or seeking professional assistance if issues persist.
Step 6. Program the Key Fob:
Some key fobs may need to be programmed after battery replacement or reassembly to function with your vehicle. Refer to your vehicle’s manual for specific programming instructions, as these can vary by make and model. Typically, the process involves inserting the key into the ignition, turning it to a particular position, and pressing certain buttons on the key fob in a set sequence. Follow the steps carefully to ensure successful programming. If programming fails, consult a dealership or automotive locksmith for assistance.
Step 7. Test All Functions:
After programming the key fob, thoroughly test all its functions to ensure everything works correctly. Check that the lock, unlock, trunk release, and panic buttons respond consistently and effectively. If your key fob has additional features, such as remote start, test those as well. If any functions are unresponsive, you may need to repeat the programming process or verify the battery installation. For persistent issues, consider contacting your dealership or a professional technician for further assistance.
Step 8. Replace Key Fob Battery if Necessary:
If the key fob fails to function correctly even after programming, the issue might lie with the battery. Open the key fob casing carefully using a small tool like a flathead screwdriver to access the battery compartment. Identify the battery type (commonly a coin cell battery like CR2032), then replace it with a new one, ensuring correct polarity. Reassemble the key fob and test its functionality again. Proper battery replacement can often resolve performance issues without requiring additional programming.
Step 9. Test the Key Fob Range:
Once the key fob is functioning correctly, it’s essential to test its range to ensure optimal performance. Stand at various distances from your vehicle and test all the key fob’s features, such as locking, unlocking, and remote start (if available). If the key fob works only at close range or inconsistently at a distance, it may indicate issues like signal interference or a weakening battery. Address any concerns as they arise to maintain reliable functionality.
Step 10. Reprogram the Key Fob:
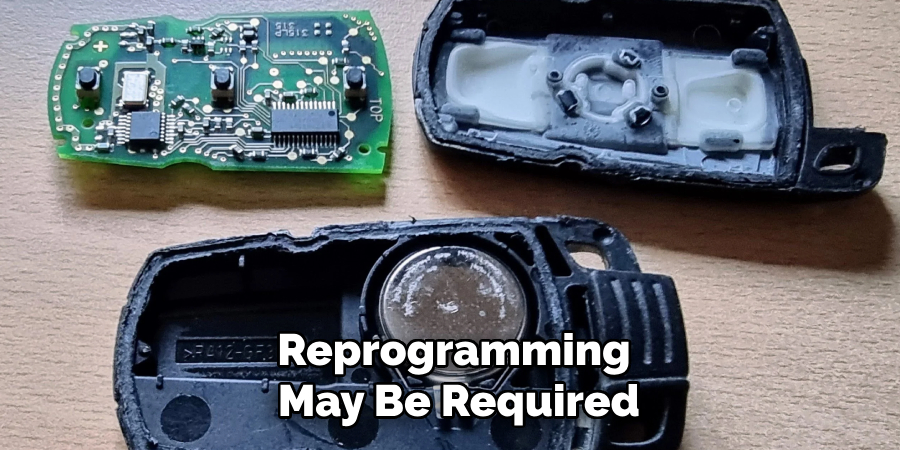
Reprogramming may be required if the key fob still does not function correctly after battery replacement and range testing. Refer to your vehicle’s manual for the specific reprogramming procedure, as the steps can vary by make and model. Generally, this involves inserting the key into the ignition, turning it to a particular position, and pressing certain buttons on the key fob in a sequence. If the manual is unavailable or the process is unclear, seek assistance from a professional locksmith or your vehicle’s dealership to ensure proper reprogramming.
By following these steps, you can maintain the performance and functionality of your key fob.
5 Things You Should Avoid
- Using Excessive Force: Avoid applying too much pressure when attempting to fix the button, as this could damage the key fob’s internal components or casing. Precision and a gentle touch are key.
- Ignoring the Battery Condition: Do not overlook checking the battery. A common issue with key fobs is a drained or weak battery. Replacing it with a fresh one is often the most straightforward fix.
- Skipping the Manual or Instructions: Failing to consult your BMW’s specific manual or repair guide can lead to improper handling. Every key fob model may have unique features and precautions.
- Using Non-Compatible Tools: Avoid using generic or unsuitable tools to open your key fob. Specialized tools are often needed to avoid scratching or breaking the device.
- DIY Without Proper Knowledge: Attempting to fix the lock button without understanding the mechanism can cause irreversible damage. When in doubt, consult a professional locksmith or authorized BMW service center.
Conclusion
How to fix a BMW key fob lock button requires a combination of caution, proper tools, and knowledge.
Begin by diagnosing the issue and ensuring the battery is in good condition and seated correctly. Follow your vehicle’s manual for specific instructions tailored to your key fob model, avoiding improper methods that could cause damage. If the button requires replacement or repair, opt for professional assistance if you’re not confident handling the delicate components yourself.
By approaching the task carefully and methodically, you can restore your key fob to optimal functionality without unnecessary complications.