

Are you experiencing problems with your key fob? Is it not working or responding when you press the buttons? Don’t worry, this is a common issue that can usually be fixed without needing to visit a mechanic or dealership.
A broken key fob can be a frustrating inconvenience, especially when it prevents you from accessing or operating your vehicle easily. Fortunately, many issues with key fobs can be diagnosed and resolved without professional assistance. This guide on how to fix broken key fob will walk you through the steps to identify common problems, such as unresponsive buttons, dead batteries, or signal issues, and provide practical solutions to restore your key fob’s functionality.
With the right tools and a little patience, you can save time and money by fixing your key fob yourself.
What Are the Causes of a Broken Key Fob?
There are several potential causes for a malfunctioning key fob. The most common issues include:
- Dead Battery: Just like any other electronic device, the battery in your key fob can die over time. This is especially true if you use your key fob frequently.
- Signal Interference: If there are other devices or signals in close proximity to your key fob, it may experience signal interference and become unresponsive.
- Physical Damage: Accidentally dropping or exposing your key fob to moisture or extreme temperatures can cause internal damage, affecting its functionality.
- Faulty Buttons: Over time, the buttons on your key fob may wear out or get stuck, making it difficult to use.
- Battery Life: Like any electronic device, the battery in your key fob will eventually run out of power, rendering it useless until the battery is replaced.
What Will You Need?
To troubleshoot and fix common key fob issues, you may need the following items:
- Replacement Battery: If your key fob’s battery is dead, you will need a new one to replace it. Make sure to purchase the correct type and size of battery for your specific key fob model.
- Small Screwdriver or Coin: Some key fobs require a small screwdriver or a coin to open the casing and access the battery compartment.
- Rubbing Alcohol: This can be used to clean dirty contacts on the buttons or inside the key fob.
- Needle-nose Pliers: These can come in handy for removing any broken pieces of plastic or metal from a damaged key fob.
- Replacement Buttons: If your key fob buttons are worn out or damaged, you may need to purchase replacement buttons and install them onto the circuit board of your key fob.
8 Easy Steps on How to Fix Broken Key Fob
Step 1. Determine the Issue:
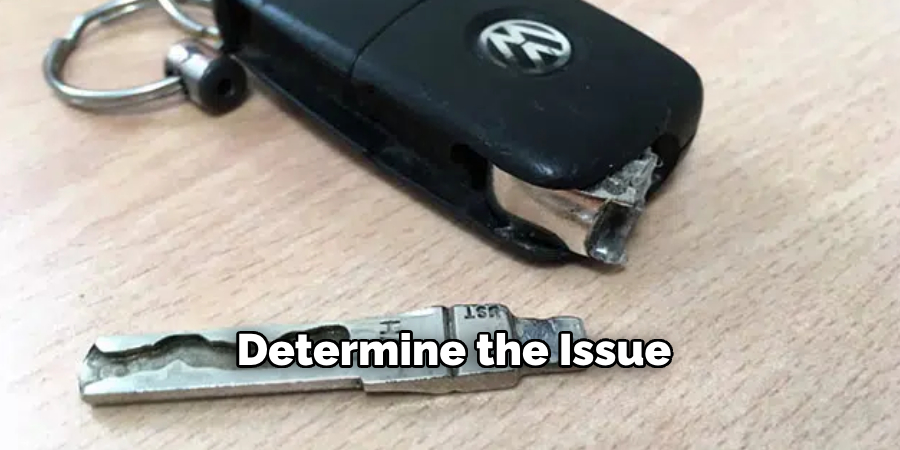
Before you begin any repairs, it’s essential to identify what’s wrong with your key fob. Common issues include unresponsive or sticky buttons, a drained battery, or damage to the casing or internal circuitry. Start by visually inspecting the key fob for any apparent signs of wear and tear, such as cracks, missing pieces, or buttons that are stuck or not clicking properly. If the issue isn’t visible, test the key fob by pressing the buttons and observing whether your vehicle responds. If there’s no reaction, the problem could be related to the battery or internal components. Understanding the root of the problem will help you proceed with the appropriate repair steps.
Step 2. Open the Key Fob:
To open the key fob, you will typically need a small flat-head screwdriver or a similar tool with a thin edge. Look along the seam or groove that runs around the edges of the key fob—it’s usually where the two halves of the casing snap together. Carefully insert the tool into this groove and gently twist or pry it open. Be patient and avoid using excessive force, as this could crack the casing or damage internal components. If the key fob has screws keeping it closed, use a screwdriver to undo them before prying. Once opened, set the top and bottom halves aside and take note of how the internal components are positioned to ensure you can properly reassemble it later.
Step 3. Inspect the Circuit Board:
Carefully examine the circuit board inside the key fob for any signs of damage or wear. Look for loose or corroded connections, as these could indicate a problem that needs addressing. Pay special attention to the battery contacts, as corrosion or debris can prevent proper electrical flow. If corrosion is present, you can clean the contacts gently using a cotton swab dipped in isopropyl alcohol. Ensure there are no cracks or chips on the circuit board itself, as these could impede functionality and may require a replacement.
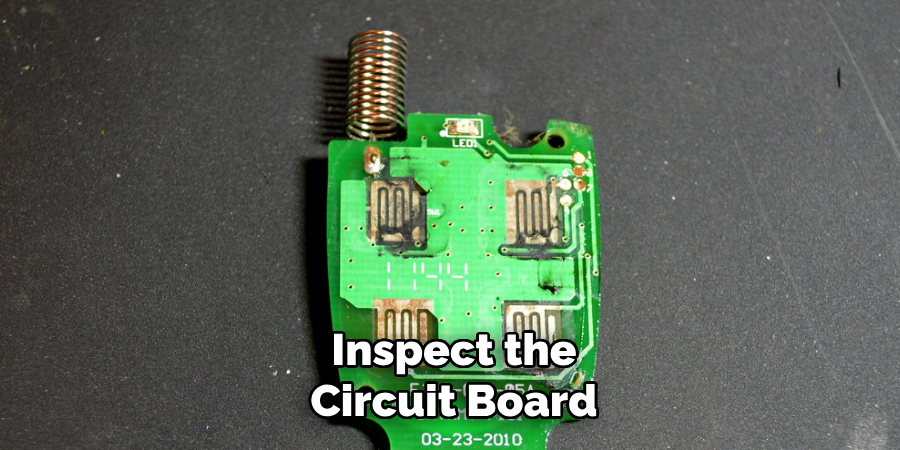
Take care not to touch the board with your bare hands, as oils from your skin can potentially harm the components. If everything appears intact, proceed to the next step, but if you notice any significant damage, consider consulting a professional or obtaining a replacement key fob.
Step 4. Clean the Contacts:
Using a clean, lint-free cloth or cotton swab, gently clean the battery contacts inside the key fob. These contacts are typically small metal pieces that connect the battery to the rest of the circuit. Over time, dirt, dust, or corrosion can build up on these surfaces, leading to poor conductivity and potential functionality issues. Dip the cloth or cotton swab in isopropyl alcohol and carefully wipe each contact, ensuring that all debris or residue is removed. Avoid using excessive force to prevent bending the contacts or damaging the delicate components. Allow the contacts to dry entirely before inserting a new or tested battery. Properly cleaned contacts will ensure a more reliable connection, restoring the key fob’s optimal performance.
Step 5. Replace the Battery:
Carefully select a new battery that matches the specifications of your key fob, ensuring it is the correct size and type, which is often indicated in the user manual or on the old battery. Before inserting the new battery, double-check its orientation by examining the polarity markings inside the battery compartment. The positive (+) and negative (-) sides must align correctly to ensure proper functionality.

Insert the battery with steady hands, avoiding touching the contact points with your fingers, as oils or moisture can interfere with the connection. Once the battery is securely in place, verify that it sits flat and aligned within the compartment. Taking the time to install the battery properly will maximize the key fob’s performance and longevity.
Step 6. Replace Worn Buttons:
Over time, frequent use of the key fob can cause its buttons to wear out, making them less responsive or even unrecognizable. To address this, scrutinize each button for signs of damage, such as cracks, fading symbols, or areas that feel sticky or soft to the touch. If any buttons appear worn or malfunctioning, consider replacing them to restore the key fob’s functionality.
You can purchase replacement buttons or a new button pad compatible with your key fob model. Begin by gently prying open the key fob casing, making sure to avoid damaging any internal components. Carefully remove the old buttons or button pad and clean the surrounding area with a soft, lint-free cloth to remove dust or debris that may have accumulated. Next, insert the new buttons or button pad securely into place, ensuring a snug fit for optimal performance.
Step 7. Repair Broken Connections:
If your key fob is still not functioning correctly after replacing the buttons or button pad, the issue may lie within the internal connections. Begin by carefully examining the circuit board for any visible signs of damage, such as cracked solder joints or corrosion. To address broken solder joints, use a soldering iron with a fine tip to re-secure the connections. Be sure to work in a well-ventilated area and handle the soldering iron with caution to avoid accidental burns or damage to the delicate components.
Step 8. Reassemble the Key Fob:
Once you have thoroughly inspected and, if necessary, repaired the circuit board, it is time to reassemble the key fob. Start by ensuring all components are clean and free of debris or residue. Align the button pad correctly with the circuit board, making sure all buttons are properly seated in their designated positions. Carefully snap the two halves of the key fob casing back together, ensuring they fit securely without forcing the pieces, which could risk damaging the internal components.
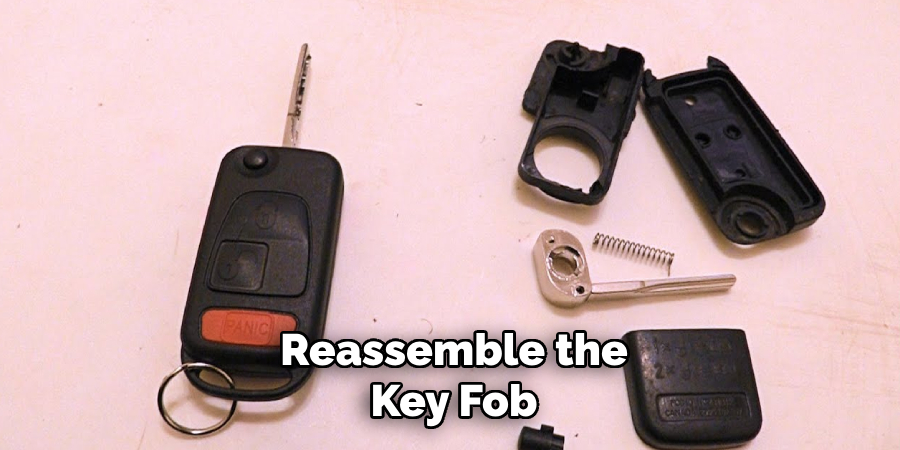
If your key fob includes a battery cover, replace it by sliding or snapping it into place, depending on the design. Double-check the placement of the battery to ensure it’s positioned correctly with the positive and negative ends aligned as indicated.
By following these simple steps, you can easily replace the battery in your key fob and get back to using it without any hassle.
Conclusion
Replacing a broken key fob doesn’t have to be a complicated task.
By carefully identifying the issue, whether it’s a depleted battery or internal damage, and following the proper steps to fix or replace the necessary components, you can restore its functionality with minimal effort. Always handle the key fob with care and consult the user manual or a professional if needed to avoid causing further damage. With patience and attention, your key fob can be as good as new, saving you time and money.
Hopefully, the article on how to fix broken key fob has helped provide you with the necessary knowledge and steps to take when faced with this issue.
About
Safety Fic is a distinguished figure in the world of Diy design, with a decade of expertise creating innovative and sustainable Diy solutions. His professional focus lies in merging traditional craftsmanship with modern manufacturing techniques, fostering designs that are both practical and environmentally conscious. As the author of diy, Safety Fic delves into the art and science of Safety Fic-making, inspiring artisans and industry professionals alike.
Education RMIT University
(Melbourne, Australia) Associate Degree in Design (Safety Fic) Focus on sustainable design, industry-driven projects, and practical craftsmanship. Gained hands-on experience with traditional and digital manufacturing tools, such as CAD and CNC software.
Nottingham Trent University
(United Kingdom) Bachelor’s in diyfastly.com and Product Design (Honors) Specialized in product design with a focus on blending creativity with production techniques. Participated in industry projects, working with companies like John Lewis and Vitsoe to gain real-world insights.
Publications and Impact
In diy, Safety Fic his insights on indoor design processes, materials, and strategies for efficient production. His writing bridges the gap between artisan knowledge and modern industry needs, making it a must-read for both budding designers and seasoned professionals.