

If you own a garage door, chances are you have encountered issues with your garage door sensor at some point. One common issue that many homeowners face is when the garage door sensor light turns yellow.
This can be frustrating and confusing, as it may prevent your garage door from opening or closing properly. In this guide, we will discuss how to fix garage door sensor yellow light and get your garage door back to functioning properly.
Necessary Items
Before you begin troubleshooting your garage door sensor, you will need a few items on hand. These include:
- A ladder
- A clean cloth or rag
- Screwdriver (if needed)
- Replacement batteries (if needed)
8 Things to Know Before You Start
1) Understanding the Purpose of Garage Door Sensors
Before we dive into troubleshooting the issue, it’s important to understand the purpose of garage door sensors. These sensors are an essential safety feature that prevents the garage door from closing on objects or people. They work by detecting any obstructions in the path of the garage door and sending a signal to the opener to stop or reverse its movement.
2) Identifying the Type of Garage Door Sensor
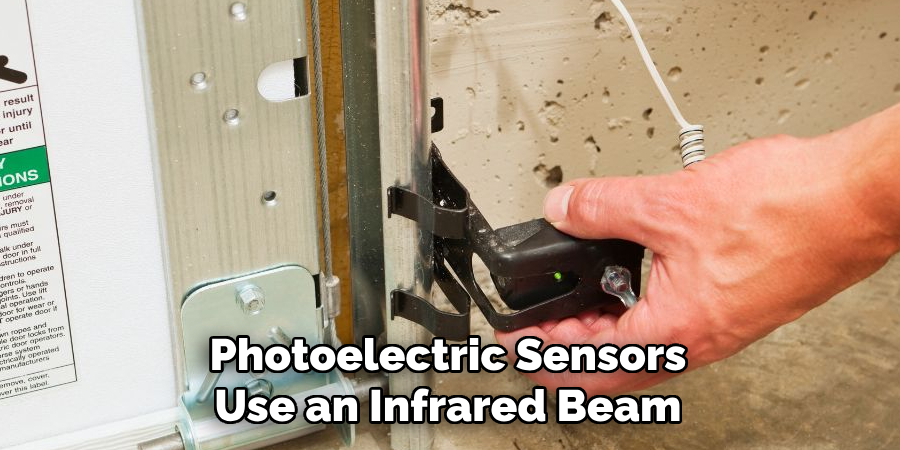
There are two types of garage door sensors – photoelectric and mechanical. Photoelectric sensors use an infrared beam to detect objects, while mechanical sensors use physical contact. Knowing which type you have will help determine the cause of the yellow light and how to fix it.
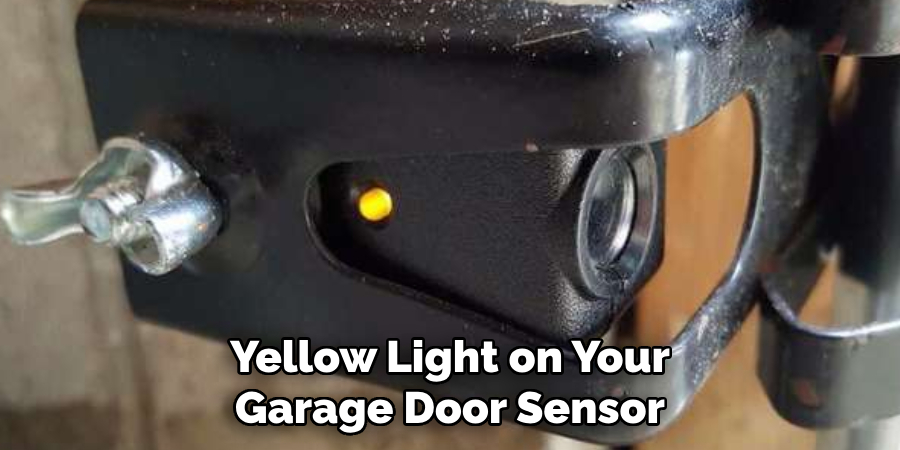
3) Understanding the Function of the Yellow Light
The yellow light on your garage door sensor indicates a problem. This could be due to an obstruction in the sensor’s path, misalignment, or other issues. It’s important not to ignore the yellow light, as it can lead to safety hazards and further damage to your garage door.
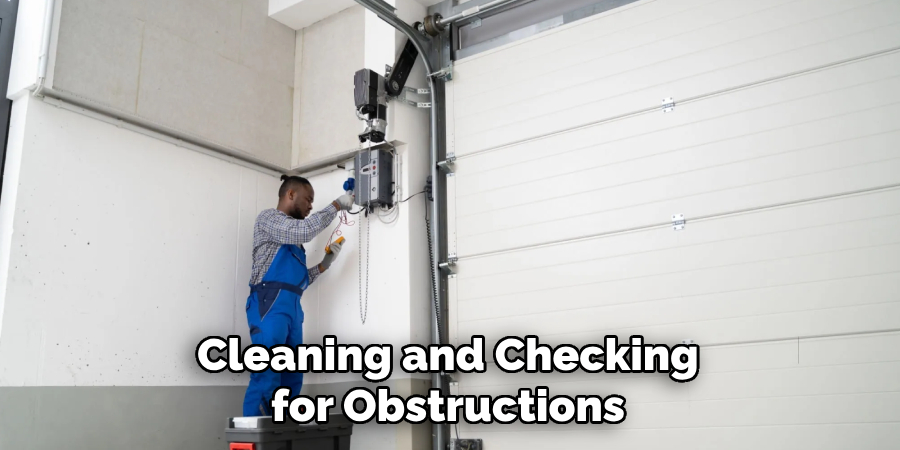
4) Checking for Obstructions
The first thing to check when troubleshooting a yellow light on your garage door sensor is for any obstructions in the sensor’s path. This could include debris or objects blocking the sensors’ view. Remove any obstacles and try operating the garage door again.
5) Cleaning the Sensors
Sometimes, dirt or dust can accumulate on the sensors, causing the yellow light to turn on. Use a clean cloth or rag to gently wipe the sensors and remove any buildup. This may solve the issue, but if not, continue troubleshooting.
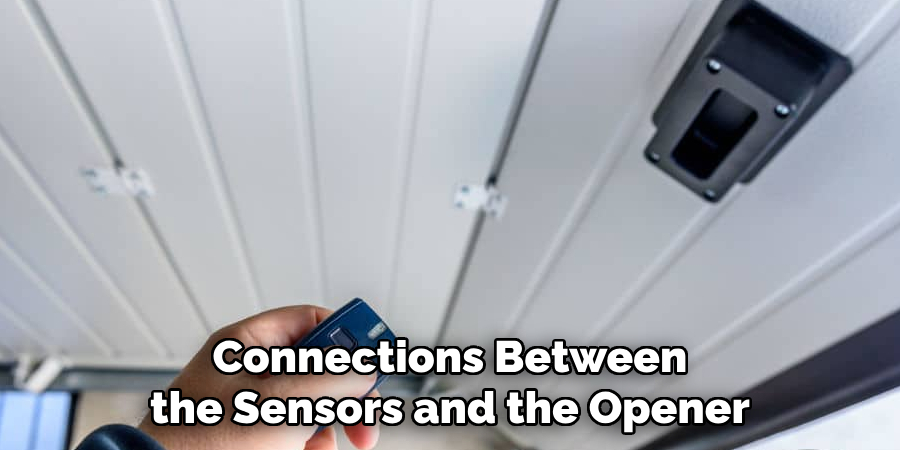
6) Checking for Loose Connections
Ensure that all connections between the sensors and the opener are secure. If there are any loose wires or connections, tighten them using a screwdriver. As a safety precaution, make sure to unplug the opener before attempting to fix any wiring.
7) Replacing Batteries
If you have a photoelectric sensor and cleaning and checking for obstructions and loose connections do not solve the issue, it may be time to replace the batteries. Check the manufacturer’s instructions for the appropriate battery size and type for your specific sensor.
8) Adjusting the Sensor Alignment
If all else fails, it may be a matter of adjusting the sensor alignment. Use a ladder to access the sensors and make sure they are pointing directly at each other. If they are not aligned correctly, adjust them until they are in line with one another.
12 Steps on How to Fix Garage Door Sensor Yellow Light
Step 1: Check for Obstructions
The first step in fixing the yellow light on your garage door sensor is to check for any obstructions in the sensor’s path. Remove any debris or objects that may be blocking the sensors’ view. So, check the floor for any items that may have fallen in the way.
Step 2: Clean the Sensors
If there are no visible obstructions and the yellow light is still on, try cleaning the sensors. Use a clean cloth or rag to gently wipe away any dirt or dust buildup on the sensors. Even small particles can interfere with the sensors’ function, so make sure to clean thoroughly.
Step 3: Check Connections
Ensure that all connections between the sensors and the opener are tight and secure. If there are any loose wires or connections, tighten them using a screwdriver. Make sure to unplug the opener before attempting to fix any wiring.
Step 4: Replace Batteries
If you have a photoelectric sensor and the previous steps do not solve the issue, it may be time to replace the batteries. Check the manufacturer’s instructions for the appropriate battery size and type for your specific sensor.
Step 5: Reset Opener
If none of the above steps work, try resetting your opener. Unplug the opener from its power source for a few minutes, then plug it back in and try operating the garage door again.
Step 6: Check Sensor Alignment
If the yellow light is still on after resetting, it may be an issue with sensor alignment. Use a ladder to access the sensors and make sure they are pointing directly at each other. If they are not aligned correctly, adjust them until they are in line with one another.
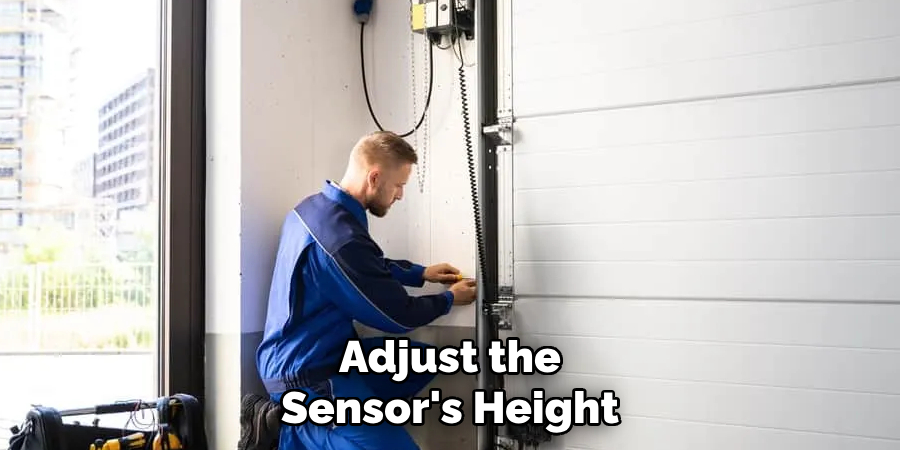
Step 7: Adjust Sensor Height
If the sensors are aligned but still not working properly, they may be too high or too low. Use a level to adjust the sensor’s height so that they are both at the same level. While the sensors should be pointing toward each other, they should not touch or overlap.
Step 8: Check for Direct Sunlight
Direct sunlight can interfere with the sensor’s function. If your sensors are in direct sunlight, try shading them with a small piece of cardboard or other material to see if it makes a difference. If it does, you may need to permanently shade the sensors or install a glare shield.
Step 9: Test the Sensors
After making any adjustments, test the sensors by opening and closing the garage door. If the yellow light is still on, continue troubleshooting. As a safety precaution, always stand clear of the door’s path while testing.
Step 10: Inspect Sensor Wires
If everything else seems to be working correctly, inspect the wires connecting the sensors to the opener. They may be damaged or corroded and need to be replaced. So, contact a professional for further assistance if needed.
Step 11: Consider Replacing the Sensors
If you have exhausted all troubleshooting options and the yellow light is still on, it may be time to replace your sensors. Contact the manufacturer or a professional for recommendations and proper installation instructions.
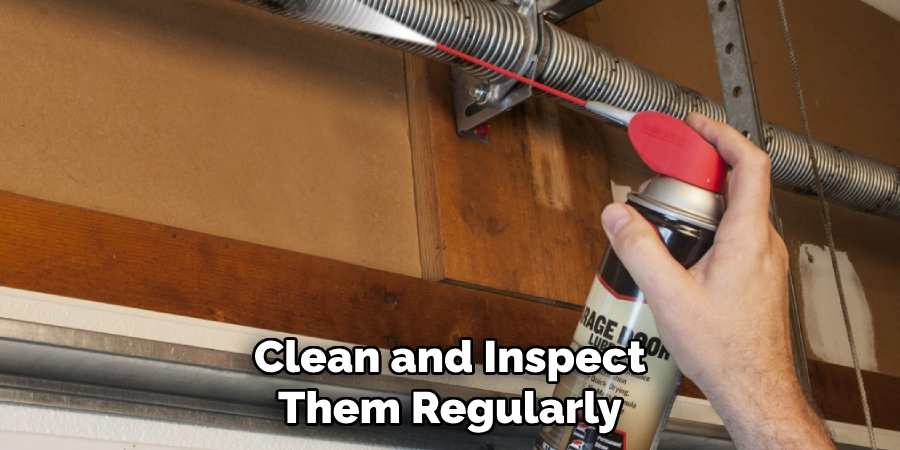
Step 12: Regular Maintenance
To avoid future issues with your garage door sensor, make sure to clean and inspect them regularly. Also, keep an eye out for any signs of wear and tear or damage. A well-maintained sensor is less likely to experience problems.
9 Safety Measures to Follow When Fixing a Garage Door Sensor
1) Wear Protective Gear
When working on your garage door, always wear protective gear such as safety glasses and gloves. This will protect you from any debris or sharp edges that may cause injury. And make sure to remove any loose clothing or jewelry that may get caught in moving parts.
2) Turn off Power
Before attempting to fix any wiring or connections, always turn off the power supply to your garage door opener. This will prevent electric shocks and potential damage to the opener. Also, unplug the opener from its power source to be extra cautious.
3) Use a Ladder
When adjusting or aligning your garage door sensors, use a sturdy and stable ladder. Do not stand on chairs, boxes, or other makeshift objects as they may tip over and cause injury. Even if you feel confident in your balance, always err on the side of caution.
4) Keep Children and Pets Away
While working on your garage door, make sure to keep children and pets at a safe distance. They may inadvertently get in the way or cause distractions that can lead to accidents. It’s best to have someone watch over them in another area while you are working.
5) Use Proper Tools
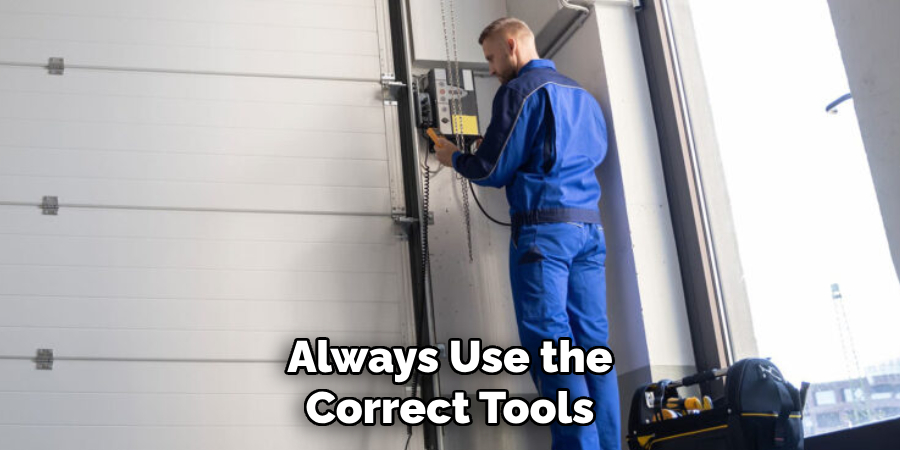
Always use the correct tools for the job. Using improper or makeshift tools can lead to damage, injury, or a poor fix. If you are unsure of which tools to use, consult the manufacturer’s instructions or seek professional assistance.
6) Follow Instructions
If you are attempting to fix your garage door sensor yourself, make sure to follow the manufacturer’s instructions carefully. Skipping steps or making guesses can result in improper fixes and potentially cause more harm than good.
7) Don’t Attempt Major Repairs
If you are not experienced with garage door repairs or do not feel comfortable attempting major fixes, it is best to leave it to a professional. Trying to fix complex issues without proper knowledge and experience can be dangerous and may cause further damage.
8) Test Before Finishing
After completing any repairs or adjustments, always test the garage door sensor before considering the job done. Make sure it is functioning properly and that all safety features are working as they should be.
9) Seek Professional Assistance
If you encounter any difficulties or are unsure of how to fix the issue, do not hesitate to seek professional assistance. It is better to be safe and have a trained expert handle the repair than risk injury or further damage to your garage door.
By following these safety measures on how to fix garage door sensor yellow light, you can ensure a smooth and safe repair process and prevent any accidents or injuries. So, always prioritize safety when working on your garage door sensor.
8 Things to Avoid When Fixing a Garage Door Sensor
1) Ignoring the Yellow Light
As mentioned earlier, the yellow light on your garage door sensor is an indication of a problem that requires attention. Ignoring it or assuming it will go away on its own can lead to further damage and potentially compromise the safety of your garage door.
2) Touching Live Wires
When inspecting or fixing the wiring of your garage door sensor, make sure to turn off the power supply and unplug the opener. Touching live wires can result in electric shocks, which can be dangerous or even fatal.
3) Using Excessive Force
If something seems stuck or difficult to move, avoid using excessive force when trying to fix it. This can lead to damage or cause components to break, making the issue more complicated and costly to fix.
4) Attempting Repairs Without Knowledge or Experience
Garage door sensors are complex systems that require proper knowledge and experience to repair. Attempting fixes without these can result in improper repairs that may not solve the issue or cause further damage.
5) Neglecting Regular Maintenance
Regular maintenance checks and tune-ups can prevent future issues with your garage door sensor. Neglecting these can result in more frequent breakdowns and potentially costly repairs. When in doubt, always refer to the manufacturer’s instructions for recommended maintenance schedules.
6) Using Improper Tools
Using improper tools or makeshift objects when fixing your garage door sensor can lead to damage or poor fixes. Make sure to use the correct tools and equipment as recommended by the manufacturer, or seek professional assistance if unsure.
7) Attempting Repairs During Extreme Weather Conditions
Fixing your garage door sensor during extreme weather conditions, such as heavy rain or snow, can be dangerous. Wait for better weather conditions before attempting any repairs to ensure your safety.
8) Rushing the Repair Process
Taking the time to properly troubleshoot and fix an issue with your garage door sensor is crucial for ensuring its safe and efficient operation. Rushing the process can result in careless mistakes and improper fixes, which may lead to further damage or safety hazards. Always take your time and follow instructions carefully when repairing your garage door sensor.
8 Additional Tips for Maintaining a Garage Door Sensor
1) Keep the Sensor Clean and Free of Debris
Regularly clean your garage door sensor to prevent dust, dirt, or debris from interfering with its operation. Use a soft cloth and mild cleaning solution to gently wipe down the sensor’s lenses and surfaces.
2) Check for Proper Alignment
Make sure that the sensors are aligned correctly and facing each other. If they are not, adjust them accordingly to ensure a consistent connection between the two. If the sensors are not aligned, it may result in false detections or the door not closing properly.
3) Test Sensors Regularly
To ensure that your garage door sensor is functioning correctly, it is essential to test it regularly. You can do this by placing an object in front of the sensor and trying to close the door. The sensor should detect the object and reverse the door’s direction.
4) Lubricate Moving Parts
Regularly lubricating the moving parts of your garage door, such as hinges and rollers, can prevent them from becoming stuck or damaged. Use a silicone-based lubricant for best results. So, keep these parts well-lubricated for the smooth operation of your garage door sensor.
5) Check for Any Loose or Damaged Parts
Inspect your garage door and its sensor periodically for any loose or damaged parts. Tighten any loose bolts or screws, and replace any damaged components to prevent further issues. Then, test the sensor to ensure that it is functioning correctly.
6) Keep the Area Around the Sensor Clear
The area around your garage door sensor should be kept clear of any objects or obstructions. This will prevent anything from blocking the sensor’s beam and causing malfunctions. With a clear area, the sensor will be able to detect any objects and operate correctly.
7) Replace Batteries in Remote Controls
If your garage door opener uses remote controls, make sure to replace the batteries regularly. Weak or dead batteries can interfere with the signal between the remote and the sensor, causing it to malfunction.
8) Seek Professional Assistance for Complex Issues
If you encounter any complex or persistent issues with your garage door sensor, it is best to seek professional assistance. They have the expertise and tools to accurately diagnose and fix any problems, ensuring the safety and proper functioning of your garage door sensor.
By following these tips on how to fix garage door sensor yellow light for maintenance, you can prolong the life of your garage door sensor and prevent future issues. Regular care and attention can save you time and money, as well as potential safety hazards in the long run.
Make sure to prioritize maintenance for your garage door sensor and address any issues promptly to ensure its optimal performance. So, keep these tips in mind and enjoy a secure and functional garage door for years to come!
Frequently Asked Questions
How Do I Know if My Garage Door Sensor Is Malfunctioning?
You may notice your door not closing or opening properly, the sensor light blinking, or a constant beeping sound when trying to operate your garage door. These are common signs of a malfunctioning sensor. However, it is always best to consult the manufacturer’s manual or seek professional assistance for accurate diagnosis and repairs.
Can I Fix My Garage Door Sensor Myself?
It is possible to fix minor issues with your garage door sensor yourself, but it is crucial to prioritize safety and follow instructions carefully. If you are unsure or encounter any complex problems, it is best to seek professional assistance.
How Often Should I Test My Garage Door Sensor?
It is recommended that you test your garage door sensor at least once a month to ensure its proper functioning. However, if you notice any issues or changes in operation, it is best to test it immediately and address any problems promptly. Remember, regular testing can prevent potential safety hazards and save you from costly repairs in the future.
Conclusion
Maintaining and repairing your garage door sensor may seem like a daunting task, but with proper care and attention, it can be a simple process. By avoiding common mistakes, following safety measures on how to fix garage door sensor yellow light, and regularly maintaining your sensor, you can ensure its efficient operation and prolong its lifespan.
Remember to always prioritize safety, follow instructions carefully, and seek professional assistance when needed. With these tips in mind, your garage door sensor will continue to keep your home secure and functional for years to come. So, make sure to prioritize maintenance and address any issues promptly for a hassle-free experience with your garage door sensor.
About
Safety Fic is a distinguished figure in the world of Diy design, with a decade of expertise creating innovative and sustainable Diy solutions. His professional focus lies in merging traditional craftsmanship with modern manufacturing techniques, fostering designs that are both practical and environmentally conscious. As the author of diy, Safety Fic delves into the art and science of Safety Fic-making, inspiring artisans and industry professionals alike.
Education RMIT University
(Melbourne, Australia) Associate Degree in Design (Safety Fic) Focus on sustainable design, industry-driven projects, and practical craftsmanship. Gained hands-on experience with traditional and digital manufacturing tools, such as CAD and CNC software.
Nottingham Trent University
(United Kingdom) Bachelor’s in diyfastly.com and Product Design (Honors) Specialized in product design with a focus on blending creativity with production techniques. Participated in industry projects, working with companies like John Lewis and Vitsoe to gain real-world insights.
Publications and Impact
In diy, Safety Fic his insights on indoor design processes, materials, and strategies for efficient production. His writing bridges the gap between artisan knowledge and modern industry needs, making it a must-read for both budding designers and seasoned professionals.