

Temperature sensors play a crucial role in the operation of water heaters, regulating the water’s heat and ensuring it stays within a safe and comfortable range. A failure in this component can lead to either dangerously hot or uncomfortably cold water.
Identifying the symptoms of temperature sensor failure is essential for timely intervention and can include unexpected temperature fluctuations, error codes displayed on the water heater, or a complete lack of hot water.
Addressing these issues promptly not only restores the convenience and safety of your water heating system but also prevents potential damage to the water heater, which can result from prolonged exposure to improper temperatures. Learning how to fix temperature sensor failure water heater is invaluable for any homeowner, ensuring that your system remains efficient and reliable over the years.
Gather Necessary Tools and Supplies
Before beginning any work on your water heater to address a temperature sensor failure, ensuring you have all the necessary tools and supplies is pivotal. Not only does proper preparation make the repair process smoother, but it also ensures safety throughout the operation. Here’s what you’ll need:
A. Screwdriver Set: Various screwdrivers may be needed to remove the water heater’s access panels or disconnect wiring. Having both flathead and Phillips head screwdrivers in various sizes ensures you’re prepared for any screws you encounter.
B. Multimeter: This essential tool helps diagnose the issue with your temperature sensor. You’ll use it to test the sensor’s resistance and ensure it’s functioning within the manufacturer’s specified range. Ensure you know how to use the multimeter for accurate readings.
C. Replacement Temperature Sensor (if needed): If testing indicates that the temperature sensor has failed, you’ll need a new one. Ensure you purchase the correct model for your water heater. Having this on hand is beneficial to prevent delays in completing your repair.
D. Safety Gloves and Eye Protection: Safety should never be compromised. Gloves protect your hands from sharp edges and potential electrical hazards, while goggles shield your eyes from any debris or drops that might occur during the repair.
Having these tools and supplies at the ready will equip you to efficiently and safely address how to fix temperature sensor failure in your water heater. This preparation is the first step in restoring your water heater to optimal function.
Turn Off the Power to the Water Heater
A. Locate the Electrical Panel in Your Home
Before attempting any repairs, you must ensure your safety by turning off the power supply to the water heater. Begin by locating the electrical panel in your home, which is typically found in the basement, garage, or utility closet. This panel controls the electricity distribution to all parts of your house.
B. Switch off the Circuit Breaker or Fuse Connected to the Water Heater
Look for the circuit breaker or fuse labeled for the water heater inside the electrical panel. If the labels are unclear or absent, refer to your home’s electrical schematic or consult a professional. Once identified, flip the circuit breaker to the “Off” position or remove the fuse to disconnect the power.
C. Test the Water Heater to Ensure the Power is Off
After disconnecting the power, verifying that the water heater is powered off is crucial. A simple way to do this is by turning on a hot water faucet in your house and observing if the water heats up after a few minutes.
If it remains cold, the water heater is off. For a more direct approach, use a non-contact voltage tester near the water heater’s wiring to ensure there’s no active electrical current. This step is vital for preventing any accidental electrical incidents during your repair.
How to Fix Temperature Sensor Failure Water Heater: Locate the Temperature Sensor
A. Consult the Water Heater Manual for Sensor Location
Knowing exactly where the temperature sensor is located on your water heater is essential before beginning the repair process. This information can typically be found within the water heater’s manual.
The manual provides a diagram or description of the sensor’s location and offers preliminary troubleshooting tips and safety warnings. If the manual is not readily available, many manufacturers provide digital copies on their websites.
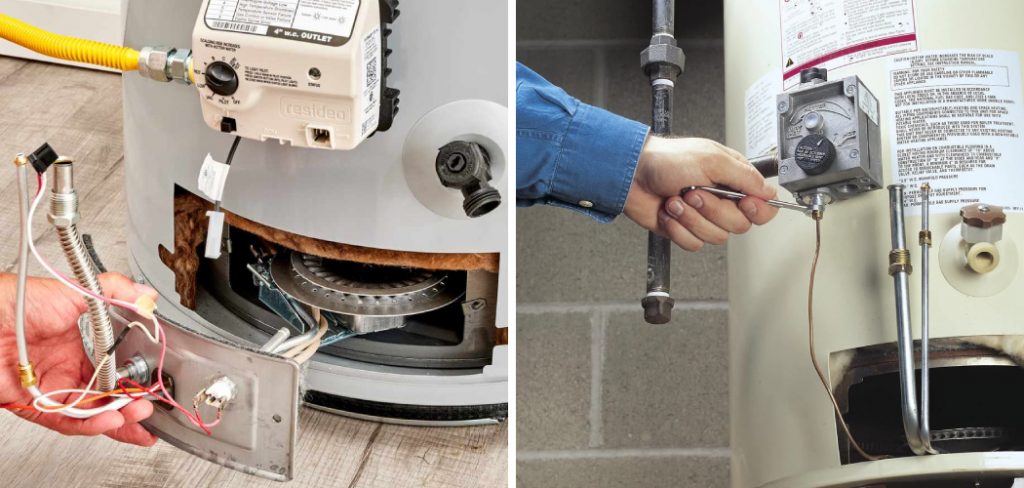
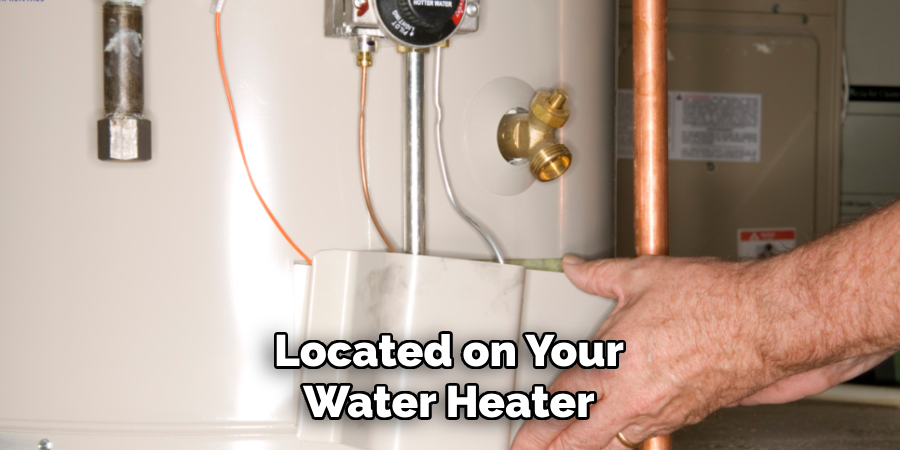
B. Typically Located Near the Top of the Tank or on the Heating Element
While the exact location can vary depending on the water heater model and brand, most temperature sensors are commonly found near the top of the tank. The sensor is often attached to the heating element in electric water heaters. Knowing this can help narrow down your search and make locating the sensor much easier, enabling a smoother repair process.
C. Use a Flashlight to Aid in Visibility if Needed
Water heater closets or basements, where heaters are usually placed, can be poorly lit. A flashlight can be your best ally in such situations, providing the necessary illumination to spot the temperature sensor.
Using a flashlight helps locate the sensor and ensures you can closely inspect it for any visible signs of damage or wear that might have contributed to the failure. Additionally, good lighting assists in safely maneuvering tools and managing wiring during the repair.
How to Fix Temperature Sensor Failure Water Heater: Inspect the Sensor Wiring
Proper inspection of the sensor wiring is crucial in diagnosing issues with your water heater’s temperature sensor. This part of the process involves a few detailed checks to ensure that wiring is not the root cause of sensor failure. Here’s how to conduct a thorough inspection:
A. Visually Inspect the Sensor Wiring for Any Damage or Disconnection
Begin by examining the sensor wiring closely, looking for any visible signs of damage such as fraying, burns, or cuts. Also, check for any disconnections or loose wires that could interfere with the sensor’s operation. Visual inspection can quickly reveal problems that might be causing the temperature sensor to malfunction.
B. Ensure the Wiring Connections are Secure and Tightened
After a visual inspection, physically inspect each connection to ensure it is secure. Over time, vibrations from the water heater can loosen connections, leading to intermittent sensor readings or complete failure. Use a screwdriver to gently tighten any loose connections, ensuring that the wiring is firmly attached to the sensor and the water heater.
C. Use a Multimeter to Test for Continuity in the Wiring
To further ensure the integrity of the sensor wiring, use a multimeter to test for continuity. Set your multimeter to the continuity setting and touch one probe to each end of the wiring.
A continuous beep or a zero reading indicates good continuity, signifying that the wiring is intact and capable of transmitting electrical signals. This step helps rule out wiring issues and allows you to focus on the sensor itself if the wiring passes inspection.
Test the Temperature Sensor
Testing the temperature sensor is a critical step in the repair process, ensuring that the sensor operates correctly and does not contribute to any water heater malfunctions. Here’s how to accurately test the temperature sensor using a multimeter:
A. Disconnect the Sensor Wiring from the Water Heater Control Panel
First, locate the sensor’s wiring, connecting it to the water heater’s control panel. Carefully disconnect these wires, making sure to note the original configuration for reassembly. This sensor isolation is essential for obtaining an accurate resistance measurement to diagnose whether the sensor is functioning properly.

B. Set the Multimeter to Measure Resistance (Ohms)
With disconnected sensor wiring, prepare your multimeter for the test by switching it to measure resistance, denoted by the ohms (Ω) symbol. The resistance measurement will reveal the sensor’s health; a functional sensor will show a specific resistance value correlating to the water temperature during testing.
C. Place the Multimeter Probes on the Sensor Terminals and Measure the Resistance
Finally, place the multimeter probes on the sensor’s terminals. To get a precise reading, it’s imperative to ensure solid contact between the probes and terminals. The resistance value displayed on your multimeter will indicate the sensor’s condition.
Compare this reading against the specifications provided in your water heater’s manual. A significant deviation from the expected resistance value suggests that the temperature sensor may be faulty and potentially needs replacing.
Compare Readings with Manufacturer Specifications
After testing the temperature sensor’s resistance, the next crucial step is to compare your findings with the manufacturer’s specifications. This comparison will determine whether the sensor is within the acceptable operating range or needs replacement. Here’s how to proceed:
A. Consult the Water Heater Manual or Manufacturer’s Website for Sensor Resistance Values
The first step is to obtain the correct resistance values for your water heater’s temperature sensor. This information is typically found in the appliance’s manual. If the manual is not readily available, most manufacturers provide digital copies on their websites. This step ensures that you have the precise parameters needed for comparison.
B. Compare the Measured Resistance with the Recommended Range
With the manufacturer’s resistance values in hand, compare them to the resistance you measured with your multimeter. The goal here is to determine whether the sensor’s resistance falls within the specified range.
A healthy temperature sensor will show a resistance value that aligns with the manufacturer’s recommendations, indicating it functions appropriately.
C. Replace the Sensor if Readings are Outside of the Specified Range
If the resistance measured deviates significantly from the prescribed range, this is a clear indication that the temperature sensor is faulty. In such cases, replacing the sensor is the best course of action.
Operating the water heater with a malfunctioning temperature sensor can lead to inaccurate temperature control, potentially causing overheating or insufficient water heating.

By meticulously comparing the measured resistance values to those specified by the manufacturer, you can accurately diagnose the condition of the temperature sensor. If replacement is necessary, ensure that you follow the manufacturer’s guidelines or consult a professional to restore your water heater to optimal functioning.
Replace the Temperature Sensor (If Necessary)
Replacing a faulty temperature sensor is essential to ensure your water heater operates efficiently and safely. Here’s a step-by-step guide on how to replace the temperature sensor:
A. Turn off the Water Supply to the Heater
Before proceeding with the replacement, it’s crucial to ensure that the water supply to the heater is turned off. This precautionary step prevents any water from leaking or causing damage during the replacement process. Locate the main water supply valve leading to the water heater and turn it off completely.
B. Remove the Old Sensor by Unscrewing it from the Water Heater Tank
With the water supply turned off, you can safely proceed to remove the old sensor. The temperature sensor is typically located near the bottom of the water heater tank. Use an appropriate wrench to carefully unscrew the sensor from the tank. Be mindful to handle the sensor gently to avoid damaging the tank or the sensor itself.
C. Install the New Sensor by Screwing it into Place and Reconnect the Wiring
Once the old sensor is removed, it’s time to install the new one. Take the new temperature sensor and gently screw it into the designated spot on the water heater tank.
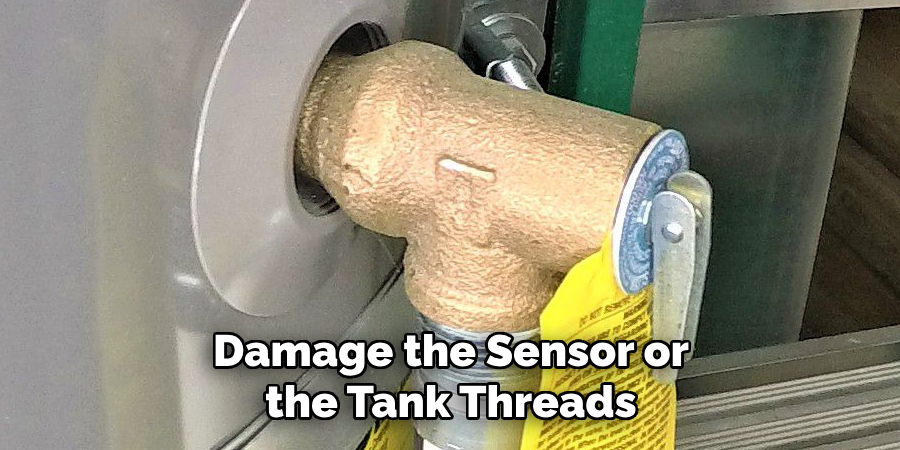
Ensure that it is securely fastened, but avoid over-tightening, which could damage the sensor or the tank threads. After the sensor is in place, carefully reconnect the sensor wiring to the water heater’s control panel, ensuring the connections are stable and secure.
Test the New Temperature Sensor After Installation
Once you have successfully replaced the temperature sensor in your water heater, it’s crucial to test the new sensor to ensure it’s functioning correctly. Here are the steps to follow for a comprehensive test:
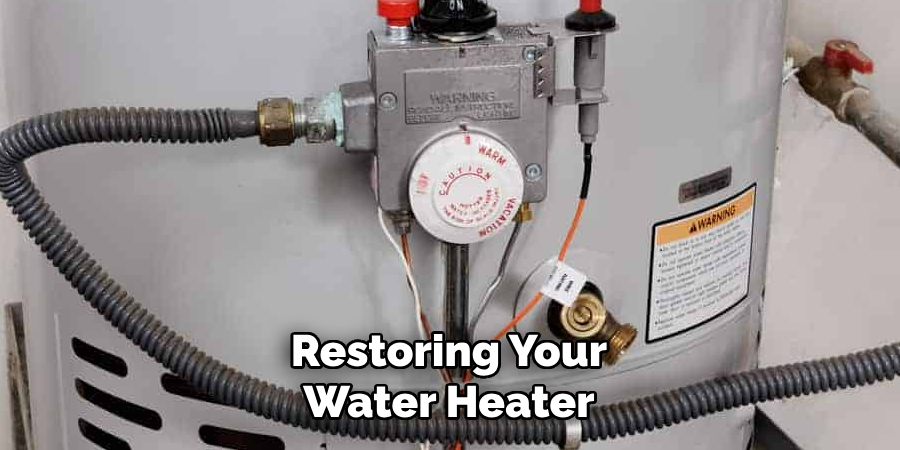
A. Turn on the Water Supply and Power to the Heater
After installing the new temperature sensor, the first step is to restore the water supply and power to your water heater. Turn on the main water supply valve that was shut off prior to the sensor replacement. Next, restore power to the water heater by either plugging it back in or turning on the circuit breaker, depending on your model.
B. Allow the Water Heater to Reach Operating Temperature
Give the water heater some time to reach its operating temperature. This period allows the newly installed temperature sensor to regulate the heating element and accurately adjust the water temperature to the set value. Depending on the model of your water heater, this could take anywhere from several minutes to an hour.
C. Monitor the Water Temperature
Once the water heater has had enough time to heat the water, it’s time to monitor the water temperature. You can use a thermometer to check the water temperature at various taps around your home. The goal is to ensure that the water temperature is consistent with the setting on the water heater, indicating that the new temperature sensor is correctly regulating the heating function.
D. Adjust Settings if Necessary
If you notice that the water temperature is not aligning with the heater’s settings, you may need to adjust the water heater’s temperature settings. This simple process typically involves turning a dial or adjusting a display panel on the water heater. After adjusting, allow some time for the water to reach the newly set temperature and then recheck it.
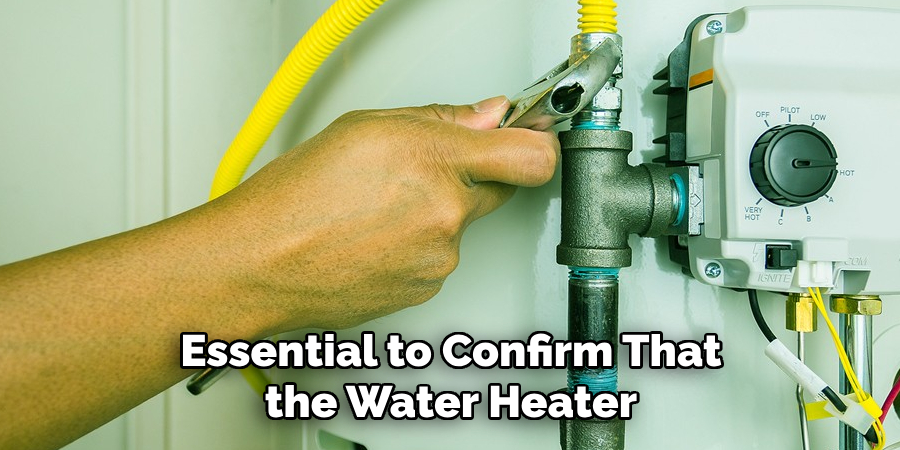
Testing the new temperature sensor is essential to confirm that the water heater is functioning efficiently and safely. Thanks to the proper operation of the new temperature sensor, homeowners can ensure that their water heater provides consistent and reliable hot water.
Perform Regular Maintenance
Regular maintenance is crucial to ensure your water heater remains in peak condition. Here’s how you can keep your water heater running efficiently with a focus on the temperature sensor:
A. Inspect the Temperature Sensor Annually for Signs of Wear or Corrosion
It’s advisable to thoroughly inspect the temperature sensor at least once a year. Look for any visible signs of wear, damage, or corrosion on the sensor itself and its wiring.
These signs might indicate that the sensor is nearing the end of its life or is already faulty, which can affect the water heater’s ability to regulate temperature accurately. Early detection of these issues allows for timely repairs or replacements, possibly averting water heating disruptions.
B. Clean the Sensor and Wiring Connections as Needed
Over time, dust, debris, or even corrosion can accumulate on the temperature sensor and its wiring connections, potentially hindering its performance. During your annual inspection, take the opportunity to carefully clean these components. Use a soft, dry cloth to wipe away any buildup.
A small brush or special cleaning solution might be required for corrosion on the connections. Ensure the sensor and wiring are completely dry before reassembling.
C. Address Any Temperature Control Issues Promptly to Prevent Future Failures
If you encounter any irregularities in water temperature control, address these issues without delay. Irregularities could include water that’s too hot or too cold or fluctuations in temperature.
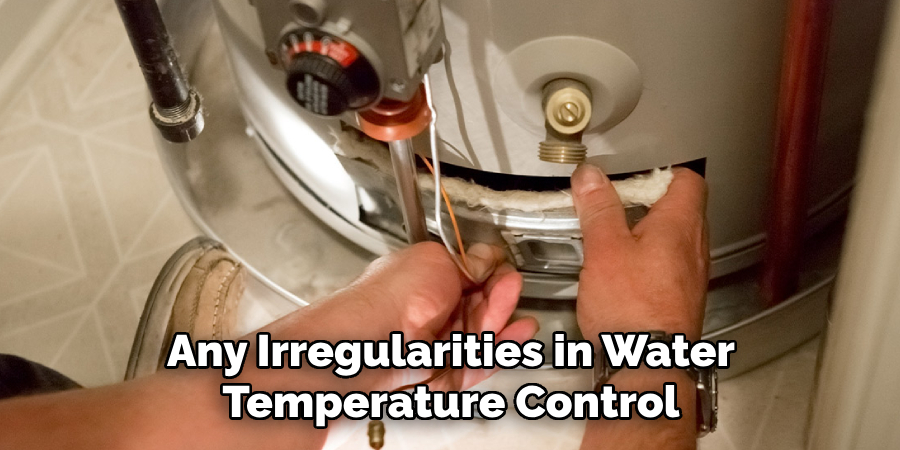
These symptoms might signal a problem with the temperature sensor or other water heater components. Promptly troubleshooting and rectifying these issues can prevent more significant failures in the future, safeguarding against potential safety hazards and ensuring your water heater continues to operate efficiently.
Conclusion
This guide has led you through the critical steps to diagnose and rectify temperature sensor failure in your water heater. From identifying symptoms of failure, such as inconsistent water temperatures, to safely removing and replacing a faulty sensor, each step is designed to ensure homeowners can confidently handle the troubleshooting process.
Regular maintenance of water heater components, especially the temperature sensor, is vital for the unit’s efficient and safe operation. Annual inspections and cleanings can help detect early signs of wear or damage, preventing unexpected failures and extending the lifespan of your water heater.
When dealing with how to fix temperature sensor failure water heater, remember the importance of following safety protocols carefully. Always shut off power and water supply before conducting any repairs. Use the right tools and replacement parts for your water heater’s model.
If the troubleshooting steps seem overwhelming, don’t hesitate to contact a professional. Ensuring your water heater’s temperature sensor is functioning correctly provides comfort and safeguards your home against potential hazards.
About
Safety Fic is a distinguished figure in the world of Diy design, with a decade of expertise creating innovative and sustainable Diy solutions. His professional focus lies in merging traditional craftsmanship with modern manufacturing techniques, fostering designs that are both practical and environmentally conscious. As the author of diy, Safety Fic delves into the art and science of Safety Fic-making, inspiring artisans and industry professionals alike.
Education RMIT University
(Melbourne, Australia) Associate Degree in Design (Safety Fic) Focus on sustainable design, industry-driven projects, and practical craftsmanship. Gained hands-on experience with traditional and digital manufacturing tools, such as CAD and CNC software.
Nottingham Trent University
(United Kingdom) Bachelor’s in diyfastly.com and Product Design (Honors) Specialized in product design with a focus on blending creativity with production techniques. Participated in industry projects, working with companies like John Lewis and Vitsoe to gain real-world insights.
Publications and Impact
In diy, Safety Fic his insights on indoor design processes, materials, and strategies for efficient production. His writing bridges the gap between artisan knowledge and modern industry needs, making it a must-read for both budding designers and seasoned professionals.