

Are you tired of power outages or simply want to protect your home from unexpected electrical surges? Installing an interlock kit can help.
Installing an interlock kit is a crucial step in ensuring the safe and effective use of a generator during power outages. An interlock kit is a mechanical device that prevents a generator and the main power source from operating simultaneously, reducing the risk of electrical hazards. Proper installation is essential to safeguard your home, appliances, and most importantly, the people residing in the space. Before starting, it is important to gather the right tools and familiarize yourself with the necessary steps to complete the installation process efficiently and safely.
This guide on how to install a interlock kit will walk you through the key steps to successfully install an interlock kit.
What Are the Benefits of Installing an Interlock Kit?
There are several benefits to installing an interlock kit in your home or business:
- Increased Safety: The primary benefit of an interlock kit is increased safety. It significantly reduces the risk of electrical accidents and hazards by preventing the transfer switch from being turned on while the main breaker is still active.
- Cost Savings: In some cases, installing an interlock kit may be a more cost-effective solution than upgrading your electrical panel. It also eliminates the need for hiring an electrician to switch between power sources during emergencies manually.
- Convenience: With an interlock kit, you can easily switch between power sources without having to disconnect and reconnect wires physically. This is especially useful during power outages or emergencies when you need to quickly switch to a backup power source.
- Protection for Your Appliances: Power surges and spikes can damage your electrical appliances, leading to costly repairs or replacements. An interlock kit helps protect your appliances by ensuring they only receive stable and safe electricity from the appropriate power source.
- Peace of Mind: Knowing that your home’s electrical system is equipped with an interlock kit can give you peace of mind, especially when you may need to rely on a backup generator for extended periods.
What Will You Need?
To install an interlock kit, you will need the following materials:
- Interlock Kit: This specialized device connects your main electrical panel to your backup generator.
- Appropriate Tools: These may include screwdrivers, pliers, wire strippers, and a drill.
- Mounting Hardware: This may include brackets and screws for securely attaching the interlock kit to your main electrical panel.
- Backup Generator: Your interlock kit will only work with a properly sized and installed backup generator. If you are unsure which type of generator is suitable for your home, consult with a professional electrician.
10 Easy Steps on How to Install a Interlock Kit
Step 1: Turn Off the Main Power
Before installing, ensure your safety by completely shutting off the main power to your electrical panel. Locate the main breaker, which is typically found at the top of your breaker panel, and switch it to the “Off” position. This step is crucial to eliminate the risk of electrocution or other electrical hazards during the process.
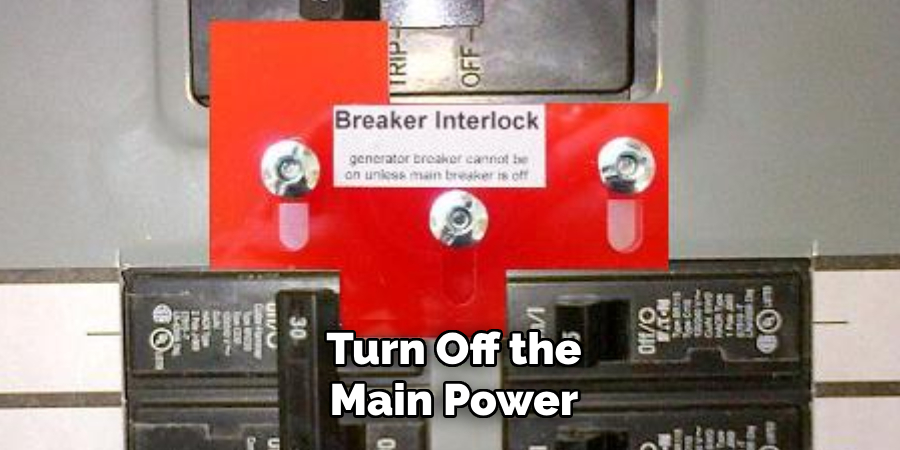
Once the main power is off, use a voltage tester to confirm that no power is running through the circuits. This additional precaution ensures that the panel is safe to work on. Always prioritize safety and wear appropriate protective gear, such as insulated gloves and safety glasses, while handling electrical components.
Step 2: Gather Necessary Tools and Materials
Before beginning any work, ensure you have all the tools and materials required for the task. Common tools include a screwdriver set, wire strippers, pliers, a voltage tester, and a flashlight for better visibility. Additionally, have electrical tape, wire connectors, and replacement parts or components as needed for the job. Organize the tools in an easy-to-access area to keep the process smooth and efficient. Having everything prepared beforehand minimizes delays and helps maintain focus on safety and precision during the procedure.
Step 3: Read the Manufacturer’s Instructions
Carefully reviewing the manufacturer’s instructions is a critical step that ensures the task is performed accurately and safely. These instructions often contain specific details about the components, proper installation techniques, and any unique requirements for the product. Misinterpreting or skipping this step could result in errors, malfunctions, or even safety hazards. Take time to understand diagrams, warnings, and recommended tools or materials outlined in the guide. If any part of the instructions is unclear, consult an expert or contact the manufacturer for clarification.
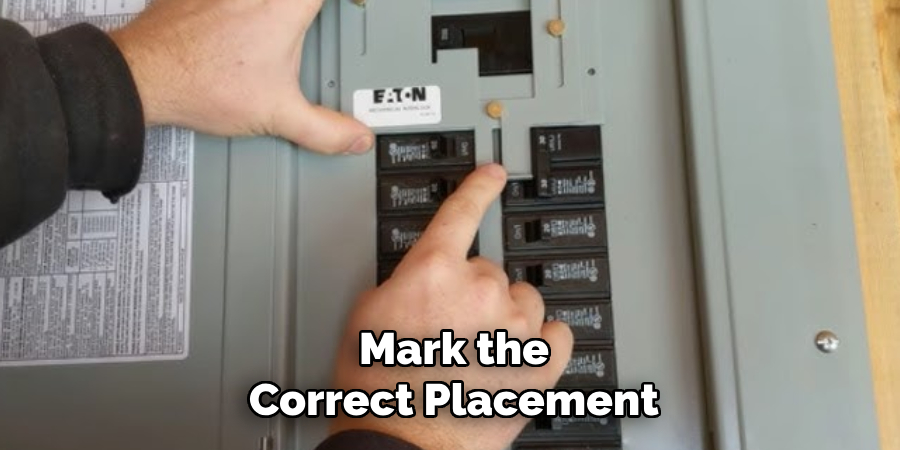
Step 4: Mark the Correct Placement
Accurately marking the placement is a crucial step to ensure proper alignment and functionality of the product. Begin by referencing any templates or measurements provided in the instructions. Use a pencil or non-permanent marker to indicate the positions where the product or its components will be installed. Double-check the markings against the guide to confirm their accuracy, as even slight deviations can impact the final outcome. Ensure the surface is clean and clear of obstructions before proceeding to the next step.
Step 5: Drill Holes for Mounting
Carefully create holes at the marked positions using a drill and the appropriate drill bit size specified in the instructions. Ensure the drill bit is perpendicular to the surface to avoid uneven mounting. Start drilling slowly to prevent slipping or misalignment, and gradually increase speed as needed. For surfaces that generate a lot of dust or debris, keep a vacuum or brush nearby to maintain a clean workspace. Once all holes have been drilled, inspect them to confirm they are clean and properly aligned with the measurements.
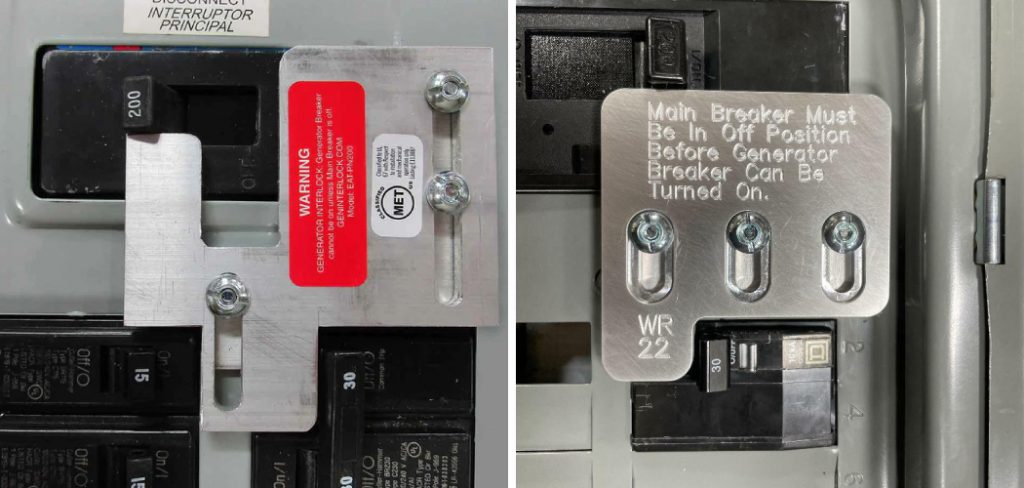
Step 6: Attach the Interlock Kit
Begin by aligning the interlock kit components with the pre-drilled holes. Carefully place the kit in position and ensure all parts fit securely and align with the specifications. Using the screws provided, fasten the kit to the surface, tightening each screw gradually and evenly to avoid over-tightening or damaging the kit. Double-check that all connections are firm and stable. If the kit includes additional locking mechanisms or brackets, install them according to the manufacturer’s instructions. Finally, test the interlock kit to ensure it functions properly before moving to the next step.
Step 7: Test the Interlock Mechanism
With the interlock kit securely installed, proceed to test its functionality. Begin by activating the mechanism according to the product’s operational guide. Ensure the components engage and disengage smoothly without any resistance or unusual noise.
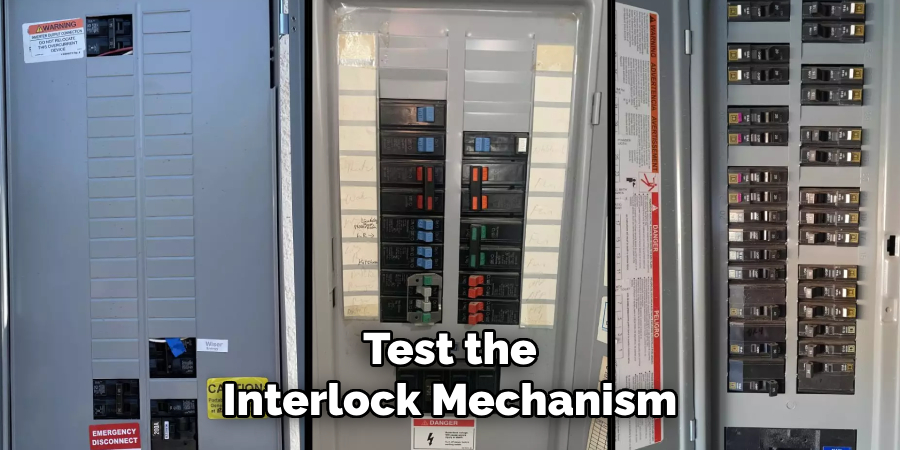
Verify that the interlock properly restricts or allows movement as intended. If any issues arise, refer to the manual’s troubleshooting section and make the necessary adjustments. Repeat the testing process until you are confident that the interlock mechanism functions reliably and as expected.
Step 8: Connect the Generator Breaker
Before connecting the generator breaker, ensure that all cables and terminals are correctly positioned and free from damage. Begin by aligning the breaker with the mounting location, ensuring a secure fit. Carefully attach the wiring to the breaker terminals, following the electrical diagram provided in the product manual. Tighten all connections firmly, avoiding excessive force that could damage the components. Once connected, inspect the setup to confirm proper alignment and secure attachment. After the visual inspection, activate the breaker to test its engagement. Monitor for any abnormal behavior, such as overheating or unusual sounds, and address any issues immediately.
Step 9: Double-Check Your Work
After completing the installation, performing a thorough review of your work is crucial. Begin by verifying that all connections are tight and secure and that no loose wires or components exist. Check the alignment of the breaker within the panel to ensure it is properly seated. Confirm that all safety measures, such as grounding, have been correctly implemented. Use a multimeter or an appropriate testing device to measure voltage and ensure the circuit functions as expected. Finally, review the product manual and cross-reference your setup to confirm compliance with the recommended installation guidelines.
Step 10: Restore Power and Test the System
Once all installation steps have been completed and verified, restore power to the system by switching the main breaker back on. Carefully observe the system as it powers up to ensure no unusual sounds, sparks, or malfunctions. Test the circuit by using the connected devices or loads to confirm proper operation. Use a multimeter to double-check voltage levels and verify that the system delivers power as expected. If any issues are detected, turn off the power immediately and revisit the previous steps to identify and resolve the problem.
By following these steps, you can safely install an interlock kit and add an extra layer of convenience and safety to your home’s backup power system. Always consult a licensed electrician if you have any doubts during the process.
Conclusion
How to install a interlock kit is a practical way to enhance the functionality and safety of your backup power system.
You can ensure a reliable connection between your generator and electrical panel by carefully following the instructions and prioritizing safety throughout the process. Always double-check your work, adhere to local codes, and consult a licensed electrician if you encounter any uncertainties.
With proper installation, an interlock kit can provide peace of mind and seamless access to backup power during outages.
About
Safety Fic is a distinguished figure in the world of Diy design, with a decade of expertise creating innovative and sustainable Diy solutions. His professional focus lies in merging traditional craftsmanship with modern manufacturing techniques, fostering designs that are both practical and environmentally conscious. As the author of diy, Safety Fic delves into the art and science of Safety Fic-making, inspiring artisans and industry professionals alike.
Education RMIT University
(Melbourne, Australia) Associate Degree in Design (Safety Fic) Focus on sustainable design, industry-driven projects, and practical craftsmanship. Gained hands-on experience with traditional and digital manufacturing tools, such as CAD and CNC software.
Nottingham Trent University
(United Kingdom) Bachelor’s in diyfastly.com and Product Design (Honors) Specialized in product design with a focus on blending creativity with production techniques. Participated in industry projects, working with companies like John Lewis and Vitsoe to gain real-world insights.
Publications and Impact
In diy, Safety Fic his insights on indoor design processes, materials, and strategies for efficient production. His writing bridges the gap between artisan knowledge and modern industry needs, making it a must-read for both budding designers and seasoned professionals.