

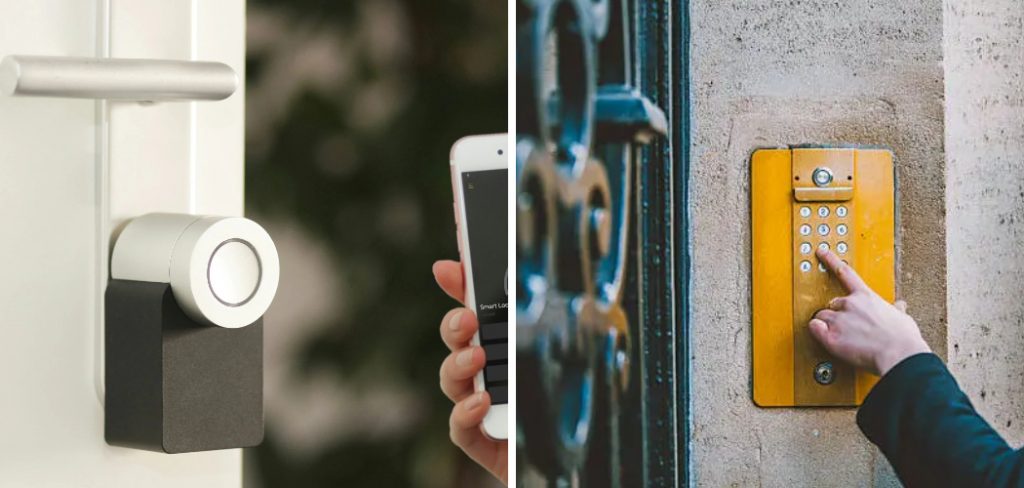
Keyless entry systems have become a modern necessity for both vehicles and homes, offering enhanced convenience, security, and control. With a keyless system, you can lock or unlock your doors using a remote, keypad, smartphone, or biometric sensor—eliminating the need for traditional keys. These systems are especially beneficial for families, busy professionals, or property owners who want an extra layer of safety.
Installing a keyless entry system may seem intimidating at first, but with the right tools and a careful step-by-step approach on how to install a keyless entry system, it’s entirely achievable for most DIY enthusiasts. Whether you’re upgrading your home door lock or adding smart access to your garage or car, this guide will walk you through every stage of installation safely and effectively.
Tools and Materials You’ll Need
- Screwdriver Set (Phillips and Flathead)
- Power Drill and Drill Bits
- Measuring Tape and Pencil
- Chisel and Hammer
- Level
- Wire Stripper and Crimping Tool (for Wired Systems)
- Electrical Tape
- Screws and Mounting Hardware
- Batteries (for Electronic Locks)
- The Keyless Entry Kit With Instruction Manual
10 Step-By-Step Guidelines on How to Install a Keyless Entry System
Step 1: Choose the Right Keyless Entry System
Before starting, decide which type of keyless entry system suits your needs. There are various models available, including keypad locks, biometric fingerprint locks, smart Wi-Fi locks, and remote-controlled car entry systems. Your choice will depend on where you plan to install it and your budget.

Make sure the system you purchase is compatible with your door type or vehicle model. Read customer reviews and product specifications to ensure it meets your expectations for security, battery life, and durability. A well-matched system ensures smooth installation and long-term reliability.
Step 2: Prepare the Installation Area
Start by removing the old lock or entry system from your door or vehicle. Use a screwdriver to take out the screws from the existing latch and strike plate. Clean the surface area to remove any dirt, debris, or old adhesive that could interfere with installation.
If you’re installing a door-based system, check the alignment of the latch hole and deadbolt area using a level. Adjust or chisel out uneven areas to fit the new keyless lock components perfectly. Proper preparation helps prevent misalignment issues later on.
Step 3: Mark the Mounting Points
Next, mark the exact locations for drilling or screwing the mounting hardware. Place the template provided in your keyless entry kit against the door and use a pencil to outline where holes should be made. If your system doesn’t include a template, measure carefully using your tape.
For electronic or biometric systems, you may need additional holes for wiring or sensors. Double-check your measurements before drilling, as even small errors can cause improper fitting. Use masking tape to protect the surface of the door or vehicle panel while marking.
Step 4: Drill Holes and Prepare for Hardware Installation
Using a power drill, create holes in the marked areas. Begin with a small pilot hole to ensure accuracy, then gradually increase the size to match the required diameter. If installing on a wooden door, use wood bits; for metal doors or car panels, use metal bits.
After drilling, smooth out any rough edges with sandpaper or a file. Check the alignment again using a level to make sure the holes are straight and properly spaced. This step ensures that both the lock mechanism and keypad will fit securely and function smoothly.
Step 5: Install the Exterior and Interior Components
Now, insert the exterior keypad or handle assembly into the pre-drilled holes. Align it properly and thread the connecting cable (if applicable) through to the inside of the door. Then, install the interior mounting plate and secure it using the provided screws.
Ensure all parts fit tightly without gaps or wobbling. Avoid over-tightening screws, as this can crack the plastic housing or strip the screw holes. Once the main components are in place, test the handle or keypad buttons to confirm smooth operation before proceeding.

Step 6: Connect the Wiring (For Electronic or Smart Systems)
If your keyless system is electronic or integrates with a smart home setup, you’ll need to connect the wiring. Follow the wiring diagram provided in the manual carefully. Connect the power, ground, and signal wires using wire connectors or crimping tools.
Use electrical tape to insulate all exposed connections. For wireless systems powered by batteries, simply insert the batteries into the designated compartment. Make sure the power source is stable and that you avoid short-circuiting by verifying all connections with a voltage tester.
Step 7: Mount the Strike Plate and Latch Mechanism
Install the latch mechanism into the door edge and secure it with screws. Next, align the strike plate with the latch bolt and fasten it onto the door frame using a screwdriver or drill. The latch should move smoothly without resistance when you test it.
If the door doesn’t close properly, adjust the strike plate position slightly until the latch clicks securely. A properly aligned latch ensures that your keyless system locks and unlocks reliably every time. Take your time to get this alignment right—it’s crucial for long-term performance.
Step 8: Program the Access Codes or Credentials
Once the physical installation is done, it’s time to program your keyless system. Follow the manufacturer’s instructions to set up user codes, fingerprint IDs, or smartphone access. Most systems allow you to create multiple user codes for family members or guests.
Make sure to test each programmed code to ensure it works correctly. If your lock connects to Wi-Fi or Bluetooth, sync it with your mobile app and verify remote access. Keep your master code secure and never share it publicly to maintain maximum security.
Step 9: Test the System Thoroughly
After installation and programming, test your keyless entry system multiple times to ensure proper functionality. Check that the door locks and unlocks smoothly and that the keypad, remote, or fingerprint sensor responds quickly.
Also, test the system under different conditions—like from outside the door, at night, or using the mobile app—to confirm reliability. Listen for unusual sounds like grinding or clicking, which could indicate misalignment. Adjust as needed before considering the installation complete.

Step 10: Finalize the Setup and Secure All Components
Finally, tighten all screws, cover the wiring with protective plates, and insert any decorative trims that came with the kit. Replace the battery cover and ensure that the system is sealed against dust and moisture.
Perform a final check to ensure that all components are securely attached and that the door or entry point closes properly. If applicable, register your product online to activate warranties and access future software updates. Once this step is done, your keyless entry system is fully operational and ready for everyday use.
Following these steps on how to install a keyless entry system will save you time and money compared to hiring a professional locksmith. It also allows for customization and personalization of your security system according to your needs.
Additional Tips
- Always read the instruction manual thoroughly before beginning installation.
- If possible, test the system on a mock setup before attaching it permanently.
- Use high-quality batteries to ensure consistent performance for battery-powered locks.
- Keep a backup physical key (if included) for emergencies.
- Label your wiring connections during installation to make future maintenance easier.
- Periodically clean the keypad or sensor area to avoid malfunction from dust or grime.
- If using a smart lock, regularly update the app firmware for security improvements.
Common Mistakes to Avoid
- Skipping alignment checks before drilling holes.
- Forgetting to disconnect the power before wiring.
- Using incorrect screw lengths that damage internal components.
- Over-tightening screws ccan causecracks or misalignment.
- Not testing all programmed codes before finalizing installation.
Do You Need To Use Professionals?
While installing a keyless entry system is manageable for most DIYers, hiring a professional can ensure precision, safety, and long-term reliability—especially for complex or smart systems. Electricians or locksmiths are trained to handle wiring, alignment, and programming tasks efficiently.
If your system integrates with home automation platforms or includes multiple access points, professional installation ensures compatibility and proper configuration. Additionally, a professional can troubleshoot potential power or connection issues immediately, saving you time and frustration.
Hiring a certified technician may cost more upfront, but it provides peace of mind knowing that your system operates flawlessly and adheres to safety standards. For simpler systems, however, a confident DIYer can handle the task effectively by following this guide carefully.
Frequently Asked Questions
Q1: How Long Does It Take to Install a Keyless Entry System?
A1: The installation time depends on the type of system and your experience level. Basic keypad locks can take around 30–45 minutes to install, while smart or biometric systems may require 1–2 hours for wiring and programming. Always allow extra time for careful setup and testing to avoid mistakes.

Q2: Can I Install a Keyless Entry System on Any Door?
A2: Most keyless entry systems are compatible with standard doors, but always check the thickness and material before buying. Wooden and metal doors work best, while glass doors or unusually thin ones may need special mounting hardware. Use the manufacturer’s compatibility guide for reference.
Q3: What Should I Do If My Keyless Entry System Stops Working?
A3: If your system stops working, first check the batteries or power supply. Replace old batteries and inspect wiring connections for looseness. Reset the system using the factory reset procedure outlined in the manual. If problems persist, consult the manufacturer’s support or hire a professional to diagnose the issue.
Conclusion
Installing a keyless entry system is one of the most effective ways to upgrade your home or vehicle’s security while adding modern convenience. With the right tools, patience, and this detailed guide on how to install a keyless entry system, you can successfully complete the installation without requiring extensive technical skills.
Whether you’re aiming for the simplicity of a keypad or the sophistication of a smart Wi-Fi lock, following each step carefully ensures a smooth, reliable setup. Always prioritize safety, accuracy, and secure programming to protect your property and loved ones. Once installed, enjoy the ease and confidence of entering your home or vehicle without ever fumbling for keys again.
About
Safety Fic is a distinguished figure in the world of Diy design, with a decade of expertise creating innovative and sustainable Diy solutions. His professional focus lies in merging traditional craftsmanship with modern manufacturing techniques, fostering designs that are both practical and environmentally conscious. As the author of diy, Safety Fic delves into the art and science of Safety Fic-making, inspiring artisans and industry professionals alike.
Education RMIT University
(Melbourne, Australia) Associate Degree in Design (Safety Fic) Focus on sustainable design, industry-driven projects, and practical craftsmanship. Gained hands-on experience with traditional and digital manufacturing tools, such as CAD and CNC software.
Nottingham Trent University
(United Kingdom) Bachelor’s in diyfastly.com and Product Design (Honors) Specialized in product design with a focus on blending creativity with production techniques. Participated in industry projects, working with companies like John Lewis and Vitsoe to gain real-world insights.
Publications and Impact
In diy, Safety Fic his insights on indoor design processes, materials, and strategies for efficient production. His writing bridges the gap between artisan knowledge and modern industry needs, making it a must-read for both budding designers and seasoned professionals.