

Installing a Kwikset deadbolt is an easy way to add extra security and peace of mind to your home. A Kwikset deadbolt provides superior protection against forced entry, making it more difficult for burglars to gain entry into your home.
Additionally, the added convenience of a keyless entry system can make coming and going easier. Installing a Kwikset deadbolt is relatively straightforward and can usually be completed in just a few steps.
Installing a Kwikset deadbolt is an easy and cost-effective way to increase your home’s security. Installing a Kwikset deadbolt on your door will help you keep the unwanted out of your home and give you peace of mind.
The installation process is simple enough that it can be done in just a few minutes with minimal tools, making it a great DIY task for homeowners. Read this blog post to learn how to install a kwikset deadbolt.
Tools You Will Need
- Tape measure
- Pencil or marker
- Drill and drill bit set
- Phillips head screwdriver
- Level
- Chisel
- Deadbolt
- Hacksaw
- Hammer
- Sandpaper (optional)
Step-by-step Instructions for How to Install a Kwikset Deadbolt
Step 1: Inspect the Doorjamb
Before you proceed with the installation of the Kwikset Deadbolt, it is important to inspect the doorjamb for any damage that might interfere with the installation. If there is any visible issues, repair or replace them before installing the Kwikset Deadbolt.
Step 2: Prepare your drill bit and screws
Take your drill bit and prepare it according to the Kwikset Deadbolt installation instructions. Make sure to select the right one for your door type and material. Place the deadbolt in its designated spot within your doorjamb, making sure that it is aligned with both edges of the jamb. Use a level if necessary to verify that you have placed it correctly.
Step 3: Drill the Holes for the Deadbolt
Using your drill bit, drill the two holes needed to install the deadbolt. Make sure that you use a slow speed and steady pressure while drilling, as too much force may cause damage to your doorjamb or hardware.
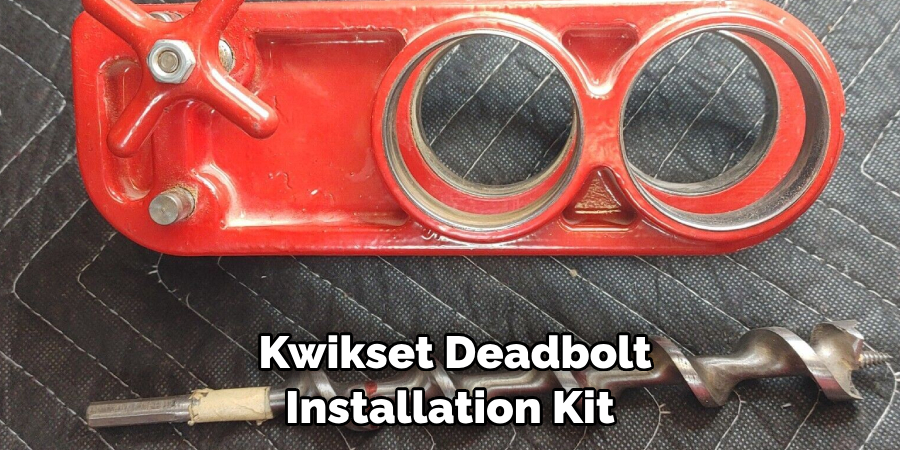
Take the two long screws that are included in the Kwikset Deadbolt installation kit and insert them into the holes you just drilled. Make sure they are securely tightened, though not too tight as to damage other components of the doorjamb.
Step 4: Secure the Deadbolt with Short Screws
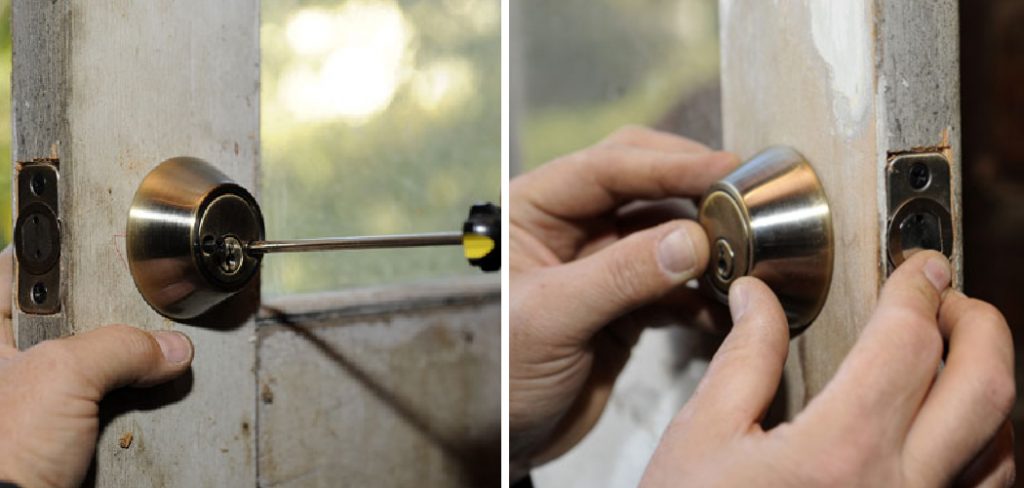
Now take the two short screws and use them to secure the deadbolt into place. Again, make sure that they are not too tight to cause any damage. Take the striker plate and attach it to the doorjamb. Make sure that it is aligned correctly with the deadbolt and is placed at the same height as your handle set.
Step 5: Fasten Striker Plate with Screws
Now take the screws that came with the striker plate and use them to secure it into place. Place the cover onto your deadbolt, making sure that it is properly aligned and secured. Finally, test out your installation to make sure everything works as expected. Open and close the door several times, making sure that the deadbolt locks and unlocks properly.
When it comes to choosing a reliable lock for your home security, it’s hard to beat a quality Kwikset Deadbolt. Not only do they provide an extra layer of protection, but they are also easy to install if you follow the correct steps.
Tips for How to Install a Kwikset Deadbolt

- Always wear safety glasses and gloves when working on the Kwikset deadbolt installation.
- Unscrew the entire lock assembly from its base, making sure to use an appropriate tool such as pliers or a screwdriver to loosen any screws that are in place.
- Make sure the door is prepared before installing the deadbolt by drilling new holes and applying fresh paint, as needed.
- Read the instructions included with the Kwikset deadbolt before attempting to install it. Make sure you understand how the lock works and its installation requirements.
- Place the Kwikset deadbolt in a safe location that is out of reach of children or pets while not in use.
- Test if the Kwikset deadbolt will fit the door by inserting it into the existing hole. If the lock is too small or too large, make adjustments as necessary.
Make sure the Kwikset deadbolt is properly aligned in the door before drilling new holes and securing it into place. After installation, re-test the lock to ensure everything works as expected. If there are any problems, contact a professional locksmith or Kwikset customer support for assistance.
What is the Best Way to Test That the Kwikset Deadbolt is Properly Installed and Functioning Correctly?
Once the Kwikset deadbolt has been installed, it is important to test that it is functioning correctly. To do this, use a few simple tests to ensure that the lock is secure and working as intended.
The simplest test is to close the door of your home or office, and attempt to open it from outside using the key provided with the lock. If it opens with ease, this could indicate a problem with your installation and should be remedied immediately.
However, if it is difficult to turn the key in the cylinder or the deadbolt doesn’t seem to engage properly, this is another indication that something may need to be adjusted or replaced.
Another test you can use is to open the door from the inside and attempt to lock it with the deadbolt. If you can’t engage the deadbolt, this could mean that either your Kwikset deadbolt isn’t seated properly in its housing, or the internal components of the cylinder aren’t aligned correctly.
Are There Any Additional Steps Necessary for Installing a Kwikset Smartkey Deadbolt?
Yes. If you are installing a Kwikset Smartkey Deadbolt, there are a few additional steps necessary for proper installation. Here is what you need to do:
- Locate the small hole in the face of the deadbolt and insert the included Allen wrench into it. This will allow you to adjust the latch on your deadbolt to fit your door.
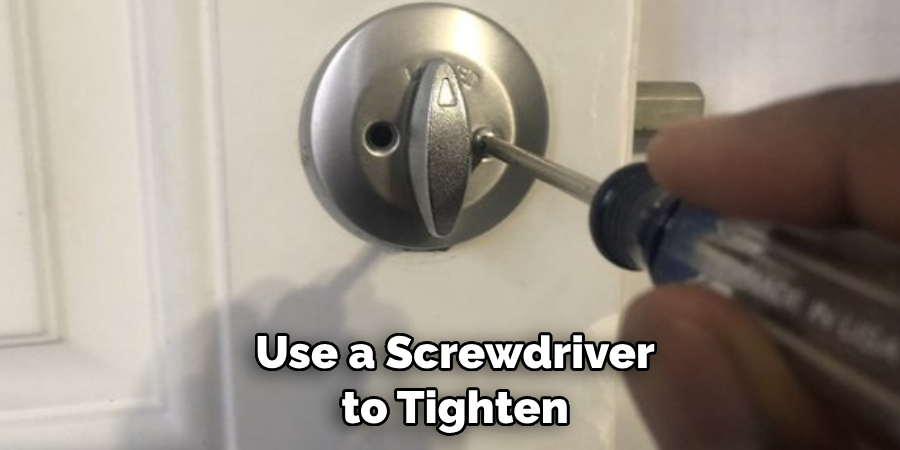
- Insert the cylinder into the latch assembly and use a screwdriver to tighten the screws on the outside of the latch assembly.
- Insert the faceplate onto the deadbolt and adjust it so that it fits flush against your door frame.
- Insert two AA batteries into your deadbolt, which will provide power to the cylinder.
- Once everything is installed, use the provided reset tool to program your deadbolt for Smartkey access. This will allow you to easily re-key your deadbolt whenever necessary without needing a locksmith.
If you have any questions regarding how to install a Kwikset Smartkey Deadbolt, it is best to consult an expert locksmith in your area. They will be able to provide assistance and advice on the best way to install your deadbolt for maximum security.
What is the Best Way to Clean Your Kwikset Deadbolt and Keep It Looking Like New?
Once you have successfully installed your Kwikset deadbolt, it is important to keep up with regular maintenance and cleaning. Doing so will ensure that your lock continues to look like new and performs as expected for years to come. To help maintain the longevity of your Kwikset deadbolt, here are some tips on how to clean it:

- For the exterior of your Kwikset deadbolt, use a damp cloth with mild soap and warm water. Make sure to rinse off any soapy residue, then dry the lock with a soft towel.
- To clean the inside of the bolt latching mechanism, use a small nylon brush or cotton swab. Gently pass it over all interior surfaces to remove any debris.
- Every 6 months, you should use a light lubricant on the latch bolt mechanism, such as WD-40. Spray it onto a cotton swab and then apply it inside of the lock.
- To clean the keyhole, use a pin or similar object to carefully pick out any dirt or grime that may have built up.
By taking the time to properly clean your Kwikset deadbolt, you can ensure that it will remain secure and in good condition for years to come.
How Can You Ensure Optimal Security for Your Doors When Using a Kwikset Deadbolt?
When installing a Kwikset deadbolt, it is important to take certain precautions to ensure optimal security for your doors. To start, you should always use a solid core or metal door jamb when installing the lock. A hollow-core door frame will not provide enough support or strength for the screws and bolts used in the installation process.
Once you have the necessary door frame, you can begin the installation process. Make sure to follow the instructions included with your Kwikset deadbolt carefully and use all of the parts provided. Additionally, it is important to make sure that all screws and bolts are securely tightened for maximum security.
Finally, once the lock has been installed use a door viewer or peephole to check the alignment of all components. It is important to make sure that the lock has been securely installed and that no gaps exist between the door and frame. This will help to ensure maximum security for your doors when using a Kwikset deadbolt.
Are There Any Potential Risks or Hazards Associated With Installing a Kwikset Deadbolt?
Yes, there are potential risks and hazards associated with installing a Kwikset deadbolt. It is important to read the installation instructions carefully and be aware of any safety precautions that need to be taken before beginning the project. Additionally, you should make sure that the area you will be working in has plenty of ventilation since drilling can create dust particles.

Furthermore, protective gear such as gloves and safety glasses may also need to be worn while installing a Kwikset deadbolt. Finally, you should always disconnect the power supply before beginning any electrical work to prevent the risk of electric shock. Ultimately, taking the proper precautions can help ensure that installation goes smoothly and safely.
What is the Most Common Problem That People Encounter When Installing a Kwikset Deadbolt and How Can It Be Avoided?
The most common problem people encounter when installing a Kwikset deadbolt is incorrect measurements. It’s important to ensure that the door frame, latch hole, and edge bore are all measured correctly.
To do this, use a tape measure to measure the width of your door and then make sure that the diameter of the strike plate matches up with that measurement. Additionally, make sure that the edge bore is large enough to accommodate the deadbolt. It’s also important to check that the latch hole is properly aligned with the door knob or lever.
Following these steps can help ensure a successful installation and avoid any potential problems. Another issue that people might have when installing a Kwikset deadbolt is setting up the lock.
It is important to make sure that the lock is installed at the correct height so it matches up with the strike plate. Additionally, make sure that you have enough clearance around the door knob or lever for easy operation. Setting up the lock correctly can help ensure a secure and properly functioning deadbolt.
Conclusion
In conclusion, installing a Kwikset deadbolt is relatively easy, provided you have the right tools. The entire process takes only about 20 minutes and can make your front door more secure than ever before. Before starting, be sure to read all instructions carefully and double-check that you have all of the necessary materials. With patience and attention to detail, anyone can successfully install a Kwikset deadbolt.
Once your new lock is installed, don’t forget to register it with the manufacturer and check for any updates that may be available. By following these simple steps, you can ensure that your home is secure against the elements and any intruders who might try to gain access. I hope this article has been beneficial for learning how to install a kwikset deadbolt. Make Sure the precautionary measures are followed chronologically
About
Safety Fic is a distinguished figure in the world of Diy design, with a decade of expertise creating innovative and sustainable Diy solutions. His professional focus lies in merging traditional craftsmanship with modern manufacturing techniques, fostering designs that are both practical and environmentally conscious. As the author of diy, Safety Fic delves into the art and science of Safety Fic-making, inspiring artisans and industry professionals alike.
Education RMIT University
(Melbourne, Australia) Associate Degree in Design (Safety Fic) Focus on sustainable design, industry-driven projects, and practical craftsmanship. Gained hands-on experience with traditional and digital manufacturing tools, such as CAD and CNC software.
Nottingham Trent University
(United Kingdom) Bachelor’s in diyfastly.com and Product Design (Honors) Specialized in product design with a focus on blending creativity with production techniques. Participated in industry projects, working with companies like John Lewis and Vitsoe to gain real-world insights.
Publications and Impact
In diy, Safety Fic his insights on indoor design processes, materials, and strategies for efficient production. His writing bridges the gap between artisan knowledge and modern industry needs, making it a must-read for both budding designers and seasoned professionals.