

Are you looking to install a map sensor on your vehicle? Don’t worry; it’s not as complicated as it sounds.
How to Install a map sensoris an essential task for ensuring your vehicle’s engine operates efficiently. The MAP sensor plays a crucial role in measuring the pressure within the intake manifold and providing this data to the engine’s control unit, helping optimize the air-fuel mixture and engine timing. A faulty or malfunctioning MAP sensor can lead to poor performance, increased fuel consumption, and even engine damage.
This guide will provide a step-by-step process to properly install a MAP sensor, whether replacing a damaged one or installing a new one. With the right tools and patience, you can complete this installation effectively and restore your vehicle’s performance.
What Are the Benefits of Installing a MAP Sensor?
Installing an MAP sensor can benefit your vehicle’s engine performance. Here are some of the most notable advantages:
- Improved Fuel Efficiency: With accurate readings from the MAP sensor, the engine can adjust the air-fuel mixture more precisely, leading to better fuel efficiency.
- Enhanced Engine Performance: The MAP sensor provides real-time data to the engine control unit, allowing it to adjust for optimal engine performance.
- Reduced Emissions: A properly functioning MAP sensor helps maintain a proper air-fuel ratio, resulting in lower emissions and a more environmentally friendly vehicle.
What Will You Need?
To replace a faulty MAP sensor, you will need:
- A new or refurbished MAP sensor
- Appropriate tools for accessing and removing the old sensor (such as socket wrenches, pliers, and screwdrivers)
- Cleaning materials (if reusing an old sensor)
- Diagnostic equipment to check for error codes and ensure proper installation
It is important to note that the specific tools needed may vary depending on your vehicle make and model. It is always best to consult a mechanic or reference a repair manual for your vehicle before attempting any replacements.
8 Easy Steps on How to Install a Map Sensor
Step 1. Locate the MAP Sensor
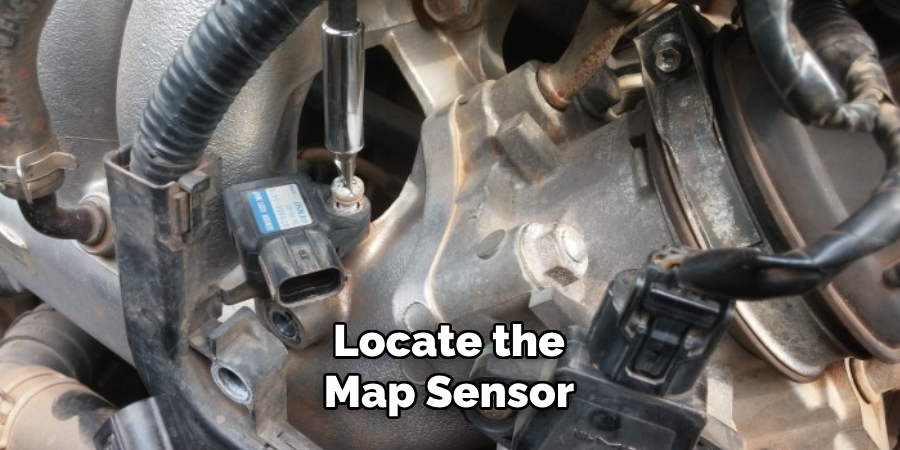
The MAP (Manifold Absolute Pressure) sensor is typically located in or near the engine’s intake manifold, as it is designed to monitor the air pressure within the manifold. Its exact location can vary depending on the vehicle’s make, model, and engine design. To locate the MAP sensor, consult your vehicle’s repair manual or refer to online resources specific to your car’s model. The sensor is generally tiny, rectangular, and connected to the intake manifold with a wiring harness and sometimes a vacuum hose. Before proceeding, ensure the engine is turned off and cooled down to avoid potential injuries. Identifying the MAP sensor’s location accurately will help streamline the replacement process and prevent unnecessary damage to other components.
Step 2: Disconnect the Battery
Before starting the MAP sensor replacement, ensure your vehicle’s battery is disconnected. This step is crucial to avoid any accidental short circuits or electrical issues while working with the sensor’s wiring. Use a wrench or socket to loosen the battery’s negative terminal and carefully remove it. Tucking the cable away from the battery will ensure it does not accidentally reconnect during the process. Disconnecting the battery also helps reset the vehicle’s onboard computer after installing the new sensor.
Step 3: Removing the Old Sensor
Once the battery is safely disconnected, you can remove the old sensor. Start by locating the sensor in your vehicle’s engine bay. It is typically attached to a mounting bracket or bolted directly onto the engine block.
Using a socket or an adjustable crescent wrench, loosen and remove any bolts securing the sensor in place. Some vehicles may have multiple sensors, so make sure you are removing the correct one.
After removing any bolts holding it, gently wiggle and pull out the old sensor from its socket on the engine block. Be careful not to damage any surrounding wires or hoses while doing so.
Step 4: Installing the New Sensor
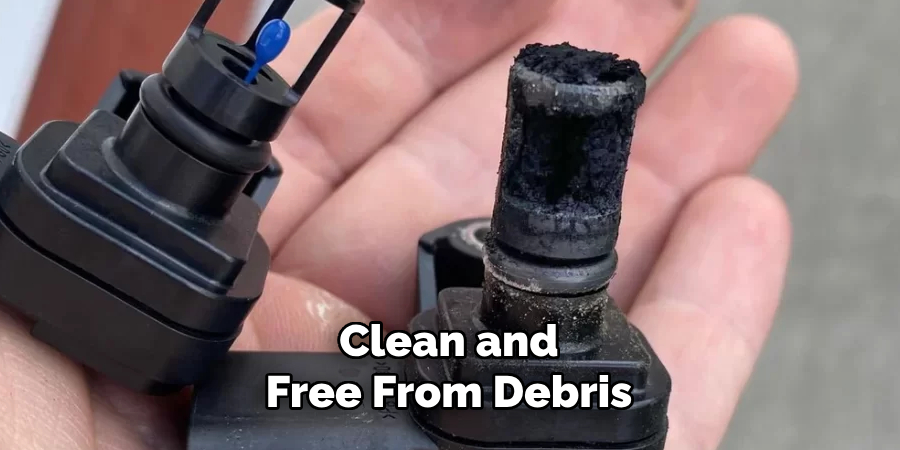
Before installing the new sensor, ensure that the mounting area on the engine block is clean and free from debris or old gasket material. Wipe the area with a clean cloth to ensure a proper seal and secure fit for the new sensor. If your new sensor comes with a gasket or O-ring, inspect it for damage and apply a small amount of engine oil to help it seat correctly.
Carefully align the new sensor with its socket, ensuring that any pins or guides are adequately matched. Once aligned, gently press the sensor into place. Avoid forcing it, as this can damage delicate components or misalign the sensor. Replace the bolts that secure the sensor and tighten them using a socket wrench or crescent wrench. Ensure the bolts are snug but not over-tightened, as this can strip the threads or damage the sensor.
Step 5: Reattaching the Air Intake
Now that the new sensor is in place, it’s time to reattach the air intake. Begin by carefully lining up the air intake with its corresponding connection on the engine. Once aligned, gently push the two pieces together until they click into place. Double check to make sure all connections are secure and properly aligned.
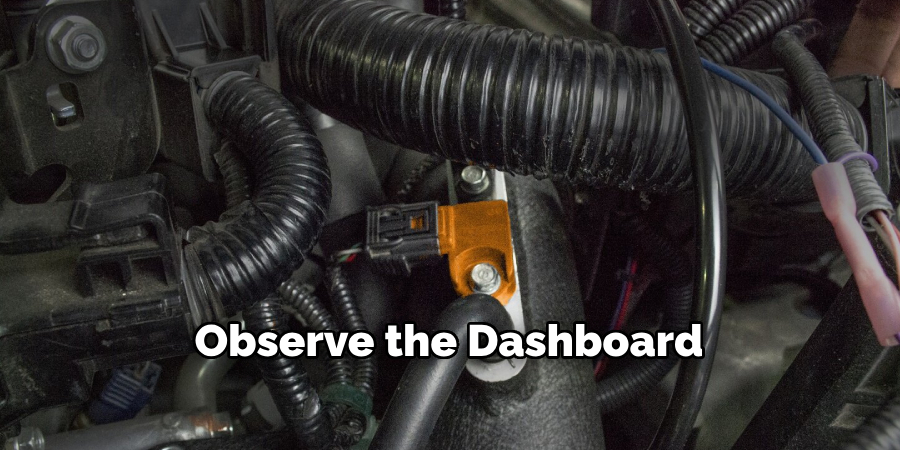
Step 6: Testing and Troubleshooting
With the air intake reattached, it’s important to test the installation to ensure the new sensor is functioning correctly. Start the engine and allow it to idle for a few minutes, paying close attention to any unusual sounds or irregularities in engine performance. Observe the dashboard for any warning lights that may appear related to the sensor or air intake system.
If no issues are detected, take the vehicle for a short test drive, observing how it accelerates, idles, and responds to throttle input. Ensure the engine runs smoothly and without hesitation. If you encounter problems, such as rough idling, poor acceleration, or new warning lights on the dashboard, turn off the engine and double-check the sensor and air intake connections. Reconfirm that the sensor is properly seated, the connectors are secure, and there is no damage to the components.
Step 7: Final Inspection and Cleanup
After completing the test drive and verifying the engine’s performance, take a moment to perform a final inspection. Check under the hood for any signs of leaks, loose connections, or misplaced tools. Ensure that all plastic covers, clamps, and other components are secured in their proper positions. Wipe down any areas that may have become dirty during the repair process. Proper cleanup and attention to detail will not only help maintain the vehicle but also ensure the long-term functionality of the components you’ve worked on.
Step 8: Keep a Log of Maintenance
Keeping a detailed log of your vehicle’s maintenance is a crucial step for ensuring its longevity and performance. Record the date, mileage, and specifics of the work performed, such as the parts replaced, fluids replenished, or any repairs made. This log serves multiple purposes; it helps you stay on track with regular maintenance intervals, provides a clear history of care for future reference, and can increase the resale value of your vehicle by demonstrating its upkeep. Additionally, having a comprehensive record can make diagnostics easier for any future issues, as mechanics or professionals will have a clear understanding of what has been done.
By following these simple steps, you can ensure the longevity and reliability of your vehicle. Regular maintenance not only saves you money in the long run but also ensures your safety on the road.
5 Things You Should Avoid
- Ignoring the Vehicle’s Manual Instructions
Always refer to your vehicle’s manual for specific guidelines regarding the installation of the MAP sensor. Skipping this step could result in improper installation or even damage to the sensor or engine components.
- Failing to Disconnect the Battery
Never try to install a MAP sensor without first disconnecting the battery. This precaution is essential to prevent short circuits or electrical damage to the sensor and other sensitive components.
- Not Cleaning the Installation Area
Installing an MAP sensor in a dirty or unclean environment can lead to debris entering the system, affecting its performance. Ensure the area is clean and free from contaminants before starting the process.
- Using Excessive Force When Installing
MAP sensors are delicate components, and forcing them into place can cause damage. Always handle the sensor carefully and ensure it fits snugly without applying unnecessary pressure.
- Skipping the Post-Installation Calibration
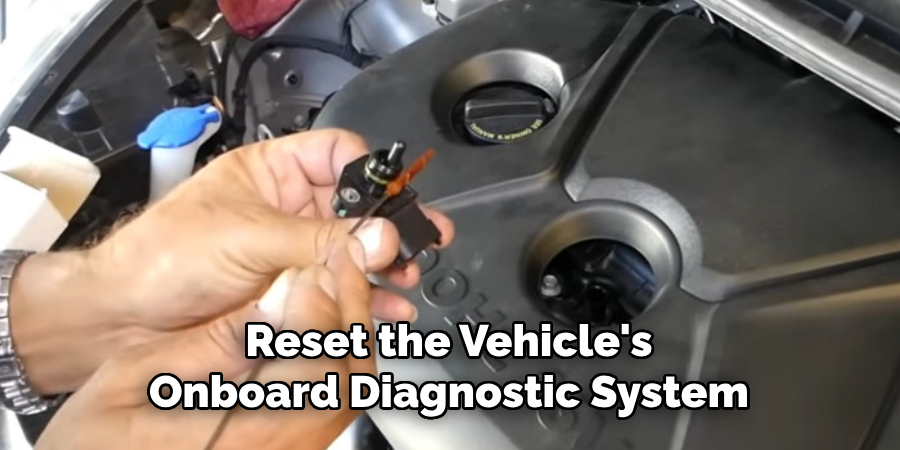
After installing an MAP sensor, it’s crucial to calibrate or reset the vehicle’s onboard diagnostic system to ensure proper functionality. Failing to do this can lead to incorrect readings and affect the engine’s performance.
Conclusion
How to Install a MAP sensor requires careful attention to detail and adherence to proper procedures to ensure optimal performance.
By following the steps outlined, such as safely removing the old sensor, correctly handling the new sensor, and performing post-installation calibration, you can avoid common issues and maintain the efficiency of your vehicle. Always refer to the manufacturer’s guidelines for specific instructions and seek professional assistance if needed.
Proper installation ensures accurate readings, better fuel efficiency, and a smoothly running engine.