

Installing a neutral wire is a crucial step in ensuring the safe and efficient operation of electrical circuits in your home.
The neutral wire serves as a return path for electrical current, helping to balance the voltage and maintain the proper functioning of your electrical appliances.
In this guide on how to install a neutral wire, we will walk you through the necessary tools, safety precautions, and step-by-step instructions to install a neutral wire correctly.
Whether you are a seasoned DIY enthusiast or a novice looking to expand your home improvement skills, this guide will equip you with the knowledge you need to complete the task confidently and safely.
What is a Neutral Wire?
Before we dive into the installation process, let’s first define what a neutral wire is and its importance in electrical circuits. A neutral wire is a type of wire that carries current back to the source in an alternating current (AC) circuit.
It is typically color-coded white and works alongside the hot wire, which supplies power to your appliances.
The primary function of the neutral wire is to provide a return path for electric currents, completing the circuit and allowing electricity to flow smoothly. Without a neutral wire, your appliances may not function correctly or could potentially be hazardous.
Tools Needed
To install a neutral wire, you will need the following tools:
Wire Cutters:
These are used to cut the existing wiring and strip insulation from the wires.
Wire Strippers:
Wire strippers are used to remove the protective coating on wires, exposing the conductive material inside.
Screwdrivers:

You will need both flathead and Phillips head screwdrivers to loosen screws and make connections.
Needle-nose Pliers:
Needle-nose pliers come in handy for gripping small wires or bending them into shape.
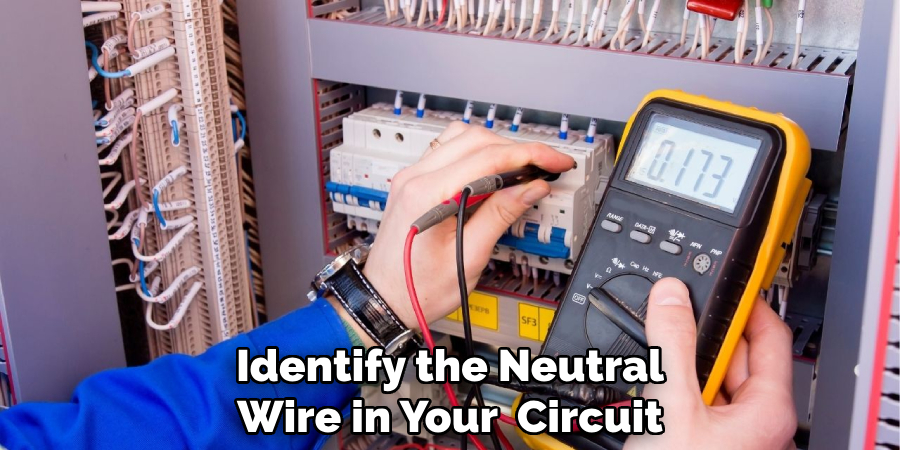
Voltage Tester:
This tool is essential for ensuring that no electricity is flowing through the wires before you start working. It detects electrical current by touching it against a wire’s insulation.
7 Step-by-step Guidelines on How to Install a Neutral Wire
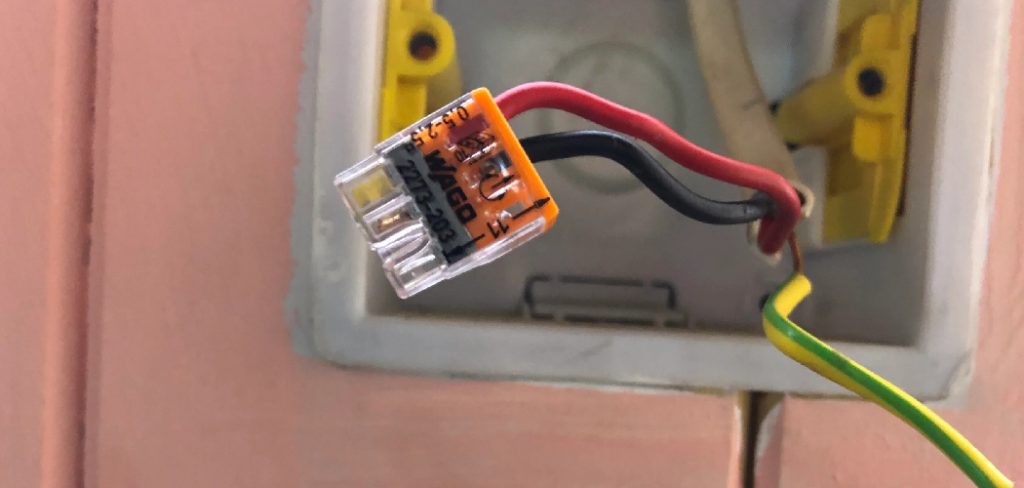
Step 1: Identify the Neutral Wire
The first step in installing a neutral wire is to identify the neutral wire in your existing electrical circuit. Begin by turning off the power to the circuit you will be working on at your home’s main electrical panel. This is critical to ensure your safety while handling electrical components.
Next, remove the cover plate and carefully unscrew the wall outlet or switch to access the wiring inside. Use your voltage tester to check for any remaining electrical current in the wires.
Touch the voltage tester to each wire to confirm that the power is off. The neutral wire should be the one that doesn’t register any current.
Step 2: Prepare the Wires
After identifying the neutral wire, the next step is to prepare the wires for installation. Begin by cutting a length of neutral wire that matches the existing wiring in your circuit.
Using your wire cutters, strip about ¾ inch of insulation from the ends of all wires involved, including the newly cut neutral wire as well as any existing wires that will be connected.
Carefully twist the exposed copper strands of each wire to prevent fraying and to ensure a secure connection. If you’re adding the neutral wire to a switch or outlet, make sure to keep the wires neatly bundled and separated to avoid any accidental crossings.
Use needle-nose pliers to bend the ends of the wires into small hooks, which will help in making a firm connection to screws or terminals. Ensure that all the wires are clean and free of any corrosion or damage before proceeding to the next step.
Step 3: Connect the Neutral Wire
With all wires prepared, it’s time to connect the neutral wire. Start by connecting one end of the neutral wire to the existing neutral wire using a wire nut.
Twist the two ends together in a clockwise direction until they are tightly connected. Wrap electrical tape around the base of each connection for added security.
Next, connect the other end of your newly cut neutral wire to either the silver screw terminal on an outlet or one of the silver screws on a switch. If you’re installing multiple outlets or switches, simply repeat this process for each device.
Step 4: Secure the Connections
After connecting the neutral wire, it is crucial to secure all connections to ensure they are safe and durable. Begin by gently tugging on each wire connection to confirm that they are tightly fastened and will not come loose over time.
If any connection feels loose, untwist the wire nut, re-twist the wires, and then re-secure the wire nut until the connection is firm.

Next, arrange all the wires neatly within the electrical box, taking care to keep the neutral wire away from the hot wire to prevent any short circuits. Use cable ties or electrical tape to bundle and organize the wires if necessary.
Carefully push any excess wire back into the box, making sure not to crimp or bend them in a way that could damage the insulation or cause strain on the connections. Finally, screw the outlet or switch back into place.
Step 5: Test the Circuit
After securing all connections, it’s vital to test the circuit to ensure the neutral wire has been installed correctly and the electrical system is functioning safely. Begin by turning the power back on at your home’s main electrical panel.
Carefully restore power to the circuit you have been working on and return to the outlet or switch.
Use the voltage tester once again to check that the power is flowing correctly. First, verify that there is no power between the neutral wire and the ground, confirming a zero voltage reading. Next, check the voltage between the hot wire and the neutral wire, which should read around 120 volts (in typical applications).
If the voltage readings are as expected and no anomalies are detected, turn on the connected device or appliance to ensure it operates properly. If everything is functioning correctly, then you have successfully installed a neutral wire!
Step 6: Replace the Cover Plate
With the neutral wire successfully installed and the circuit tested to confirm everything is functioning correctly, you can now replace the cover plate.
Begin by carefully tucking all the wires back into the electrical box, ensuring that they are neatly arranged and not pinched or crimped by the box edges. Align the outlet or switch so that it sits flush with the wall, and use the appropriate screws to secure it in place.
Once the outlet or switch is securely mounted, place the cover plate over it, aligning the screw holes with those on the outlet or switch. Insert the screws into the holes and tighten them just enough to hold the plate firmly in place, being careful not to overtighten as this could crack the cover plate.
Finally, wipe the cover plate with a soft cloth to remove any fingerprints or smudges. Your installation is now complete!
Step 7: Safety Precautions
As mentioned earlier, it is crucial to ensure your safety while installing a neutral wire. Here are some essential safety precautions to keep in mind:
- Always turn off the power at the main electrical panel before starting any electrical work.
- Use a voltage tester to confirm the absence of current in the wires before handling them.
- Wear personal protective equipment (PPE), such as rubber gloves and safety glasses, when working with wires and electrical components.
- If you’re unsure about how to proceed or encounter any issues during installation, do not hesitate to seek professional help from a licensed electrician.
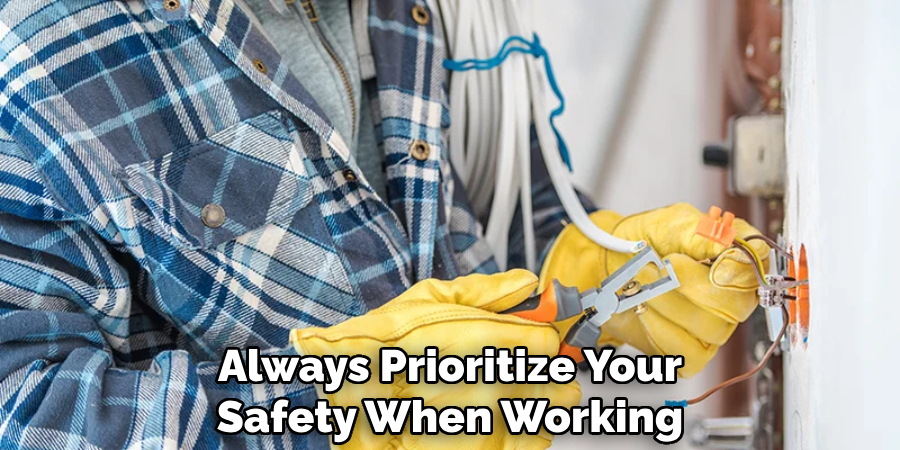
Remember, electricity can be dangerous and potentially lethal, so always prioritize your safety when working with it.
By following these steps on how to install a neutral wire and taking proper safety precautions, you can successfully install a neutral wire in your electrical system and ensure the safe functioning of all your devices and appliances. Happy wiring!
Additional Tips and Tricks
- When adding a neutral wire to an existing circuit, make sure to match the gauge (thickness) of the new wire to that of the existing wiring.
- Label all wires and connections with adhesive labels or tape to avoid confusion and make troubleshooting easier in the future.
- Keep a well-stocked toolbox with essential electrical tools, such as wire cutters, pliers, screwdrivers, and a voltage tester.
- Regularly inspect your electrical system for any signs of wear or damage and address them promptly to prevent potential hazards.
- Don’t be afraid to ask for help or guidance from an experienced electrician if you’re unsure about anything during the installation process. It’s always better to be safe than sorry. With these tips and tricks on how to install a neutral wire, you can confidently tackle the installation of a neutral wire in your electrical system.
Conclusion
Installing a neutral wire is an essential task for ensuring the proper functionality and safety of your electrical system.
By following the outlined steps on how to install a neutral wire meticulously, from turning off the power to testing the circuit, you not only increase the efficiency of your electrical devices but also enhance the overall safety of your home.
Remember to always prioritize safety, use the appropriate tools, and seek professional assistance if needed. With the right precautions and careful execution, the installation process can be straightforward and rewarding, leading to a reliable and well-functioning electrical setup. Happy wiring!
About
Safety Fic is a distinguished figure in the world of Diy design, with a decade of expertise creating innovative and sustainable Diy solutions. His professional focus lies in merging traditional craftsmanship with modern manufacturing techniques, fostering designs that are both practical and environmentally conscious. As the author of diy, Safety Fic delves into the art and science of Safety Fic-making, inspiring artisans and industry professionals alike.
Education RMIT University
(Melbourne, Australia) Associate Degree in Design (Safety Fic) Focus on sustainable design, industry-driven projects, and practical craftsmanship. Gained hands-on experience with traditional and digital manufacturing tools, such as CAD and CNC software.
Nottingham Trent University
(United Kingdom) Bachelor’s in diyfastly.com and Product Design (Honors) Specialized in product design with a focus on blending creativity with production techniques. Participated in industry projects, working with companies like John Lewis and Vitsoe to gain real-world insights.
Publications and Impact
In diy, Safety Fic his insights on indoor design processes, materials, and strategies for efficient production. His writing bridges the gap between artisan knowledge and modern industry needs, making it a must-read for both budding designers and seasoned professionals.