

Do you want to increase the security of your home or business? Installing a night owl wired security camera system is one of the most effective ways to do this. Not only do they offer peace of mind, but they also provide evidence should anything ever happen due to their high-quality recordings.
However, installing a security system can be intimidating and complicated at first glance—but don’t worry! We are going to walk you through everything step by step guidelines on how to install a night owl wired security cameras.
From picking out your equipment, setting up cameras for optimal coverage, running wires effectively, and connecting the necessary hardware – we have got you covered! So if you’re ready to get started on securing your property with a reliable and dependable surveillance system then read on!
Tools and Materials You Will Need to Install Anight Owl Wired Security Cameras
- Night Owl Security Camera Kit
- Power Drill & Drill Bits
- Fish Tape (Optional)
- Wire Cutter/Stripper
- Hammer & Nails (Optional)
- Network Cable
Step-by-step Guidelines on How to Install a Night Owl Wired Security Cameras
Step 1: Setting Up Your Equipment
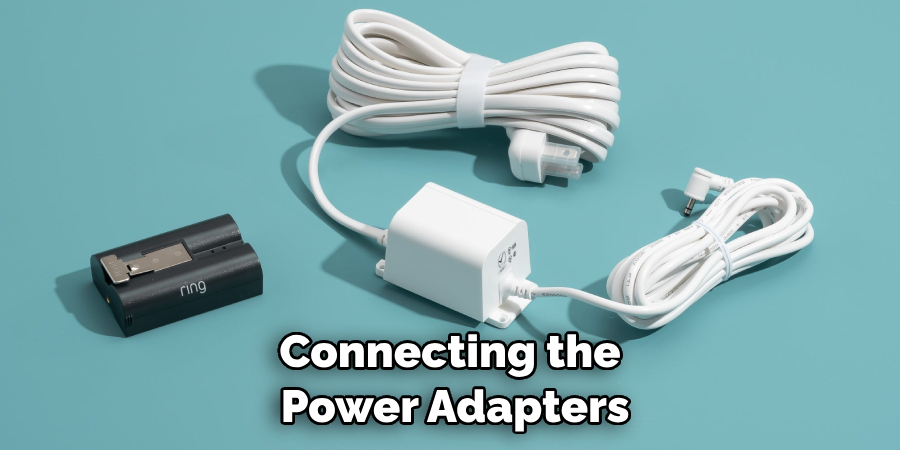
The first step to installing your night owl-wired security camera system is to set up the equipment. This includes unpacking and organizing the parts, connecting the power adapters, mounting your cameras, and setting up your DVR/NVR (digital video recorder or network video recorder).
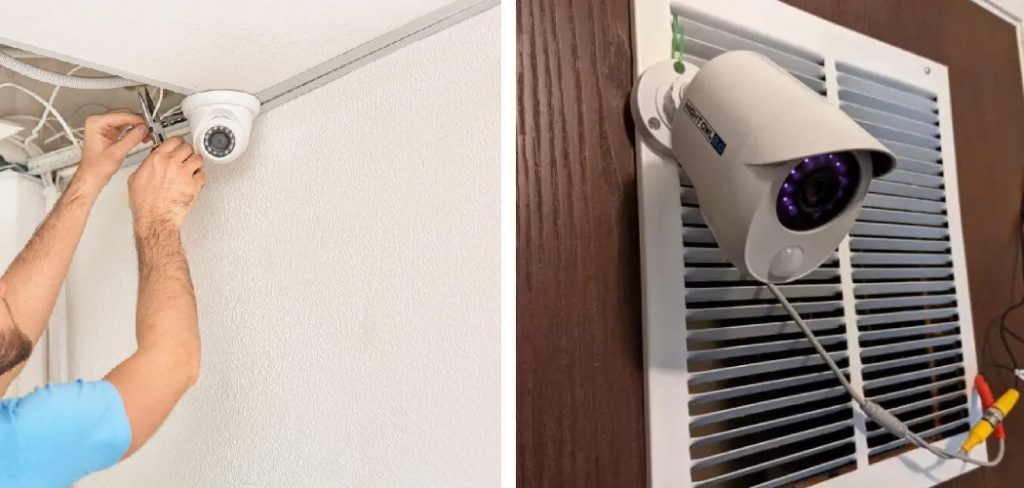
Step 2: Positioning Your Cameras for Optimal Coverage
Once your equipment is in place, you will need to identify where each camera should be installed. It is important to take into consideration the areas that need to be monitored, and where each camera will have the best view for capturing footage. Common areas include doors, windows, hallways, garages, and storage areas.
Step 3: Running The Wires
Once you’ve identified where each camera needs to be located and mounted, it is now time to run the wires. Depending on your setup, this can be done through walls or on an exterior surface. If you need to run wires through a wall, use a power drill with appropriate bits so that the wire will not be damaged during installation. When running wires outdoors, use weatherproof materials such as conduit or outdoor-approved cable.
Step 4: Connecting the Hardware
The final step in installing your security camera system is to connect the hardware. This includes connecting the cameras to the power supply and connecting them to your DVR/NVR. Make sure you check each connection before closing up any walls or outdoor surfaces for a secure fit.
Step 5: Setting up the Software
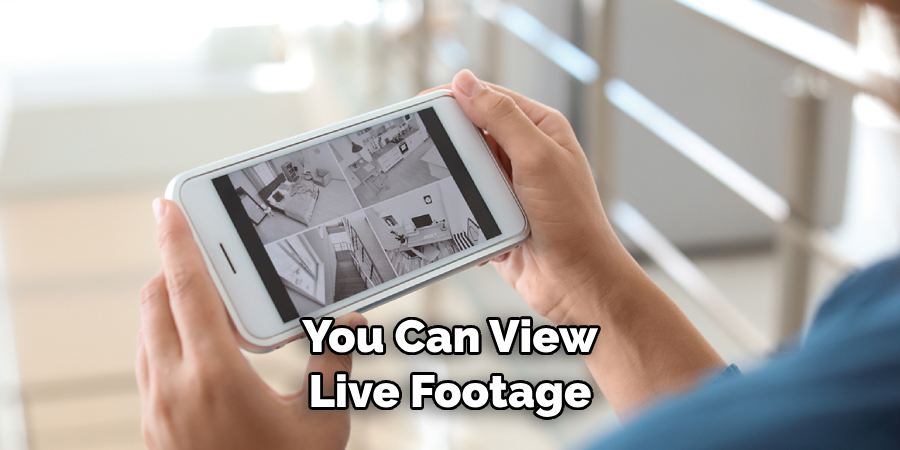
Now that your cameras are installed and connected, it’s time to set up the software. This includes installing the appropriate app and setting up notifications for when motion is detected. You can also access the footage from anywhere with a secure internet connection.
Following these steps will ensure that you have a secure and reliable night owl-wired security camera system. If you ever need help with installation, many companies offer professional services so that your security cameras are installed correctly the first time.
Additional Tips and Tricks to Install a Night Owl Wired Security Cameras

- When installing your security cameras, always make sure to place them in a location that provides optimal visibility and coverage of the area you wish to monitor.
- Make sure that the area surrounding the camera is free from obstacles such as trees or other objects that could obstruct its view.
- Consider mounting your security cameras on walls or poles if possible. This will allow for a greater range of coverage and better visibility.
- Make sure to follow the instructions provided with your Night Owl security camera system for best results.
- If you are unsure how to connect your cameras to the main power source, it is recommended that you contact an electrician for assistance before proceeding.
- Consider installing motion sensors in areas where you want extra security coverage. This will ensure that your cameras are activated at the appropriate times and can provide added safety for your home or business.
- Take extra precautions when installing outdoor security cameras by making sure they are not exposed to direct sunlight, rain, or other elements that could damage the camera.
- If you plan on connecting multiple cameras to one system, make sure to use the appropriate power source and networking cables for each camera.
- Test your Night Owl security camera system before leaving it unattended for any length of time. Make sure that all connections are working properly and that the cameras are capturing images clearly and accurately.
Following these tips and tricks should help you get the most out of your Night Owl security camera system. With a quality setup, you can be sure that your home or business is well-protected and monitored at all times.
In addition to cameras, consider investing in other security measures such as motion sensors, alarms, or even video monitors. By taking all these steps you can ensure that your property remains safe and secure.
Troubleshooting Tips for Night Owl Wired Security Cameras
- If your security camera is not displaying images clearly, check the wiring and connections to ensure that nothing has come loose.
- A power interruption can cause some Night Owl cameras to freeze or become unresponsive. Make sure that your power source is reliable and consider investing in a backup generator if necessary.
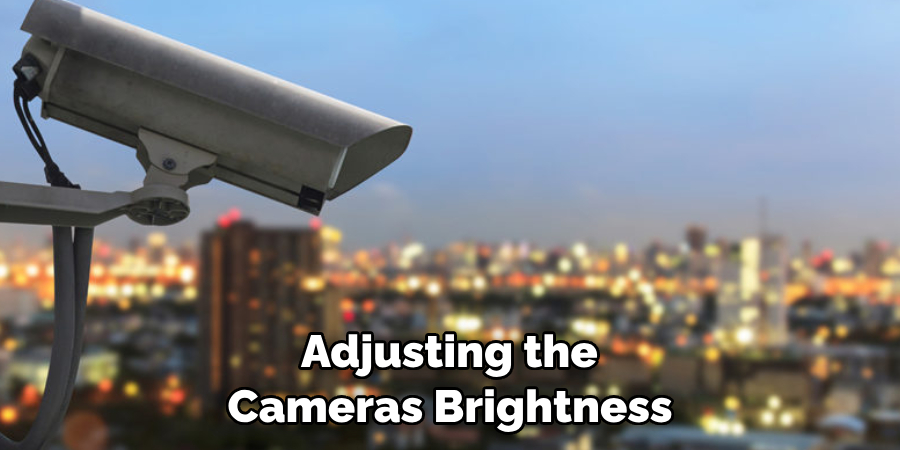
- Consider adjusting the settings on your security cameras depending on your current lighting conditions. Adjusting the camera’s brightness, contrast, and exposure settings can help improve image quality.
- If you are having trouble connecting multiple cameras to one system, make sure that all devices are powered on and connected properly. It may also be necessary to reset some of the settings or update your Night Owl software.
- If you are experiencing poor image quality or lag when viewing live footage, try adjusting the network settings on your security cameras. For optimum performance, it is recommended that you connect your cameras to a wired internet connection rather than relying on a wireless signal.
- If your Night Owl camera system still isn’t working as expected after troubleshooting, contact customer service for assistance. They can provide detailed instructions on how to troubleshoot any specific issues you may be experiencing.
By following these troubleshooting tips, you should be able to get your Night Owl security cameras up and running in no time. It is important to take the necessary steps to ensure that your cameras are working properly so that they can effectively monitor and protect your home or business. With a quality setup, you can be sure that your property is secure and safeguarded from any potential threats or intruders.
Frequently Asked Questions
What Type of Power Source Do Night Owl Security Cameras Require?
Night Owl security cameras typically require a 12V DC power source, though some models may also be compatible with PoE (Power over Ethernet). It is important to refer to the instructions provided with your system for specific details on which type of power source is required.
How Many Cameras Can Be Connected To One System?
The exact number of cameras that can be connected to one system will vary depending on the model and type of Night Owl security camera system you have. You may need to upgrade your network or purchase additional equipment if you plan on connecting multiple cameras.
Does Night Owl Offer Any Professional Installation Services?
Yes, Night Owl offers professional installation services for security camera systems. Professional installers can help ensure that your system is properly set up and configured for optimal performance. They can also provide advice on the best placement for your cameras and any other necessary details related to the installation.
Is It Possible To View Footage From My Security Cameras Remotely?
Yes, Night Owl security cameras are compatible with a variety of remote monitoring and viewing options. With the appropriate software or app, you can view live footage from your security cameras anywhere with an internet connection. You can also access recorded footage from your mobile device or computer if necessary.
Are Night Owl Security Cameras Waterproof?
Yes, certain Night Owl security camera models are waterproof and designed for outdoor use. It is important to refer to the product specifications to ensure that your specific model can withstand exposure to rain, snow, and other elements before attempting to install it outdoors.
Conclusion
Installing a Night Owl Wired Security Camera can be a daunting task but it doesn’t have to be. With the right tools, instructions, and guidance, anyone can install their own camera and have peace of mind knowing that their property is being monitored from a safe place. Remember to always ensure all wires are connected correctly before powering up the cameras.
Following guided tutorials and speaking with an expert if there is ever any doubt or confusion during the installation process. A correct installation of your Wired Security Camera will give you and your family added security and peace of mind for years to come. Now that you know how to install a Night Owl Wired Security Cameras, give it a try today!
About
Safety Fic is a distinguished figure in the world of Diy design, with a decade of expertise creating innovative and sustainable Diy solutions. His professional focus lies in merging traditional craftsmanship with modern manufacturing techniques, fostering designs that are both practical and environmentally conscious. As the author of diy, Safety Fic delves into the art and science of Safety Fic-making, inspiring artisans and industry professionals alike.
Education RMIT University
(Melbourne, Australia) Associate Degree in Design (Safety Fic) Focus on sustainable design, industry-driven projects, and practical craftsmanship. Gained hands-on experience with traditional and digital manufacturing tools, such as CAD and CNC software.
Nottingham Trent University
(United Kingdom) Bachelor’s in diyfastly.com and Product Design (Honors) Specialized in product design with a focus on blending creativity with production techniques. Participated in industry projects, working with companies like John Lewis and Vitsoe to gain real-world insights.
Publications and Impact
In diy, Safety Fic his insights on indoor design processes, materials, and strategies for efficient production. His writing bridges the gap between artisan knowledge and modern industry needs, making it a must-read for both budding designers and seasoned professionals.