
In today’s world, vehicle security and efficiency are paramount for car owners. Understanding “how to install a tracking device on a car” can provide you with enhanced safety, peace of mind, and valuable insights into your vehicle’s performance. This comprehensive guide aims to walk you through the process, ensuring a hassle-free installation and optimal usage of your tracking device whether you opt for a versatile GPS tracker or the convenience of an OBD-II tracker. This knowledge empowers you to monitor your car’s whereabouts, aiding in both theft prevention and efficient fleet management.
Understanding Different Types of Tracking Devices
GPS Trackers: Function and Common Uses
GPS trackers use satellite signals to pinpoint your vehicle’s precise location. These devices are highly versatile and can be used for a range of applications, from theft recovery to monitoring a fleet’s whereabouts. They offer real-time tracking and can provide detailed reports on the vehicle’s routes, stops, and speeds. GPS trackers are ideal for both personal and commercial use, offering peace of mind by ensuring the vehicle’s location is always known.
OBD-II Trackers: Benefits and Compatibility with Most Vehicles
OBD-II trackers are designed to plug directly into the On-Board Diagnostics port, a feature present in most vehicles manufactured after 1996. These trackers are easy to install and can provide a wealth of information, including vehicle health diagnostics and driving behavior data. They are particularly beneficial for fleet management, enabling the efficient monitoring of multiple vehicles. Their plug-and-play nature makes them accessible to the average user without needing professional installation.
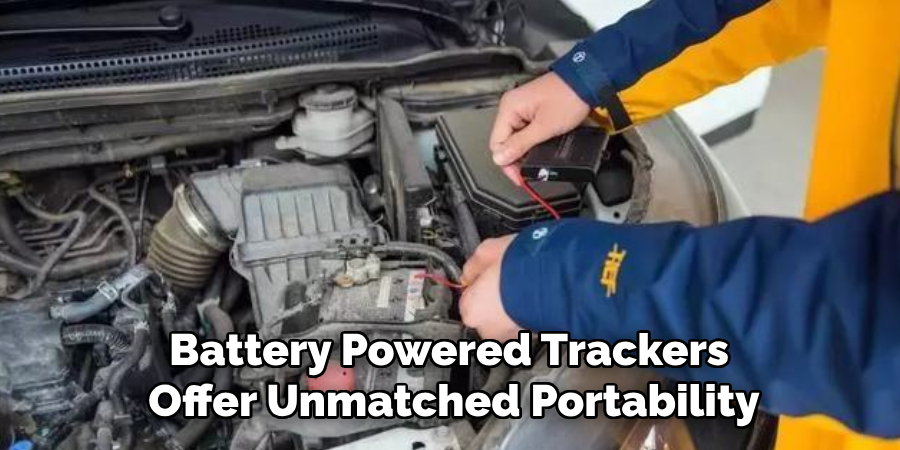
Battery-Powered Trackers: Portability and Ease of Use
Battery-powered trackers offer unmatched portability, making them an excellent choice for temporary tracking needs. These devices can be easily moved from one vehicle to another and are often installed using strong adhesives or zip ties. Their independence from the vehicle’s electrical system means they can be concealed in various parts of the car, ensuring discretion. The ease of installation and flexibility make them popular for personal use.
Hardwired Trackers: Permanent Installation and Reliability
Hardwired trackers are connected directly to the vehicle’s electrical system, providing a more permanent and reliable solution. These devices are less likely to be discovered or tampered with, making them ideal for long-term tracking needs. Although the installation process is more complex, often requiring professional assistance, the result is a robust and dependable tracking system. Hardwired trackers are perfect for personal vehicles and commercial fleets, ensuring constant tracking without worrying about battery depletion.
Tools and Materials Needed
List of Tools:
- Screwdriver
- Wire strippers
- Electrical tape
- Zip ties
- Mobile phone or computer for setup
List of Materials:
- Chosen tracking device
- SIM card (if required)
- Installation manual
Optional:
- Vehicle-specific tools and materials
Choosing the Right Location for Installation
Importance of Discreet Placement to Avoid Tampering
One of the most crucial aspects of installing a tracking device is choosing a location that is not easily accessible or visible. Discreet placement helps avoid tampering or removal of the device and ensures that the tracking mechanism operates without interruption. A well-hidden tracker is essential for preventing theft and maintaining the element of surprise, especially in the case of unauthorized use or emergencies.
Common Locations for Different Types of Trackers
GPS Trackers:
For GPS trackers, the optimal locations are often under the dashboard, in the trunk, or inside bumpers. These spots provide good signal reception while keeping the device out of sight. Under the dashboard is a particularly popular choice due to its convenient access to power sources and the vehicle’s structure, which shields the device from external elements.
OBD-II Trackers:
OBD-II trackers are plug-and-play devices that connect directly to the diagnostic port located under the dashboard. This port is typically found near the driver’s seat, making it easily accessible for quick installation while remaining relatively hidden from plain view.
Battery-Powered Trackers:
Due to their portable nature, battery-powered trackers offer flexibility in placement. Common locations include under seats, inside glove compartments, or any other inconspicuous area within the vehicle. These spots provide both concealment and easy access for occasional maintenance or battery replacement.

Hardwired Trackers:
Hardwired trackers require a more permanent installation and are best hidden within the vehicle’s electrical system. Ideal locations include behind the dashboard, within the fuse box area, or disguised among other wiring components. This ensures that the tracker remains undetectable and functions reliably over the long term.
How to Install a Tracking Device on A Car: Installing a GPS Tracker
Step-by-step Guide to Installing a GPS Tracker
- Locating the Optimal Position for Signal Reception
To ensure reliable signal reception, choose a location within the vehicle where the GPS tracker has a clear line of sight to the sky. Common positions include under the dashboard, within the rear bumper, or in the trunk. The chosen spot should provide good coverage while maintaining a discreet profile to avoid detection and tampering.
- Mounting the Tracker Using Screws, Adhesives, or Magnets
Depending on the design and mounting options of your GPS tracker, secure the device in place using either screws, strong adhesives, or built-in magnets. Each method has its advantages: screws offer a more permanent fix, adhesives provide a quick solution, and magnets offer the flexibility to relocate the device easily if necessary.
- Connecting the Tracker to a Power Source if Required
Some GPS trackers rely on the vehicle’s electrical system for power, while others are battery-operated. If your tracker requires a power connection, identify a suitable power source, such as the vehicle’s fuse box or wiring harness. Use wire strippers to expose the necessary wires, and connect them securely using electrical tape or crimp connectors. Ensure that all connections are insulated and secure to prevent electrical short circuits or malfunctions.
- Activating the Tracker and Ensuring It Is Operational
After mounting and connecting the device, follow the manufacturer’s instructions to activate the tracker. This may involve inserting a SIM card, powering on the device, or connecting it to the tracking system’s app or website.
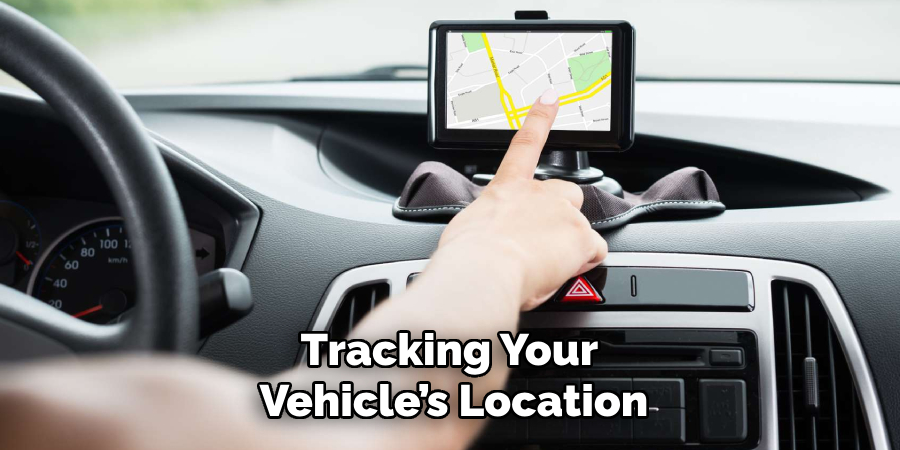
- Testing the Device by Tracking the Car’s Location Using the Associated App or Website
Once your GPS tracker is installed and activated, test its functionality by tracking your vehicle’s location through the associated app or website. Verify that the real-time location data is accurate and detailed reports are generated correctly. Periodically check the tracker to ensure it remains operational and maintain regular updates as needed.
How to Install a Tracking Device on A Car: Installing an OBD-II Tracker
Explanation of the OBD-II Port and Its Location
The OBD-II (On-Board Diagnostics) port is a standardized diagnostic interface found in most vehicles manufactured after 1996. It is typically located under the dashboard, near the driver’s seat. This port provides access to the vehicle’s diagnostic system and is used for various purposes, including emissions testing, troubleshooting, and now even GPS tracking.
Step-by-step Guide to Installing an OBD-II Tracker
- Locating the OBD-II Port
Begin by identifying the location of the OBD-II port in your vehicle. It is usually found beneath the steering column, under the driver-side dashboard. Some vehicles may have it behind a small panel or cover, which can be easily removed.
- Plugging the Tracker into the OBD-II Port
When the port is located, take your OBD-II tracker and align its connector with the port. Gently but firmly insert the tracker into the port, ensuring that it is completely seated and secure. Most OBD-II trackers are designed for a snug fit to prevent disconnection during vehicle operation.
- Ensuring a Secure Connection
Once plugged in, check that the tracker is securely connected and not easily dislodged. The device should remain stable even with vibrations and movements while driving. If the tracker includes a securing mechanism, use it to lock the device in place.
- Pairing the Tracker with the Mobile App or Monitoring System
Follow the manufacturer’s instructions to pair the tracker with its corresponding mobile app or online monitoring system. This typically involves downloading an app, creating an account, and entering the tracker’s unique ID or serial number.
- Testing the Device for Accurate Data Transmission
After pairing, test the tracker’s functionality by monitoring your vehicle’s location and diagnostic data through the app or website. Verify that the data is accurate and updated in real time. Perform a short drive to ensure the tracker maintains a consistent connection and transmits data correctly.
Final Checks and Safety Tips
Verifying the Tracker’s Operational Status and Data Accuracy
After installation, consistently verify the tracker’s operational status by monitoring location data and vehicle diagnostics. Check the app or monitoring system for accuracy in real-time updates to ensure reliable performance.
Ensuring All Connections Are Secure and There Are No Loose Wires
Inspect all connections to confirm they are secure. Loose wires can cause malfunctions, so regularly examine the tracker, especially after driving on bumpy or rough roads, to ensure everything remains intact.
Regularly Checking the Tracker and Updating Its Firmware or Software as Needed
Routine checks are essential for a well-functioning GPS tracker. Periodically update the device’s firmware or software according to the manufacturer’s guidelines to maintain optimal performance and security features.
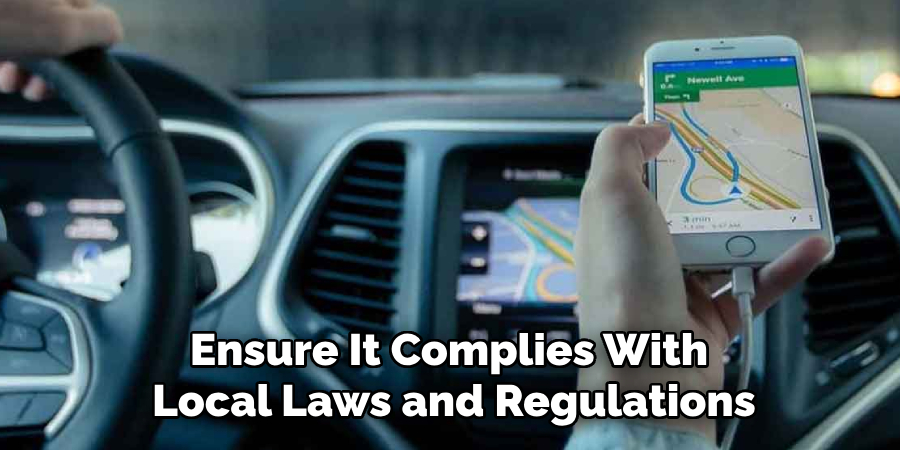
Ensuring Compliance with Local Laws and Regulations Regarding Vehicle Tracking
Before using a GPS tracker, ensure it complies with local laws and regulations related to vehicle tracking. Legal requirements vary by location, so familiarize yourself with pertinent rules to avoid legal complications.
Conclusion
Installing a tracking device on your vehicle can significantly enhance security and provide valuable real-time data about your car’s location and diagnostics. This guide on how to install a tracking device on a car offers detailed steps, whether you’re opting for a versatile GPS tracker or a convenient OBD-II device. You can achieve optimal performance and peace of mind by following these instructions, ensuring secure connections, and regularly maintaining the device. Remember to stay compliant with local regulations to enjoy the full benefits of your tracking system legally and responsibly.