

Are you tired of constantly worrying about changing lanes and being unable to see other vehicles? Do you want to improve your driving experience and enhance your safety on the road? Then, it might be time to install a blind spot monitoring system in your car.

How to install blind spot monitoring system can significantly enhance the safety and convenience of your driving experience. This system uses sensors and cameras to detect vehicles or objects in areas you cannot easily see while driving, alerting you to potential hazards. Although professional installation is an option, you can successfully install a blind spot monitoring system with the right tools and a step-by-step approach.
This guide will walk you through the process, ensuring proper setup and functionality to help you stay aware of your surroundings on the road.
What Are the Benefits of Installing a Blind Spot Monitoring System?
Blind spot monitoring systems provide numerous benefits for drivers. Here are some reasons why installing one in your vehicle can significantly improve the safety and overall driving experience:
- Enhanced Visibility: One of the main advantages of a blind spot monitoring system is increased visibility while driving. By alerting you to potential hazards or vehicles in your blind spots, this system helps you become more aware of your surroundings and make safer decisions on the road.
- Accident Prevention: With increased visibility comes a decreased risk of accidents. By constantly scanning your blind spots, a blind spot monitoring system can help prevent collisions with other vehicles, pedestrians, or objects that you may have missed otherwise.
- Ease of Parking: Parallel parking and backing out of tight spaces can be nerve-wracking, especially if you have limited visibility. With a blind spot monitoring system, you can easily see any obstacles or vehicles in your path, making it easier to maneuver into and out of parking spots.
- Reduced Stress: Driving can be overwhelming, especially when surrounded by traffic or navigating unfamiliar areas. A blind spot monitoring system removes some of that stress by providing an extra set of eyes on the road. This can help alleviate anxiety and make for a more relaxed driving experience.
What Will You Need?
To install a blind spot monitoring system in your vehicle, you will typically need the following:
- A Compatible Vehicle: Not all vehicles have the technology to support a blind spot monitoring system. It is important to check that your car is compatible before purchasing and installing one.
- The Right Equipment: This includes sensors, cameras, and other hardware components that make up the blind spot monitoring system.
- Professional Installation: While some systems come with easy-to-follow instructions for self-installation, it is recommended to have a professional install the system for optimal performance and safety.
8 Easy Steps on How to Install Blind Spot Monitoring System
Step 1. Gather the Necessary Tools and Equipment
Before beginning the installation process, ensure you have all the tools and components needed for a smooth installation. Common tools include screwdrivers, a wrench set, a drill with drill bits, electrical tape, wire strippers, and a multimeter for testing electrical connections.
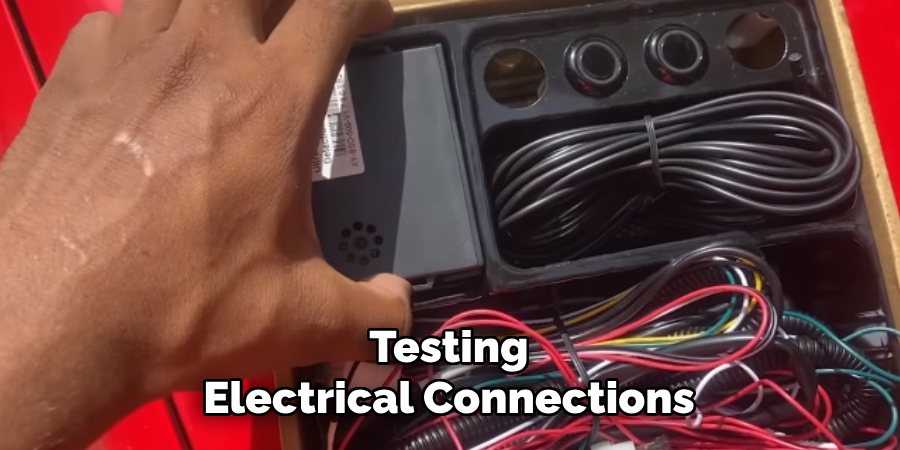
Additionally, ensure you have the complete blind spot monitoring system kit, including sensors, cameras, wiring harnesses, mounting brackets, and user manuals provided by the manufacturer. Keeping everything organized and within reach will save time and help prevent mistakes during the installation. Proper preparation is key to ensuring the process runs efficiently and safely.
Step 2: Locate the Optimal Sensor Placement
Begin the installation process by identifying the ideal locations for the blind spot monitoring system sensors on your vehicle. Typically, these sensors are mounted on the rear bumper, near its corners, to provide maximum coverage of the blind spots. Refer to the manufacturer’s instructions for specific placement guidelines, as some systems may have unique requirements.
Before drilling or attaching the sensors, double-check the positions to ensure they won’t interfere with existing components or obstruct other essential features of your vehicle. Mark the selected spots with a marker or adhesive tape for precision during installation.
Step 3: Install the Sensors
Using the marked spots as a guide, carefully drill holes into the bumper if required by the sensor design. Use the appropriate drill bit size specified in the manufacturer’s instructions. For adhesive-mounted sensors, clean the surface thoroughly to ensure a secure attachment.
Once the holes are made or the surface is prepared, insert or attach the sensors firmly, ensuring they are flush with the bumper and oriented correctly. After installation, double-check that all sensors are securely in place before proceeding to the wiring step.
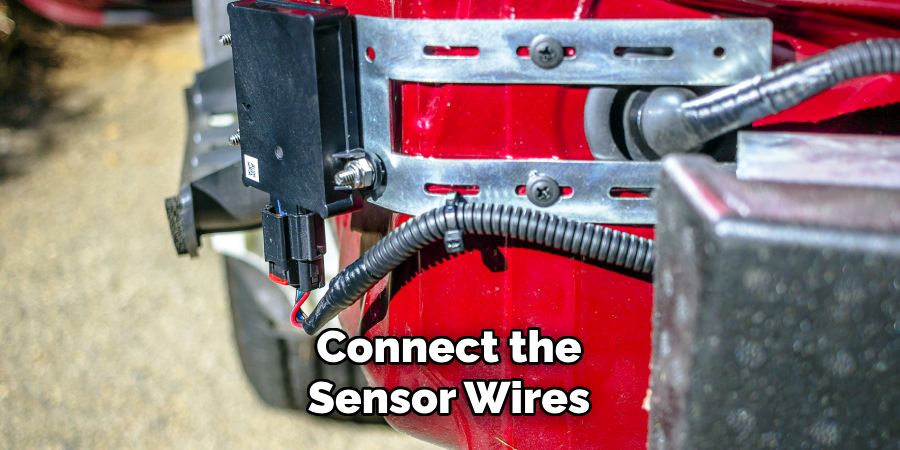
Step 4: Wiring the Sensors
With the sensors securely installed, the next step is to connect the wiring. Begin by routing the sensor wires through the bumper and into the vehicle’s interior, using any available grommets or pre-existing holes to protect the cables from damage. Ensure the wires are neatly arranged to avoid tangling or interference with other components.
Connect the sensor wires to the control unit as specified by the manufacturer’s wiring diagram. Properly secure the connections to prevent loose or faulty wiring. Once all connections are made, test the system to verify that all sensors function correctly before finalizing the installation.
Step 5: Mount the Control Unit
Securely mount the control unit in a location that is accessible and protected from excessive heat or moisture. Common mounting points include beneath the dashboard or in the trunk, depending on the vehicle’s make and model. Use screws or adhesive mounts provided by the manufacturer to ensure a stable installation. Ensure the control unit does not obstruct other components or interfere with vehicle operation. Refer to the manufacturer’s guidelines for proper placement and orientation of the control unit.
Step 6: Wiring the Control Unit
Carefully connect the wiring harness to the control unit, ensuring each wire is attached to its corresponding terminal as indicated in the manufacturer’s wiring diagram. Route the cables neatly and securely to avoid tangling or interference with moving parts. Use zip ties or cable organizers to keep the wiring in place and prevent it from coming loose during vehicle operation. Double-check all connections for proper fit and ensure no exposed wires are left that could cause a short circuit.
Step 7: Test the Electrical System
After securing all the connections, test the electrical system to ensure everything functions correctly. Reconnect the vehicle’s battery and turn on the ignition. Check the operation of the connected components, such as lights, sensors, or other devices, to verify they are working as intended. If any issues are detected, re-inspect the wiring and connections, referring to the manufacturer’s diagram to identify and correct the problem. Once all systems are operational, proceed with finalizing the installation.
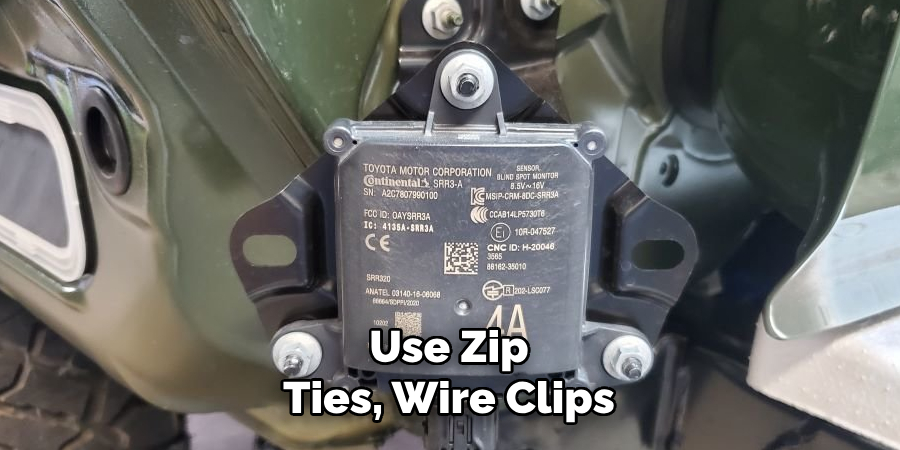
Step 8: Finalizing the Installation
After verifying that all components are functioning correctly, securing the wiring and ensuring the setup is durable for long-term use is essential. Use zip ties, wire clips, or adhesive mounts to organize and firmly hold the wires in place, preventing any loose or dangling connections that could pose a safety risk or lead to wear over time.
Double-check that no wires are exposed or in contact with sharp edges, moving parts, or heat sources that could cause damage. Review the installation site to ensure all tools, debris, or unused materials have been cleared, leaving a clean and professional finish. If applicable, test the system under real-world conditions to confirm reliability and address any minor adjustments needed. Proper finalization prevents potential issues and ensures a safe, effective, and polished installation.
Following these best practices and guidelines can ensure a successful installation process and avoid any potential complications or safety hazards.
5 Things You Should Avoid
- Skipping the Instruction Manual: Avoid thoroughly reading the manufacturer’s instruction manual. Each blind spot monitoring system may have unique requirements or steps, and skipping this crucial guide can lead to improper installations.
- Ignoring Proper Wiring Practices: Failing to connect securely and route wiring can result in system malfunctions or even electrical hazards. Ensure all wires are correctly connected and protected to avoid damage from vibration or exposure.
- Neglecting to Test the System After Installation: Don’t overlook the importance of testing the blind spot monitoring system before hitting the road. Ensured the sensors functioned as intended and calibrated them to maintain accuracy.
- Rushing Through the Installation Process: Hurrying may lead to mistakes, such as missing bolts, improperly mounted sensors, or loose connections. Take the time to double-check your work to guarantee a stable and reliable setup.
- Disregarding Component Placement Guidelines: Incorrect placement of sensors or monitors can compromise the system’s effectiveness. Always adhere to manufacturer recommendations regarding positioning to ensure optimal coverage and functionality.

Conclusion
How to install blind spot monitoring system requires careful planning, attention to detail, and adherence to manufacturer guidelines.
You can achieve a safe and effective installation by following the outlined steps, ensuring proper wiring, verifying component placement, and double-checking your work. A properly installed system enhances driving safety by providing additional awareness of your surroundings, helping to prevent potential accidents.
Taking the time to install this technology correctly ultimately pays off with improved confidence and peace of mind on the road.
About
Safety Fic is a distinguished figure in the world of Diy design, with a decade of expertise creating innovative and sustainable Diy solutions. His professional focus lies in merging traditional craftsmanship with modern manufacturing techniques, fostering designs that are both practical and environmentally conscious. As the author of diy, Safety Fic delves into the art and science of Safety Fic-making, inspiring artisans and industry professionals alike.
Education RMIT University
(Melbourne, Australia) Associate Degree in Design (Safety Fic) Focus on sustainable design, industry-driven projects, and practical craftsmanship. Gained hands-on experience with traditional and digital manufacturing tools, such as CAD and CNC software.
Nottingham Trent University
(United Kingdom) Bachelor’s in diyfastly.com and Product Design (Honors) Specialized in product design with a focus on blending creativity with production techniques. Participated in industry projects, working with companies like John Lewis and Vitsoe to gain real-world insights.
Publications and Impact
In diy, Safety Fic his insights on indoor design processes, materials, and strategies for efficient production. His writing bridges the gap between artisan knowledge and modern industry needs, making it a must-read for both budding designers and seasoned professionals.