

Automating your outdoor lighting is a simple way to enhance your home’s security and convenience. Dusk to dawn sensors, which automatically turn lights on at sunset and off at sunrise, are a popular and energy-efficient solution. While the idea of electrical work can seem daunting, this project is surprisingly straightforward for most homeowners with basic DIY skills.
Learning how to install dusk to dawn sensor units can save you money on both installation costs and your monthly electricity bill. This upgrade eliminates the need to remember to flip a switch, ensuring your property is always well-lit when it needs to be. This guide will provide a clear, step-by-step walkthrough, making the installation process accessible and safe. By following these instructions carefully, you can confidently add this modern convenience to your home’s exterior lighting system.
Why Automatic Lighting Control is a Smart Home Upgrade
Installing a dusk to dawn sensor is a practical investment in your home’s safety and energy efficiency. It provides reliable, automated outdoor lighting, which deters potential intruders and ensures you and your family always have a well-lit path to your door. This automatic lighting control also prevents the energy waste that occurs when you forget to turn off exterior lights in the morning. For a small upfront cost and a bit of time, you can add a modern, “set it and forget it” feature that adds value and peace of mind to your daily life.
8 Step-by-Step Guide: How to Install Dusk to Dawn Sensor
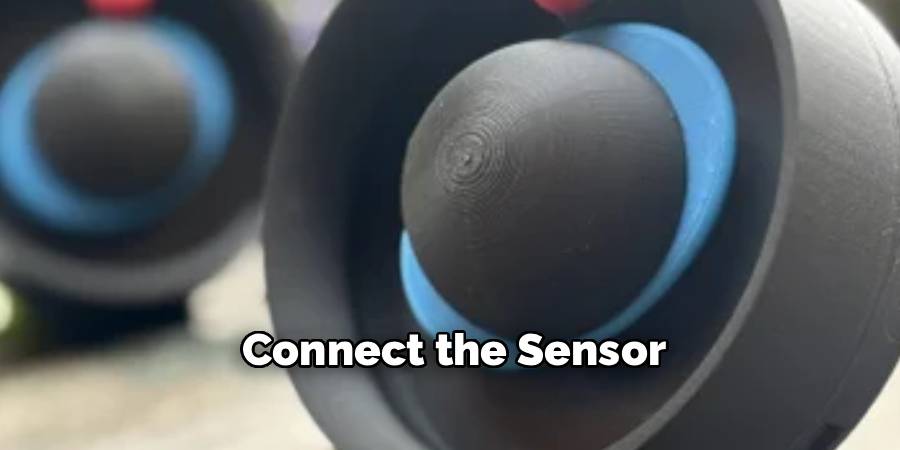
Step 1: Turn Off the Power Supply
Before beginning any electrical work, your absolute first priority is safety. Locate your home’s main electrical panel, often found in a garage, basement, or utility closet. Identify the circuit breaker that controls the power to the specific outdoor light fixture you will be working on.
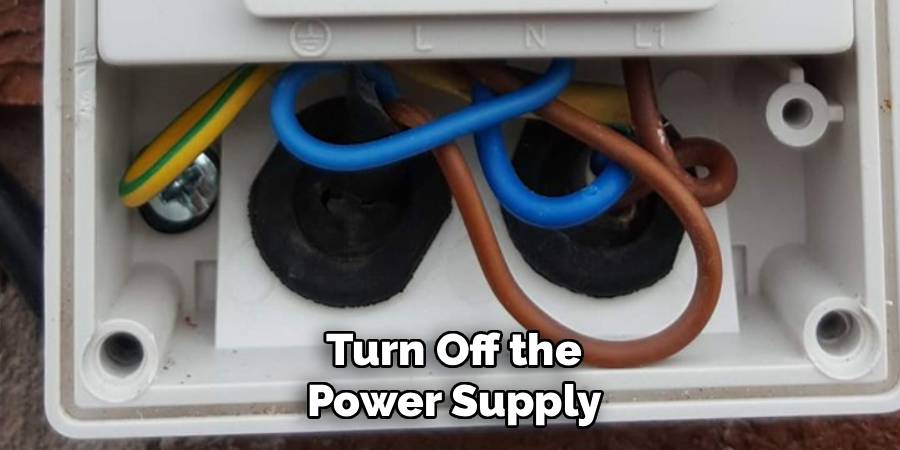
Switch this breaker to the “OFF” position. To be certain the power is off, return to the light fixture and flip its corresponding wall switch on and off. The light should not turn on. For an extra layer of safety, use a non-contact voltage tester to confirm there is no live current at the fixture’s wiring.
Step 2: Remove the Existing Light
With the power confirmed off, you can safely remove the existing outdoor lighting fixture. Most fixtures are attached to the wall or ceiling with one or two decorative nuts or screws. Carefully unscrew these fasteners while supporting the weight of the fixture to prevent it from falling. Once it is loose, gently pull the fixture away from the wall to expose the junction box and wiring. You should see three wires from the house connected to the fixture: a black (hot), a white (neutral), and a green or bare copper (ground) wire, all connected with wire nuts.
Step 3: Disconnect the Wiring
Carefully observe how the wires are connected before disconnecting anything. It can be helpful to take a quick photo with your phone for reference. To disconnect the wires, simply twist the wire nuts counter-clockwise until they come off. Gently separate the house wires from the fixture wires. Once all wires are disconnected, you can set the old light fixture aside. This leaves you with the three wires coming from your home’s electrical system, ready for the sensor wiring. Take a moment to inspect these wires for any signs of damage or corrosion.
Step 4: Prepare the New Sensor
Unpack your new dusk to dawn sensor and the new light fixture, if you are replacing the entire unit. Many modern outdoor fixtures come with a sensor pre-installed. If you are adding a separate sensor to an existing fixture, you will typically need to wire it between the power source and the light.
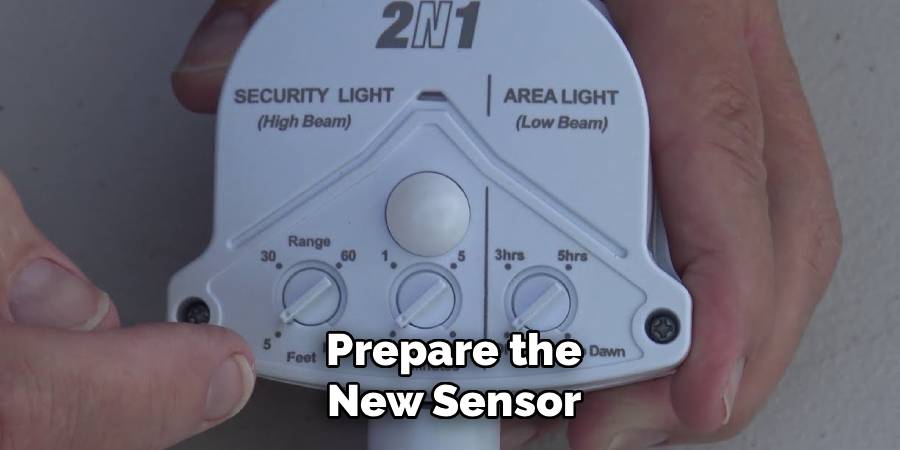
The sensor will have its own set of black, white, and red (or blue) wires. Carefully read the manufacturer’s instructions, as the sensor wiring configuration is crucial for proper function. This is a key step in learning how to install dusk to dawn sensor correctly.
Step 5: Connect the Sensor
This step involves connecting the sensor to both the house power and the light fixture. Typically, the black wire from the house connects to the black wire of the sensor. The white wire from the house connects to the white wire of the sensor AND the white wire of the light fixture. The red wire from the sensor (the “load” wire) connects to the black wire of the light fixture. Finally, connect all ground wires (green or bare copper) together. Use new wire nuts to secure each connection, twisting them clockwise until they are tight. Gently tug on each wire to ensure a secure connection.
Step 6: Mount the New Light
With the sensor wiring complete, carefully tuck the wires and wire nuts back into the junction box. Position the new light fixture and sensor assembly against the wall, aligning its mounting holes with the screws on the junction box’s mounting bracket. Secure the fixture in place using the decorative nuts or screws that came with it. Ensure the fixture is snug against the wall to create a weatherproof seal. Make sure the dusk to dawn sensor’s photocell has a clear, unobstructed view of the sky and is not blocked by any part of the fixture or roof overhang.
Step 7: Seal the Fixture
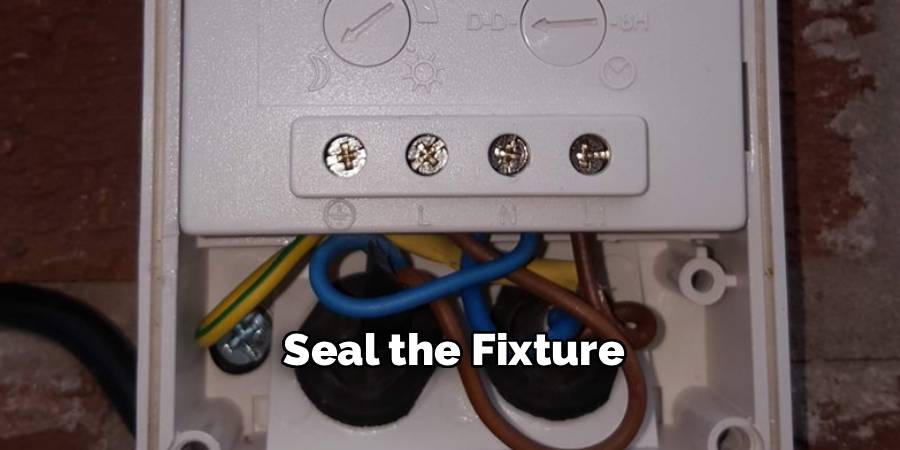
Properly sealing your outdoor lighting is essential to prevent moisture from getting into the junction box and causing electrical issues. Apply a bead of clear, exterior-grade silicone caulk around the top and sides of the light fixture’s base where it meets the wall. Leave the bottom edge of the base unsealed. This small gap allows any moisture that might get behind the fixture to drain out, preventing it from accumulating and causing damage. This simple step greatly enhances the durability and safety of your light fixture installation.
Step 8: Restore Power
Return to the circuit breaker panel and switch the breaker for your outdoor light back to the “ON” position. The light may turn on for a few moments as the sensor calibrates. To test the sensor’s functionality during the day, you can cover the photocell completely with a piece of black electrical tape or your hand. After a minute or two, the light should turn on. When you remove the cover and expose the sensor to daylight, the light should turn off. This confirms that you know how to install dusk to dawn sensor and that it is working correctly.
Troubleshooting Common Issues
If your dusk-to-dawn sensor isn’t functioning as expected, here are some common issues and solutions:
- Light Does Not Turn On at Night
- Ensure the sensor is not obstructed by dirt, debris, or anything that blocks its exposure to light.
- Check that the sensor is positioned correctly and not facing direct artificial light, which may interfere with its operation.
- Verify the electrical connections to ensure they are secure and properly installed.
- Light Stays On All the Time
- Confirm that the sensor is not in a location exposed to constant shade or shadows.
- Verify that the sensor is not damaged or faulty by closely inspecting it for cracks or other signs of wear. Replace it if necessary.
- Light Flickers or Turns On and Off Repeatedly
- Check for any loose connections in your wiring.
- Make sure the sensor is not directly exposed to reflective surfaces, which can cause false readings.
- If the bulb or fixture itself is old or malfunctioning, consider replacing it.
- Sensor Does Not Calibrate Properly
- Reset the sensor by turning the power off for a few minutes and then back on.
- Double-check that the sensor is installed in accordance with the manufacturer’s guidelines and is not angled improperly.
By addressing these simple troubleshooting steps, most issues with dusk-to-dawn sensors can be resolved quickly and effectively.
Frequently Asked Questions (FAQs)
Can I Add a Dusk to Dawn Sensor to Any Light Fixture?
Yes, you can add a separate dusk to dawn sensor to most existing outdoor light fixtures, as long as you have access to the wiring. You can purchase screw-in socket sensors, which are the easiest to install, or hardwired sensors that wire into the fixture’s junction box. Make sure the sensor’s maximum wattage rating is compatible with the bulb you intend to use.
Where Is the Best Place to Position the Sensor?
The sensor’s photocell needs a clear, unobstructed view of the sky to accurately detect ambient light levels. Avoid placing it under a deep roof overhang, behind a tree branch, or where it might be affected by another light source. An artificial light shining on the sensor can trick it into thinking it’s daytime, preventing your light from turning on when it should.
Why Does My Dusk to Dawn Light Flicker or Stay On During the Day?
Flickering is often caused by reflective surfaces near the sensor. Light from the bulb itself can bounce off a nearby wall, window, or soffit and hit the sensor, causing it to rapidly turn on and off. If the light stays on during the day, the sensor might be dirty, faulty, or not receiving enough direct daylight to switch off. Check for obstructions and clean the photocell lens.
What Kind of Light Bulbs Should I Use?
You can use most types of bulbs, including incandescent, LED, and CFL, as long as they are compatible with your fixture and the sensor’s wattage rating. However, LED bulbs are highly recommended for outdoor lighting. They offer the best energy efficiency, have an extremely long lifespan, and perform well in cold temperatures, making them the most cost-effective and reliable option.
Do I Need an Electrician to Install a Dusk to Dawn Sensor?
If you have basic knowledge of home wiring and are comfortable working with electricity after turning off the power, you can likely install a sensor yourself. However, safety is paramount. If you are unsure about any part of the process, have older wiring, or are not confident in your ability to work safely, it is always best to hire a qualified electrician.
Conclusion
Successfully learning how to install dusk to dawn sensor units is a practical and rewarding DIY project that improves your home’s security and energy efficiency. By carefully following the steps for shutting off power, wiring the components, and testing your work, you can confidently upgrade your outdoor lighting system in just an afternoon. This simple change provides automated, reliable lighting exactly when you need it.
The convenience of “set it and forget it” lighting adds a touch of modern luxury to any home. With the knowledge from this guide, you are now equipped to tackle this project, saving money and gaining a valuable new skill in home maintenance. Enjoy the peace of mind that comes with a well-lit and secure property.