

Installing hinges on a gate is a fundamental skill for anyone looking to enhance their property’s security and aesthetics. Whether you’re building a new gate or replacing old hinges, mastering this process ensures your gate operates smoothly and securely for years to come. In this guide, we’ll take you through the step-by-step process of how to install hinges on a gate, from choosing the right type of hinges to ensuring proper alignment and functionality.
Whether you’re a DIY enthusiast or tackling this project for the first time, our easy-to-follow instructions will help you achieve a sturdy and reliable gate installation that enhances both the look and functionality of your property.
Importance of Proper Hinge Installation
Proper hinge installation is crucial for the longevity and functionality of your gate. Incorrectly installed hinges can lead to several problems, including sagging gates, misalignment, and even damage to the gate or surrounding structures. A well-installed hinge ensures that the gate opens and closes smoothly without undue strain on the gateposts or the hardware. It also distributes the gate’s weight evenly, reducing wear and tear over time.
By taking the time to install hinges correctly, you can avoid costly repairs and maintain the aesthetic appeal and security of your property. Proper installation also contributes to safety, preventing accidental gate falls or malfunctions that could result in injuries. Therefore, understanding the importance of precise and secure hinge placement cannot be overstated.
Selecting the Right Hinges for Your Gate
Choosing the appropriate hinges for your gate is a critical first step in the installation process. The type of hinges you select will depend on several factors, including the gate’s material, size, weight, and intended use. For heavier gates, such as those made of metal or solid wood, robust, heavy-duty hinges are necessary to support the extra weight and ensure smooth operation. Light-duty hinges may suffice for smaller, lighter gates, such as those made of vinyl or lattice.

When selecting hinges, you should also consider the gate’s environment. If the gate will be exposed to harsh weather conditions or saltwater, opting for corrosion-resistant materials, such as stainless steel or galvanized hinges, can significantly extend the lifespan of your installation. Additionally, think about the aesthetic elements; decorative hinges can enhance the visual appeal of your gate and complement the overall design of your property.
10 Methods How to Install Hinges on a Gate
Method 1: Choosing the Right Hinges
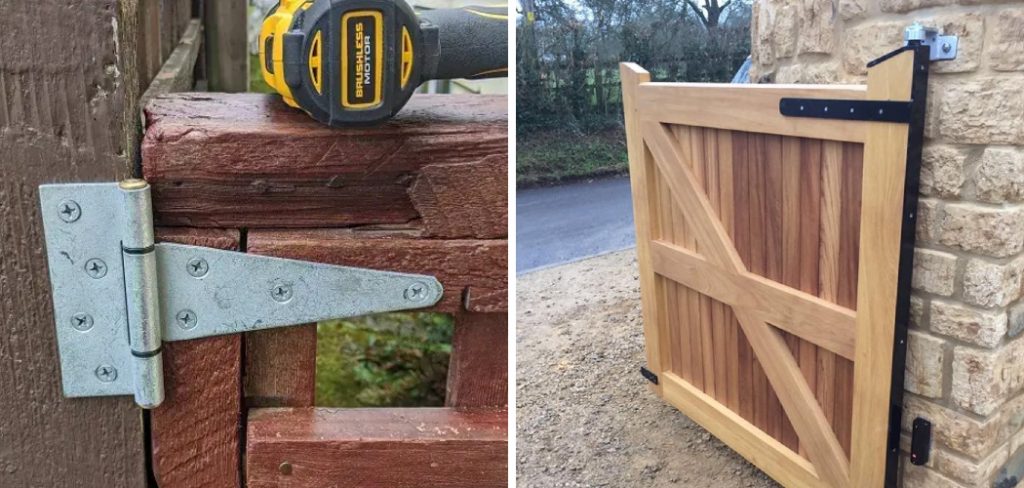
Selecting the appropriate hinges for your gate is the first and most crucial step in the installation process. Hinges come in various sizes, materials, and styles, such as butt hinges, strap hinges, and T-hinges. The type of hinge you choose should match the weight, size, and intended use of the gate. For heavy wooden gates, robust strap or T-hinges are ideal, while lighter metal gates may work well with standard butt hinges.
Additionally, consider the environment where the gate will be installed. For outdoor gates exposed to the elements, opt for rust-resistant materials like stainless steel or galvanized steel. Ensuring you have the right hinges will support the gate’s weight properly and ensure smooth operation.
Method 2: Gathering the Necessary Tools and Materials
Before starting the installation, gather all the necessary tools and materials to avoid interruptions. You will need hinges, screws or bolts (depending on the hinge type), a drill with appropriate drill bits, a screwdriver, a tape measure, a level, a pencil, a wrench, and safety gear such as gloves and goggles. Having everything ready will make the installation process smoother and more efficient. Additionally, ensure that the gate and post are in good condition, free from any rot or damage, as this can affect the stability and longevity of the hinges.
Method 3: Measuring and Marking Hinge Placement
Accurate measurement and marking of hinge placement are crucial for a well-balanced gate. Start by determining the number of hinges needed, typically two for standard gates and three or more for larger or heavier gates. Measure and mark the hinge positions on both the gate and the post.
For a two-hinge setup, place one hinge about 6-8 inches from the top and the other 6-8 inches from the bottom. Use a tape measure and a pencil to mark the exact positions. Ensure that the hinges are aligned perfectly on both the gate and the post to avoid misalignment issues during operation.

Method 4: Drilling Pilot Holes
Drilling pilot holes is essential for preventing the wood from splitting and ensuring that the screws or bolts go in smoothly. Use a drill bit slightly smaller than the diameter of the screws or bolts to drill pilot holes at the marked positions on the gate and post.
For each hinge, drill at least two holes on both the gate and the post. Ensure the holes are straight and deep enough to accommodate the screws or bolts fully. This step is particularly important for heavy-duty gates, where the hinges must bear substantial weight and stress.
Method 5: Attaching Hinges to the Gate
With the pilot holes drilled, you can begin attaching the hinges to the gate. Align the hinge with the pilot holes on the gate and insert the screws or bolts through the hinge holes. Use a screwdriver or wrench to tighten them securely. Ensure that the hinge is flush against the gate surface and that all screws or bolts are tightened evenly. Repeat this process for all hinges. For added security, especially with heavy gates, consider using longer screws or bolts that penetrate deeply into the gate structure, providing a stronger hold.
Method 6: Positioning the Gate on the Post
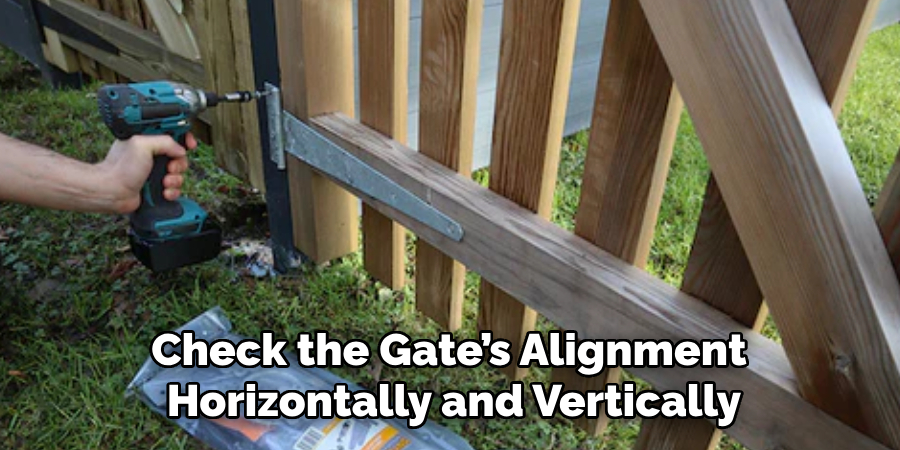
After attaching the hinges to the gate, position the gate against the post to align the hinges with the marked positions. This step may require an extra set of hands, particularly for larger or heavier gates. Ensure that the gate is level and properly aligned with the post.
Use a level to check the gate’s alignment horizontally and vertically. If necessary, use wooden shims to hold the gate in place and maintain proper alignment while you secure the hinges to the post. Proper positioning at this stage is crucial for ensuring smooth operation and preventing sagging or misalignment issues later on.
Method 7: Securing Hinges to the Post
Once the gate is positioned correctly, begin securing the hinges to the post. Align the hinge holes with the pilot holes on the post and insert the screws or bolts. Tighten them securely using a screwdriver or wrench.
Start with the top hinge and then move to the bottom hinge, ensuring the gate remains level throughout the process. For gates with three or more hinges, secure the middle hinge(s) last. Double-check that all hinges are securely attached and that the gate swings freely without obstruction. Properly securing the hinges to the post is essential for the stability and durability of the gate.
Method 8: Adjusting Hinge Tension
Some hinges, particularly those used for self-closing gates, come with adjustable tension settings. After installing the hinges, you may need to adjust the tension to ensure the gate closes smoothly and with the desired force.
Use the adjustment mechanism on the hinge, such as a tension screw or pin, to modify the tension. Turn the adjustment screw or pin clockwise to increase tension or counterclockwise to decrease it. Test the gate’s operation after each adjustment to achieve the perfect balance. Proper tension adjustment ensures the gate closes securely without slamming or remaining ajar.
Method 9: Testing Gate Operation
Once the hinges are installed and adjusted, thoroughly test the gate’s operation. Open and close the gate several times to ensure it swings smoothly and without any resistance. Check for any signs of misalignment, binding, or uneven gaps between the gate and the post.
If you encounter any issues, make the necessary adjustments to the hinges, tension, or positioning. Ensuring that the gate operates correctly from the start will prevent future problems and ensure reliable performance. Regular testing and maintenance will also help identify any potential issues early, allowing for prompt repairs.

Method 10: Performing Regular Maintenance
Maintaining your gate hinges is essential for long-term functionality and durability. Regularly inspect the hinges for signs of wear, rust, or damage. Clean the hinges to remove dirt and debris, and lubricate them with a high-quality lubricant to prevent friction and ensure smooth operation.
Tighten any loose screws or bolts and adjust the tension as needed. For gates exposed to harsh weather conditions, consider applying a protective coating to the hinges to prevent corrosion. Regular maintenance will extend the life of your hinges and ensure your gate remains in excellent working condition for years to come.
Conclusion
Installing gate hinges is a critical process that requires careful planning, precise execution, and ongoing maintenance to ensure optimal functionality and longevity. From accurate measurement and marking to drilling pilot holes, attaching hinges, and adjusting tension, each step plays a vital role in the stability and performance of the gate.
Following these methods diligently will help prevent common issues such as sagging, misalignment, and operational difficulties. Thanks for reading, and we hope this has given you some inspiration on how to install hinges on a gate!
About
Safety Fic is a distinguished figure in the world of Diy design, with a decade of expertise creating innovative and sustainable Diy solutions. His professional focus lies in merging traditional craftsmanship with modern manufacturing techniques, fostering designs that are both practical and environmentally conscious. As the author of diy, Safety Fic delves into the art and science of Safety Fic-making, inspiring artisans and industry professionals alike.
Education RMIT University
(Melbourne, Australia) Associate Degree in Design (Safety Fic) Focus on sustainable design, industry-driven projects, and practical craftsmanship. Gained hands-on experience with traditional and digital manufacturing tools, such as CAD and CNC software.
Nottingham Trent University
(United Kingdom) Bachelor’s in diyfastly.com and Product Design (Honors) Specialized in product design with a focus on blending creativity with production techniques. Participated in industry projects, working with companies like John Lewis and Vitsoe to gain real-world insights.
Publications and Impact
In diy, Safety Fic his insights on indoor design processes, materials, and strategies for efficient production. His writing bridges the gap between artisan knowledge and modern industry needs, making it a must-read for both budding designers and seasoned professionals.