

Are you planning to use a ladder for your next DIY project? If so, you may want to consider installing a ladder stabilizer. This handy tool attaches to the top of your ladder and provides added stability and safety while you work.
A ladder stabilizer is a crucial accessory that enhances the safety and stability of your ladder, especially when working at heights or on uneven surfaces. Installing a ladder stabilizer properly can significantly reduce the risk of accidents and ensure you can confidently complete your tasks.
In this guide, we will walk you through the step-by-step process of how to install ladder stabilizer, providing you with detailed instructions and tips to make the installation quick and effortless. Whether you’re a DIY enthusiast or a professional tradesperson, following these steps will help you secure your ladder and work safely.
What Will You Need?
Before you begin the installation process, ensure you have all the necessary tools and materials. These include:
- A ladder stabilizer
- A ladder (of course!)
- Measuring tape
- Pliers or adjustable wrench
- Screwdriver (preferably a drill)
- Ladder pads (optional but recommended for added stability and protection)
Once you have all the materials, you can proceed to the installation process.
10 Easy Steps on How to Install Ladder Stabilizer
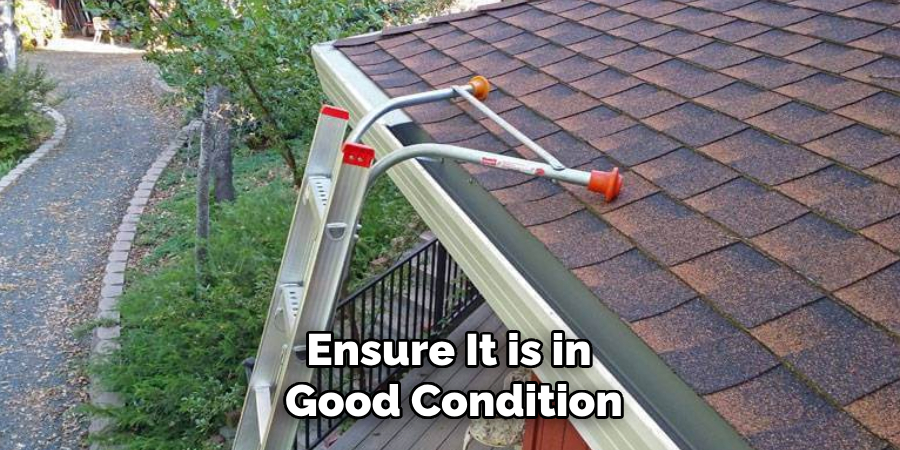
Step 1: Inspect Your Ladder
Before installing the ladder stabilizer, it’s essential to inspect your ladder thoroughly to ensure it is in good condition. Check for any visible damage such as cracks, bends, or corrosion, especially around the top section where the stabilizer will be attached. Ensure all rungs, rails, and joints are secure and free from defects. Confirm that the ladder’s locking mechanisms are functioning correctly, as a stable ladder foundation is critical for the stabilizer’s effectiveness. If your ladder shows any signs of wear and tear, it is advisable to repair or replace the damaged parts before proceeding with the installation.
Step 2: Position the Ladder Stabilizer
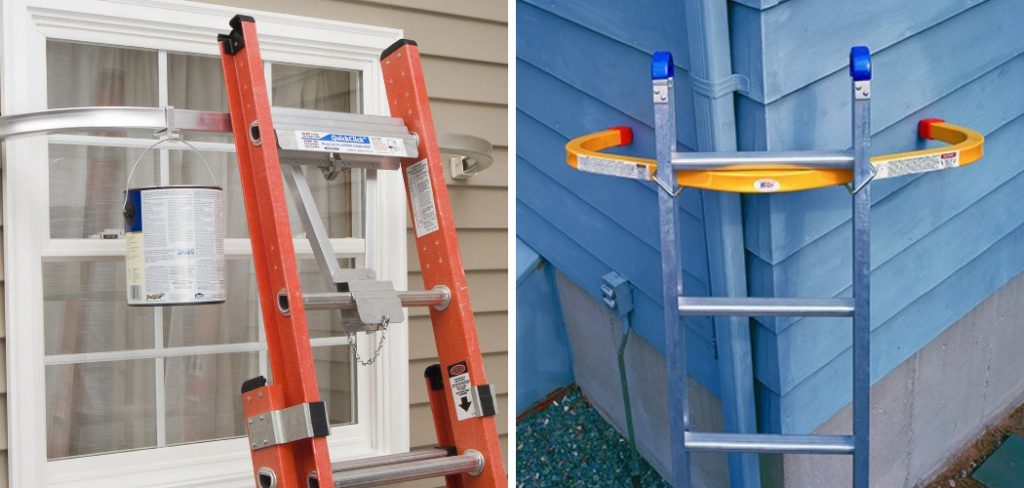
Unbox your ladder stabilizer and lay out its components, ensuring you have everything needed for the installation. Position the stabilizer at the top of the ladder, aligning it symmetrically with the ladder’s rails. Most stabilizers are designed with adjustable arms, allowing them to fit various ladder widths. Ensure that the stabilizer is centered properly to provide balanced support. Proper positioning is crucial for maximizing stability and safety.
Step 3: Attach the Stabilizer Brackets
With the stabilizer positioned, secure the brackets to the ladder’s rails. Depending on the model, you might need to use bolts, screws, or clamp mechanisms provided with the stabilizer. Use a measuring tape to ensure that both sides of the stabilizer are equidistant from the top rung. This symmetry will help distribute the weight evenly and prevent any wobbling. Tighten the brackets using pliers or an adjustable wrench, but avoid over-tightening, as this could damage the ladder or the stabilizer itself.
Step 4: Secure the Stabilizer Arms
Once the brackets are firmly in place, extend the stabilizer arms to their full length or to the desired width that accommodates your working area. Some stabilizers come with locking pins or adjustment levers. Engage these mechanisms to lock the arms into position. Double-check that the arms are securely fixed and cannot retract or collapse during use. This step is vital for ensuring that the stabilizer provides reliable support.
Step 5: Check for Level and Alignment
After securing the stabilizer arms, it’s crucial to ensure that the stabilizer is level and properly aligned. Use a spirit level or a carpenter’s level to check the stabilizer’s horizontal and vertical alignment. Place the level on top of the stabilizer and adjust the arms if necessary to achieve a balanced setup. Proper leveling is vital to distribute the weight evenly and prevent tilting or shifting while working. Ensuring the stabilizer is perpendicular to the ladder will help maintain steadiness and promote safe operation.
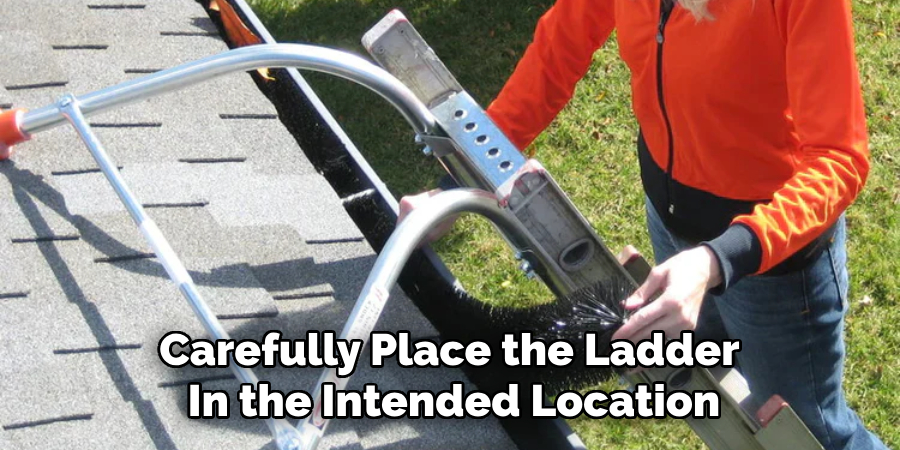
Step 6: Test the Stability
Carefully place the ladder in the intended location and conduct a stability test. Gently shake the ladder to see if the stabilizer holds it firmly in place. If there’s any noticeable movement, recheck the tightened bolts and the alignment of the stabilizer. Repeat this step until the ladder stands securely with minimal or no movement.
Step 7: Install Ladder Pads (Optional)
Consider installing ladder pads on the stabilizer arms for added stability and protection. Ladder pads typically provide extra grip, preventing the ladder from slipping, especially on smooth surfaces. They also protect both the ladder and the surface from scratches and potential damage. Slide the pads onto the stabilizer arms and secure them as instructed by the manufacturer.
Step 8: Verify All Connections
Before using the ladder, perform a final check on all connections, brackets, and locking mechanisms. Make sure everything is firmly secured and in proper working condition. Inspect the ladder once more to ensure there are no overlooked damages or defects that might compromise safety.
Step 9: Position the Ladder for Use
Position the ladder against the surface you intend to work on. Ensure that it stands on a flat platform and that the stabilizer arms are in contact with the wall or roof for added support. Aim for a ladder angle of approximately 75 degrees, which offers optimal balance. Use the measuring tape if necessary to verify the correct angle.
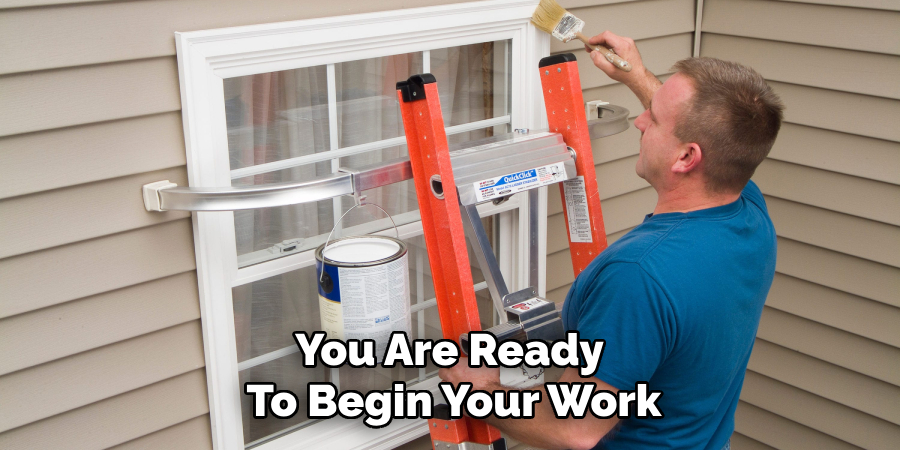
Step 10: Climb and Work Safely
With the ladder stabilizer securely installed and the ladder positioned, you are ready to begin your work. Always maintain three points of contact (two feet and one hand or two hands and one foot) when climbing or working on the ladder. Avoid overreaching, as this can destabilize the ladder. Follow all safety guidelines outlined in your ladder’s user manual, and be mindful of your movements to ensure a safe and efficient task completion.
By following these steps, you can confidently install a ladder stabilizer and enhance your safety while working on any project.
5 Additional Tips and Tricks
- Read the Manual Thoroughly: Before starting the installation process, always read the manufacturer’s manual carefully. Understanding the specific instructions and recommendations can prevent common mistakes and ensure a secure fit.
- Check for Compatibility: Make sure that the ladder stabilizer you have chosen is compatible with your ladder. Some stabilizers are designed for certain ladder types and sizes, so double-checking compatibility can save time and hassle.
- Secure the Ladder on a Flat Surface: Always install the stabilizer while the ladder is on a flat, stable surface. This ensures that the ladder remains steady during installation and reduces the risk of accidents.
- Perform a Trial Installation: Before fully tightening all the bolts and screws, perform a trial installation. This allows you to adjust the stabilizer for the best fit and stability, ensuring optimal performance.
- Regular Maintenance and Inspection: After installation, regularly check your ladder stabilizer for any signs of wear or damage. Tighten any loose screws or bolts and replace any worn parts to maintain safety and effectiveness.
With these additional tips and tricks, you can ensure a smooth and safe installation of your ladder stabilizer.
5 Things You Should Avoid
- Ignoring Weight Limits: Never disregard the weight limits specified by the manufacturer. Overloading your ladder and stabilizer can lead to structural failure and serious accidents.
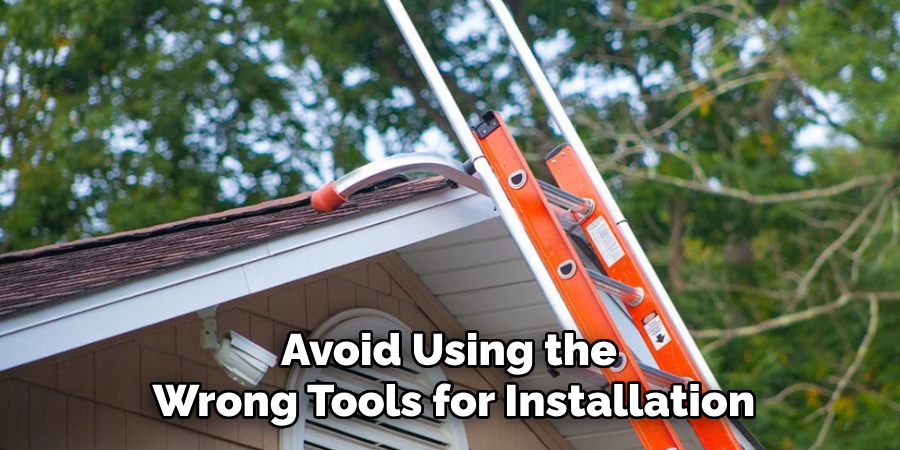
- Using Improper Tools: Avoid using the wrong tools for installation. Using makeshift or incorrect tools can compromise the integrity of the installation and may damage the stabilizer or ladder.
- Skipping Safety Gear: Never forgo wearing appropriate safety gear such as gloves and safety glasses during installation. This helps protect you from potential injuries caused by slips or falling debris.
- Forgetting to Tighten Bolts: Do not overlook the importance of securely tightening all bolts and screws. Loose fittings can cause the stabilizer to shift or detach, posing a serious safety risk.
- Installing During Adverse Weather Conditions: Refrain from installing the ladder stabilizer in poor weather conditions like rain, strong winds, or icy surfaces. Wet or unstable ground can lead to slips and falls, endangering your safety.
Avoiding these common pitfalls will help ensure that your ladder stabilizer is installed correctly and remains reliable during use.
What are the Causes of Ladder Stabilizer Failure?
Some possible causes of ladder stabilizer failure include:
- Incompatibility with the ladder
- Improper installation or use
- Overloading beyond weight limits
- Wear and tear over time
Knowing these potential causes, you can take preventive measures to avoid ladder stabilizer failure and ensure its longevity. Remember to always prioritize safety and follow the manufacturer’s instructions for proper installation and maintenance.
Conclusion
Installing a ladder stabilizer is crucial in ensuring your safety while working at heights.
You can achieve a secure and efficient setup by following the guidelines provided, including reading the manufacturer’s manual, checking for compatibility, securing the ladder on a flat surface, and conducting a trial installation. Regular maintenance and avoiding common mistakes such as ignoring weight limits and using improper tools will further ensure the longevity and reliability of your ladder stabilizer. Ultimately, prioritizing safety and adhering to these practices will provide peace of mind, allowing you to carry out your tasks with confidence and security.
Hopefully, the article on how to install ladder stabilizer has provided valuable information and tips for a successful installation process. Now, go ahead and make sure you have everything in place before starting your next project! Happy and safe climbing!
About
Safety Fic is a distinguished figure in the world of Diy design, with a decade of expertise creating innovative and sustainable Diy solutions. His professional focus lies in merging traditional craftsmanship with modern manufacturing techniques, fostering designs that are both practical and environmentally conscious. As the author of diy, Safety Fic delves into the art and science of Safety Fic-making, inspiring artisans and industry professionals alike.
Education RMIT University
(Melbourne, Australia) Associate Degree in Design (Safety Fic) Focus on sustainable design, industry-driven projects, and practical craftsmanship. Gained hands-on experience with traditional and digital manufacturing tools, such as CAD and CNC software.
Nottingham Trent University
(United Kingdom) Bachelor’s in diyfastly.com and Product Design (Honors) Specialized in product design with a focus on blending creativity with production techniques. Participated in industry projects, working with companies like John Lewis and Vitsoe to gain real-world insights.
Publications and Impact
In diy, Safety Fic his insights on indoor design processes, materials, and strategies for efficient production. His writing bridges the gap between artisan knowledge and modern industry needs, making it a must-read for both budding designers and seasoned professionals.