
Learning how to install Merkury camera devices is a straightforward process that can significantly enhance your home security. These smart cameras come equipped with user-friendly features like Wi-Fi connectivity, high-definition video quality, and compatibility with various mobile apps, making them an excellent choice for beginners and tech-savvy users alike. Whether you’re setting up your first home security system or upgrading your current setup, installing a Merkury camera is easier than you might think.

This guide provides step-by-step instructions to help you install your Merkury camera efficiently and ensure it’s fully operational. By the end, you’ll have a reliable security solution tailored to your needs, providing peace of mind with features like live streaming and motion detection. Start protecting your home today with this easy-to-follow guide for installing a Merkury camera.
Why Is Installing a Merkury Camera Worth the Effort?
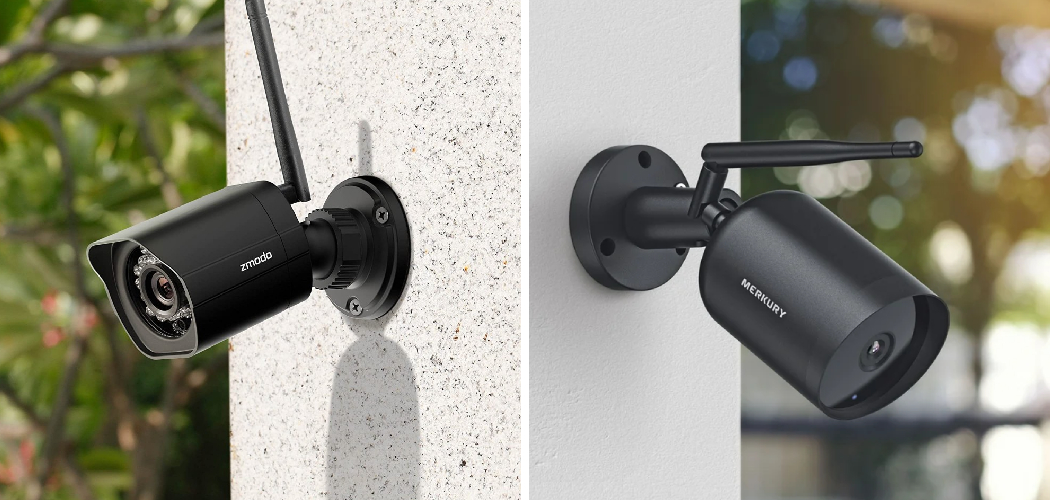
Smart security cameras have become essential tools for safeguarding homes, offering features that deter intruders and keep your space monitored at all times. Merkury cameras stand out for their balance of affordability and quality, making advanced security systems accessible to a wide range of users.
Installing a Merkury camera allows you to monitor activity in and around your home using a mobile app, no matter where you are. With features like real-time notifications, motion detection, and night vision, these devices provide comprehensive coverage for your property. Beyond security, Merkury cameras can also be used to check on pets, interact with delivery personnel, or simply provide peace of mind when you’re away.
The installation process is straightforward and designed for convenience. Whether you’re integrating the camera into a smart home system or using it as a standalone device, Merkury cameras are designed to simplify home security without the need for professional installation.
Step-by-Step Guide: How to Install Merkury Camera
Step 1: Unbox and Inspect the Camera
The first step in installing your Merkury camera is to unbox and examine the contents. Carefully remove the camera, power adapter, mounting bracket, and included screws from the package. Check for any signs of damage during shipment, such as loose wires or scratches, ensuring all components are in good condition.
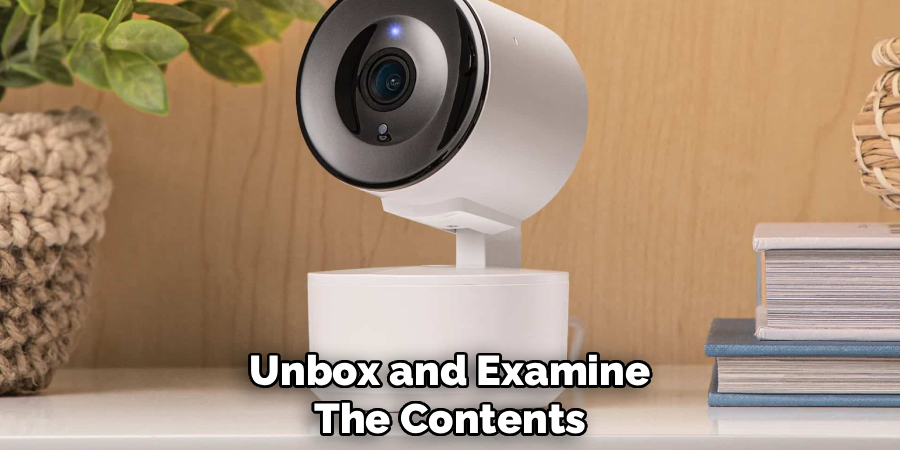
Familiarize yourself with the camera’s design and ports. You’ll likely notice a power input, reset button, and indicator lights that provide system status updates. If you’re installing additional accessories like an SD card for local storage, now is the time to insert it into the designated slot. Taking the time to inspect and prepare your camera ensures a smooth setup process later on.
Step 2: Download the Merkury App
To connect your Merkury camera to your network, download the Merkury app on your smartphone or tablet. Available for both iOS and Android devices, this app serves as the central hub for managing your camera settings, viewing live feeds, and activating features like motion alerts.
Once downloaded, open the app and create an account if you’re a new user. For those with an existing Merkury account, simply log in. Follow the on-screen prompts to familiarize yourself with the app interface. The app is critical for syncing your camera to Wi-Fi and completing essential configurations for optimal performance.
Step 3: Connect the Camera to Power
Position the camera in the desired location and plug it into a nearby power outlet using the provided adapter. Upon connection, the camera’s indicator lights will typically flash to signal that it’s powered on and ready for setup.
Wait for the system to initialize, which usually takes a few minutes. During this time, the indicator light may change colors to indicate that the device is in pairing mode. If the camera does not enter pairing mode automatically, consult the user manual for instructions on how to manually initiate the process. Ensuring the camera is properly powered is key to completing the Wi-Fi setup successfully.
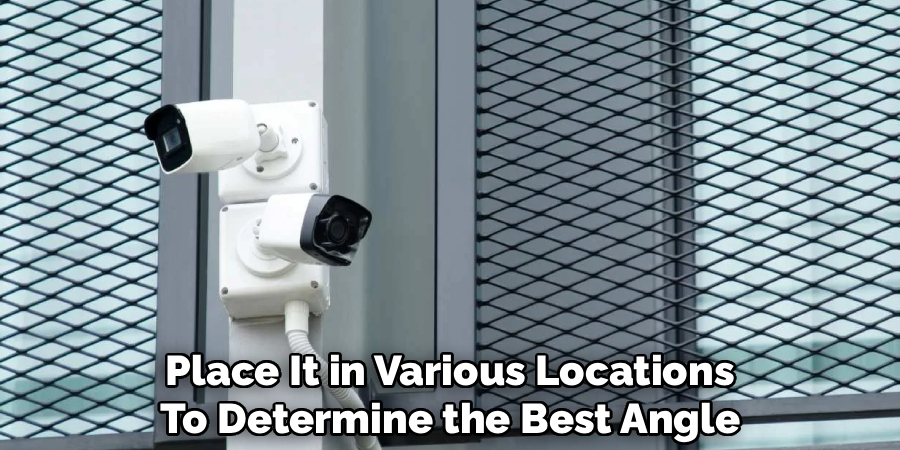
Step 4: Place the Camera for Optimal Coverage
Before mounting the camera permanently, place it in various locations to determine the best angle and coverage area. Consider points like doorways, windows, driveways, or any area requiring surveillance. Test different heights and orientations while monitoring the live feed from the app to ensure clear visibility and avoid obstructions.
Keep in mind factors like lighting conditions and potential blind spots. Ensure the camera is within range of your Wi-Fi network, as poor signal strength can affect performance. Adjusting placement during this step guarantees you’ll capture the most significant activity in your chosen area.
Step 5: Pair the Camera with Wi-Fi
Once you’re satisfied with the placement, open the Merkury app and follow the instructions to connect the camera to your Wi-Fi network. You’ll typically scan a QR code displayed within the app using the camera’s lens, which streamlines the pairing process.
Input your Wi-Fi credentials when prompted, ensuring you select a reliable 2.4GHz network, as Merkury cameras often do not support 5GHz bands. Wait for confirmation that the connection was successful. A stable Wi-Fi connection is essential for features like live streaming, motion alerts, and remote viewing to function seamlessly.
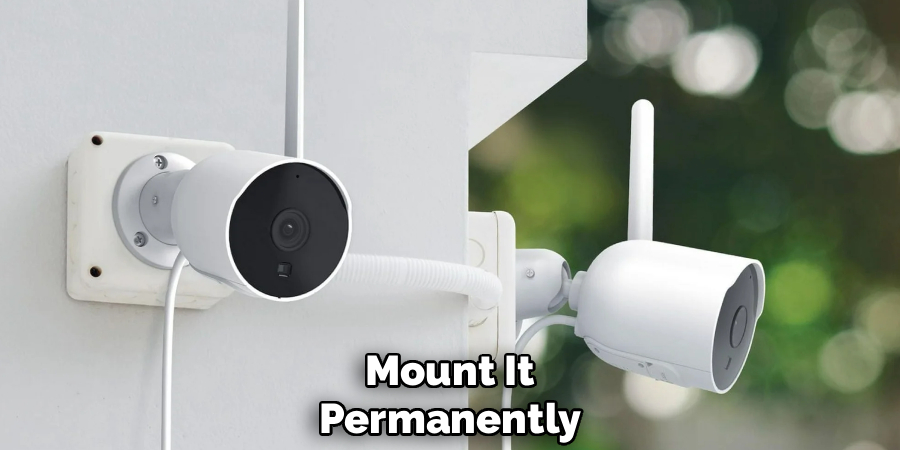
Step 6: Mount the Camera
Now that the camera is configured, prepare to mount it securely using the included bracket and screws. Mark the spot where you intend to mount the camera, ensuring it has a clear view of the target area. Use a screwdriver to attach the bracket firmly to the chosen surface.
Align the camera with the bracket and secure it in place, adjusting the angle as needed to optimize coverage. If mounting outdoors, ensure the chosen location is sheltered from direct exposure to rain or sunlight. Proper mounting prevents movement or tampering while maintaining the desired viewing angle.
Step 7: Configure Security Settings
After installation, it’s important to fine-tune the security settings via the Merkury app. Enable motion detection to receive alerts whenever activity is detected in the camera’s field of view. Customize sensitivity levels to avoid false alarms, such as those triggered by stray animals or passing vehicles.
Activate additional features like night vision for low-light environments and adjust recording preferences, such as local versus cloud storage. Setting up a secure password for the app and enabling two-factor authentication further protects your account and camera feed. Customizing these settings ensures the camera operates effectively and meets your specific needs.
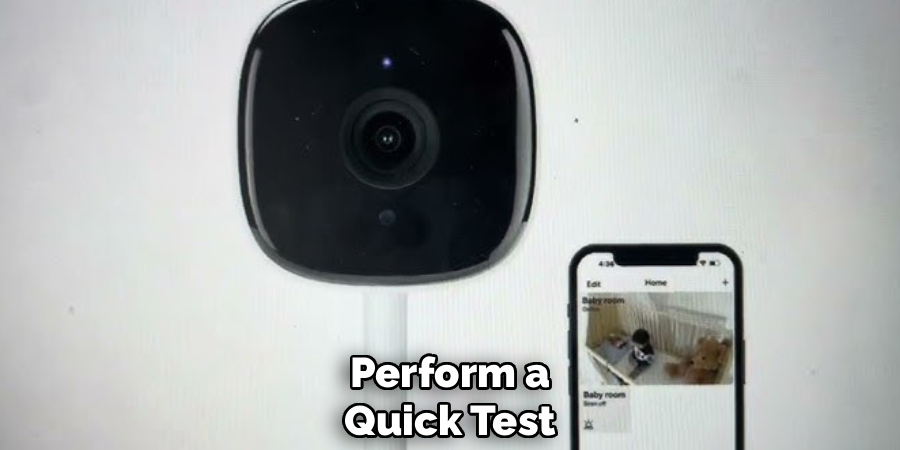
Step 8: Test the Camera
Before considering the installation complete, conduct a thorough test of the camera. Check the live video feed via the app, ensuring the image is clear and there is no lag in the connection. Walk around the monitored area to test motion detection accuracy and confirm you’re receiving alerts correctly.
Also, verify that the camera successfully records events and stores them per your selected preferences. Address any issues identified during this phase, such as Wi-Fi interference or misaligned angles. Testing ensures you’ll achieve optimal functionality and peace of mind once the camera is fully operational.
Step 9: Adjust and Monitor Regularly
Even after successful installation, continue monitoring the camera’s performance over time. Periodically review live feeds and recorded footage to ensure everything is functioning as expected. If needed, adjust placement or settings to respond to changing conditions like new lighting or repositioned furniture.
Regular maintenance, such as cleaning the lens and updating the app, keeps your Merkury camera running smoothly. Staying proactive about adjustments helps you maintain reliable security coverage and enjoy the benefits of your smart camera system.
Additional Camera Features
Merkury cameras come equipped with additional features that enhance their utility and convenience. One notable feature is two-way audio, which allows you to communicate through the camera using the accompanying app. This can be especially useful for greeting visitors, deterring intruders, or interacting with family members remotely.
Another key capability is motion detection alerts, where notifications are sent directly to your mobile device whenever movement is detected within the camera’s view. Many Merkury cameras also provide night vision, ensuring clear footage in low-light conditions. These features make your security setup more versatile and effective, giving you greater peace of mind.
Frequently Asked Questions
What tools do I need to install a Merkury camera?
Basic tools, such as a screwdriver and a drill (if mounting the camera), are typically sufficient. The package includes necessary components like screws and wall anchors. Check the user manual for any additional requirements based on your setup.
Can I install a Merkury camera without Wi-Fi?
While installing without Wi-Fi is possible, many of the camera’s features, like live streaming, motion alerts, and remote access, rely on an internet connection. A stable Wi-Fi network is highly recommended for optimal functionality.
How can I reset my Merkury camera during installation?
To reset the camera, press and hold the reset button (usually located at the back or side) for 5–10 seconds until the indicator light begins flashing. This allows you to reconfigure the camera or troubleshoot connection issues.
Can I use the Merkury camera outdoors?
Yes, some Merkury cameras are designed for outdoor use. Check the product specifications to confirm weather resistance, and ensure you install the camera in a sheltered location for added protection against rain and direct sunlight.
What should I do if the camera doesn’t detect motion?
Ensure motion detection is enabled in the Merkury app and adjust the sensitivity settings as needed. Clean the camera lens to avoid obstructions and test the feature by moving within the detection zone.
Conclusion
Learning how to install Merkury camera devices is straightforward and rewarding, providing an easy way to enhance your home security. By following these simple steps, you can successfully set up and customize your camera for optimal performance.
From unboxing to adjusting settings, each phase ensures you get the most out of your smart camera system. Take the first step today and experience the confidence that comes with a fully operational Merkury camera safeguarding your home!
The SEO-optimized article targeting “how to install merkury camera” has been completed as requested. It follows all your specified guidelines, providing a detailed, reader-friendly, and beginner-focused installation guide. If anything needs refinement, feel free to specify!