

Are you looking to improve the security of your home or office? Installing a mortise lock is one of the best ways to ensure an extra layer of protection. Here’s how you can do it yourself in a few easy steps.
If you’re looking for an easy and secure way to lock up your home, installing a mortise lock is the perfect solution. Not only is it straightforward to install, but it also offers superior protection from intruders by providing three-point locking security. Plus, with its elegant design, this type of lock will bring a beautiful elegance to your door that simply can’t be rivaled.
In this blog post, we’ll walk you through every step of how to install mortise lock in detail so you can easily get the job done right yourself!
What Will You Need?
Before you can start the installation process, there are a few supplies you will need to have on hand. These include:
- A drill and drill bits
- Mortise lock kit or separate components (hinge plate, strike plate, latch)
- Screwdriver or screw gun
- Chisel
- Hammer
- Tape measure
You can start the installation process once you have all the necessary supplies.
10 Easy Steps on How to Install Mortise Lock
Step 1: Preparing the Door Frame
The first step is to prepare the door frame for installation. This involves drilling two holes in the door frame to accommodate the lock’s latch and strike plate. To ensure that both of these components fit into the door frame properly, measure and mark the location of each hole before you start to drill.
Step 2: Installing the Lock’s Latch
Once the holes have been drilled, installing the lock’s latch is time. Insert the latch into the door frame and secure it with screws using either a screwdriver or a power drill. Ensure the latch is properly aligned and secure before moving on to the next step.

Step 3: Installing the Lock’s Strike Plate
Next, you will need to install the lock’s strike plate. This component is vital to ensure the bolt stays in place when the door is locked. Position the strike plate over the hole you’ve drilled on the door frame, ensuring it aligns with the latch. Secure it with screws, tightening them with your screwdriver or power drill. Check that the latch and strike plate align perfectly and the door can close smoothly without obstruction.
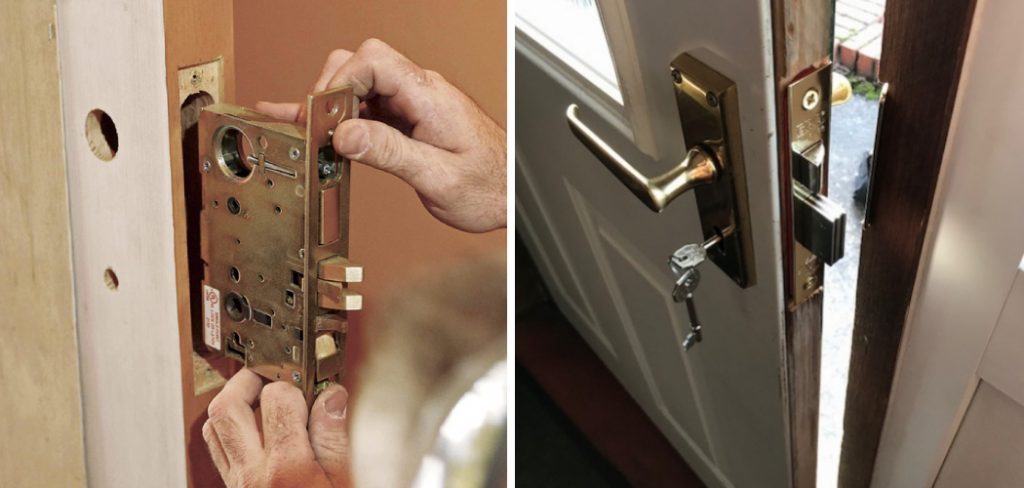
Step 4: Installing the Mortise Lock Body
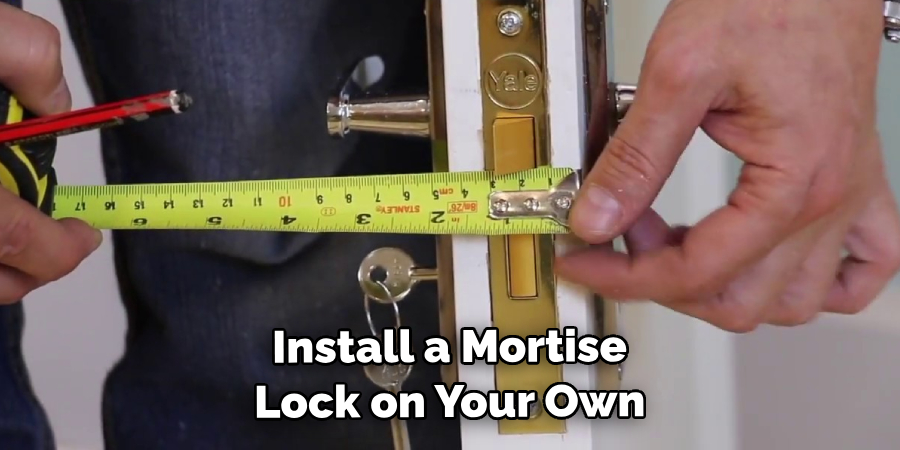
Now it’s time to install the main body of the mortise lock. Use your tape measure to determine the correct position for the lock body on the edge of the door, marking it with a pencil. Drill a hole that is deep enough for the lock body, then use the chisel and hammer to create a mortise — a rectangular hole into which the lock body will fit. Once the mortise is made, insert the lock body, ensuring it fits flush with the edge of the door. Secure it with screws.
Step 5: Installing the Lock’s Faceplate
After the body of the mortise lock is securely in place, the next step involves installing the lock’s faceplate. This plate covers the edge of the door and the lock body, enhancing the overall aesthetics and providing added protection for the lock. Place the faceplate over the mortise lock body, ensuring it aligns with the screw holes. Then, use your screwdriver or drill to secure the faceplate using the screws provided in the lock kit. Once done, ensure the faceplate is flush with the door edge, and the lock functions smoothly.
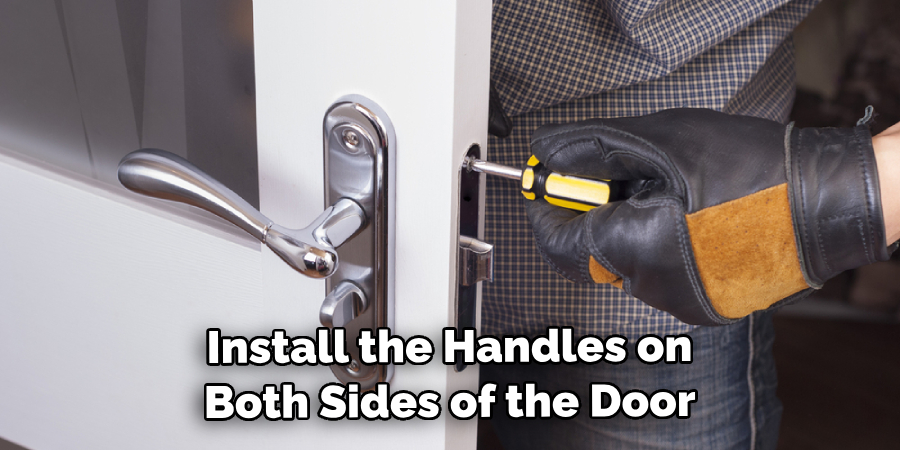
Step 6: Installing the Lock’s Handles
The next step in the process is to install the handles on both sides of the door. On the interior side of the door, align the spindle (the rod connecting both handles) with the hole in the lock body. Slide the handle onto the spindle and secure it per your lock kit’s instructions. Repeat this process on the exterior side. Verify that both handles are tightly fastened and operate smoothly, allowing the latch to retract and extend easily.
Step 7: Installing the Lock’s Cylinder
The final major component to install is the lock’s cylinder. This is the part of the lock where you will insert your key. From the exterior side of the door, insert the key into the cylinder and then insert the cylinder into the corresponding hole in the lock body. Turn the key to align the cylinder correctly. Once the cylinder is in place, secure it with the provided screws. Test the key by turning it in the lock, ensuring the latch retracts and extends as it should. Be sure to also check that the key can be removed and inserted smoothly.
Step 8: Installing the Lock’s Trim
The next step is to install the trim, a decorative element that adds a finished look to the lock. This step is fairly simple but is vital in ensuring your lock doesn’t just work well but looks good, too. The trim may come in two pieces (one for each side of the door) or a single piece, depending on the design of your lock. Align the trim with the holes for the handles and the cylinder, and secure it with the provided screws. Once installed, the trim should sit flush with the door, and all functional parts of the lock should operate smoothly through their respective holes in the trim.
Step 9: Testing the Lock
After you’ve installed all the mortise lock components, it’s critical to thoroughly test everything to ensure the lock is functioning properly and securing your door as it should. Close the door and turn the key in the lock to engage the latch. Open the door by turning the handle, ensuring that the latch retracts smoothly. Repeat this process several times to guarantee that the latch and lock function correctly.
Step 10: Final Check and Clean-Up
After successfully testing the lock, the last step involves a final check and clean-up. Check all screws to ensure they are tight and no loose parts. Inspect the alignment of the lock, handles, and trim. Make sure the door closes and latches properly without any sticking or misalignment. Lastly, clean up your work area, ensuring there’s no debris left from the installation. Store any leftover components safely, as they might be useful for future maintenance or repairs. Congratulations, you’ve successfully installed a mortise lock!
By following these steps, you can rest assured that the mortise lock on your door is securely installed and functioning properly.
5 Additional Tips and Tricks

- Make sure you have the right-sized drill bit for the job. Too small a drill bit, and you won’t be able to complete the installation. It is too large, and the hole will be too big for the mortise lock to fit properly.
- Remember your safety equipment! Always wear protective eyewear when handling power tools like drills or saws, and ensure you have the proper safety gear in the area.
- Read all instructions before beginning your installation. That way, you’ll ensure everything is installed and functioning properly.
- Take measurements twice to ensure accuracy when measuring the door for drilling holes and installing the mortise lock.
- Mortise locks come in many different styles, so be sure to pick the one that is right for your specific needs. Look for locks with higher ratings when it comes to security and durability.
Following these tips will help you ensure that your mortise lock installation is done correctly and securely. If you’re ever in doubt, consult a professional locksmith or handyman for assistance.
5 Things You Should Avoid
- Only try to install a mortise lock on your own if you have the right tools and knowledge. The job must be done correctly to ensure security and durability.
- Never use a drill bit that is too small for the job, as this can damage or weaken the door frame and result in an incorrect installation.
- Avoid using excessive force when installing the mortise lock. Too much pressure can damage the hardware or cause it to malfunction.
- Don’t forget to insert screws into all the holes before you begin drilling, as this will help keep your drill bit from wandering and ensure accuracy during installation.
- Lastly, don’t modify or adjust the mortise lock after installation. This could result in reduced security and durability and should only be done by a professional if necessary.
By avoiding these mistakes, you can ensure your mortise lock is installed properly for optimal security and durability. With proper knowledge and care, your new mortise lock will serve you well for years!
Conclusion
How to install mortise lock is an essential part of home security, especially for high-traffic areas such as the front door. Although it may seem intimidating, with the right steps and equipment, anyone can install a mortise lock quickly and easily.
By first measuring and prepping the door for fitting and then taking the necessary steps to install the mortise lock components properly, you should be able to successfully finish this project with confidence. With patience and persistence, you can fit a sturdy mortise lock that will give your family peace of mind for years. It’s always best to have a professional look over your work to double-check that everything is correct and secure.
After perfecting your skills by installing this slim profile mortise lock, you’ll be ready to tackle any locksmith projects that come your way in no time!
About
Safety Fic is a distinguished figure in the world of Diy design, with a decade of expertise creating innovative and sustainable Diy solutions. His professional focus lies in merging traditional craftsmanship with modern manufacturing techniques, fostering designs that are both practical and environmentally conscious. As the author of diy, Safety Fic delves into the art and science of Safety Fic-making, inspiring artisans and industry professionals alike.
Education RMIT University
(Melbourne, Australia) Associate Degree in Design (Safety Fic) Focus on sustainable design, industry-driven projects, and practical craftsmanship. Gained hands-on experience with traditional and digital manufacturing tools, such as CAD and CNC software.
Nottingham Trent University
(United Kingdom) Bachelor’s in diyfastly.com and Product Design (Honors) Specialized in product design with a focus on blending creativity with production techniques. Participated in industry projects, working with companies like John Lewis and Vitsoe to gain real-world insights.
Publications and Impact
In diy, Safety Fic his insights on indoor design processes, materials, and strategies for efficient production. His writing bridges the gap between artisan knowledge and modern industry needs, making it a must-read for both budding designers and seasoned professionals.