

Installing a Ring contact sensor with screws is a simple yet effective way to enhance the security of your home. Whether you’re adding new sensors to doors, windows, or other entry points, knowing how to install them properly ensures reliable performance and peace of mind.
With the use of screws, you can securely mount the sensors in place, providing a stable connection to your Ring security system. In this guide, we’ll walk you through the step-by-step process of how to install ring contact sensor with screws, covering everything from gathering the necessary tools to positioning the sensors for optimal functionality.
By following these instructions, you’ll be able to fortify your home against potential intruders and enjoy the added convenience of remote monitoring and alerts provided by your Ring security system.
Importance of Home Security
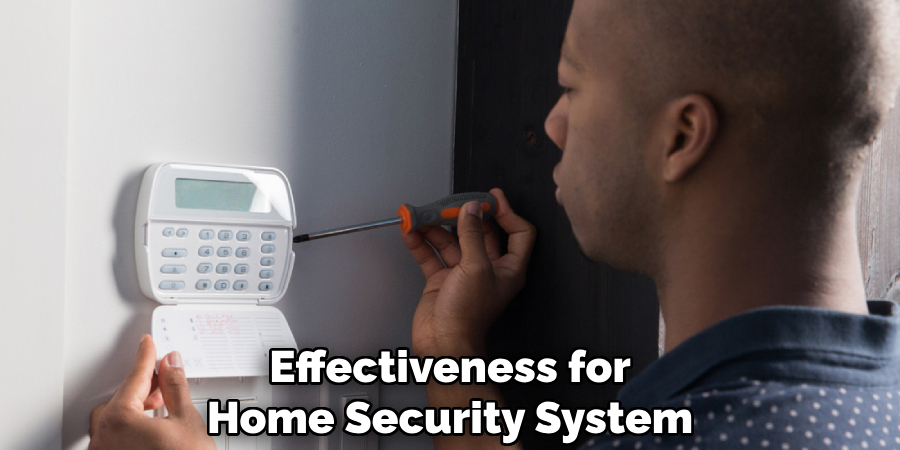
The importance of home security cannot be overstated. In today’s world, where safety concerns are paramount, ensuring the security of your home provides not just protection for your property and valuables, but also peace of mind for you and your loved ones.
A well-secured home deters potential intruders, reduces the risk of theft and vandalism, and can even lower insurance premiums. Furthermore, modern security systems, like Ring, offer remote monitoring capabilities, allowing homeowners to keep an eye on their property from anywhere in the world.
This level of vigilance and control is crucial in promptly addressing any security breaches and ensuring that help can be quickly dispatched when necessary. In essence, investing in home security is investing in the safety and well-being of your household.
Benefits of Screw Installation Method
Choosing the screw installation method for your Ring contact sensors offers several advantages over adhesive alternatives. First and foremost, screws provide a more secure and durable mounting option.
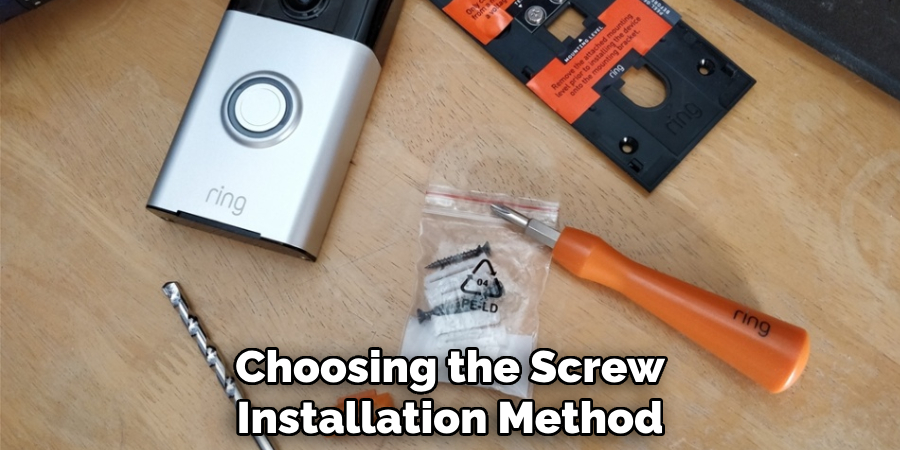
This is especially important in areas prone to high traffic or environmental factors such as humidity and temperature changes, which can weaken adhesive bonds over time. Screws ensure that your sensors stay firmly in place, reducing the risk of malfunctions due to shifting or falling.
Additionally, using screws for installation allows for more flexibility in positioning your sensors.
Unlike adhesive strips that might not adhere well to certain surfaces or limit your ability to reposition sensors without compromising the adhesive’s strength, screws can be easily adjusted or reinstalled in a new location if you decide to change your setup or move to a new home.
Another benefit of the screw installation method is its compatibility with a wider range of surfaces and materials. Whether you’re mounting sensors on wood, drywall, or even some types of metal, screws can securely anchor your devices where adhesives might fail.
This versatility ensures that you can enhance the security of your home without being constrained by the limitations of adhesive mounting options.
Lastly, the visual deterrence provided by visibly mounted sensors can be enhanced with screws. Potential intruders recognizing the effort and permanence of a screw-mounted sensor may deem a break-in attempt less likely to succeed, thereby acting as an additional layer of security.
Preparing for Installation
Before beginning the installation process, it’s essential to prepare and gather all the necessary tools and materials. This preparation ensures a smooth installation experience and helps avoid any interruptions.

- Identify the Installation Locations: Decide where you want to place your Ring contact sensors. Common areas include front and back doors, windows, and any other potential entry points into your home. Consider locations that are not only strategic for security purposes but also accessible for installation.
- Gather Tools and Materials: You will need a drill, a screwdriver, and possibly a level to ensure your sensors are mounted straight. The Ring contact sensor package typically includes screws and anchors, but verify this ahead of time. If you’re drilling into drywall, wooden surfaces, or masonry, make sure you have the appropriate drill bits and anchors.
- Check the Sensor Alignment: Before drilling any holes, it’s crucial to check that the primary sensor and its magnet align correctly when the door or window is closed. Misalignment can result in false alarms or failure to detect actual intrusions.
- Plan Cable Paths: If your sensor setup requires wiring (for power or integration with other systems), plan the route for any cables to run discreetly and safely. While not applicable to all Ring sensor models, some setups might require this consideration.
- Read the Installation Guide: Though this guide provides a comprehensive overview, reading the installation guide that comes with your Ring contact sensor is recommended. It may include model-specific instructions or tips that can assist in the installation process.
By carefully preparing for the installation of your Ring contact sensors with screws, you ensure that the process goes as smoothly as possible, leading to a more secure and reliable home security system.
Gathering Necessary Tools and Materials
Once you’ve identified the locations for your Ring contact sensors and planned for any necessary cable paths, it’s time to gather all the tools and materials you’ll need for a successful installation.
Ensuring you have everything ready before starting the installation process can save you time and prevent any unnecessary interruptions. Here is a list of essential tools and materials you should have on hand:
- Drill: A power drill will be necessary for making holes in the wall for the screws. Ensure you have a fully charged battery if using a cordless model.
- Drill Bits: You’ll need drill bits suitable for the material you’re drilling into. For example, wood drill bits for wooden surfaces, masonry bits for brick or concrete, and high-speed steel bits for metal surfaces.
- Screwdriver: A screwdriver is needed for driving the screws into the drilled holes. A set with interchangeable heads is advantageous as it can adapt to various screw sizes and types.
- Screws and Wall Anchors: These are typically included with your Ring contact sensor package. Wall anchors are essential for ensuring a secure fit in drywall or masonry.
- Level: To make sure your sensors are installed straight, which is crucial for optimal operation, having a small level on hand is helpful.
- Tape Measure: A tape measure is useful for measuring the distance between the sensor and its magnet to ensure correct placement.
- Pencil: To mark the drill points on the wall accurately before drilling.
- Safety Equipment: Always remember to wear safety glasses to protect your eyes during drilling, and a dust mask if you’ll be drilling into masonry or other materials that could generate harmful dust.
- Stud Finder (Optional): If you’re drilling into walls, using a stud finder can help locate studs for more secure anchoring of the sensors.
With these tools and materials prepared, you’re now ready to proceed with the physical installation of your Ring contact sensors, ensuring they’re well-placed to contribute to the safety and security of your home.
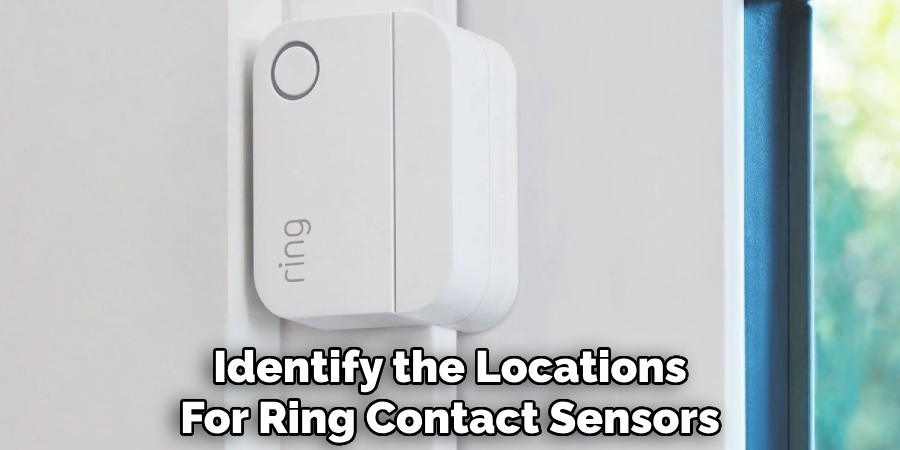
Understanding Sensor Placement
The correct placement of your Ring contact sensors is crucial for ensuring the effectiveness of your home security system. When sensors are properly positioned, they maximize the protection of your home by detecting any unauthorized openings of doors and windows.
Here are essential considerations to keep in mind when determining the optimal locations for your sensors:
- Entry Points: The primary focus should be on all potential entry points into your home. This includes not only front and back doors but also ground-level windows, basement entryways, and garage doors. These areas are the most likely routes for potential intruders.
- Environmental Factors: Consider the environmental conditions around the installation sites. Avoid placing sensors near HVAC vents, heaters, or in direct sunlight, as extreme temperature changes can affect sensor performance.
- Reachability: Sensors should be placed out of reach of small children and pets to prevent tampering or accidental damage. However, they should still be accessible for battery changes or maintenance.
- Secondary Areas: Don’t overlook areas that might seem less obvious, such as basement windows, attic vents, or pet doors. Though less commonly used as entry points, securing these can provide an additional layer of protection.
- Visibility: While the visual deterrence of a sensor can be beneficial, in some cases, it may be preferable to install sensors in a more discreet manner, depending on your security strategy and aesthetic preferences.
By carefully considering each of these points, you can identify the most strategic locations for your Ring contact sensors. This ensures comprehensive coverage of your home, reducing the likelihood of security breaches and providing peace of mind.
Disarming Ring Alarm System
Disarming your Ring Alarm system is a simple process that temporarily deactivates your sensors, allowing you to move freely within your home without triggering an alarm.
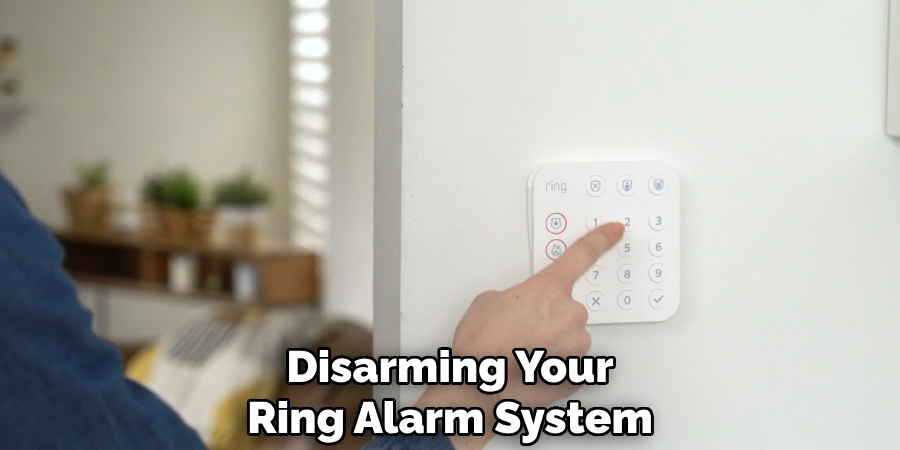
This is particularly useful when you’re staying in, have guests over, or need to open windows and doors for ventilation. Here’s how to safely disarm your system:
- Via the Ring App: The most convenient way to disarm your system is through the Ring app on your smartphone or tablet. Open the app, and you’ll see a dashboard with the option to “Disarm,” “Home,” and “Away.” Tap “Disarm” to deactivate the sensors. You’ll need your four-digit access code if you have one set up for additional security.
- Using the Keypad: If you have a Ring Alarm Keypad, you can disarm your system by pressing the “Disarm” button, which is typically represented by a shield icon. Enter your access code if prompted. The keypad will confirm the system is disarmed with a visual or auditory signal.
- Guest Access: If you’re expecting visitors or have household members who need occasional access, you can create guest codes. This allows them to disarm the system without giving them your main access code. Manage guest codes through the Ring app under the ‘Users’ section.
- Scheduled Disarm: For added convenience, you can schedule times for your Ring Alarm system to automatically disarm and rearm. This is useful for routines, such as leaving for work or school, ensuring your home is always protected when you’re away. Set up schedules through the Ring app in the settings menu.
Remember, while your system is disarmed, your home is not protected by the alarm sensors. However, your Ring cameras and doorbells will continue to function, providing video surveillance and notifications of activity at your doorstep or within their field of view.
Always rearm your system when you leave your home or retire for the night to maintain the highest level of security.
10 Methods How to Install Ring Contact Sensor with Screws
1.Gathering the Necessary Tools and Materials:
Before you begin the installation process, gather all the tools and materials you’ll need. This includes the Ring contact sensor, screws (usually provided with the sensor), a screwdriver (typically Phillips-head), a pencil or marker for marking screw holes, and a tape measure or ruler for precise positioning.
2.Choosing the Installation Location:
Carefully consider where you want to install the contact sensor. Ideally, it should be placed on the door or window frame, with the sensor aligned with the corresponding magnet on the door or window itself.
This ensures that the sensor is triggered when the door or window is opened or closed. Take measurements to determine the exact placement, ensuring that the sensor and magnet are aligned properly when the door or window is closed.
3.Preparing the Installation Area:
Once you’ve chosen the installation location, prepare the area by cleaning the surface where the sensor will be mounted. Use a mild detergent or rubbing alcohol to remove any dirt, grease, or residue that could affect adhesion. Ensure the surface is dry before proceeding with the installation.
4.Positioning the Sensor and Magnet:
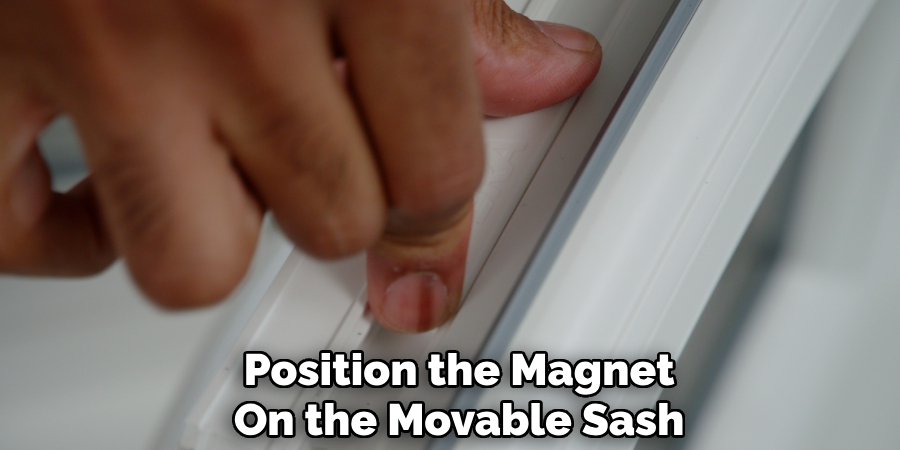
Place the contact sensor and its corresponding magnet in the desired location, ensuring that they are aligned properly.
The sensor should be mounted on the door or window frame, while the magnet should be mounted on the door or window itself, within close proximity to the sensor. Position them so that they are parallel and within the specified distance for proper operation (typically within ½ inch to 1 inch).
5.Marking Screw Holes:
Using a pencil or marker, mark the locations of the screw holes on the surface where the sensor and magnet will be mounted. This will serve as a guide for drilling pilot holes and securing the screws during the installation process. Ensure that the marks are aligned accurately and evenly spaced to prevent any misalignment or issues with mounting.
6.Drilling Pilot Holes:
With the screw hole locations marked, use a drill with an appropriate drill bit to create pilot holes in the mounting surface. The size of the drill bit should match the diameter of the screws provided with the contact sensor. Be sure to drill the pilot holes to the appropriate depth to accommodate the length of the screws without damaging the surface.
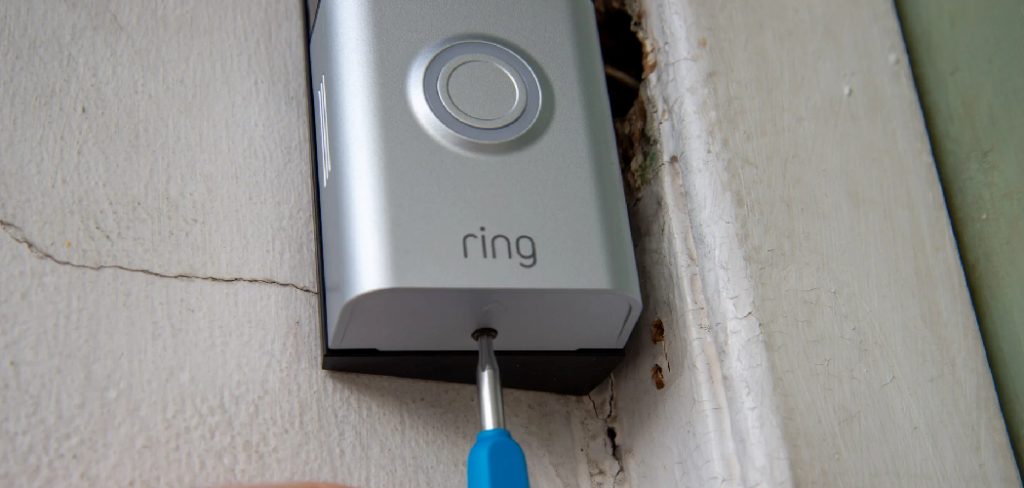
7.Attaching the Sensor and Magnet with Screws:
Once the pilot holes are drilled, it’s time to attach the contact sensor and magnet to the mounting surface using screws. Position the sensor and magnet over the pilot holes, aligning them with the screw holes marked earlier.
Insert the screws through the mounting holes on the sensor and magnet, then tighten them securely using a screwdriver. Ensure that the sensor and magnet are firmly attached to the surface and that there is no wobbling or movement.
8.Testing Sensor Functionality:
After installing the contact sensor and magnet, it’s essential to test their functionality to ensure they are working correctly.
Open and close the door or window to trigger the sensor and verify that it sends alerts to your Ring security system promptly. Check for any issues with alignment or sensitivity and make any necessary adjustments to ensure reliable performance.
9.Securing Wiring (if applicable):
If the contact sensor requires wiring for power or connectivity, ensure that the wiring is securely routed and protected. Use cable clips or adhesive cable organizers to secure the wiring along the surface and prevent it from becoming tangled or damaged.
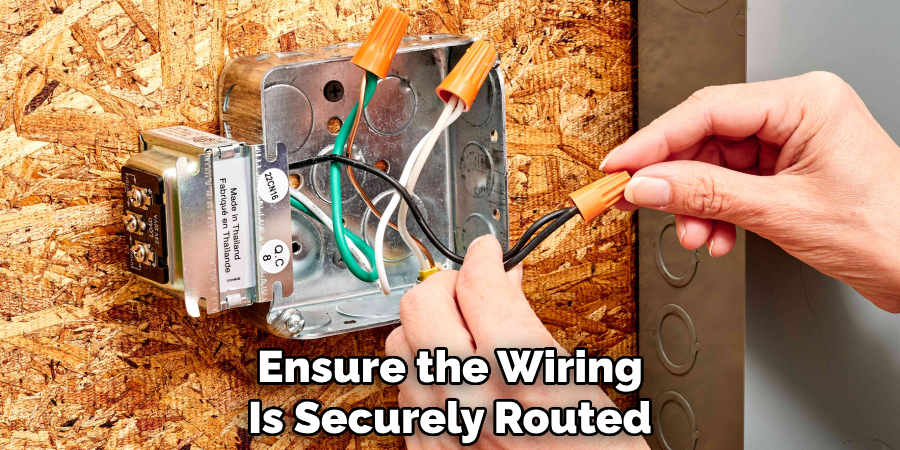
Ensure that the wiring does not interfere with the operation of the sensor or obstruct the movement of the door or window.
10.Final Adjustments and Troubleshooting:
Once the contact sensor is installed, make any final adjustments or troubleshooting as needed to ensure optimal performance. Check for proper alignment between the sensor and magnet, adjust sensitivity settings if necessary, and address any issues with connectivity or alerts.
Test the sensor again to confirm that it is functioning correctly and providing reliable security monitoring for your home.
Conclusion
In conclusion, mastering the installation of Ring contact sensors with screws empowers homeowners to enhance their home security effortlessly.
By following the step-by-step guide outlined above, individuals can confidently mount sensors in optimal locations, ensuring comprehensive coverage and reliable detection capabilities throughout their property.
As the sensors are securely attached and integrated into the Ring alarm system, take pride in the heightened level of protection and peace of mind that comes with knowing your home is safeguarded against intruders. Remember, regular testing and maintenance are essential to ensure the continued effectiveness of your Ring contact sensors.
Thanks for reading, and we hope this has given you some inspiration on how to install ring contact sensor with screws!
About
Safety Fic is a distinguished figure in the world of Diy design, with a decade of expertise creating innovative and sustainable Diy solutions. His professional focus lies in merging traditional craftsmanship with modern manufacturing techniques, fostering designs that are both practical and environmentally conscious. As the author of diy, Safety Fic delves into the art and science of Safety Fic-making, inspiring artisans and industry professionals alike.
Education RMIT University
(Melbourne, Australia) Associate Degree in Design (Safety Fic) Focus on sustainable design, industry-driven projects, and practical craftsmanship. Gained hands-on experience with traditional and digital manufacturing tools, such as CAD and CNC software.
Nottingham Trent University
(United Kingdom) Bachelor’s in diyfastly.com and Product Design (Honors) Specialized in product design with a focus on blending creativity with production techniques. Participated in industry projects, working with companies like John Lewis and Vitsoe to gain real-world insights.
Publications and Impact
In diy, Safety Fic his insights on indoor design processes, materials, and strategies for efficient production. His writing bridges the gap between artisan knowledge and modern industry needs, making it a must-read for both budding designers and seasoned professionals.