

Are you looking for an easy way to reduce porch security risks and increase the safety of your home? Installing a Ring Peephole Camera is the perfect solution. This smart doorbell camera lets you see, hear, and speak to whoever is at your doorstep right from your smartphone or tablet.
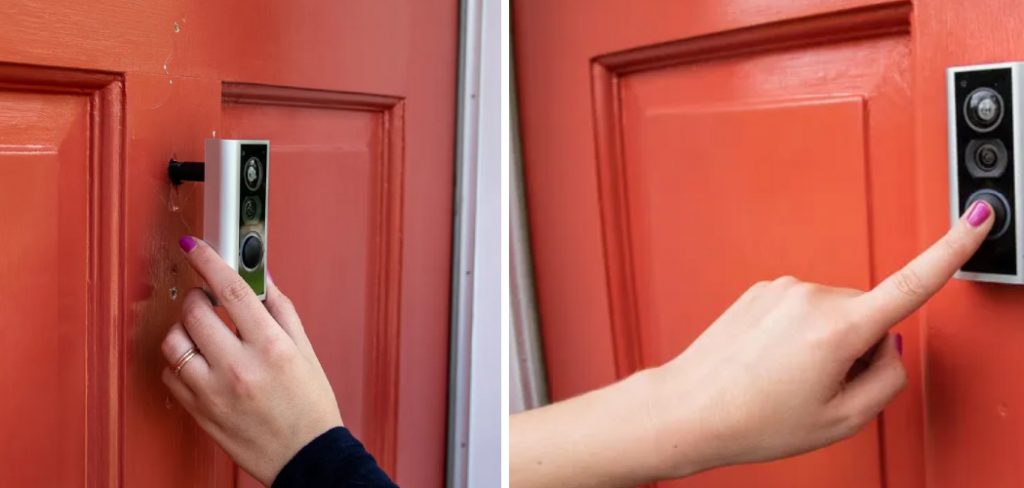
Simply secure it over any existing peephole in minutes— no wiring or drilling is required! We’ll walk you through each step on how to install ring peephole camera of installation so you can “answer” the door wherever you are.
Needed Materials
Given below is the list of materials that you will need to follow this tutorial:
- A Ring Peephole Camera
- A Screwdriver
- The Ring App (Installed on Your Smartphone or Tablet)
- Batteries (If Required)
11 Step-by-step Guidelines on How to Install Ring Peephole Camera
Step 1: Remove Your Old Door Viewer
The first step is to remove your old door viewer or peephole. You can do this by using a screwdriver to unscrew the two screws holding it in place. Once removed, you will have access to the hole in which your ring device will be installed. You can discard the old door viewer or keep it in case you need to reinstall it in the future. It’s always good to keep important parts of your home. But in this case, you won’t need it.
Step 2: Preparing Your Ring Peephole Camera
Before installing your ring device, make sure you have all the necessary components. This includes the base plate, backplate, security screws, and battery pack (if applicable).
You can find these components inside the box that came with your ring device. If you have a battery pack, insert the batteries before proceeding to the next step. It’s important to have your ring device ready before moving on. It will save you time and make the installation process smoother.
Step 3: Attaching the Base Plate
Take the base plate and align it with the hole in your door. Make sure that the small tab on the top of the base plate is pointing toward your door frame. Once aligned, use a screwdriver to secure it in place by tightening the screws. You may need to use force when screwing it in.
It’s important to make sure the base plate is secured tightly. This will ensure that your ring device stays in place. This base plate is necessary to mount your ring device on and it also helps to cover any gaps or imperfections around the hole.
Step 4: Attaching the Backplate
Next, take the backplate and align it with the base plate. You will notice that there are two small tabs on the backplate that should fit into the slots on the base plate. Once aligned, push down firmly until it snaps into place.
It’s important to make sure that the backplate is securely attached to the base plate. But don’t worry, if you need to remove it in the future, you can do so by pulling it from the bottom of the backplate. It should come off easily.
Step 5: Installing the Security Screws
To prevent anyone from tampering with your ring device, you will need to install the security screws. These are provided in the box and can be found inside the backplate. Using a screwdriver, tighten both security screws on each side of the backplate.
You may need to apply some force to get them in securely. This will ensure that your ring device is protected and won’t be easily removed by others. it’s an important step to take in terms of security.
Step 6: Installing the Ring App
To set up your ring device, you will need to install the Ring app on your smartphone or tablet. The app is available for both iOS and Android devices. Once installed, open the app and create an account if you don’t already have one. If you do have an account, simply log in and follow the instructions to add a new device. But don’t worry, the app will guide you through each step.
Step 7: Adding a New Device
Inside the Ring app, select “Set Up a Device” from the menu. Then select “Doorbells” as your device type. Next, scan the QR code found on the back of your ring device. This will connect your device to your account and allow you to access its features.
If the QR code is damaged or unreadable, you can also manually enter the device ID found on the back of your ring device. You can also name your device for easier identification. It’s important to make sure that your device is connected to a stable Wi-Fi network.
Step 8: Connecting to Wi-Fi
Your ring device will need to be connected to a stable Wi-Fi network in order to function properly. Follow the instructions on the app to connect your device to your home Wi-Fi network.

You may need to enter your Wi-Fi password for this step. Once connected, you will be prompted to test your device and make sure everything is working properly. It may take a few minutes for your device to connect to the app. You can also customize your device settings and notifications through the app.
Step 9: Customizing Your Settings
Now it’s time to customize your ring device settings according to your preferences. You can choose how sensitive you want the motion detection feature to be, adjust the volume of the speaker and microphone, and set up alerts for when someone rings your doorbell.
Take your time to explore the different options and adjust them according to your needs. It’s important to make sure you are satisfied with the settings before proceeding.
Step 10: Securing Your Ring Device
Once your device is connected to the app and set up, you can secure it in place. Simply push down on the tab at the bottom of the backplate until it locks into place. You can also tighten the security screws a bit more if necessary.
This will ensure that your ring device stays in place and is protected from theft or tampering. You can now test out your device by pressing the doorbell button and checking for alerts on your smartphone or tablet.
Step 11: Testing Your Ring Device
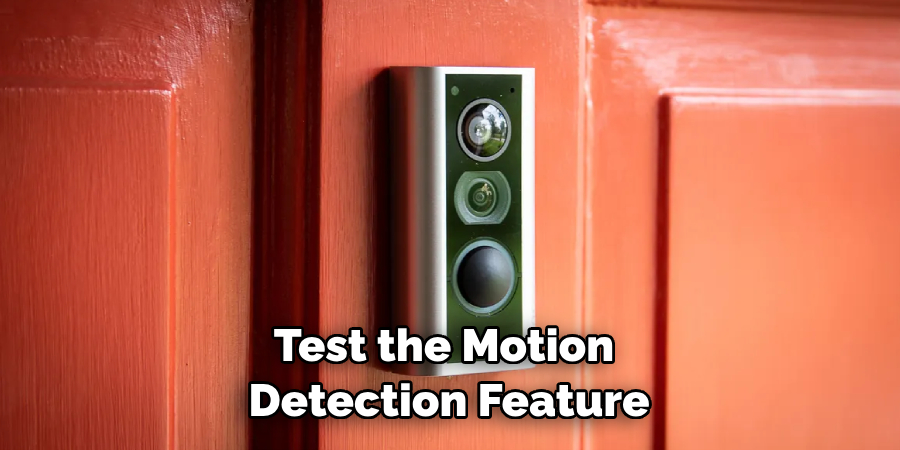
Congratulations, you have successfully installed your ring peephole camera! Now it’s time to test it out. Have someone come to your doorstep or use the app’s “Live View” feature to see if everything is working properly. You can also test the motion detection feature by walking past your door and seeing if you receive an alert on your phone. If everything is working as expected, then you’re all set!
You now have a fully functioning ring peephole camera to help you “answer” the door wherever you are. So go ahead and enjoy the added convenience and security of having a Ring Peephole Camera installed on your door. And remember, you can always refer back to these guides on how to install ring peephole camera if you ever need to reinstall or troubleshoot your device. Stay safe and connected with Ring!
Do You Need to Use Professionals?
Installing a ring peephole camera is a relatively simple process that can be done by anyone with basic household tools. However, if you’re not comfortable with DIY projects or simply don’t have the time, you can always hire a professional to install your device for you. Ring offers professional installation services for an additional fee. This may be a good option if you want to ensure that your device is installed correctly and securely.
Keep in mind that professional installation may also come with a warranty or guarantee for their work. Consider your options and choose what works best for you. With a little effort, you can enjoy all the benefits of having a ring peephole camera in your home. So don’t wait any longer, install your Ring Peephole Camera today and join the millions of homeowners who have found peace of mind with this innovative device. Happy installing!
Frequently Asked Questions
Q1: What if I Don’t Have a Doorbell?

A1: If you don’t have an existing doorbell, you can still install the ring peephole camera. Simply use the included drill bit to create a hole for the base plate and follow the same steps as above. Alternatively, you can also purchase the Ring Peephole Cam Battery which does not require any drilling or wiring.
Q2: Can I Install the Ring Peephole Camera on My Apartment Door?
A2: Yes, as long as your landlord approves and there are no regulations prohibiting the installation of doorbell cameras in your building. You may also want to inform your neighbors about the installation to avoid any misunderstandings or concerns.
Q3: Can I Change the Batteries on My Ring Peephole Camera?
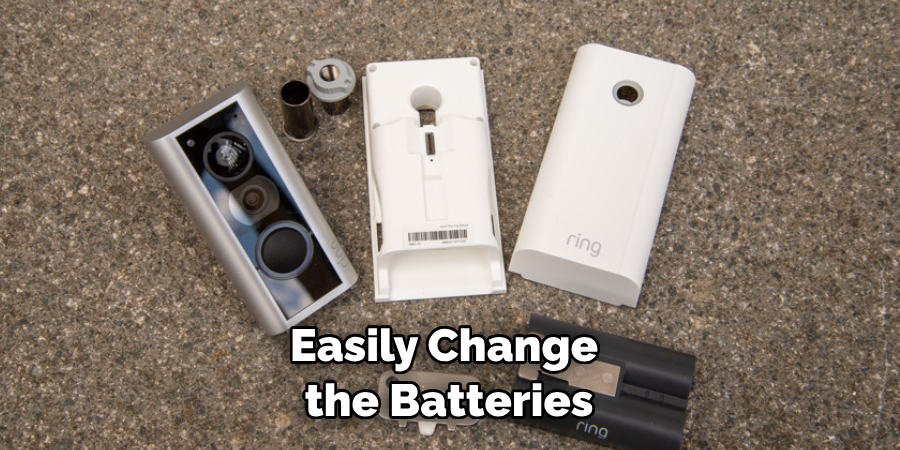
A3: If you have purchased the battery-powered version of the ring peephole camera, you can easily change the batteries when they run low. Simply remove the backplate and replace the batteries. You may want to consider purchasing rechargeable batteries for convenience and cost savings.
Q4: Can I Access My Ring Peephole Camera Footage Remotely?
A4: Yes, you can access your Ring device footage remotely through the Ring app. Simply open the app and select your device to view live footage or recorded events. You can also adjust your settings or receive notifications when someone rings your doorbell or when motion is detected.
Conclusion
In conclusion, installing a Ring Peephole Camera is an important way to ensure the safety of your home or business. With Ring Video Doorbells, you can keep track of who is at the door anytime and anywhere. Not only are these surveillance cameras convenient and easy to install, but they also offer peace of mind knowing that your property is being monitored.
So get started on how to install ring peephole camera! Let Ring help you safely monitor your property from inside or out with their secure and easy-to-use technology. You’ll be glad when you have the peace of mind of knowing that you’ve kept your home safe from intruders and theft.
About
Safety Fic is a distinguished figure in the world of Diy design, with a decade of expertise creating innovative and sustainable Diy solutions. His professional focus lies in merging traditional craftsmanship with modern manufacturing techniques, fostering designs that are both practical and environmentally conscious. As the author of diy, Safety Fic delves into the art and science of Safety Fic-making, inspiring artisans and industry professionals alike.
Education RMIT University
(Melbourne, Australia) Associate Degree in Design (Safety Fic) Focus on sustainable design, industry-driven projects, and practical craftsmanship. Gained hands-on experience with traditional and digital manufacturing tools, such as CAD and CNC software.
Nottingham Trent University
(United Kingdom) Bachelor’s in diyfastly.com and Product Design (Honors) Specialized in product design with a focus on blending creativity with production techniques. Participated in industry projects, working with companies like John Lewis and Vitsoe to gain real-world insights.
Publications and Impact
In diy, Safety Fic his insights on indoor design processes, materials, and strategies for efficient production. His writing bridges the gap between artisan knowledge and modern industry needs, making it a must-read for both budding designers and seasoned professionals.