
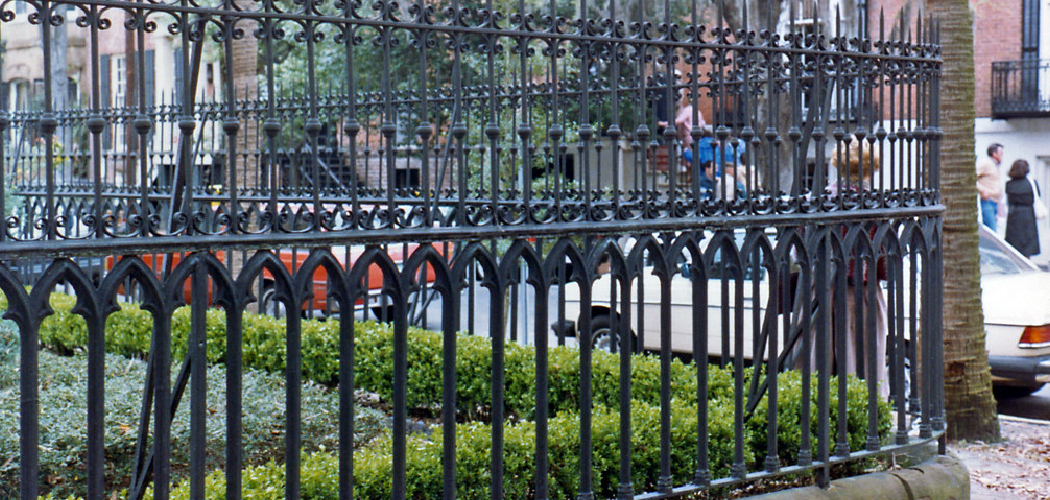
Installing a rod iron fence can enhance the aesthetic appeal and security of your property. This type of fencing is known for its durability and classic design, making it a popular choice for many homeowners. Whether you’re looking to define boundaries, protect your garden, or simply add a touch of elegance, a rod iron fence can meet your needs.

In this guide on how to install rod iron fence, we will walk you through the step-by-step process of installing a rod iron fence, ensuring you achieve professional results without the need for hiring a contractor. Let’s get started on creating a beautiful and secure perimeter for your home.
Why Choose Rod Iron Fencing?
Before diving into the installation process, it’s important to understand why rod iron fencing is a popular choice among homeowners. Here are some of the benefits of installing a rod iron fence:
Durability:
Rod iron fences are made from strong and durable materials that can withstand harsh weather conditions, making them an excellent long-term investment.
Security:
Due to its sturdy construction, a rod iron fence can act as a deterrent to potential intruders, providing an added layer of security for your property.
Aesthetics:
Rod iron fences have a classic and elegant design that can enhance the overall look of your property. They can also be customized to suit your personal style and preferences.
Low Maintenance:
Once installed, rod iron fences require minimal maintenance, making them a hassle-free option for homeowners.
Tools and Materials Needed
Before starting the installation process, you will need to gather the necessary tools and materials. Here’s a list of what you’ll need:
Measuring Tape:
This is to ensure accuracy in determining the size and placement of your fence.
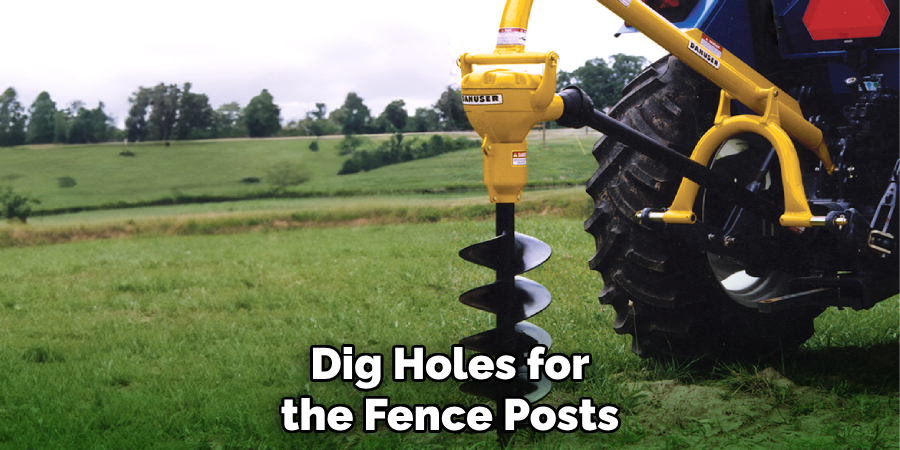
Post Hole Digger:
To dig holes for the fence posts.
Level:
To ensure that your fence is straight and even.
Drill and Screws:
This is for attaching panels and gates to the posts.
Concrete Mix:
To secure the posts in place.
Gravel or Quick-Drying Cement:
This is to fill in any gaps around the posts.
8 Step-by-step on How to Install Rod Iron Fence
Now that you have all the necessary tools and materials let’s dive into the installation process:
Step 1: Measure and Mark
The first step in installing your rod iron fence is to measure and mark the area where the fence will be placed. Start by using your measuring tape to determine the total length of the fence line. Mark the location of each fence post with spray paint or stakes, ensuring they are evenly spaced according to the manufacturer’s recommendations.
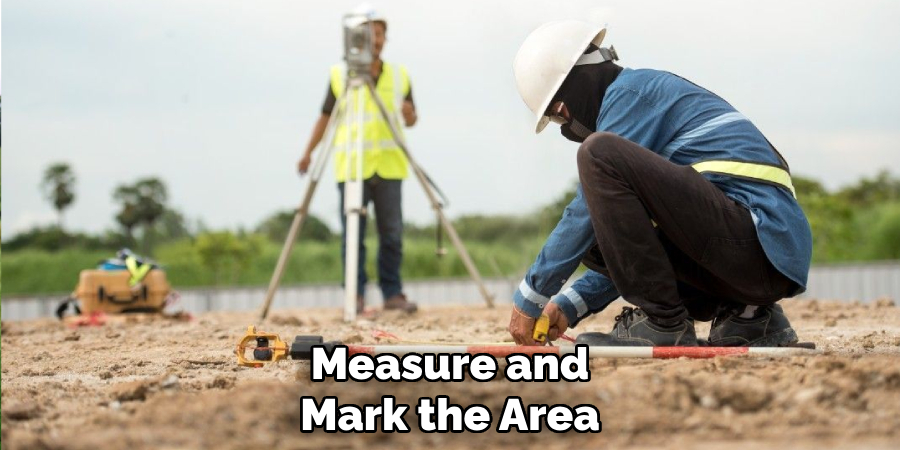
It’s important to take accurate measurements and maintain consistent spacing to ensure the fence panels fit properly and the overall installation looks uniform. Double-check your measurements and markings before moving on to the next step to avoid any issues during the installation process.
Step 2: Dig Post Holes
Once you have measured and marked the positions for your posts, the next step is to dig the post holes. Using a post-hole digger or an auger, dig each hole to a depth of at least one-third the length of the fence post. Typically, this will be around 2-3 feet deep, depending on the height of your fence. The diameter of each hole should be about three times the width of the post to allow for adequate support.
Ensure that the holes are straight and uniform in depth. You may want to use a piece of string or a level to check the alignment from one post hole to the next, ensuring that they form a straight line. Additionally, it’s important to consider the local frost line when digging, as the posts need to be set below this line to prevent shifting during freeze-thaw cycles.
Step 3: Set the Posts
Once all the post holes are dug, it’s time to set the posts. Place a few inches of gravel or quick-drying cement at the bottom of each hole for added support. Position each post in its designated spot and use a level to ensure it is straight and plumb. This step is crucial, as any misaligned posts will result in an uneven fence.
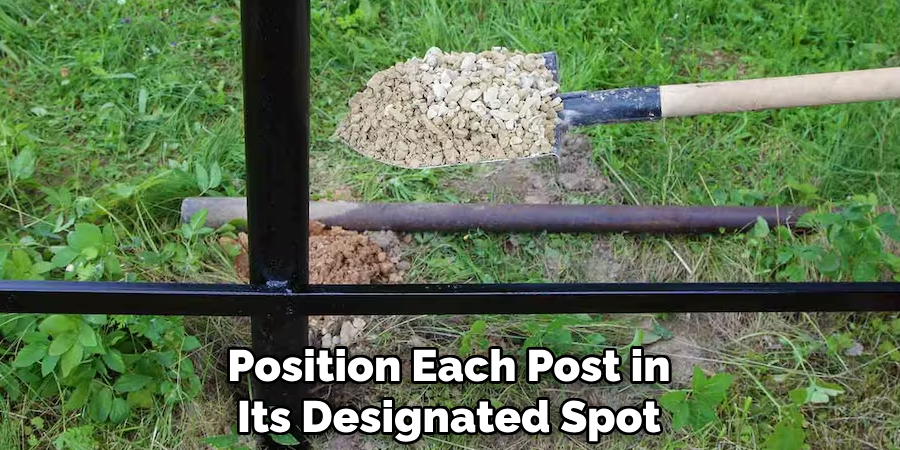
Next, fill the remaining space around each post with concrete mix, ensuring that there are no air pockets. Use a trowel to smooth out the surface of the concrete and double-check that the posts are still straight and evenly spaced. Allow the concrete to dry completely before moving on to the next step.
Step 4: Attach Panels
With the posts securely in place and the concrete dried, the next step is to attach the rod iron fence panels to the posts. Begin by positioning the first panel against the set posts aligning the mounting brackets with the pre-drilled holes in the posts. It may be helpful to have an extra pair of hands for this step to hold the panel in place while you secure it.
Using a drill and screws, attach the panel to the post by driving the screws through the mounting brackets and into the post. Ensure that the panel is level and properly aligned before tightening the screws completely. Repeat this process for each panel, working your way along the fence line.
Step 5: Add Gates
Adding gates to your rod iron fence not only provides access points but also enhances the overall functionality and security of the enclosure. Begin by choosing gate locations that are convenient for entry and exit, ensuring they align with your fence’s layout. Measure the width of the openings where the gates will be installed and verify that the gate frames match these dimensions.
Start by installing the gate posts, which should be sturdier than the regular fence posts to support the weight of the gates. Dig the post holes following the same method used for the fence posts, but consider making them slightly deeper and wider for added stability. Set the gate posts in concrete and ensure they are level and plumb. Allow the concrete to fully cure before proceeding with hanging the gates.
Step 6: Hang Gates
Once the gate posts are set, it’s time to hang the gates. Begin by attaching hinges to the gate frame, making sure they are evenly spaced and aligned with the post. Next, attach the other side of the hinge to the gate post using screws.
With the hinges securely attached, lift the gate and position it between the two posts. Adjust as needed so that there is an even gap on all sides of the gate. Once in place, secure the hinges to the post by driving screws through them into the wood or concrete.
Step 7: Finishing Touches
With the main structure of your rod iron fence complete, it’s time to focus on the finishing touches that will enhance both the appearance and longevity of your fence. Start by inspecting the entire fence for any loose screws or fittings and tighten them as necessary. Check that all panels and gates operate smoothly and make adjustments if needed.
Next, consider applying a protective coating or rust-resistant paint to the fence to prevent corrosion and maintain its aesthetic appeal. This is especially important if you live in an area with harsh weather conditions. Clean the surface of the fence thoroughly before applying any paint or coating to ensure proper adhesion.
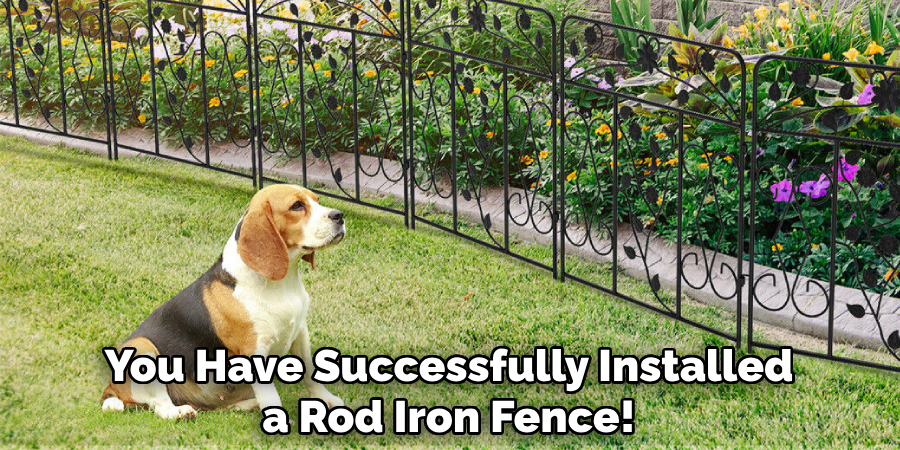
Step 8: Enjoy Your New Fence
Congratulations, you have successfully installed a rod iron fence! With proper maintenance and care, your new fence will last for years to come. Remember to regularly inspect the fence for any signs of damage or wear and address them promptly to prevent further issues. Now it’s time to sit back, relax, and enjoy the added security, privacy, and curb appeal that your new fence provides.
Following these steps on how to install rod iron fence and taking the time to properly install your rod iron fence will not only ensure a sturdy and attractive installation but also save you time and money in the long run. Remember to always follow manufacturer guidelines and consult with a professional if needed. With a little effort and attention to detail, your new fence will be a valuable addition to your home for years to come. Happy fencing!
Frequently Asked Questions
Q: How Long Does It Take to Install a Rod Iron Fence?
A: The time it takes to install a rod iron fence can vary depending on the size of the project and any potential complications. On average, it can take anywhere from a few days to a couple of weeks to complete the installation process. It’s important to properly plan and allocate enough time for each step of the installation.
Q: Do I Need Any Special Tools or Equipment?
A: Yes, you will need some special tools and equipment to install a rod iron fence. These may include a post-hole digger, level, concrete mix, screws, hinges, and a drill. It’s also recommended to have an extra pair of hands available for certain steps in the process.
Q: Can I Install a Rod Iron Fence Myself?
A: While it is possible to install a rod iron fence yourself, it can be a complex and time-consuming process. It’s important to have some background knowledge and experience in fence installation before attempting this project. Hiring a professional may be the best option to ensure a successful and efficient installation. However, if you are confident in your skills and follow all safety precautions, installing a rod iron fence can be a rewarding DIY project.
Conclusion
Installing a rod iron fence can be a rewarding project that enhances the security, privacy, and aesthetic appeal of your property. By carefully planning each step on how to install rod iron fence, gathering the necessary tools and materials, and following a systematic approach, you can achieve a professional-looking result, even if you’re tackling the project as a DIY enthusiast. Remember that attention to detail and patience are key to ensuring a sturdy and durable installation.
Regular maintenance will also be crucial in preserving the beauty and functionality of your fence for many years. Whether you choose to take on the installation yourself or hire a professional, the end result will undoubtedly add value and charm to your home. Happy fencing!