

Are you looking for an easy and affordable way to baby-proof your home? Safety 1st adhesive cabinet and drawer latches are a great option. They provide an effective solution that leaves no marks or damage, all at a fraction of the cost of traditional hardware solutions.
Protecting your family, especially young children, is of the utmost importance. To provide additional safety for little ones around the home, consider installing Safety 1st Adhesive Cabinet and Drawer latches. These easy-to-install latches will help ensure that dangerous items are kept from curious hands while providing peace of mind for parents.
In this post, we’ll discuss choosing the right products for your specific needs and efficient installation techniques so you can start protecting your home today! Keep reading to learn more about how to install safety 1st adhesive cabinet and drawer latches.
What Will You Need?
Before you begin installing the latches, it’s important to make sure you have the right tools and supplies. Here is a list of what you’ll need:
- Safety 1st adhesive cabinet and drawer latches
- Drill or screwdriver (if needed)
- Pencil or marker (for marking drill holes if necessary)
- Clean cloth
- Measuring tape
- Safety goggles
Once you have gathered the necessary supplies for installation, it’s time to begin!
10 Easy Steps on How to Install Safety 1st Adhesive Cabinet and Drawer Latches
Step 1. Choosing The Right Product
When purchasing Safety 1st adhesive cabinet and drawer latches, you will have several options. Various options are available depending on the type of surface or door you need to secure. Try the adhesive latch if you are securing a smooth surface such as plastic or metal. Select a screw-in latch for wooden surfaces, as it will give your home additional protection.
Step 2. Measuring and Marking
Once you’ve chosen the right product for your needs, it’s time to measure and mark where the latch should go. Using a measuring tape, ensure the latch is exactly the right distance from the edge of the cabinet or drawer. Mark this location with a pencil or marker, then double-check your measurements before you drill.

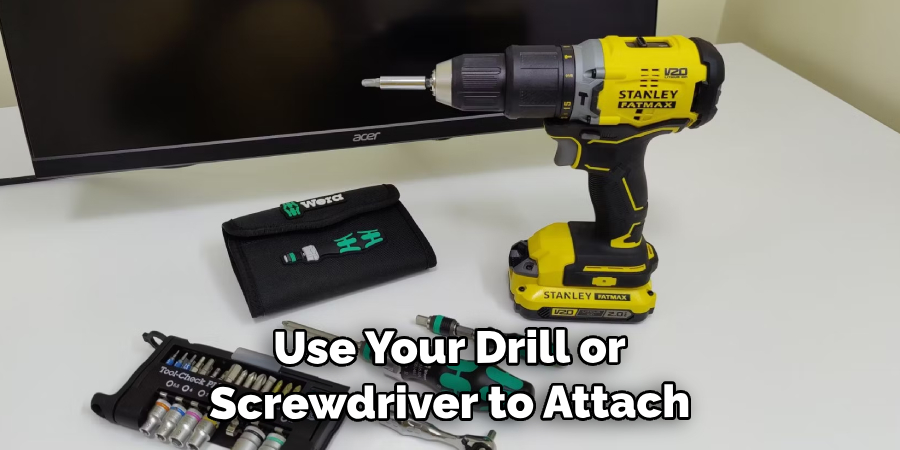
Step 3. Drilling (if applicable)
If you are using a screw-in latch, you must drill holes into your door or cabinet where the screws will go. Put on your safety goggles and use a drill or screwdriver to make the holes. Make sure you double-check your measurements before drilling!
Step 4. Installing Adhesive Strips
If you are using an adhesive latch, you must install the adhesive strips that come with the product. Start by cleaning off the surface where the latch will be installed. Once the surface is clean, peel off the adhesive strips and attach them to the back of the latch.
Step 5. Attaching The Latch
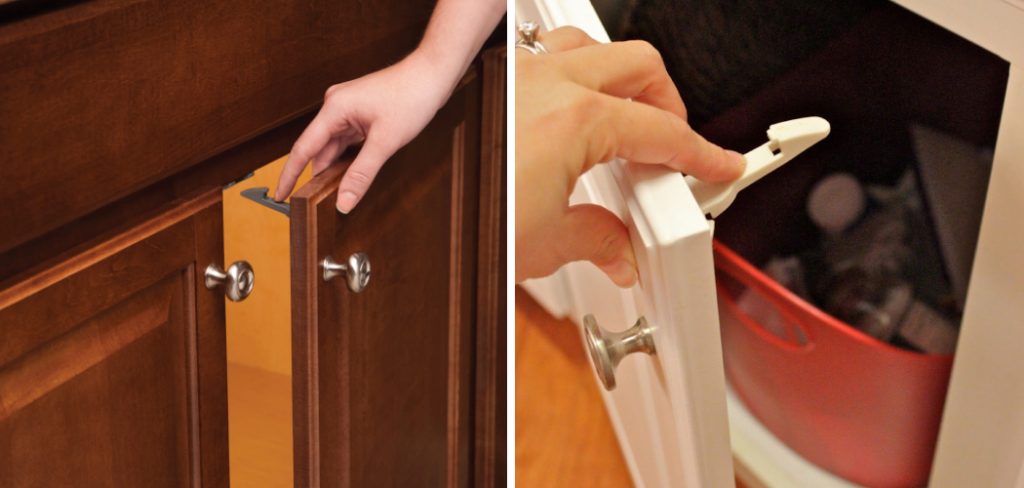
Once you have attached your adhesive strips, it’s time to attach your safety 1st latch. Place it on the marked area and press firmly for a few seconds. This will ensure a strong bond between the latch and the surface it is attached to.
Step 6. Testing The Latch
It’s important to ensure your latch is properly secured before letting your child near it. Test out the latch by gently tugging it to ensure it stays firmly in place. If everything looks secure, then you can move on to the next step.
Step 7. Attaching The Latches To The Door or Drawer
Depending on the type of latch you are using, there may be additional steps for attaching it to your door or drawer. For an adhesive latch, make sure that the edges of the latch are firmly secured to your surface. If you use a screw-in latch, use your drill or screwdriver to attach the screws that came with the product. Make sure that these are tight and secure before moving on.
Step 8. Final Inspection
Once the latches have been installed, it’s time to do a final inspection. Make sure that all of the screws are tight and secure and that the latch is properly attached to the cabinet or drawer. If everything looks good, you can move on to the next step.
Step 9. Cleaning
Before you are finished installing your Safety 1st latches, it’s important to clean up any debris or dust that may have been created. Use a damp cloth to remove dirt or sawdust from the area. Be careful not to damage the surface of your door or cabinet.
Step 10. Admire Your Handiwork!
Once all of the steps have been completed, you can stand back and admire your handiwork! Your Safety 1st adhesive cabinet and drawer latches are now installed and ready to provide additional protection for your family.
Installing Safety 1st adhesive cabinet and drawer latches is an affordable and easy way to baby-proof your home. With only a few steps, you can provide additional safety for your family without any damage or hassle. Why wait? Start protecting your home today!
5 Additional Tips and Tricks
- Preparation is Crucial: Before installing the Safety 1st adhesive cabinet and drawer latches, ensure that the surface where the adhesive will be applied thoroughly. Use a mild detergent or rubbing alcohol to remove any grease or dirt. This will greatly enhance the adhesive’s effectiveness and longevity.
- Measure Twice, Install Once: Always carefully measure the distance between the latch and the catch. Incorrect measurements can lead to ineffective latching or stress on the adhesive, leading to potential failure.
- Patience is a Virtue: After applying the adhesive, wait at least 24 hours before using the latch. This waiting period allows the adhesive to reach maximum strength, ensuring the latch stays secure.
- Test for Safety: After the adhesive has been fully set, test each latch’s functionality and strength before allowing children access. A good latch should resist tugging and close the cabinet or drawer firmly.
- Regular Maintenance Checks: Regularly inspect the latches for signs of wear or loosening. Consider replacing a latch immediately to ensure continued safety if it appears less secure.
With these five tips, you can be sure that your Safety 1st adhesive cabinet and drawer latches are installed correctly and securely.
5 Things You Should Avoid
- Adhesive Overload: Too much adhesive can reduce its effectiveness and weaken the latch’s bond. Using just enough to create a secure seal is best, without overdoing it.
- Abrupt Temperature Changes: Extreme temperature fluctuations can cause the adhesive to shrink or expand, weakening its bond or damaging the latch components.
- Abrasive Cleaners: Avoid using harsh and abrasive cleaners, as these can damage the surface of the latches or weaken their adhesive bond.
- Uneven Surfaces: Before installation, ensure that the surface is even and smooth. Uneven surfaces can create air pockets or gaps between the latch and its catch, reducing its effectiveness.
- Over-tightening Screws: Over-tightening screws or bolts when attaching the latch can weaken its adhesive bond and cause stress on the components. It is best to use just enough torque to ensure a secure fit.
With these five tips, you can install your Safety 1st adhesive cabinet and drawer latches properly and provide maximum safety for your family.
What are the Use Cases for Safety 1st Adhesive Cabinet and Drawer Latches?
Safety 1st adhesive cabinet and drawer latches are a versatile option for childproofing. They can be used in kitchens, bathrooms, bedrooms, playrooms, offices, or any other area where you want to keep curious children away from potential dangers.
Common use cases include preventing access to hazardous items, such as cleaning supplies and medicines and shielding children from dangerous electrical outlets. They can also prevent curious children from opening drawers or cabinets with sharp objects inside. Additionally, these latches are a great choice for furniture that is not suitable for permanent installation of a latch.
Safety 1st adhesive cabinet and drawer latches offer parents peace of mind, knowing that their little ones are safe and secure. With proper installation and regular maintenance checks, these latches can provide reliable protection for years.
How Do You Remove Safety 1st Adhesive Cabinet and Drawer Latches?
Removing the Safety 1st adhesive cabinet and drawer latches can be done with minimal effort. First, gently use a flathead screwdriver to pry up the latch from its mounting base. Next, apply heat to the remaining adhesive using a blow dryer or heat gun set on low.
Once the adhesive is softened, use a plastic putty knife to scrape away the remaining residue carefully. Finally, clean the area with a mild detergent or rubbing alcohol before installing a new latch.
By following these steps, you can easily remove the Safety 1st adhesive cabinet and drawer latches and replace them with new ones if needed. Remember to take your time and wear protective gear, such as safety goggles and gloves, when using any heat tool.
Conclusion
How to install safety 1st adhesive cabinet and drawer latches is a great way to protect the little ones in your home. With these latches, you can easily keep kids out of off-limits cabinets or drawers. The quick install process and the lasting power of adhesive latches make them a cost-effective way to keep your children safe.
Following these easy steps will help ensure that you have everything you need to complete the installation quickly and easily, so don’t wait. Install safety 1st adhesive cabinet, and drawer latches today to keep curious fingers from opening cupboards or drawers that could house dangerous materials. This simple action is essential for ensuring a safe environment in your home and can be done in just minutes!
So take action – get your latches now, install them correctly, put your mind at ease, and start enjoying a safer home for you and your family!
About
Safety Fic is a distinguished figure in the world of Diy design, with a decade of expertise creating innovative and sustainable Diy solutions. His professional focus lies in merging traditional craftsmanship with modern manufacturing techniques, fostering designs that are both practical and environmentally conscious. As the author of diy, Safety Fic delves into the art and science of Safety Fic-making, inspiring artisans and industry professionals alike.
Education RMIT University
(Melbourne, Australia) Associate Degree in Design (Safety Fic) Focus on sustainable design, industry-driven projects, and practical craftsmanship. Gained hands-on experience with traditional and digital manufacturing tools, such as CAD and CNC software.
Nottingham Trent University
(United Kingdom) Bachelor’s in diyfastly.com and Product Design (Honors) Specialized in product design with a focus on blending creativity with production techniques. Participated in industry projects, working with companies like John Lewis and Vitsoe to gain real-world insights.
Publications and Impact
In diy, Safety Fic his insights on indoor design processes, materials, and strategies for efficient production. His writing bridges the gap between artisan knowledge and modern industry needs, making it a must-read for both budding designers and seasoned professionals.