

Installing a Safety First car seat correctly is paramount for ensuring the safety and well-being of infants and toddlers during travel.

Safety First car seats are designed with rigorous safety standards in mind, offering various models suitable for different age groups and vehicle types. This guide explores the key aspects of how to install safety first car seat.
Installing these car seats involves following precise instructions to secure them firmly and securely in the vehicle, minimizing the risk of injury in the event of a collision or sudden stop.
Proper installation includes understanding the specific features of your Safety First car seat, such as the latch system or seatbelt attachment methods, and ensuring the seat is positioned correctly according to the child’s age, weight, and height.
By prioritizing correct installation and regularly reviewing safety guidelines, caregivers can provide optimal protection for young passengers, fostering peace of mind and confidence while traveling.
This article outlines essential steps and tips for installing a Safety First car seat correctly to maximize safety and comfort for children in vehicles.
Selecting the Right Car Seat for Your Child
Choosing the appropriate car seat for your child is essential for their safety and comfort during travel.
The selection process involves considering factors such as the child’s age, weight, and height, as well as ensuring that the car seat is compatible with your vehicle. Car seats are broadly categorized into three types: rear-facing, forward-facing, and booster seats.
For infants and toddlers, rear-facing car seats are recommended as they provide the best support for the child’s head, neck, and spine in the event of a collision. These seats should be used until the child reaches the maximum height or weight limit specified by the manufacturer.
Once children outgrow their rear-facing car seats, they can transition to forward-facing seats equipped with a harness system. Forward-facing seats offer excellent protection by distributing crash forces across the stronger parts of the child’s body.
As children grow older and surpass the limits of their forward-facing car seats, booster seats become necessary. Booster seats raise the child so that the vehicle’s seatbelt fits correctly over their chest and lap, reducing the risk of injury.
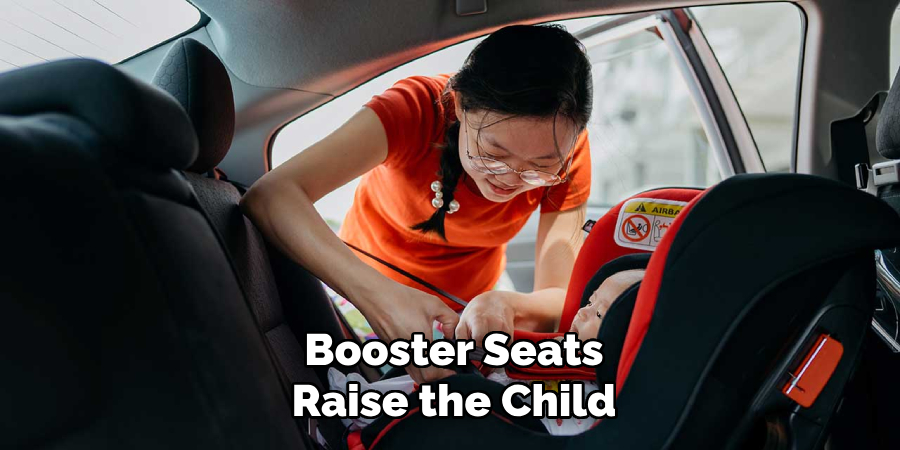
It is crucial to ensure the seatbelt lies flat across the upper thighs and chest rather than the stomach and neck.
10 Methods How to Install Safety First Car Seat
1. Read the Manual Thoroughly
The first and most important step in installing a Safety 1st car seat is to thoroughly read both the car seat manual and your vehicle’s owner manual.
The car seat manual provides specific instructions and illustrations tailored to the model of your car seat, covering various installation methods, weight limits, and safety tips.
The vehicle’s owner manual will provide information about the locations of the LATCH (Lower Anchors and Tethers for Children) system and the best seating positions for car seat installation.
Understanding these instructions is vital to ensuring you install the seat correctly and safely.
2. Choose the Right Installation Method
Safety 1st car seats typically offer two main installation methods: using the vehicle’s seat belt or the LATCH system. The LATCH system is designed to make car seat installation easier and more secure. However, the vehicle’s seat belt is equally safe when used correctly.
Decide on the method that best suits your vehicle and car seat model. Ensure your vehicle supports the LATCH system, as not all vehicles have this feature.
In some cases, the vehicle’s seat belt may provide a more secure fit, especially for older children who are transitioning to booster seats.
3. Position the Car Seat Correctly
Proper positioning of the car seat is critical for safety. For infants and young toddlers, a rear-facing position is recommended as it provides the best protection for their developing neck and spine.

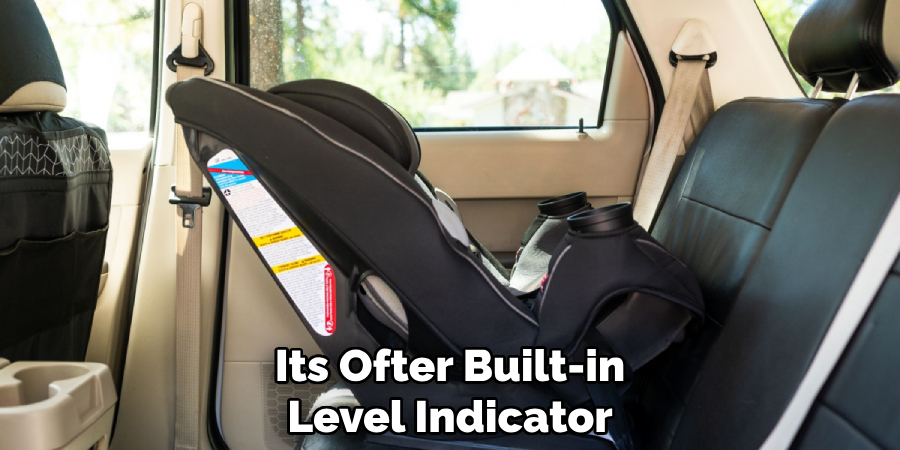
Place the car seat in the back seat of your vehicle, which is the safest location for children. Ensure the car seat is level according to the manufacturer’s guidelines. Many Safety 1st car seats come with built-in indicators or level lines to help you achieve the correct angle.
A level car seat ensures the child is positioned correctly, reducing the risk of injury during sudden stops or accidents.
4. Install Using the LATCH System
If you choose to use the LATCH system, locate the lower anchors in your vehicle’s back seat. Attach the car seat’s lower anchor connectors to these anchors. Ensure the connectors are securely attached and that the straps are not twisted.
Pull the straps to tighten the car seat firmly against the vehicle seat. Many Safety 1st car seats feature a built-in tightening mechanism that makes this process easier.
Once the lower anchors are secured, attach the top tether strap (if your car seat has one) to the designated tether anchor point in your vehicle.
5. Install Using the Vehicle Seat Belt
For installations using the vehicle’s seat belt, thread the seat belt through the appropriate path on the car seat. Buckle the seat belt and pull it tight. Ensure the seat belt is locked in place by pulling it all the way out and letting it retract, engaging the locking mechanism.
This step is crucial to prevent the seat from moving in the event of a crash. Some Safety 1st car seats have built-in lock-offs that can help keep the seat belt tight and secure. Check the manual for specific instructions on using these features.
Ensure there is minimal movement at the base of the car seat; it should not move more than an inch side-to-side or front-to-back.
6. Check for a Secure Fit
Once the car seat is installed, it is essential to check for a secure fit. The car seat should not move more than one inch in any direction when you pull at the base. If there is excessive movement, re-tighten the LATCH straps or seat belt.
For rear-facing seats, ensure the recline angle is correct according to the car seat’s indicators. For forward-facing seats, ensure the top tether is properly attached and tightened.
7. Adjust the Harness Correctly
The harness system is crucial for keeping your child secure in the car seat. For rear-facing seats, the harness straps should be at or just below the child’s shoulders.
For forward-facing seats, the straps should be at or just above the shoulders. Ensure the harness is snug but not too tight; you should be able to fit only one finger between the harness and the child’s collarbone.
The chest clip should be at armpit level to keep the harness straps properly positioned. Regularly adjust the harness to accommodate your growing child, and always check it before every trip.
8. Ensure Proper Recline Angle
The recline angle of the car seat is important for your child’s safety and comfort. Safety 1st car seats often include a built-in level indicator or adjustable base to help achieve the correct angle. For rear-facing seats, the seat should be reclined enough to keep the child’s airway open.
If the seat is too upright, the child’s head may flop forward, compromising their breathing. For forward-facing seats, ensure the seat is upright enough to prevent slumping, which can affect the child’s spine and airway.
Adjust the recline angle according to the manufacturer’s guidelines, and use rolled towels or pool noodles under the base if necessary to achieve the proper angle.
9. Perform a Final Safety Check
Before you consider the installation complete, perform a final safety check. Ensure the car seat is securely installed with minimal movement, the harness is correctly adjusted, and the recline angle is proper.
Verify that all straps and connectors are in good condition and not twisted. Double-check that the car seat is installed in the safest location in your vehicle, typically the back seat.
If possible, have a certified car seat technician inspect your installation to ensure it meets all safety standards. This extra step can provide peace of mind and ensure your child’s safety.
10. Stay Informed and Up-to-Date
Car seat safety standards and recommendations can change over time. Stay informed about the latest guidelines from organizations like the American Academy of Pediatrics (AAP) and the National Highway Traffic Safety Administration (NHTSA).

Regularly review the car seat manual and check for any recalls or safety notices from Safety 1st. As your child grows, transition them to the appropriate car seat or booster seat according to their weight and height. Staying up-to-date ensures you are always using the safest practices for transporting your child.
Conclusion
In conclusion, installing a Safety 1st car seat correctly involves careful attention to detail and adherence to safety guidelines. Begin by thoroughly reading the manuals and choosing the right installation method for your vehicle. Position the car seat correctly, ensuring it is level and secure.
Use the LATCH system or the vehicle seat belt, checking for a tight fit and minimal movement. Adjust the harness properly and ensure the correct recline angle. Perform a final safety check and stay informed about the latest safety recommendations.
Thanks for reading, and we hope this has given you some inspiration on how to install safety first car seat!
About
Safety Fic is a distinguished figure in the world of Diy design, with a decade of expertise creating innovative and sustainable Diy solutions. His professional focus lies in merging traditional craftsmanship with modern manufacturing techniques, fostering designs that are both practical and environmentally conscious. As the author of diy, Safety Fic delves into the art and science of Safety Fic-making, inspiring artisans and industry professionals alike.
Education RMIT University
(Melbourne, Australia) Associate Degree in Design (Safety Fic) Focus on sustainable design, industry-driven projects, and practical craftsmanship. Gained hands-on experience with traditional and digital manufacturing tools, such as CAD and CNC software.
Nottingham Trent University
(United Kingdom) Bachelor’s in diyfastly.com and Product Design (Honors) Specialized in product design with a focus on blending creativity with production techniques. Participated in industry projects, working with companies like John Lewis and Vitsoe to gain real-world insights.
Publications and Impact
In diy, Safety Fic his insights on indoor design processes, materials, and strategies for efficient production. His writing bridges the gap between artisan knowledge and modern industry needs, making it a must-read for both budding designers and seasoned professionals.