

Are you concerned about the safety of your home and property? Do you want to protect your home from intruders but don’t know how? If so, installing security cameras under eaves can be a great way to keep an eye on things. Not only do they provide peace of mind, but they offer much-needed protection for those times when you’re away from home.
Installing security cameras under eaves also gives you the capability to quickly access footage if there’s ever been suspicious activity at your residence. However, before considering this type of setup, it’s important that you make sure all necessary precautions are taken in order to install these devices correctly and securely.
In this blog post, we’ll explore what kinds of cameras should be used for installing under eaves and provide step-by-step tips on how to successfully install these camera show to install security cameras under eaves so that they remain effective deterrents against break-ins and property damage.
This guide will show you exactly what steps need to be followed in order to properly install security cameras under eaves!
What is Eaves?
Eaves are the lower edge of a roof that often extend beyond the exterior walls of a building. This overhanging part is typically supported by rafters or an architrave and allows for more air circulation in order to reduce moisture levels within your home. The most common materials used for this purpose are wood, metal, vinyl, fiberglass, and asphalt shingles.
What Kind of Camera Should I Use?
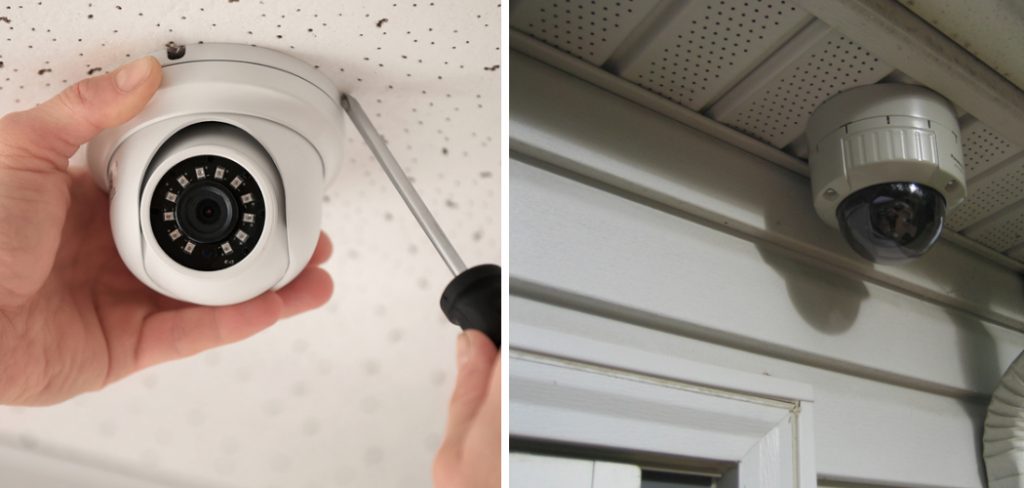
When it comes to installing security cameras under eaves, you’ll want to use waterproof or weatherproof cameras that are designed for outdoor installation. In addition, your camera should be equipped with night vision capabilities in order to capture clear footage even when it’s dark outside.
Look for a camera that is rated for both indoor and outdoor use, as this will ensure that the camera can handle a wide range of temperatures and weather conditions.
Required Items
Before you get started, make sure that you have all the necessary tools and equipment for the installation. You’ll need:
- A drill
- A drill bit for the camera mount
- Screws and anchors (for drywall)
- Caulk, caulk gun, and silicone sealant
- Level or plumb bob to make sure your camera is leveled correctly
- Cable ties/clips to secure power and video cables in place
How to Install Security Cameras Under Eaves 10 Steps
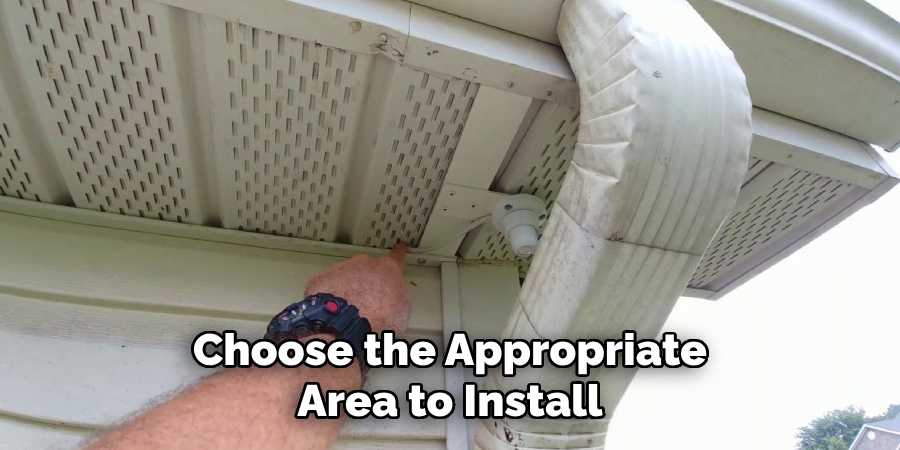
Step 1: Choose the Place
Choose the appropriate area to install your security cameras under the eaves. Make sure the chosen area has good visibility from multiple angles and is away from obstructive branches or other objects that may interfere with the signal.
Step 2: Prepare the Wall
Before beginning the installation, clean the wall where you’ll be mounting your camera and make sure it’s free of dust or debris. If necessary, use a damp cloth to wipe off any dirt.
Step 3: Drill the Wall
Now, use your drill and drill bit to create a hole in the wall. Be sure to measure twice before drilling! Make sure the hole is at least two inches deep. While drilling, be sure to wear safety glasses and use an appropriate drill bit for the job.
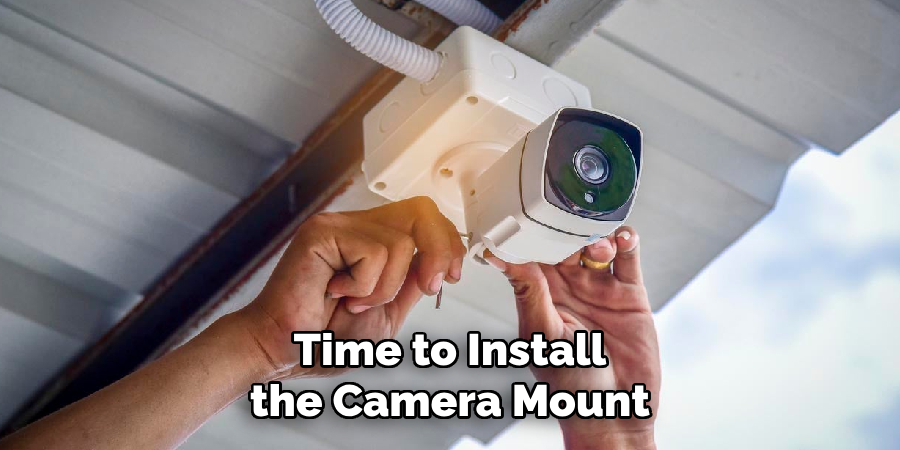
Step 4: Install the Camera Mount
Once you’ve drilled your hole in the wall, it’s time to install the camera mount. Place your security camera mount into the hole and secure it with screws or anchors (for drywall). Be sure to use the appropriate screws and anchors for your surface.
Step 5: Secure the Mount to the Wall
Next, you’ll need to secure the camera mount to the wall. Use caulk or silicone sealant around the edges of the camera mount plate in order to make it watertight. Be sure that no gaps are left between the wall and the mount.
Step 6: Connect the Power
Once the camera mount is installed, it’s time to connect your power source. You can either choose to run an extension cord or use a hardwired connection for more security. If you go with the latter option, make sure that all wires are concealed from view and securely fastened in place with cable ties or clips.
Step 7: Adjust the Camera
Now it’s time to adjust your camera. Using a level or plumb bob, make sure that the camera is level and pointed in the right direction. After you’ve adjusted your camera to the desired position, carefully tighten all screws and bolts so that it won’t be able to move.
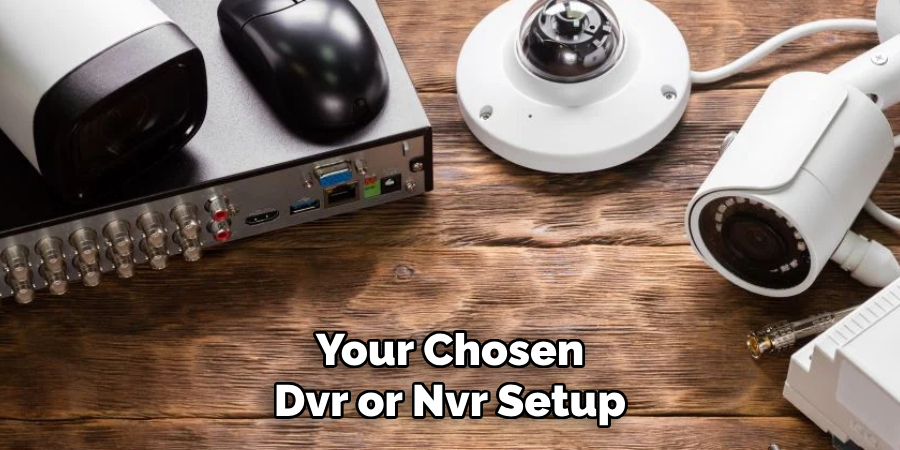
Step 8: Connect the Video Feed
Connect the video cable from your camera to your chosen DVR or NVR setup. Make sure that all connections are secure and check for any signal interference by running a test of the connection.
Step 9: Test the Camera
Once everything is connected, it’s important to test your camera. Perform a few tests by using the app that comes with your security system or simply play back the footage on the screen. This will allow you to check if everything is working correctly and make any necessary adjustments if needed.
Step 10: Attach Eaves
Finally, attach your eaves to the camera mount plate. Make sure that your eaves are securely fastened to the wall and the camera mount. This will help protect your security camera from damage caused by rain or other harsh weather conditions.
Now you’re ready to start using your security cameras under the eaves! With these steps, you can ensure that all necessary precautions are taken for the successful installation of your security camera system. For more information on the best practices for installing a security system, contact our team of experts today!
5 Considerations Before Installing Your Security Camera System
- Before you install your security camera system, make sure to consider all of the different factors that could affect its performance. This includes the amount of lighting in the area, the type of camera you’re using, the size of the area being monitored, and any obstacles that may obstruct your line of sight.
- Make sure to choose the right type of camera for your home or business. Different cameras are designed with different features and capabilities. Consider what you need from a camera and determine which one is best suited for you before making any purchases.
- You’ll also want to consider where you’ll be playing your security camera. Make sure to choose a spot that is not easily accessible by vandals or thieves in order to protect your equipment from being damaged. acing the cameras in order to
- When it comes to installing the cameras, make sure to use the right tools for the job and be careful when drilling into walls. You don’t want to cause any structural damage when mounting your camera.
- Finally, make sure to test out your security cameras before relying on them for full-time monitoring. Check the image quality and make sure that all of your connections are secure and working properly.
By following these steps, you can ensure that you have a successful installation of security cameras under eaves! Contact our team of experts today for more information on how to get started with your security system!
4 Safety Measures to Take When Dealing with Security Cameras
- Make sure to keep your security cameras out of reach from children and pets. Smaller models may be tempting for children to grab and play with, so it’s important to ensure that they are stored safely away at all times.
- Be mindful when you’re installing the cameras in an area with a lot of people. Make sure that you’re not invading anyone’s privacy with your security cameras, and be sure to inform people in the area that they are being monitored by video surveillance.
- Pay attention to any changes in your camera footage, such as blurred images or grainy videos. This could indicate an issue with the camera itself and should be addressed immediately to avoid any unwanted security risks.
- Finally, make sure to regularly check your cameras and upgrade them as needed. Technology is constantly changing, so invest in the best quality of cameras that you can afford to ensure maximum protection for your home or business.
By taking these safety measures into account before you install your security camera system, you can ensure that your security system is up-to-date and secure.
Conclusion
All in all, installing security cameras under your eaves is a great way to improve the safety of your home and provide extra peace of mind. It takes some planning and preparation, but with the right materials and tools, any homeowner can easily install their own security camera.
Take a few steps on how to install security cameras under eaves to ensure you have everything needed for this project and prepare yourself for this installation journey.
With good preparation and integrity, you will be able to enjoy the secure environment that comes with these extra measures of surveillance. If problems arise during setup or operation, don’t hesitate to reach out for professional help, as it’s important to keep an eye on your home.
Start today, and in no time, you can enjoy the benefits that come with always keeping an extra eye on your property and family.
About
Safety Fic is a distinguished figure in the world of Diy design, with a decade of expertise creating innovative and sustainable Diy solutions. His professional focus lies in merging traditional craftsmanship with modern manufacturing techniques, fostering designs that are both practical and environmentally conscious. As the author of diy, Safety Fic delves into the art and science of Safety Fic-making, inspiring artisans and industry professionals alike.
Education RMIT University
(Melbourne, Australia) Associate Degree in Design (Safety Fic) Focus on sustainable design, industry-driven projects, and practical craftsmanship. Gained hands-on experience with traditional and digital manufacturing tools, such as CAD and CNC software.
Nottingham Trent University
(United Kingdom) Bachelor’s in diyfastly.com and Product Design (Honors) Specialized in product design with a focus on blending creativity with production techniques. Participated in industry projects, working with companies like John Lewis and Vitsoe to gain real-world insights.
Publications and Impact
In diy, Safety Fic his insights on indoor design processes, materials, and strategies for efficient production. His writing bridges the gap between artisan knowledge and modern industry needs, making it a must-read for both budding designers and seasoned professionals.