
The Yale Assure Lock 2 is a smart lock designed to enhance the security and convenience of your home. With its sleek design, advanced features, and compatibility with various smart home systems, it offers a modern solution for keyless entry. This guide will walk you through the installation process of how to install yale assure lock 2, ensuring your lock is set up correctly and ready to use.

Why Choose Yale Assure Lock 2
The Yale Assure Lock 2 stands out as a top choice for homeowners looking for a secure and user-friendly smart lock. Its keyless entry eliminates the hassle of carrying physical keys, while advanced features such as touchscreen keypads and seamless smartphone integration provide exceptional convenience.
The lock is compatible with major smart home ecosystems like Apple HomeKit, Amazon Alexa, and Google Assistant, allowing you to integrate it seamlessly into your connected home. Additionally, its durable construction ensures long-lasting performance, and its modern design complements a variety of home aesthetics. Whether you’re prioritizing security, ease of use, or design, the Yale Assure Lock 2 is an excellent option that adapts to your lifestyle needs.
Tools and Materials Needed
To successfully install and set up the Yale Assure Lock 2, you will need the following tools and materials:
- Phillips screwdriver
- Flathead screwdriver
- Measuring tape
- Drill (if necessary for new door installation)
- 2 AA batteries (included with the lock)
- Smartphone or tablet (for setup via the Yale Access app)
- Wi-Fi Bridge (optional, for remote functionality)
Ensure you have these tools and materials on hand before beginning the installation process to streamline setup and avoid delays.
10 Methods How to Install Yale Assure Lock 2
1. Unbox and Inspect the Lock
Before beginning the installation, it’s essential to ensure that you have all the necessary components. The Yale Assure Lock 2 should come with the lock mechanism, a mounting plate, screws, a backplate, and a keypad, along with a user manual. Inspect the parts to make sure everything is intact and in good condition. Double-check the model number to ensure you have the correct lock for your door type. This step is crucial to avoid delays or interruptions once you start the installation process.
2. Remove the Existing Lock
The first step in installing the Yale Assure Lock 2 is removing the old lock. Using a screwdriver, remove the screws from the existing deadbolt and handle. Once the screws are removed, carefully detach the hardware, including the interior and exterior components. If your existing lock is a standard deadbolt, it’s likely that you’ll have to remove the entire assembly, including the latch, strike plate, and other elements that may be present. Keep the screws aside if you plan to reuse them or recycle the old parts if no longer needed.
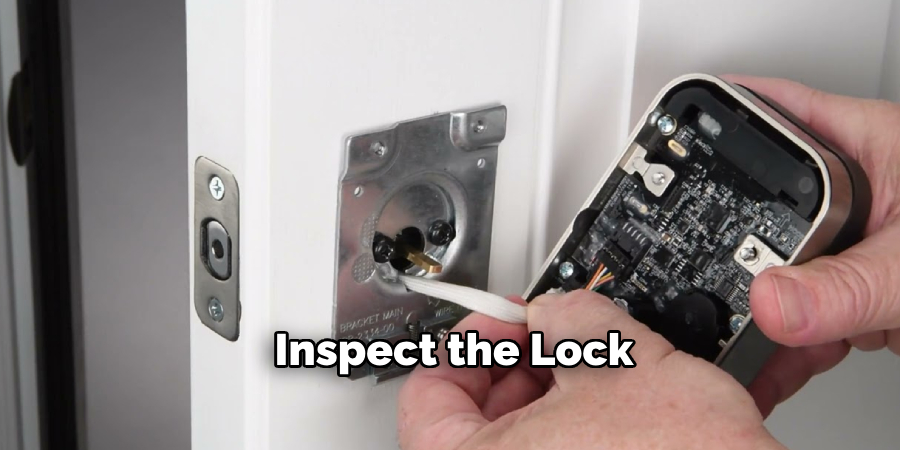
3. Prepare the Door and Strike Plate
Once the old lock is removed, take a moment to inspect the door and ensure that there are no obstructions in the area where the new lock will be installed. Clean the surface and ensure the hole is the correct size for the Yale Assure Lock 2’s latch mechanism. Most of the time, you won’t need to make significant adjustments, but it’s a good idea to verify that the hole is aligned properly for the new lock. If the hole is too small, use a door-boring kit to widen it. Similarly, check the strike plate to make sure it fits securely in the door frame.
4. Install the Latch Mechanism

Next, it’s time to install the latch mechanism, which is the part of the lock that fits into the doorframe. Insert the latch into the hole on the door, ensuring that the slanted side of the latch faces the doorframe. The latch should slide smoothly into place. Secure it using the screws provided in the installation kit, making sure the latch is flush with the door and not tilted. This step ensures that the Yale Assure Lock 2 will work effectively once installed.
5. Attach the Backplate and Interior Assembly
With the latch mechanism in place, it’s time to install the backplate and the interior assembly. Start by aligning the backplate on the interior side of the door. The backplate should cover the latch mechanism and serve as the base for the lock’s interior components. Once aligned, secure it to the door using screws. The interior assembly contains the battery compartment, and it will serve as the control hub for the lock, so it’s important to attach it securely. Ensure that the assembly is snugly fitted against the door and is properly aligned with the latch.
6. Install the Keypad and Exterior Assembly
Now, move to the exterior side of the door where the keypad will be installed. Align the exterior assembly (keypad) with the latch mechanism and the backplate. The keypad is typically connected to the backplate using a wire harness that powers the lock and allows for communication between the interior and exterior components. Carefully connect the wiring from the keypad to the interior assembly, ensuring the connectors are properly seated. Once the wiring is securely connected, fit the exterior assembly over the backplate and attach it to the door, securing it with the screws provided.
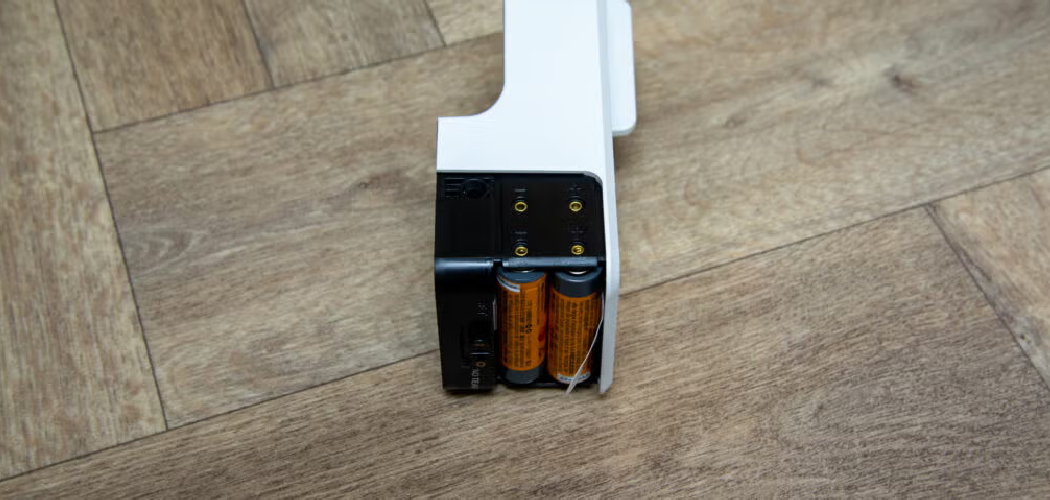
7. Insert the Batteries
Before continuing, insert the batteries into the interior assembly of the Yale Assure Lock 2. Most models of the lock require four AA batteries, which should be inserted into the battery compartment located on the back of the interior unit. Ensure that the batteries are installed correctly, following the polarity indicators inside the compartment. Installing fresh, high-quality batteries will ensure that your lock functions properly from the outset. Once the batteries are in place, close the battery compartment securely.
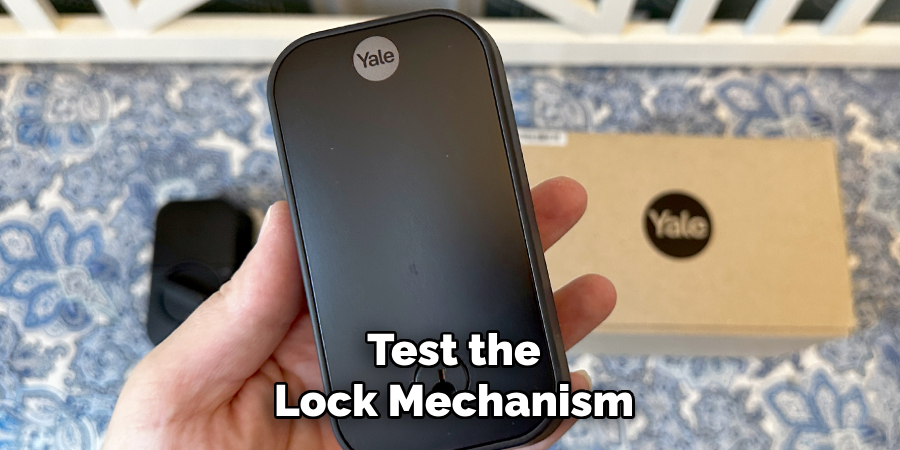
8. Test the Lock Mechanism
Before securing all parts and finalizing the installation, it’s important to test the lock mechanism. Turn the lock to the “locked” and “unlocked” positions to ensure the latch mechanism is functioning smoothly. Verify that the keypad lights up and that the interior and exterior components align properly. You may also want to test the lock with the key to make sure that both the key and keypad functions are working as expected. If there’s any resistance or issue with the lock’s operation, check that all parts are securely fitted and the wiring is connected properly.
9. Program the Lock
Once the physical installation is complete and the lock functions properly, you can proceed with programming your Yale Assure Lock 2. To do this, follow the instructions in the user manual to set up the initial master code. Typically, you’ll need to press a certain combination of keys on the keypad to enter programming mode.
Once in programming mode, you can set your primary code and add additional user codes for family members or guests. The Yale Assure Lock 2 allows for a variety of access codes to be set, providing flexibility for different users. Be sure to choose a secure code that’s easy to remember but difficult for others to guess.
10. Final Checks and Secure the Lock
The final step in installing your Yale Assure Lock 2 is to perform a thorough check. Ensure that the lock is properly calibrated and functions as expected. Test all programmed codes, verify that the deadbolt locks and unlocks correctly, and check the keypad’s responsiveness.
Once satisfied with the lock’s operation, secure all screws and ensure the lock is tightly fixed to the door. If desired, connect your lock to your smart home system through the Yale app or another compatible platform for remote access and management. Finally, store your master code and user codes in a secure location, as they are essential for future programming and security.
Maintenance and Upkeep
Regular maintenance of your Yale smart lock ensures its longevity and reliable performance. Periodically check the batteries and replace them as needed to avoid unexpected power loss. Clean the keypad gently with a soft, damp cloth to remove dirt and grime, ensuring it stays responsive.
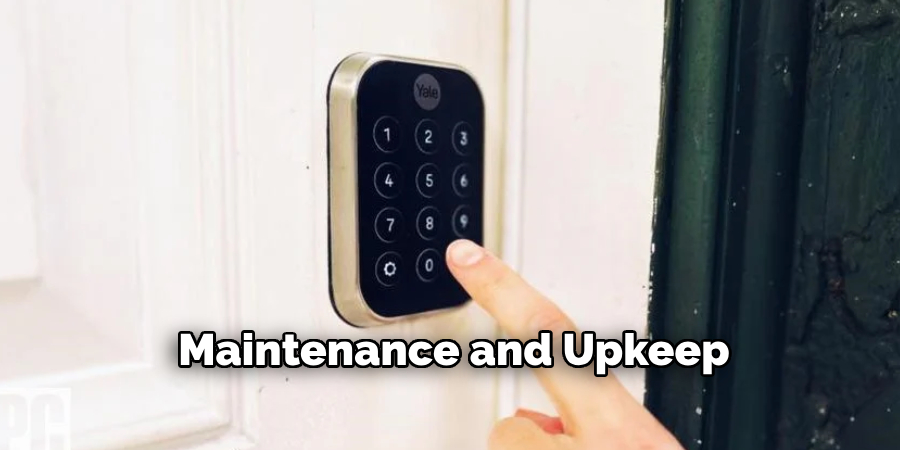
Inspect the lock and screws occasionally to confirm they remain secure and free of wear. If connected to a smart home system, verify that firmware and app updates are applied to maintain compatibility and security features. Proper upkeep will help guarantee that your smart lock functions effectively for years to come.
Conclusion
Installing the Yale Assure Lock 2 is a straightforward process that enhances both the convenience and security of your home. By following the steps outlined above, you can ensure a successful installation of this smart lock. From removing your old lock and installing the latch mechanism to programming the lock and conducting final tests, each step is critical for the proper functioning of the lock.
With its seamless integration into smart home systems and the ability to control access remotely, the Yale Assure Lock 2 offers robust security while simplifying your home access management. Whether you’re securing your home or business, this modern solution provides peace of mind and flexibility in keeping your property safe. Thanks for reading, and we hope this has given you some inspiration on how to install yale assure lock 2!