In times of flooding, sandbags serve as a vital tool for protecting your home from water intrusion.
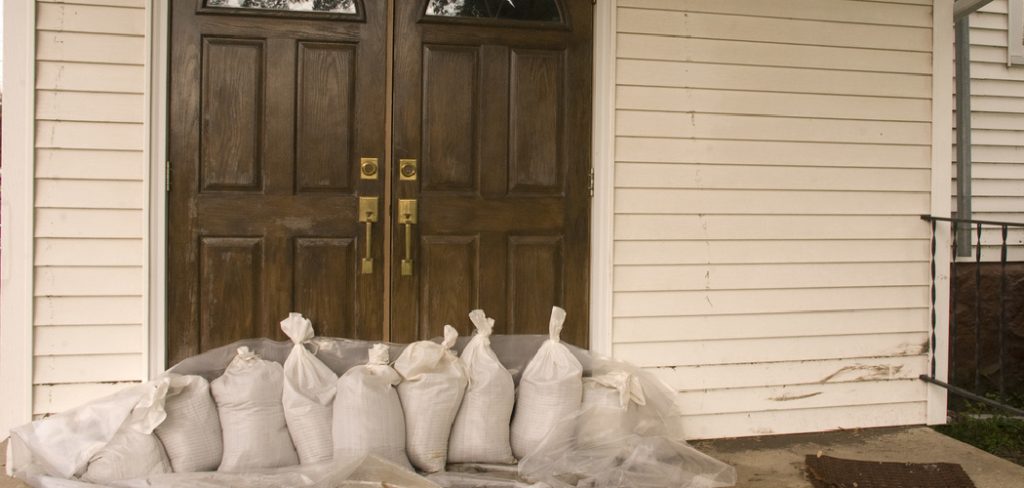
Their primary purpose is to create a temporary barrier that redirects or blocks rising water, effectively preventing it from entering through doors and other vulnerable entry points.
Common scenarios where sandbags prove essential include heavy rainstorms, hurricanes, and unexpectedly high river levels that threaten to overflow their banks.
By understanding how to lay sandbags in front of doorways, homeowners can significantly reduce the risk of water damage and safeguard their living spaces.
This article delves into the important steps necessary for effective sandbag deployment, including gathering materials, filling techniques, and proper placement strategies.
Additionally, we will provide safety tips to ensure your flood preparation is efficient and effective, allowing you to protect your home confidently during times of crisis.
Understanding the Purpose of Sandbags
How Sandbags Work
Sandbags function primarily as a barrier to redirect and block water, harnessing the principle of weight and stability.
When filled with sand or other heavy materials, they create a dense wall that withstands the force of incoming water, effectively preventing it from flowing into vulnerable areas like doors and low-lying spots.
The water’s pressure pushes against the sandbags, but their mass keeps them anchored in place, creating an effective blockade. To maximize their effectiveness, sandbags must be tightly packed, forming a continuous barrier with minimal gaps.
This strategic arrangement allows the sandbags to absorb some of the water pressure and channel the water away from the protected area.
When and Where to Use Sandbags
Sandbags are incredibly versatile and can be used to mitigate flood risks. Common applications include protecting doorways, garage entrances, and basement windows, where water is likely to enter.
Additionally, they can be used around outdoor features like patios and drainage areas that may overflow during heavy rainfall. To determine the number of sandbags needed, assess the specific vulnerabilities of your home and the expected water level.
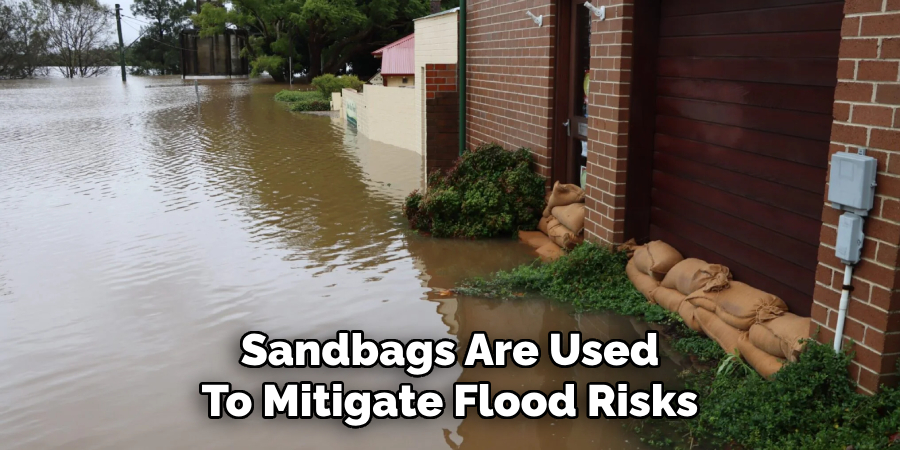
Typically, a wall made of sandbags should be at least 1 foot high for effective water blocking, and it’s advisable to have extra sandbags on hand, as the anticipated flood severity may change rapidly.
Homeowners can significantly enhance their flood protection efforts by planning ahead and strategically deploying sandbags.
Preparation: Gathering Materials and Planning
Materials Needed
Gathering all necessary materials is essential before you begin laying sandbags. The primary items you’ll need include sandbags, which are typically available at hardware stores or through local authorities in flood-prone areas, and sand or an alternative fill material such as soil or gravel.
Optional but recommended items include plastic sheeting to create an additional water barrier and protective gloves to keep your hands clean and safe while handling sand and bags. A shovel can also facilitate the filling process and make managing the sand easier.
Filling the Sandbags
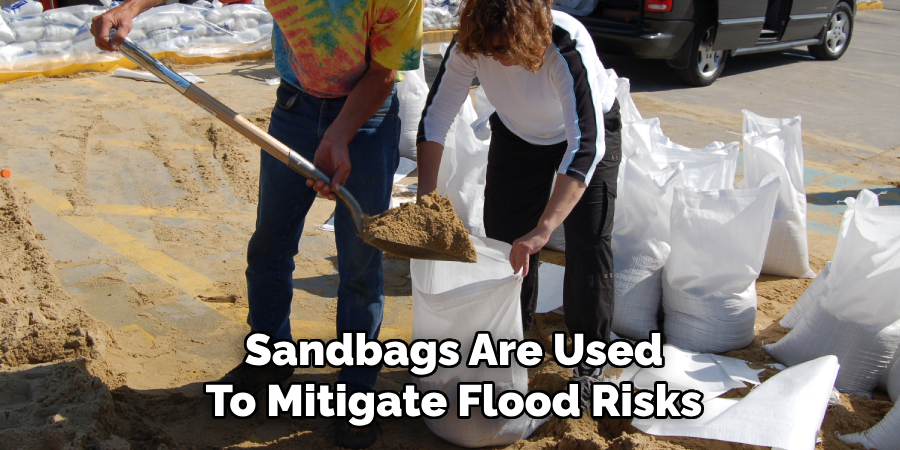
To fill your sandbags effectively, start by placing them on a flat surface, such as a driveway or patio, to make handling easier. Use a shovel to fill each bag until it is about two-thirds full; this amount ensures the bags retain shape and weight when stacked.
Avoid overfilling, as this can cause the bags to burst or become difficult to manage. Once filled, securely tie or fold the top of the sandbag to prevent spillage during transport and deployment.
Properly filled bags are key to creating a stable and effective barrier against rising water.
Planning the Layout
Before laying down the sandbags, take a moment to plan their layout. Consider the width of the door you’re protecting and the expected water level based on weather forecasts or past flood experiences.
Measure the door’s width and calculate how many sandbags will be necessary to form a continuous barrier, taking care to ensure they overlap. Aim for a barrier height of at least one foot to provide substantial protection.
Visualizing the arrangement beforehand can help streamline the deployment process, allowing you to work efficiently and effectively when flooding threatens your home.
How to Lay Sandbags in Front of Door: Step-by-Step Guide
Step 1: Prepare the Door Area
Before laying your sandbags, preparing the area around the door is crucial. Start by clearing any debris that could obstruct your efforts, such as leaves, branches, or outdoor furniture.
Ensure the ground is as flat as possible, free from rocks or uneven surfaces that could compromise the stability of the sandbags. Next, secure the door itself by locking it to prevent it from moving or bending under pressure.
If desired, lay down a plastic sheet in front of the door to act as an additional water barrier. This sheet can help to mitigate the water that seeps through any gaps, providing an extra layer of protection. You’re ready to position your sandbags once the area is clear and secured.
Step 2: Position the First Layer of Sandbags
Begin by placing the first layer of sandbags directly against the base of the door. Ensure each bag is positioned tightly against the next, with the folded side facing inward.
This alignment allows for better sealing and prevents water from seeping through the gaps. It’s advisable to start at one end and work your way to the other, keeping the bags closely packed.
If the sandbags are filled properly (two-thirds full), they will hold their shape while providing the necessary weight. As you lay the first layer, check for any spaces between the bags and adjust to ensure they fit snugly together.
The goal is to create a solid, continuous barrier that effectively blocks water from entering through the door.
Step 3: Stagger and Stack Additional Layers
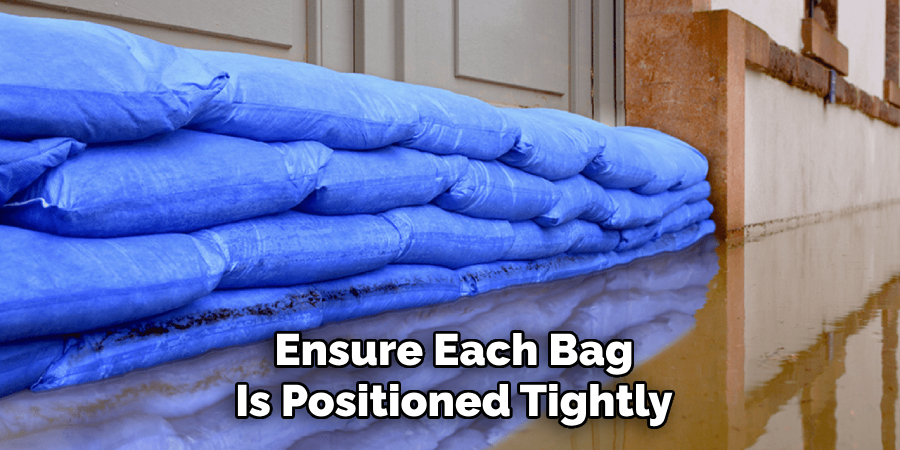
Stack additional layers of sandbags in a staggered brick pattern to enhance stability and minimize gaps. Begin the second layer by positioning the first bag so that its midpoint aligns with the base of the two bags in the layer below.
This means that no two bags are directly above one another, which significantly improves the strength of your dam against incoming water. Continue adding layers, ensuring each one is tightly pressed together without noticeable gaps.
Aim for a height of at least one foot above the ground with each stacked layer. Make sure that the bags remain level and that their weight distribution is balanced for maximum resistance against floodwaters.
Repeat this process until you achieve the desired height for your sandbag barrier, always prioritizing a tightly woven structure to optimize water blockage.
Ensuring an Effective Seal and Maintenance
Creating a Tight Seal
To ensure your sandbags form a tight seal against the door, start by pressing each bag firmly down to eliminate gaps between them. The goal is to create a continuous barrier that minimizes any pathways for water to seep through.
For added reinforcement, consider layering a plastic sheet over the sandbags, which can help redirect water flow. Alternatively, use duct tape along the seams where bags meet to further secure the barrier.
Ensuring a tight seal is crucial for maximizing the protective benefits of your sandbag installation.
Checking and Maintaining the Sandbag Barrier
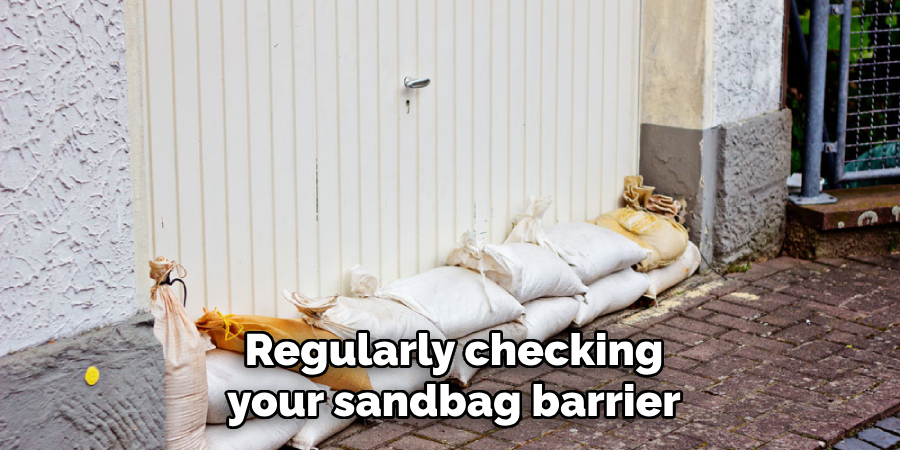
Regularly checking your sandbag barrier is essential to ensure its effectiveness. Inspect the barrier for any signs of shifting, instability, or water seepage.
If you detect any gaps or if water begins to flow through, adjust the existing bags or add more to fortify the structure. This proactive maintenance can make a significant difference in protecting your home during heavy rain events.
Additionally, after significant rain, reassess the barrier to determine if it needs reinforcement as conditions may change quickly.
Post-Flood Cleanup
Once the flood threat has passed, it’s important to safely remove and dispose of the sandbags. Wear gloves and a mask while handling the bags, as they may be contaminated with floodwaters, bacteria, or chemicals.
If the sandbags are not damaged, consider reusing the sand for landscaping projects; otherwise, properly dispose of them according to local guidelines. Be sure to clean the area surrounding the sandbag installation to prevent the spread of contaminants.
After removal, disinfect your hands and any tools used in the process to maintain safety and health standards.
Additional Tips for Effective Flood Protection
Combining Sandbags with Other Barriers
Consider using sandbags alongside water-activated flood barriers or specifically designed door barriers for enhanced flood protection.
These additional measures can help create a more robust defense against rising water levels, providing an extra layer of security in critical areas around your home.
Regularly Monitor Weather Conditions
It’s essential to stay informed about local weather conditions and potential flood risks. Regularly check news updates or weather apps, and prepare your sandbags in advance. Being ready can make all the difference in protecting your home when forecasts predict heavy rainfall or flooding.
Consider Long-Term Flood Solutions
While sandbags are effective for immediate flood protection, consider investing in long-term solutions.
This may include installing permanent barriers, improving drainage systems, or changing landscaping to redirect water away from your property. Such measures can significantly reduce the risk of flooding and offer lasting peace of mind.
Conclusion
In summary, knowing how to lay sandbags in front of door effectively involves several key steps: first, clear the area and lay down a plastic sheet for added protection; then place the first layer of sandbags tightly against the door; subsequently, stagger and stack additional layers for stability; ensure a tight seal to block water seepage; and consistently check and maintain the barrier throughout the flood event.
Remember, safety is paramount during flood preparation and cleanup. Always handle potentially contaminated sandbags with gloves and masks to protect yourself from harmful bacteria and chemicals.
Lastly, encourage proactive measures by preparing your flood barriers in advance and considering long-term solutions, such as permanent barriers or improved drainage systems, to enhance your home’s resilience against future flooding events.
About
Safety Fic is a distinguished figure in the world of Diy design, with a decade of expertise creating innovative and sustainable Diy solutions. His professional focus lies in merging traditional craftsmanship with modern manufacturing techniques, fostering designs that are both practical and environmentally conscious. As the author of diy, Safety Fic delves into the art and science of Safety Fic-making, inspiring artisans and industry professionals alike.
Education RMIT University
(Melbourne, Australia) Associate Degree in Design (Safety Fic) Focus on sustainable design, industry-driven projects, and practical craftsmanship. Gained hands-on experience with traditional and digital manufacturing tools, such as CAD and CNC software.
Nottingham Trent University
(United Kingdom) Bachelor’s in diyfastly.com and Product Design (Honors) Specialized in product design with a focus on blending creativity with production techniques. Participated in industry projects, working with companies like John Lewis and Vitsoe to gain real-world insights.
Publications and Impact
In diy, Safety Fic his insights on indoor design processes, materials, and strategies for efficient production. His writing bridges the gap between artisan knowledge and modern industry needs, making it a must-read for both budding designers and seasoned professionals.
