

The Brinks Digital Deadbolt offers a combination of convenience and security for your home or office. With its modern design and easy-to-use interface, it provides a reliable solution for protecting your property without the need for traditional keys.

Whether you’re new to digital locks or simply need guidance on their operation, this guide will walk you through the steps on how to lock brinks digital deadbolt to securely lock your Brinks Digital Deadbolt.
Understanding Your Brinks Digital Deadbolt Model
Before locking your Brinks Digital Deadbolt, it is essential to understand the specific model you have. Brinks offers various digital deadbolt designs, each with unique features such as keyless entry, touchscreen controls, or programmable access codes. Review your product manual to familiarize yourself with its components, including the keypad, thumbturn, and any backup keyhole.
Ensure that the lock has been properly installed and that the batteries are fully charged, as many models rely on battery power for their functionality. Knowing your model’s features and limitations will help you utilize it effectively and ensure optimal security for your home or office.
Needed Materials
- Product Manual
- Batteries (if Applicable)
- Backup Keys (if Applicable)
7 Step-by-step Guidelines on How to Lock Brinks Digital Deadbolt
Step 1: Familiarize Yourself
Begin by familiarizing yourself with the Brinks Digital Deadbolt. Carefully read through the product manual to understand its features and functionality. Take note of specific details such as how to program and operate the keypad, how to use the thumbturn, and how to insert backup keys if applicable.
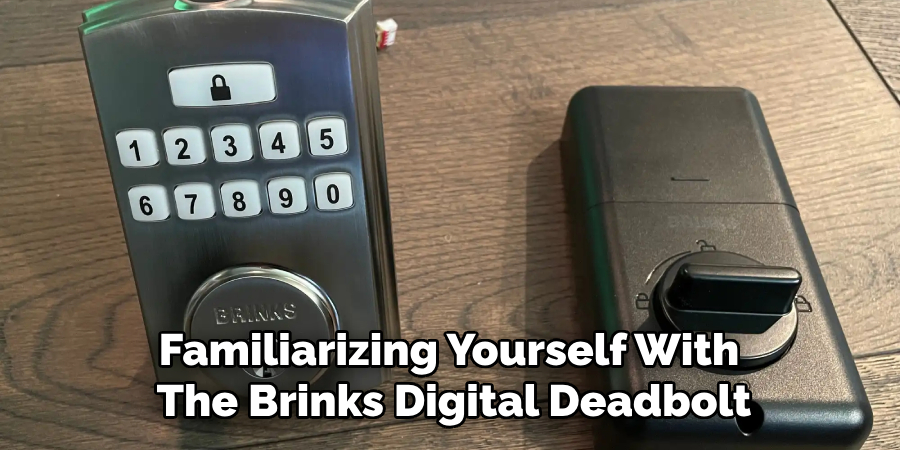
Identifying the battery compartment and understanding the indicators for a low battery can also save time later. This initial step ensures you have a clear overview of the lock’s design and operation, setting you up for a smooth installation and usage experience.
Step 2: Prepare the Door
Before installing the lock, ensure the door is properly prepared to accommodate it. Confirm that the door edge is level and that any existing holes for the lock and latch meet the required dimensions specified in the product manual.
Use the provided template, if included, to check alignment and spacing for the lock components. Additionally, ensure the door thickness falls within the acceptable range for the lock’s design. If necessary, adjust or correct any misaligned holes, as precision is essential for proper functionality. This preparation step is crucial for a secure and hassle-free installation process.
Step 3: Remove Old Lock (If Applicable)
If your door already has an old lock installed, you’ll need to remove it before proceeding with the smart lock installation. Begin by unscrewing the screws on the interior and exterior sides of the lock using a screwdriver.
Carefully pull the lock components apart and remove them from the door. Ensure that all parts, such as the latch mechanism or deadbolt, are also removed. Once the old lock is completely disassembled, clean the area around the door holes to remove any dust or debris, creating a smooth surface for the new smart lock installation.
Step 4: Install Batteries
Most smart locks require batteries to operate, typically AA or AAA batteries. Check the manufacturer’s instructions to determine the correct type and quantity of batteries needed. Open the battery compartment on the smart lock and insert the batteries, ensuring they are oriented according to the polarity markings (+ and -).
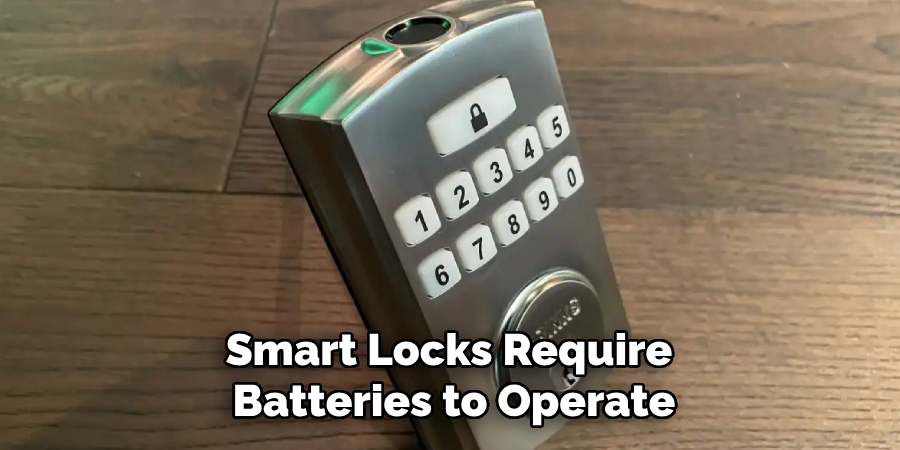
Once installed, some locks may power on automatically or require an initial setup process. Proper installation of batteries is essential for the smart lock to function correctly.
Step 5: Follow the Manufacturer’s Instructions
After preparing the lock and inserting the batteries, refer to the manufacturer’s instructions to complete the installation process. These instructions will guide you through properly aligning the lock components, securing it to the door, and configuring any necessary settings.
Some smart locks may require you to download a companion app to pair the lock with your smartphone or connect it to your home network. Ensure that all steps are followed carefully to ensure proper functionality and security.
Step 6: Configure Your Lock
Once the smart lock is installed, the next step is to configure it to suit your needs. This typically involves downloading the lock’s companion app on your smartphone or tablet. Follow the app’s setup process, which may include creating an account, connecting the lock to your home Wi-Fi or Bluetooth, and setting up access codes or permissions.
Be sure to test the lock’s functionality after configuration to ensure it’s operating correctly and securely.
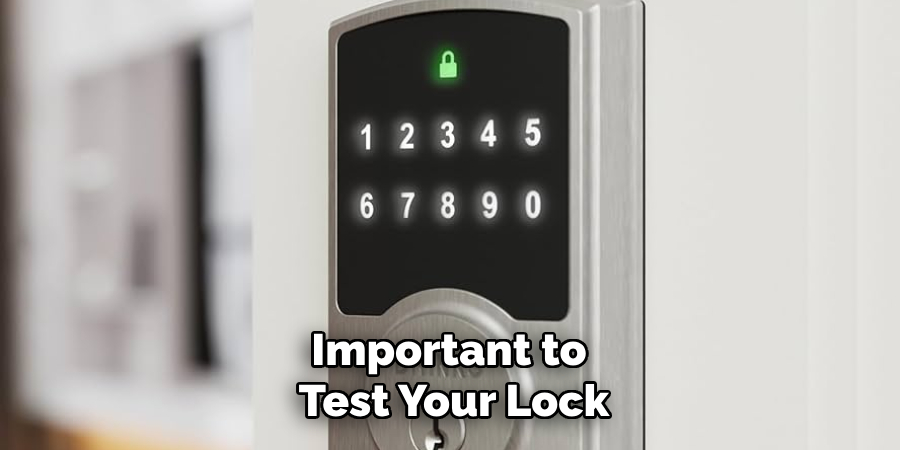
Step 7: Test Your Lock
After installation and configuration, it’s important to test your lock to ensure it is working properly. Try locking and unlocking the door using both the physical keypad and the app on your device. If there are any issues, consult the manufacturer’s troubleshooting guide or contact customer support for assistance.
Following these steps on how to lock brinks digital deadbolt will ensure the safety and security of your home. It’s important to regularly check and maintain your lock to ensure it continues to function properly. Additionally, consider setting up automatic reminders for changing batteries or updating software to keep your lock in top condition.
Tips for Effective Use
- Change access codes regularly to ensure maximum security.
- Make sure all users are familiar with how to operate the lock and its various components.
- Keep batteries charged or replace them when necessary.
- Choose a strong, unique access code that is difficult to guess.
- Consider integrating your smart lock with other home security systems for added protection.
- Regularly clean and maintain the physical components of the lock to prevent malfunctions.
- Follow the manufacturer’s instructions for installation and setup to ensure proper functionality.
- Monitor and update software as needed to stay up-to-date with any security patches or improvements.
Troubleshooting Locking Issues
If you encounter issues with your smart lock, there are several steps you can take to troubleshoot the problem:
Check the Power Source
Ensure the batteries are not depleted or improperly installed. Replace the batteries with fresh ones if necessary and verify correct placement.
Inspect Network Connectivity
If your lock relies on Wi-Fi or Bluetooth, verify that the connection is stable. Restart your router or device and ensure it is within the required range.
Recalibrate the Lock
Some smart locks may need recalibration, especially if the locking mechanism is misaligned. Follow the manufacturer’s guide to recalibrate properly.
Examine the Lock Mechanism
Debris or dirt can sometimes obstruct the lock’s movement. Gently clean the mechanism and confirm that the door is properly aligned with the strike plate.
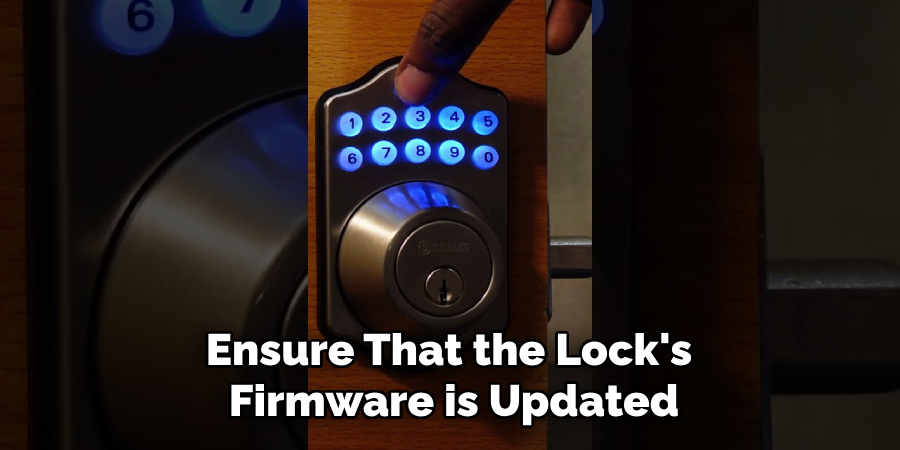
Check the Software
Ensure that the lock’s firmware is updated to the latest version, as outdated software can cause operational hiccups. Regularly check for available updates and install them as needed.
Reset the Device
If all else fails, perform a factory reset on the lock, following the manufacturer’s instructions. Be sure to reconfigure your settings afterward.
Contact Technical Support
If troubleshooting does not resolve the issue, reach out to the manufacturer’s support team for additional assistance or explore warranty options if applicable.
Security Tips
Ensuring the security of your smart lock is essential to protect your home. Start by using a strong and unique password for your lock’s app or interface, avoiding easily guessed combinations. Regularly update the lock’s firmware to protect against any vulnerabilities and keep it secure from potential threats. Limit access to trusted individuals, and deactivate user codes that are no longer needed.
If the lock supports two-factor authentication, enable it for an added layer of protection. Finally, monitor your lock’s activity logs, if available, to stay informed about any unusual or unauthorized access attempts. These practices can help you maintain a secure and reliable smart lock system.
Frequently Asked Questions
Q: Can I Still Use Keys With My Smart Lock?
A: Yes, most smart locks have a backup key option in case of any technical issues or if you prefer to use traditional keys. However, it is recommended to limit the use of physical keys as they can be lost or stolen and pose a security risk.
Q: Do Smart Locks Work Without an Internet Connection?
A: It depends on the type of smart lock you have. Some models require an internet connection for remote access and control, while others can function using Bluetooth or a local Wi-Fi network. Make sure to check the specifications of your specific lock to determine its connectivity requirements.
Q: How Do I Know if My Smart Lock’s Battery is Low?
A: Most smart locks come with a companion app that allows you to monitor the battery life. You can also receive notifications when the battery is running low or check the physical lock for any warning lights or sounds that may indicate a low battery. It’s important to keep an eye on your smart lock’s battery life to avoid getting locked out of your home.
Conclusion
Smart locks offer a convenient and secure way to manage access to your home, combining advanced technology with user-friendly features. Understanding their functionality, maintaining proper battery levels, and utilizing companion apps can ensure a seamless experience.
By staying informed about your lock’s specifications and upkeep, you can enjoy peace of mind and the ease of modern home security. Thanks for reading this article on how to lock brinks digital deadbolt.