

Securing a gate with a latch is essential for both safety and convenience. A well-installed latch provides security by preventing unauthorized access and ensuring that the gate remains closed, protecting children and pets from wandering out and keeping intruders at bay.
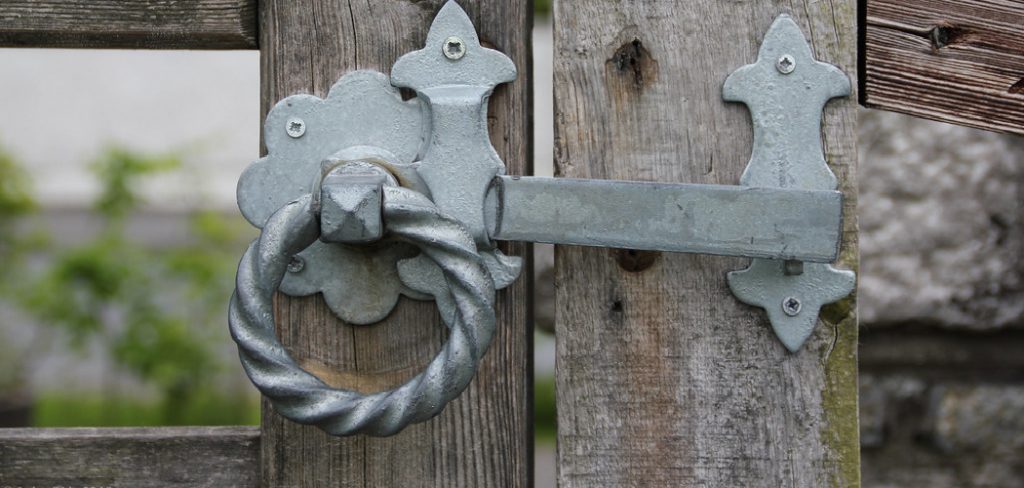
Various gate latches are available, each suited for different needs and gate types. A gravity latch is simple and typically found on residential gates. Thumb latches offer a traditional aesthetic and are best for wooden gates.
Bolt latches provide enhanced security and are ideal for heavy gates. Understanding how to put a latch on a gate involves several key steps: choosing the right latch, gathering the necessary tools and materials, preparing for installation, and following a clear step-by-step guide to ensure proper alignment and operation.
This guide will help you through the entire process to ensure your gate is both secure and functional.
Choosing the Right Latch for Your Gate
Selecting the appropriate latch for your gate is crucial for ensuring both functionality and security. Various gate latches are available, each designed for specific uses.
A gravity latch is a popular option for residential gates due to its simplicity and ease of use. It operates by using the force of gravity to keep the gate closed, making it ideal for lightweight, frequently used gates.
Thumb latches, on the other hand, offer a classic and traditional appearance, making them perfect for wooden gates that require a more aesthetic touch. They function with a thumb-activated lever and are often used in gardens and decorative gates.
Bolt latches are the best choice for heavy-duty applications as they provide additional security. These latches feature a sliding bolt mechanism that securely locks the gate, making them suitable for gates that need extra reinforcement.
When choosing a latch, consider the material compatibility. Ensure that the latch you select is suitable for the gate’s material, whether it be wood, metal, or vinyl.
Additionally, assess your security needs and the ease of use, especially if children or the elderly will be operating the gate. Finally, check the gate’s alignment and structure to ensure it is in good condition and capable of supporting the latch installation.
Tools and Materials Needed
- List of tools: screwdriver, drill, measuring tape, pencil, level
- List of materials: gate latch kit (latch, screws, strike plate)
- Optional: wood filler, sandpaper, paint, or stain for touch-ups
Preparing for Installation
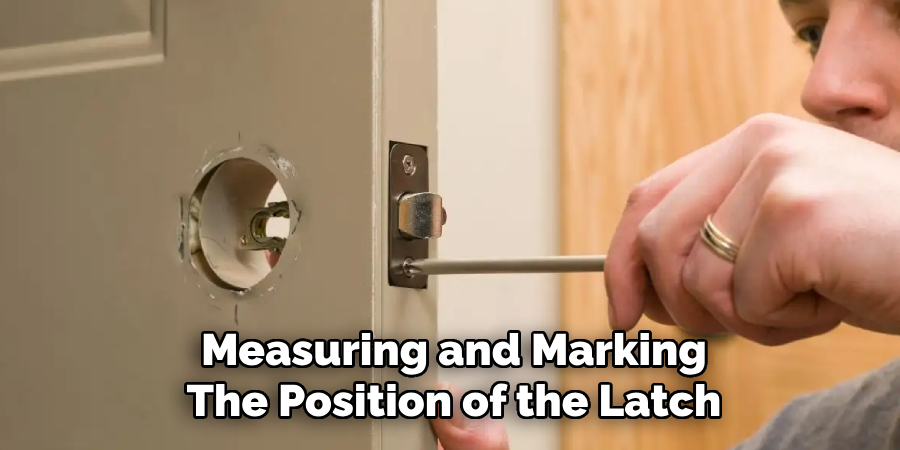
Before installing a gate latch, preparing adequately to ensure smooth operation and secure fitment is essential. Begin by measuring and marking the position of the latch on both the gate and the post.
The latch should be positioned at a comfortable height to allow easy access for operation, typically around waist height. Use a measuring tape to find the ideal height and make pencil marks to guide you.
Next, align the latch with the gate post to ensure proper engagement. The latch mechanism should easily catch and lock when the gate is closed. If the gate and post are not aligned correctly, the latch’s functionality could lead to issues.
Before installing, check the gate and post for any necessary adjustments or repairs. Ensure that the gate swings freely, without any obstructions, and is properly aligned with the post. Tighten any loose screws or bolts and check for any signs of damage or wear.
Additionally, it is important to verify that the gate is level and does not sag. A sagging gate may cause misalignment, preventing the latch from functioning correctly.
Address any structural issues before moving on to the installation phase. Proper preparation will set a solid foundation for a successful latch installation.
How to Put a Latch on A Gate: Installing the Latch
Step-by-step Guide to Installing a Gravity Latch
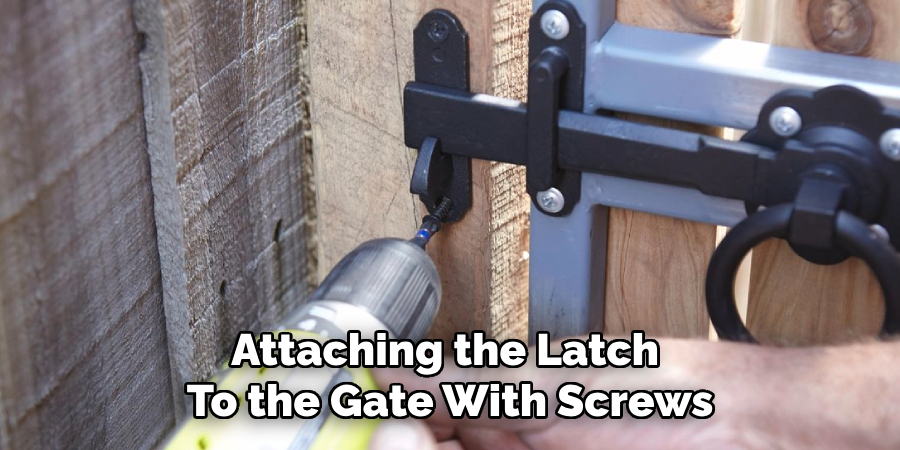
- Positioning the Latch on the Gate and Marking Screw Holes with a Pencil: Begin by holding the gravity latch against the gate where you previously marked the desired height. Make sure the latch is flush against the gate surface. Using a pencil, mark the positions of the screw holes on the gate. Ensure that these marks are clear and precise to aid in accurate drilling.
- Drilling Pilot Holes for the Screws: Using a drill with an appropriate-sized drill bit, carefully drill pilot holes at the marked positions on the gate. These pilot holes make it easier to drive in the screws and help prevent the wood from splitting. It’s vital to drill straight and to the correct depth to accommodate the screws.
- Attaching the Latch to the Gate with Screws: Align the latch with the pilot holes and secure it to the gate using the screws provided in your gate latch kit. Use a screwdriver or a drill with a screwdriver bit to drive the screws in firmly but avoid overtightening, which could damage the latch or the gate.
- Positioning and Attaching the Strike Plate on the Gate Post: Close the gate and hold the strike plate in place on the gate post, ensuring the latch will engage correctly when the gate is shut. Mark the screw holes for the strike plate on the post with a pencil. Drill pilot holes at these marks and then attach the strike plate to the post with screws. Check that the strike plate is flush and securely mounted.
- Testing the Latch to Ensure Smooth Operation and Proper Alignment: Once the latch and strike plate are attached, repeatedly open and close the gate to test the latch’s operation. Ensure that the latch engages smoothly and the gate remains securely closed. Verify that there is no resistance or misalignment.
- Adjustments and Troubleshooting if the Latch Does Not Align Properly: If the latch does not align perfectly, you may need to make minor adjustments. Loosen the screws and reposition the latch or strike plate as necessary. Sometimes, you may need to adjust the gate or post alignment. Repeat the testing process until the latch operates smoothly and aligns correctly.
How to Put a Latch on A Gate: Installing Other Types of Latches
Installing a Thumb Latch
- Positioning the Thumb Latch on the Gate and Marking Screw Holes: Hold the thumb latch at the desired height on the gate, typically at a comfortable hand level. Mark the screw hole positions with a pencil.
- Drilling Pilot Holes and Attaching the Latch: Drill pilot holes at the marks. Align the thumb latch over the holes and secure it with screws, ensuring it’s firmly attached.
- Installing the Catch or Strike Plate on the Gate Post: Close the gate and position the catch plate on the post where the thumb latch will engage. Mark the screw holes, drill pilot holes, and attach the catch plate with screws.
- Testing the Latch and Making Any Necessary Adjustments: Open and close the gate to test the latch, ensuring it catches properly. Adjust the latch or catch plate if needed to ensure smooth operation.
Installing a Bolt Latch
- Positioning the Bolt Latch on the Gate and Marking Screw Holes: Place the bolt latch at the preferred height on the gate. Mark the screw hole locations with a pencil.
- Drilling Pilot Holes and Attaching the Bolt: Drill pilot holes at the marked locations, align the bolt latch with the holes, and secure it with screws.
- Installing the Catch or Receiver on the Gate Post: Close the gate and position the receiver on the post where the bolt will lock, marking the screw hole positions. Drill pilot holes and attach the receiver with screws.
- Testing the Bolt Latch and Ensuring It Locks Securely: Test the bolt latch by sliding it into the receiver. Ensure it locks securely and adjusts if necessary to achieve proper alignment and functionality.
Ensuring Security and Longevity
Ensuring the security and longevity of your gate latch installation involves a few key maintenance steps. Start by checking all screws and components for tightness and security; loose screws can compromise the latch’s effectiveness and should be promptly tightened.
If you notice any holes or rough spots on the gate, apply wood filler to smooth them out and then sand the area once the filler has dried. This preparation step is crucial before painting or staining, as it helps the finish adhere better and look more uniform.

Painting or staining the latch area to match the gate enhances its appearance and provides a layer of protection against weathering and moisture. Lastly, regularly inspect the latch for signs of wear and tear.
Perform maintenance as needed, such as lubricating moving parts or replacing worn components, to ensure they continue to function properly and securely for years to come.
Tips for Maintaining Gate Latches
Regularly Checking and Tightening Screws and Bolts
To ensure the longevity and security of your gate latch, make it a habit to regularly inspect and tighten all screws and bolts. Over time, these components may loosen due to usage and weather conditions, which can compromise the latch’s effectiveness and safety.
Lubricating Moving Parts to Ensure Smooth Operation
Lubricate the moving parts of your gate latch to maintain smooth and effortless operation. Use a high-quality lubricant suitable for outdoor use, applying it sparingly to hinges, springs, and any other moving components.
Cleaning the Latch and Strike Plate to Prevent Dirt and Debris Buildup
Keep the latch and strike plate clean by wiping them down periodically with a damp cloth. Removing dirt and debris will prevent these materials from interfering with the latch’s performance and help maintain its smooth operation.
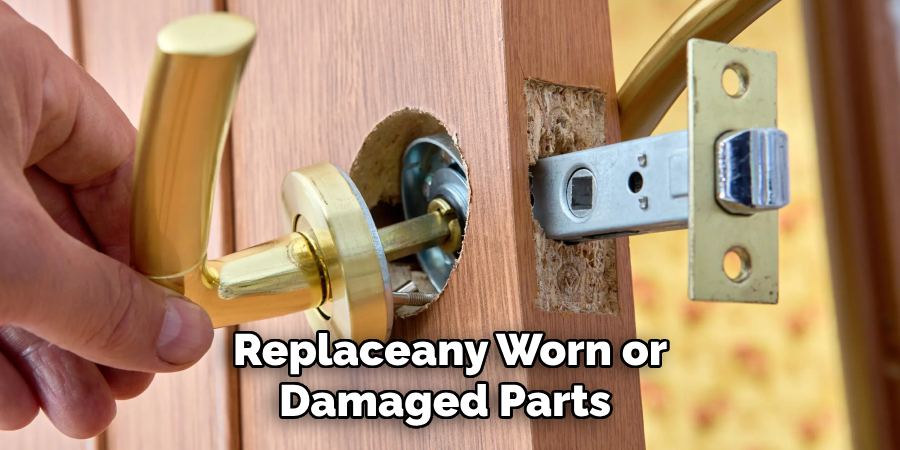
Replacing Worn or Damaged Parts Promptly
If you notice any worn or damaged parts, replace them immediately. Prompt replacement ensures the latch remains secure and functional, preventing potential gate malfunctions and enhancing overall safety.
Conclusion
Properly installing and maintaining a gate latch is vital for ensuring the security and longevity of your gate. This guide has outlined the essential steps on how to put a latch on a gate, emphasizing the significance of precision during installation and the importance of regular maintenance.
By frequently inspecting and maintaining your gate latch, you can prevent common issues such as misalignment, loose screws, or worn parts, thereby ensuring smooth operation and robust security.
Choosing the right latch for your specific gate type and conditions is also crucial. Investing in a durable, high-quality latch and diligent upkeep will provide peace of mind and long-term functionality.
Remember, a well-maintained gate latch secures your property and enhances the overall aesthetics and integrity of your gate structure.
About
Safety Fic is a distinguished figure in the world of Diy design, with a decade of expertise creating innovative and sustainable Diy solutions. His professional focus lies in merging traditional craftsmanship with modern manufacturing techniques, fostering designs that are both practical and environmentally conscious. As the author of diy, Safety Fic delves into the art and science of Safety Fic-making, inspiring artisans and industry professionals alike.
Education RMIT University
(Melbourne, Australia) Associate Degree in Design (Safety Fic) Focus on sustainable design, industry-driven projects, and practical craftsmanship. Gained hands-on experience with traditional and digital manufacturing tools, such as CAD and CNC software.
Nottingham Trent University
(United Kingdom) Bachelor’s in diyfastly.com and Product Design (Honors) Specialized in product design with a focus on blending creativity with production techniques. Participated in industry projects, working with companies like John Lewis and Vitsoe to gain real-world insights.
Publications and Impact
In diy, Safety Fic his insights on indoor design processes, materials, and strategies for efficient production. His writing bridges the gap between artisan knowledge and modern industry needs, making it a must-read for both budding designers and seasoned professionals.