

Are you looking to remove a hard-wired smoke alarm from your home but not sure where to start? Don’t worry. It’s actually a fairly simple process.
Removing a hard-wired smoke alarm is a process that, while straightforward, requires careful attention to safety and the correct steps. These devices are directly connected to your home’s electrical system, which presents a risk of electric shock if not handled properly.
Furthermore, since smoke alarms play a crucial role in home safety, ensuring that you’re prepared with a replacement or immediately reinstalling the alarm after maintenance is essential.
This guide is designed to walk you through the process of how to remove a hard wired smoke alarm. Remember, working with electrical systems always warrants caution, and consulting with a professional is advised if you need clarification at any stage.
Are Hard Wired Smoke Detectors Safe?
Before we dive into the steps of removing a hard wired smoke alarm, it’s essential to understand the safety measures surrounding these devices. Hard-wired smoke detectors are considered safe when correctly installed and maintained. They provide an early warning system in case of fire or smoke, which can save lives.
However, like any electrical device, there is always a risk associated with handling and installing them. That’s why it’s crucial to follow safety precautions when dealing with hard-wired smoke alarms.
What is the Significance of Smoke Alarms?
Smoke alarms are crucial in detecting fires and saving lives. According to the National Fire Protection Association (NFPA), three out of five home fire deaths occur in homes with no working smoke alarms or none at all.
Smoke alarms are designed to sound an alarm when they detect smoke, giving you and your family time to evacuate safely. They are also equipped with battery backup systems, which are vital in case of a power outage. It’s important to regularly test your smoke alarm to ensure that it is functioning correctly and replace the batteries at least once a year.
What Will You Need?
Before starting the process, it’s always helpful to have all the necessary tools and materials on hand. This will save you time and prevent any delays or disruptions in your schedule. Here are some items you’ll need to remove a hard-wired smoke alarm:
- Screwdriver
- Voltage tester
- Replacement smoke alarm (if needed)
- Ladder (if required)
10 Easy Steps on How to Remove a Hard Wired Smoke Alarm
Step 1: Turn Off Power
To ensure your safety, the first and most critical step in removing a hard-wired smoke alarm is to turn off the power to the unit. This process involves locating your home’s electrical breaker panel, which is often found in garages, basements, or utility closets. Once you’ve found the panel, identify and switch off the circuit breaker that supplies power to the smoke alarm. It’s essential to be precise in this step to avoid the risk of electric shock.
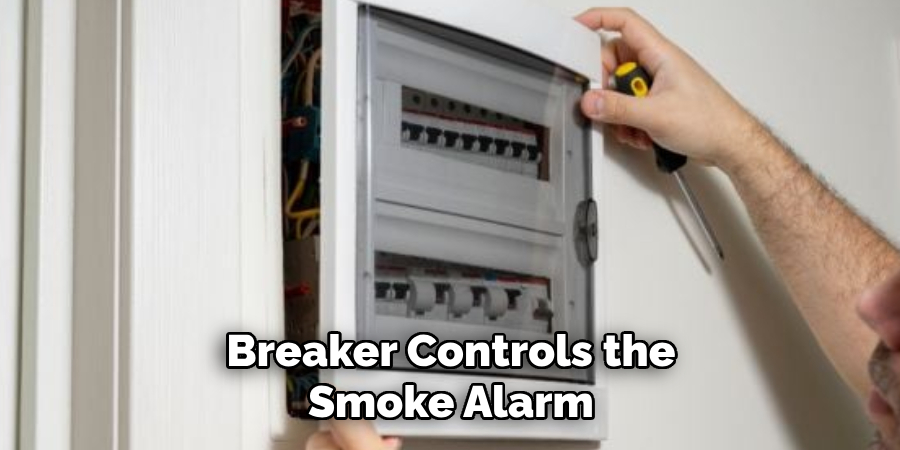
If you need help determining which breaker controls the smoke alarm, it’s better to err on the side of caution and turn off the main power supply to your home. After turning off the power, use a voltage tester to double-check that the power is indeed off to the smoke alarm circuit before proceeding to the next step. This precautionary measure ensures your work on the smoke alarm is conducted in a safe environment, free from electrical hazards.
Step 2: Remove the Smoke Alarm Cover
With the power confirmed off, the next step is carefully removing the smoke alarm’s cover. Most smoke alarm models have twisting mechanisms or a simple snap-off cover. Gently twist the alarm counterclockwise or apply a slight outward pressure to the sides if it has snap-off features.
Removing the cover will expose the inner components of the smoke alarm, including the mounting bracket and wiring. It’s crucial to proceed with care to avoid damaging the device, especially if you plan to reinstall it after maintenance or replace it with a new unit of the same model.
Step 3: Detach the Smoke Alarm from Its Mounting Bracket
Once the cover is removed, the smoke alarm is secured to a mounting bracket on the ceiling or wall. This bracket keeps the alarm in place and connected to the household’s electrical wiring. Look for the locking mechanism—this could be a set of screws, a twisting lock, or a simple snap fit.
Use a screwdriver if necessary to loosen and remove any screws, then gently twist or push the alarm to detach it from the bracket. Handle the alarm carefully, as it is still connected to the electrical wires. This step requires patience and a gentle touch to avoid pulling or damaging the wires.

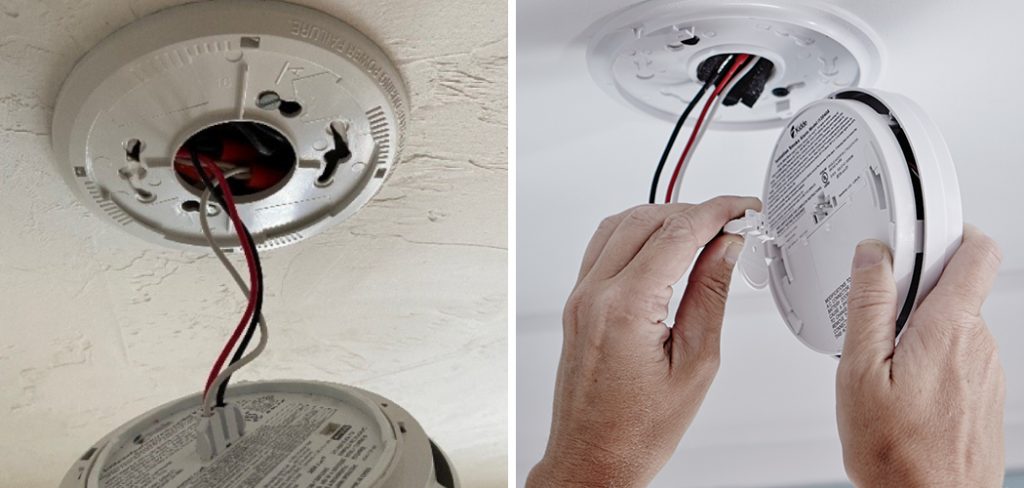
Step 4: Disconnect the Wires
With the smoke alarm detached from its mounting bracket, you’ll now have access to the electrical wires that power the unit. Most hard-wired smoke alarms are connected with wire nuts that twist onto the ends of the wires to secure them together. Carefully unscrew these wire nuts to disconnect the alarm from the house’s electrical system.
There will typically be three wires to disconnect: black (hot), white (neutral), and sometimes red or yellow (interconnect). Remember the configuration of these wires, as you will need to connect them in the same way when installing a new smoke alarm or reattaching the existing one after maintenance.
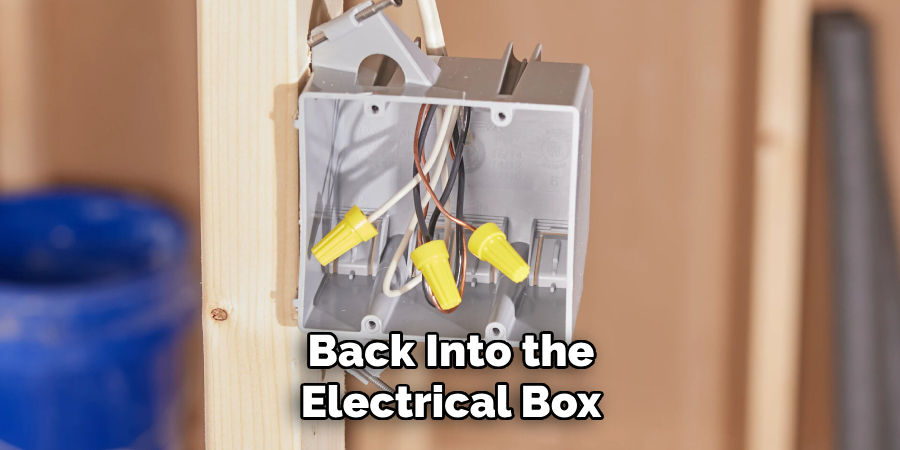
Once disconnected, carefully fold and tuck the wires back into the electrical box in the ceiling or wall, ensuring they do not interfere with the mounting bracket.
Step 5: Remove the Mounting Bracket
With the smoke alarm and wires properly disconnected, the next step involves removing the mounting bracket from the ceiling or wall. This bracket is typically secured with screws directly into the ceiling joists or into a specialized electrical box designed for smoke alarms.
Use your screwdriver to remove these screws carefully. Keep the screws and the bracket together if you plan to use them for installing a new smoke alarm. It’s essential to be cautious during this step to avoid causing damage to your ceiling or wall. Once removed, inspect the area for any wear or damage and prepare it to install a new smoke alarm or reinstall the previous one after maintenance.
Step 6: Prepare the New Smoke Alarm for Installation
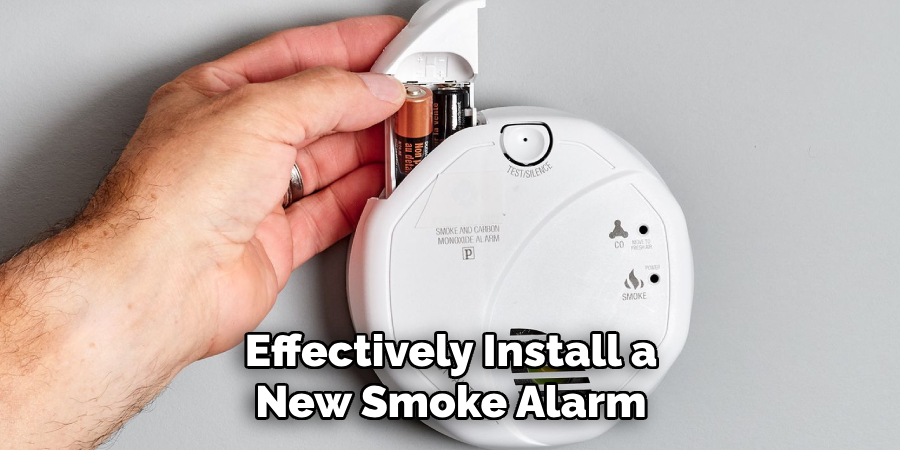
If you’re installing a new smoke alarm, take this time to prepare it by ensuring all parts are present and accounted for, according to the manufacturer’s instructions. Check the new alarm for a battery compartment, and if it requires batteries, install them as directed. Some models come with a battery already installed but may have a plastic tab that needs removal to activate the battery.
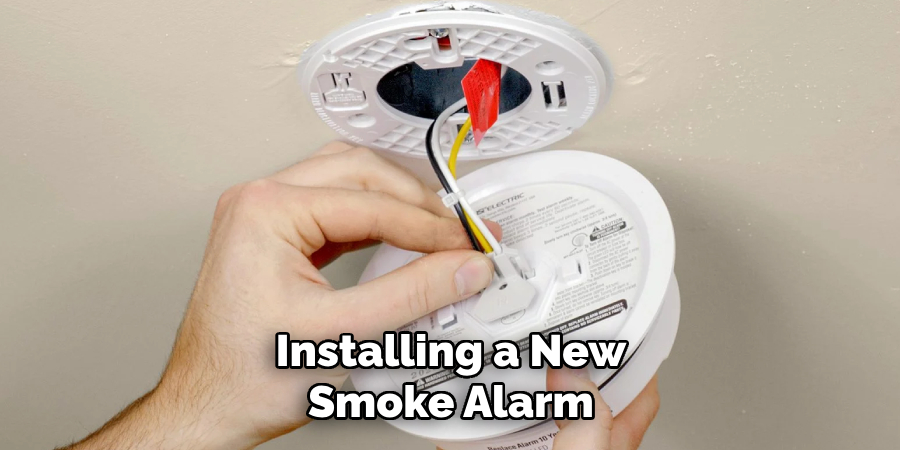
Additionally, familiarize yourself with the new smoke alarm’s mounting system. It may differ slightly from the one you just removed, so understanding how it attaches to the bracket will streamline the installation process. This preparation step is crucial for a smooth and efficient installation, helping to secure your home with a functioning smoke alarm as swiftly as possible.
Step 7: Install the Mounting Bracket
After you’ve removed the old mounting bracket and prepared your new smoke alarm, the next step is to attach the new mounting bracket to the ceiling or wall. Position the bracket in the desired location, ensuring it is secure and aligned correctly. If you’re using the original holes, make sure they are still suitable for holding the screws tightly.
If you need help, you may need to drill new holes. Use your screwdriver to fasten the bracket with screws until it is firmly attached. Be careful not to overtighten and damage the material of your ceiling or wall. This step lays the foundation for a stable installation of your new smoke alarm, guaranteeing its proper function and your safety.
Step 8: Connect the Wires to the New Smoke Alarm
With the mounting bracket securely in place, it’s time to connect the electrical wires to your new smoke alarm. Carefully pull the previously tucked-away wires out from the electrical box. Match the wire colors of the smoke alarm to those of your house’s electrical system—usually, black to black (hot), white to white (neutral), and red or yellow to red or yellow (interconnect), if applicable.
Use wire nuts to secure each connection, twisting them onto the ends of the wires until tight and secure. Ensure there are no loose connections and that each wire is properly attached to its corresponding wire in the smoke alarm.
After all the connections are made, gently push the wires back into the electrical box to keep them out of the way and to prevent any interference with the smoke alarm during installation.
Step 9: Attach the Smoke Alarm to the Mounting Bracket
Now that the wires are securely connected and tucked away, it’s time to attach your new smoke alarm to the mounting bracket. Align the smoke alarm with the bracket, paying close attention to any guides or notches that indicate the correct position. Depending on the model, you may need to rotate the alarm until it clicks into place, or you might have to snap it directly onto the bracket.
Once aligned, gently push the smoke alarm into the bracket until it is securely attached. Ensure it is firmly in place and does not wobble or detach easily. This final step in the installation process is vital to ensure that your smoke alarm is mounted correctly and is stable, ensuring reliable protection for you and your home.
Step 10: Test the Smoke Alarm
After successfully attaching the smoke alarm to its mounting bracket, the final and most crucial step is testing the unit to ensure it works correctly. Most smoke alarms have a test button—press and hold this button for a few seconds to initiate the test sequence.
You should hear a loud, piercing sound indicating the alarm is operational. If your smoke alarm is interconnected with other alarms in your home, this test should also trigger the others to sound off.
If the alarm does not sound during the test, check your connections and the battery (if applicable) to ensure everything is properly set up. Repeat the test once any adjustments are made. As recommended by the manufacturer, regular testing is essential for maintaining the effectiveness of your smoke alarm and ensuring the safety of your home and its occupants.
By following these ten steps, you can safely and effectively install a new smoke alarm in your home or replace an existing one. Always read the manufacturer’s instructions for specific details about your smoke alarm model and follow all safety precautions.
5 Additional Tips and Tricks
- Ensure Tools are Ready: Before starting, gather all necessary tools, such as a screwdriver, wire nuts, electrical tape, and a voltage tester. Having everything on hand will make the process smoother and safer.
- Inspect for Backup Batteries: Some hardwired smoke alarms also have backup batteries to function during power outages. Ensure these batteries are removed to completely disable the alarm during removal.
- Label the Wires: Before disconnecting, label each wire with tape or stickers to remember their placement. This step is crucial if you plan to install a new smoke alarm later and need to know which wires connect where.
- Use a Voltage Tester: Before touching any wires, use a voltage tester to ensure no electric current flows through the wires. This step is vital for your safety, even if you have turned off the power.
- Secure Wires After Removal: After removing the smoke alarm, cap the wires with wire nuts and secure them with electrical tape. This ensures that the exposed wires do not pose a risk of electrical fire or shock if the power is accidentally turned back on.
With these additional tips, removing a hardwired smoke alarm should be a hassle-free process.
5 Things You Should Avoid When Removing a Hard Wired Smoke Alarm
- Ignoring Safety Precautions: Only start the removal process after first turning off the power at the breaker box. Skipping this step can expose you to electrical hazards, risking electric shock.
- Forgetting to Test Before You Touch: Even after you’ve turned off the power, always use a voltage tester on the wires before handling them. Assuming the wires are safe without testing can lead to dangerous accidents.
- Leaving Wires Unprotected: Do not leave the electrical wires exposed after disconnecting the smoke alarm. Ensure that they are properly capped with wire nuts and taped to prevent electrical risks.
- Handling Without Proper Knowledge: If you are unsure about how to remove the smoke alarm safely or interpret the wiring, only proceed with consulting a professional. DIY efforts without adequate knowledge can lead to damage or injury.
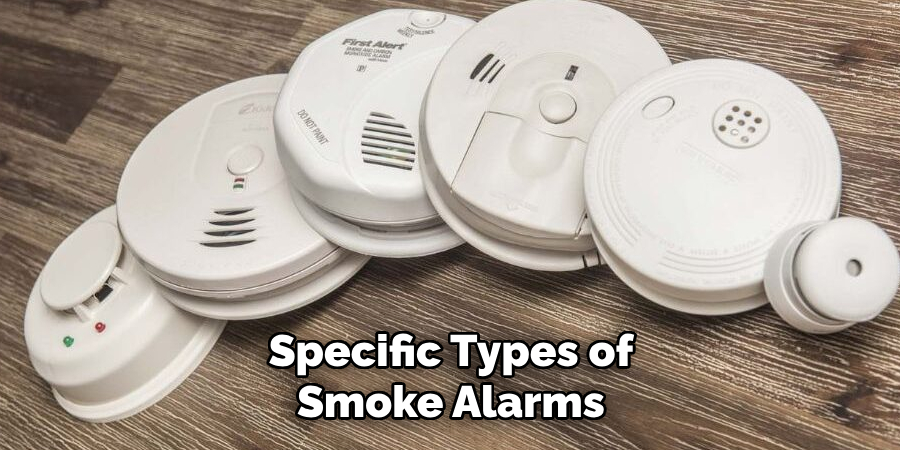
- Disregarding Local Regulations: Before removing a hardwired smoke alarm, check your local building codes and regulations regarding smoke alarm installation. Some areas may require immediate replacement or specific types of smoke alarms ensuring continued safety in your home.
By avoiding these common mistakes, you can confidently and efficiently remove a hardwired smoke alarm.
How Do You Know if Your Smoke Detector is Hard Wired?
To determine if your smoke detector is hard-wired, you can follow these steps:
- Check the Power Source: Hardwired smoke detectors are connected to your home’s electrical system and do not rely on batteries. If the detector has a slot for a battery but no battery inside, it is likely hard-wired.
- Look for Wires: Carefully remove the detector’s cover to expose the backplate. You should see wires attached to the backplate, which is a clear indication that your smoke detector is hard-wired.
- Check for a Backup Battery: Some hardwired smoke detectors may also have backup batteries in case of power outages. If you find a battery inside, your detector is hard-wired and battery-operated.
- Consult the Manual: If you still have your smoke detector’s user manual, it should mention whether it is hard-wired or not. You can also search for the model number online for more information.
By following these steps, you can confirm if your smoke detector is hard-wired before attempting to remove it. It is essential to know the type of detector you have for a safe and successful removal process.
Which is Better Hard Wired or a Battery Smoke Detector?
Both hard-wired and battery-operated smoke detectors have their advantages and drawbacks. It ultimately depends on your personal preferences and needs. Here are some points to consider when determining which type of detector is better for you:
1. Hard-Wired Smoke Detector:
Pros:
- Consistent power supply from your home’s electrical system.
- No need to worry about changing batteries.
- It can be interconnected with other alarms in your home.
Cons:
- Requires professional installation and rewiring.
- No power means no protection, so backup batteries are necessary.
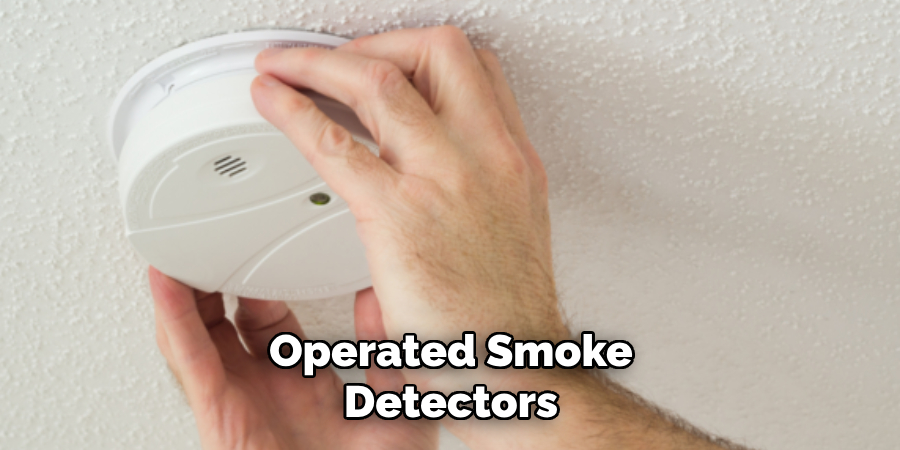
2. Battery Operated Smoke Detector:
Pros:
- Easy to install without any wiring required.
- It can be placed anywhere, making it ideal for renters or temporary living situations.
Cons:
- Relies on battery power, which needs to be regularly checked and replaced.
- Non-interconnected alarms may not alert you if there is a fire in another part of your home.
Ultimately, the best type of smoke detector for you depends on your individual circumstances. If you are still deciding, consider consulting with a professional or researching further to make an informed decision.
Conclusion
How to remove a hard wired smoke alarm may seem daunting, but with proper preparation and understanding, the process can be straightforward and safe. The provided steps, tips, and cautions are designed to guide you through the procedure with minimal risk and ensure you do not inadvertently compromise your home’s safety or violate local regulations.
Remember, when dealing with electrical components and safety devices such as smoke alarms, if you are unsure or uncomfortable at any point, consulting with or hiring a professional electrician is the safest choice. Not only does this ensure the job is done correctly, but it also minimizes the risk of injury or damage to your home.
In conclusion, following these guidelines will help you efficiently and safely remove a hard-wired smoke alarm, whether you’re replacing it with a new one or performing maintenance.
About
Safety Fic is a distinguished figure in the world of Diy design, with a decade of expertise creating innovative and sustainable Diy solutions. His professional focus lies in merging traditional craftsmanship with modern manufacturing techniques, fostering designs that are both practical and environmentally conscious. As the author of diy, Safety Fic delves into the art and science of Safety Fic-making, inspiring artisans and industry professionals alike.
Education RMIT University
(Melbourne, Australia) Associate Degree in Design (Safety Fic) Focus on sustainable design, industry-driven projects, and practical craftsmanship. Gained hands-on experience with traditional and digital manufacturing tools, such as CAD and CNC software.
Nottingham Trent University
(United Kingdom) Bachelor’s in diyfastly.com and Product Design (Honors) Specialized in product design with a focus on blending creativity with production techniques. Participated in industry projects, working with companies like John Lewis and Vitsoe to gain real-world insights.
Publications and Impact
In diy, Safety Fic his insights on indoor design processes, materials, and strategies for efficient production. His writing bridges the gap between artisan knowledge and modern industry needs, making it a must-read for both budding designers and seasoned professionals.