

Learning how to remove Addalock is a simple yet essential process for anyone using this portable security device. Addalock is a widely popular safety solution, especially for travelers or renters, offering an additional layer of protection for doors without permanent installation or damage to the property. However, as convenient as it is to set up, some users may need help with its removal, especially if they’re first-time users.
Removing Addalock correctly ensures that both the lock itself and the door remain undamaged while preserving the device for future use. Whether you’re moving to another room, switching doors, or packing up after a trip, this guide will provide step-by-step instructions to make the process stress-free. By the end, you’ll feel confident in removing this practical security tool with ease.
Why Removing Addalock Correctly is Important
Understanding how to properly remove Addalock is vital for several reasons. Firstly, mishandling it can result in scratches or minor damage to your door or door frame. Since Addalock doesn’t require tools for installation, it’s designed to be damage-free, but incorrect removal could compromise both the device and surface if not executed with care.
Addalock is a portable security solution prized for its reusability. Removing it correctly ensures that it remains in good condition, ready for repeated use. This is particularly important for travelers or renters who use Addalock frequently in various settings. Knowing how to remove it without misplacing or damaging any components maximizes its reliability as a long-term solution.
Finally, safely removing Addalock allows you to transition smoothly between using the lock on different doors or during different moments of travel. It keeps the security device handy and ready for use whenever you need peace of mind in an unfamiliar space. Removing the Addalock properly builds confidence, showing just how versatile this simple security tool can be.
Step-by-Step Guide: How to Remove Addalock
Step 1: Understand the Addalock Mechanism
To start, familiarize yourself with how Addalock operates. The device consists of two main parts—a metal plate that inserts into the door’s latch and a red handle or mechanism that secures the door shut from the inside. Knowing how these components work together makes removal straightforward and ensures that you don’t damage the lock or the door.
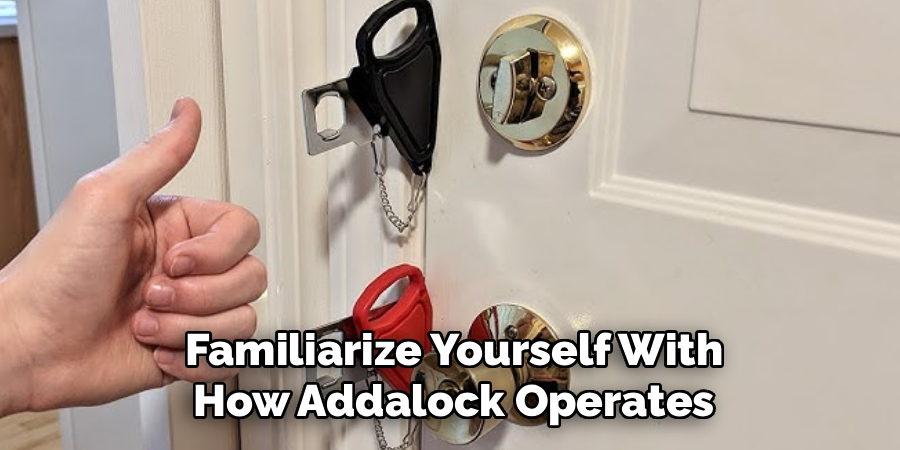
If you’ve already used Addalock, you might recall how it slides into place at the locking point and is then secured by the device handle. Reverse-engineering this setup will help make the removal process more intuitive. Be sure that the locking mechanism is not in an overly stressful position, as this could make the components harder to release.
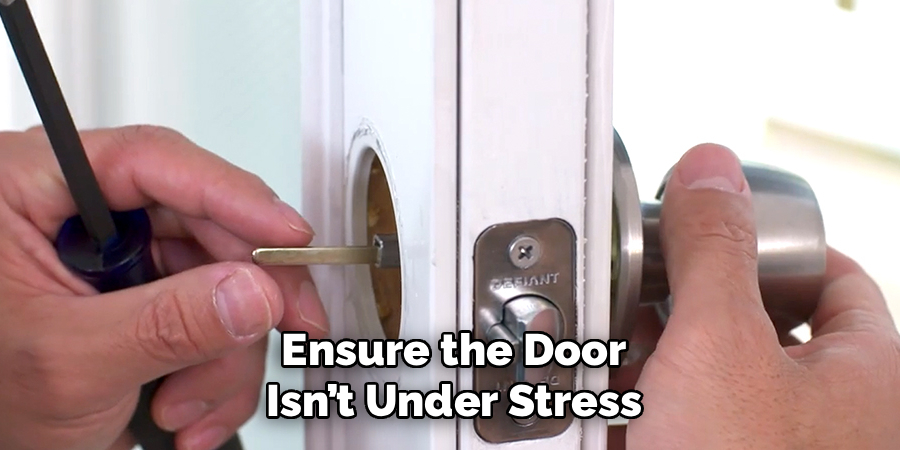
Step 2: Prepare the Door for Removal
Before removing the Addalock, make sure that the door itself is in a stable position. Ensure it’s closed fully but not under excess pressure. If the door is being pushed or pulled, it might add strain to the lock, making removal unnecessarily difficult.
Start by standing inside the room, holding the door steady. The goal here is to prevent any sudden shifts while you work. This small but important step minimizes the chances of misaligned components during the removal process, creating a stress-free starting point.
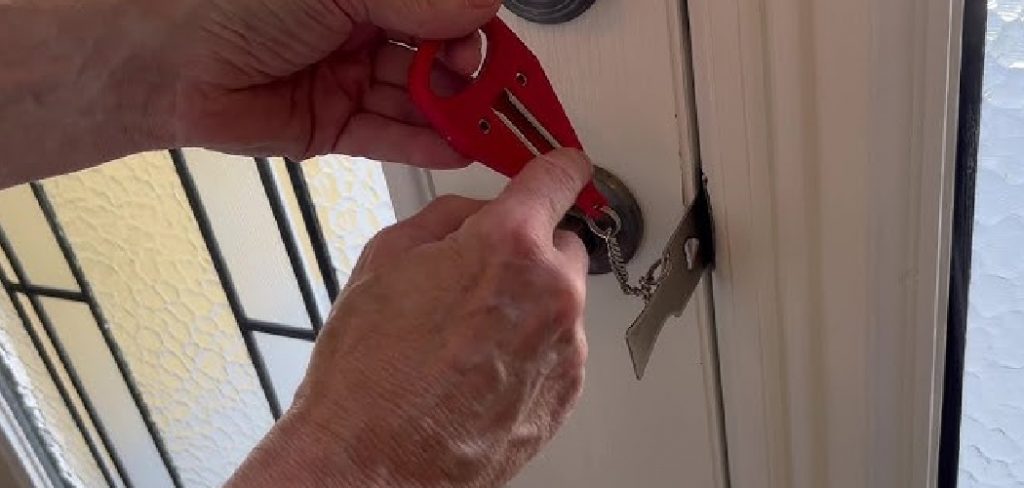
Step 3: Release the Red Handle
Locate the red handle on the Addalock, which plays a primary role in keeping the device in its locked position. To release it, hold the red handle firmly and lift it upward or outward, depending on how it was installed. This movement disengages the pressure securing the door, effectively unlocking the Addalock.
Avoid forcing the handle if it doesn’t lift on the first try—check to ensure the door isn’t under excessive pressure or that the handle isn’t stuck. With proper care, releasing the handle should be smooth and quick, marking the first major step in the removal process.
Step 4: Remove the Metal Plate

After disengaging the red handle, focus on the metal plate inserted into the door latch. This plate provides the core function of the Addalock, physically securing the door. Gently wiggle the plate to loosen it from the latch. Pull it out slowly, ensuring it clears the latch fully before releasing your grip.
During this step, it’s important to avoid bending or scratching the plate, as this could damage its integrity over time. The edges of the plate should slide out smoothly if no external forces are acting on the door. Once you remove the metal plate, set it aside carefully.
Step 5: Inspect the Addalock Components
Once the device is fully removed, take a moment to inspect its components. Check that the red handle moves freely and that the metal plate is straight without bends or warping. Any damage to these components can affect the lock’s performance in future uses.
This quick inspection also helps you ensure that no part of the device was left behind in the door latch or lost during the removal. By confirming that everything is intact, you’re ready to safely store or reuse the lock elsewhere.
Step 6: Clean the Door Area
After removing Addalock, examine the door and frame for any residual marks or dust. Although the device is designed to be non-invasive, prolonged use might leave slight impressions or smudges on the door surface. Use a clean, damp cloth to wipe over the affected areas gently.
Regular cleaning ensures the door remains in good condition after every use. It also prevents the buildup of dirt or residue that might interfere with future Addalock installations. Taking these extra steps adds to the professionalism and care of using a portable lock like this one.
Step 7: Store the Addalock Properly
To ensure the Addalock stays in optimal condition, store it securely in its original carrying pouch or another safe container. Keep it in a cool, dry place, away from sharp objects or excessive pressure that could damage its components.
By storing the Addalock properly, you’ll extend its lifespan and ensure it’s ready to use when you need it. Maintaining a habit of organizing the lock and its components helps you avoid losing any parts, especially if you frequently use it while traveling.
Step 8: Test Your Door’s Functionality
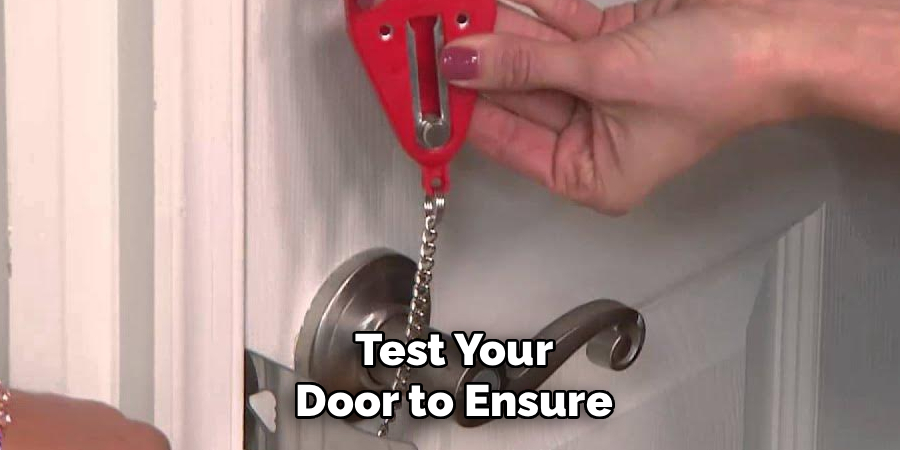
After the Addalock has been removed, test your door to ensure it operates smoothly without any hindrance. Open and close it a few times to confirm that the latch and locking mechanisms are in proper working order.
Testing the door provides peace of mind and guarantees that no part of the Addalock is obstructing the door or causing damage. This final step prepares your door for normal use or for a future Addalock reinstallation without complications.
Addalock’s Safety Benefits
The Addalock provides an exceptional layer of safety and security, making it an essential tool for both temporary and permanent applications. Its portable and easy-to-install design makes it ideal for travelers seeking extra protection in hotel rooms, college students wishing to enhance dorm security, or homeowners looking for added peace of mind.
By preventing unauthorized entry, the Addalock helps deter potential intruders and protects personal spaces. Furthermore, this device offers a level of privacy and control over access, ensuring users feel secure whether at home or on the go. Its versatility and effectiveness make the Addalock a reliable solution for anyone prioritizing safety in various environments.
Frequently Asked Questions
What is an Addalock, and how does it work?
Addalock is a portable locking device used to provide additional security for inward-swinging doors. It works by inserting a metal plate into the door latch and securing it with a red handle, preventing the door from opening.
Can using Addalock damage my door or frame?
When used and removed correctly, Addalock does not damage your door or frame. It’s designed to be portable and non-invasive, making it a popular option for renters and travelers.
What should I do if my Addalock gets stuck?
If Addalock gets stuck, ensure the door isn’t under stress (like strong pressure from outside or improper alignment). Wiggle the components gently, and avoid using excessive force to avoid damage.
Is Addalock reusable after removal?
Yes, Addalock is fully reusable. Properly removing and storing it ensures the device remains functional for future uses, even under frequent travel or relocations.
Can I use Addalock on any door?
Addalock is specifically designed for inward-swinging doors. It may not work on outward-swinging doors or doors with unusual latch mechanisms, so check compatibility before use.
Conclusion
Understanding how to remove Addalock is key to preserving both the device and your door’s condition. Following these steps ensures a smooth process, avoiding damage and preparing the lock for future use.
Addalock offers a practical solution for individuals seeking temporary door security, making it an ideal choice for travelers, renters, or anyone looking to enhance safety. Its compact design and ease of use make it a reliable companion for various scenarios, ensuring peace of mind wherever you go.
Proper removal and care transform Addalock into a lasting, reliable solution for your security needs. Start applying these techniques today and enjoy seamless portability and peace of mind with your Addalock!