ADT panels serve as the brains of many home security systems, seamlessly integrating various components for optimal protection. While highly reliable, there may come a time when knowing how to remove an ADT panel becomes essential.
Whether it’s due to upgrading to more advanced technology, moving to a new home, or addressing a panel malfunction, the removal process can be straightforward with the right knowledge. This guide aims to provide you with a comprehensive understanding of why and how to remove ADT panel, ensuring you can approach the task with confidence.
Types of ADT Panels
Understanding the variety of ADT panels is crucial for correctly removing your specific model.
A. Traditional Control Panels
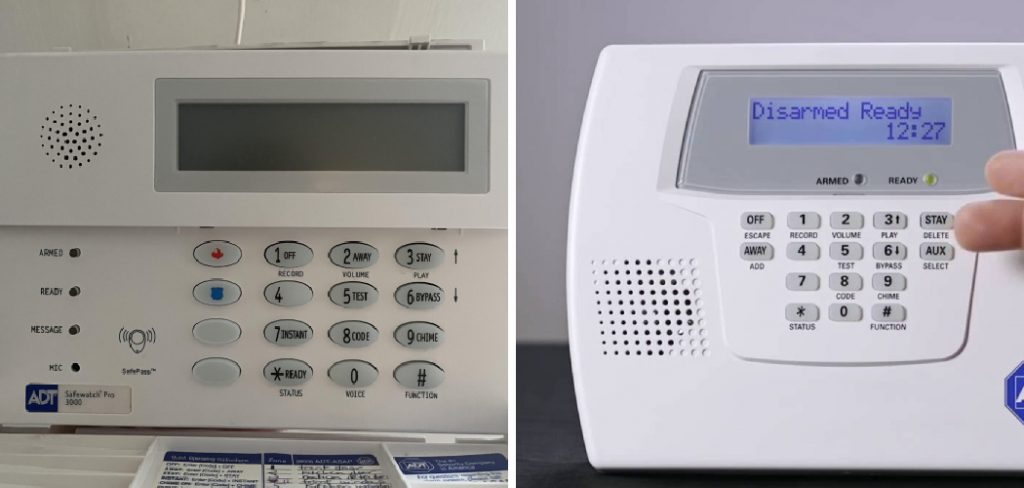
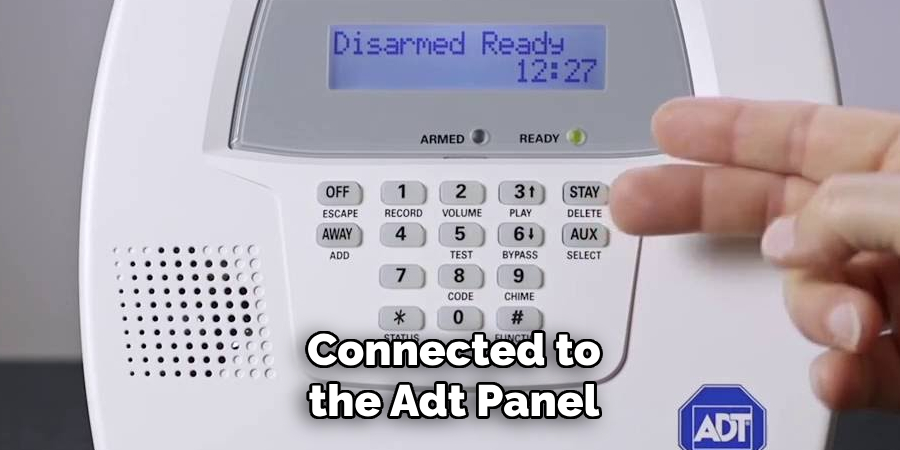
Traditional Control Panels are the most basic form of ADT security systems. They typically feature a physical keypad for inputting commands, such as arming or disarming the alarm. These panels are straightforward but very reliable, making them a staple in older security systems.
B. Touchscreen Panels
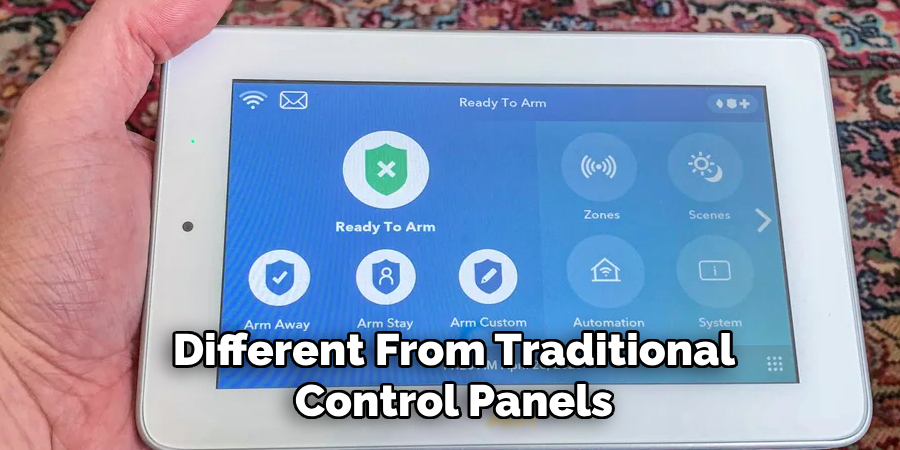
Touchscreen Panels represent a significant advancement in home security technology. These panels offer a sleek design and intuitive interface, making navigation and system management easier and more interactive. With features like one-touch arming, weather alerts, and user codes, they provide enhanced usability and functionality.
C. Wireless Key Pads
Wireless Key Pads are an extension of ADT systems, allowing you to control your security system remotely. These keypads communicate with the main alarm system wirelessly, offering flexibility in placement and usage within your home. They are particularly useful for large homes or for those needing to access their system from various locations.
Reasons to Remove Your ADT Panel
Deciding to remove your ADT panel is not a decision taken lightly, but various circumstances may necessitate this action.
A. Upgrading to a New System
One primary reason for removing an ADT panel is the desire or necessity to upgrade to a more advanced system. Technological advancements in home security are ongoing, and newer models offer enhanced features, better integration with smart home devices, and improved user interfaces.

Upgrading ensures that your home security system remains efficient, advanced, and capable of providing the highest level of protection.
B. Relocation of the Panel
Sometimes, the initial placement of an ADT panel may no longer be ideal due to remodeling, changes in home layout, or the need for easier access. Relocating the panel to a more suitable location can significantly improve the system’s functionality and the user’s interaction with it.
C. Panel Malfunction
Like any electronic device, ADT panels can experience malfunctions over time. Issues such as unresponsive keypads, frequent false alarms, or complete system failures are indications that the panel might need to be removed, either for repair or replacement. Removing a malfunctioning panel is crucial to maintain the integrity and reliability of your home’s security system.
Precautions Before Removal
Certain precautions must be taken before proceeding with the removal of your ADT panel to ensure a safe and efficient process. These initial steps are crucial in avoiding potential risks and complications.
A. Disarming the Alarm System
First and foremost, it’s essential to disarm the alarm system to prevent triggering any alerts or emergency services during the removal process. This can typically be done through the panel’s interface or, in some cases, remotely via a mobile app associated with your ADT system.
B. Checking for Power Sources
Another critical step is identifying and understanding all power sources connected to the ADT panel. This includes both the main electrical supply and any backup batteries. Disconnecting the power properly ensures that there’s no risk of electrical shock or accidental reactivation of the system while it’s being dismantled.
C. Contacting ADT Support (if necessary)
If you’re unsure about any aspect of the removal process or if dismantling the panel interferes with service agreements or warranties, it’s advisable to contact ADT support. Their guidance can help you avoid any potential issues related to the removal and ensure that you’re not violating any terms of service that could affect future support or warranty claims.
Removing Traditional Control Panels
Removing traditional control panels involves a series of careful steps to ensure the process is completed safely and efficiently. Here’s how to approach this task:
A. Locating and Removing the Cover
The first step in removing a traditional ADT control panel is to locate and remove its cover. This is typically accomplished by loosening screws or releasing clips that hold the cover in place. It’s important to proceed with caution to avoid damaging the cover or the panel itself. Once the cover is removed, you’ll have access to the internal components of the system, including the circuit board and wiring.
B. Disconnecting Wires and Power Source
With the panel’s internal components exposed, the next step is to carefully disconnect the wires. Start by identifying the power source wires, which are usually distinguished by their color or labeling.
Gently detach these wires from the terminal, noting their configuration for future reference in case you need to reconnect them or install a new system. After disconnecting the power source, proceed to disconnect any other wires connected to the panel, such as those leading to sensors or auxiliary devices.
C. Detaching the Panel from the Wall
Once all wires have been safely disconnected, the final step is to detach the panel from the wall. This typically involves unscrewing the mounting brackets or fasteners that secure the panel in place.
Take care to support the panel with one hand while removing the last fasteners to prevent it from falling. After the panel is detached, carefully set it aside in a safe place until you’re ready to dispose of it or hand it over for recycling or refurbishing.
By following these steps carefully, you can safely remove your traditional ADT control panel, paving the way for an upgrade or relocation of your home security system.
How to Remove ADT Panel: Removing Touchscreen Panels
Removing touchscreen panels is slightly different from traditional control panels due to their advanced technology and integrated features. Follow these steps to remove a touchscreen panel safely:
A. Accessing the Settings Menu
To begin, access the settings menu on your touchscreen panel. This usually involves entering a passcode or using an administrator access feature. Navigating this menu is crucial as it allows you to perform necessary preparations before physically detaching the panel. Look for options related to system settings or maintenance to proceed to the next steps safely.
B. Disabling the Panel
Once you’ve accessed the settings or maintenance menu, the next step is to disable the panel. This may involve selecting a disable or maintenance mode within the menu options.
Disabling the panel ensures that it doesn’t trigger alarms or send emergency signals while you’re removing it. This step is vital for preventing false alarms and ensuring that emergency services are not dispatched accidentally.
C. Detaching from the Mounting Bracket
After the panel is properly disabled, you can begin the physical removal. Touchscreen panels are typically mounted to the wall with a bracket system. Look for release mechanisms or screws that secure the panel to the brackets. These could be located on the sides or back of the panel.
Once identified, gently release the panel from the bracket. Be cautious during this step to avoid damaging the panel or the wall. Holding the panel securely with one hand while releasing the mechanism with the other can prevent accidental drops.
By following these instructions, you can remove your touchscreen panel safely, making it easier to upgrade your system, move your panel to a new location, or replace it if necessary.
How to Remove ADT Panel: Removing Wireless keypads

Wireless keypads offer flexibility in placement and operation within modern security systems but require specific steps for safe removal. Here is a detailed guide to efficiently remove a wireless keypad from your security setup:
A. Disarming the Alarm System
Before attempting to remove your wireless keypad, it’s crucial to ensure that the entire alarm system is disarmed. This step prevents the system from sending unintended signals or alarms during the removal process.
Disarming can generally be done directly from the keypad or through a mobile application that controls your security system. It’s vital to wait for visual or audio confirmation that the system is fully disarmed before proceeding to the next step.
B. Removing Batteries (if applicable)
Batteries power many wireless keypads to maintain their connectivity even during power outages. Locate and remove the battery compartment before detaching the keypad from its mounted surface.
This may require sliding off the cover, unscrewing a panel, or pressing a release button. Carefully remove the batteries and set them aside. It’s essential to handle batteries with care to prevent any damage or leakage.
C. Detaching from the Wall or Surface
After the alarm system is disarmed and any batteries are removed, you can proceed to detach the keypad from its installed location. Wireless keypads are commonly attached using adhesive strips, mounting brackets, or screws.
If the keypad is adhered to a surface, gently pull it away, starting from one corner, to minimize damage to the wall or keypad. For keypads secured with screws or brackets, use the appropriate screwdriver to loosen and remove the hardware before carefully lifting the keypad away from the surface.
By following these steps, you can safely remove your wireless keypad. This process helps ensure the security system is not unintentionally triggered, preserves the condition of both the keypad and installation surface, and prepares the device for reuse or proper disposal.
Proper Disposal or Repurposing
After successfully removing the various components of a security system, such as traditional control panels, touchscreen panels, and wireless keypads, it’s crucial to consider environmentally responsible ways to dispose of or repurpose these items.
Adhering to best practices not only benefits the environment but also complies with local regulations regarding electronic waste. Here are steps to properly manage the disposal or repurposing of these components:
A. Recycling Electronic Components
Electronic components contain valuable metals and materials that can be harmful to the environment if not disposed of correctly. Local electronic waste recycling facilities specialize in safely processing these items.
They recover usable materials and ensure harmful substances are handled appropriately. Before recycling, inquire with the facility about any preparation steps, such as removing batteries or specific parts, to facilitate the recycling process.
B. Donating or Selling Functional Panels
If the removed security panels are still functional, consider donating them to organizations or individuals in need. Alternatively, selling them is an option to recoup some of the investment while extending the product’s life cycle.
Platforms like online marketplaces, community boards, or even security system forums can be excellent places to offer these items. Ensure that all personal data is erased and the system is reset to factory settings before handing it over to the new owner.
C. Proper Disposal of Batteries
Batteries, especially those found in wireless keypads, require special attention during disposal. Many batteries contain chemicals that can be hazardous if released into the environment.
Local recycling programs often accept batteries for proper disposal. Retailers and community centers sometimes offer battery recycling drop-off points. Ensure batteries are handled and stored carefully to prevent leakage or damage before disposal.
By following these guidelines, you can ensure that the components of your security system are disposed of or repurposed responsibly, contributing to sustainable practices and minimizing environmental impact.
Troubleshooting Common Issues
In the process of removing and repurposing your security system’s components, you might encounter a few common issues. Here’s how to address them effectively:
A. Panel Won’t Power Off
If you’re struggling to power off a panel, first check the manual for any specific instructions. Often, a hidden reset button or specific command sequence is required to fully shut down these devices.
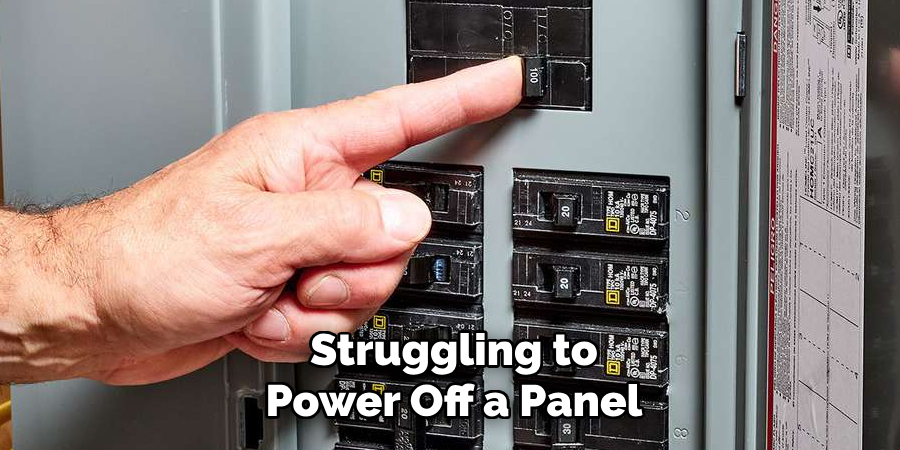
If the panel remains on, ensure it’s not connected to any backup power sources, like batteries or an uninterruptible power supply (UPS). If all else fails, consulting with the manufacturer’s support may provide additional insights.
B. Difficulty Removing from Mounting Bracket
When a panel refuses to budge from its mounting bracket, verify you’ve removed all screws or locking mechanisms. Sometimes, a bracket may have a hidden latch or screw that’s not immediately visible.
Applying too much force can damage the wall or the panel itself, so proceed with caution. A gentle wiggle or the use of a flat tool (like a flathead screwdriver) might help in safely loosening the panel.
C. Restoring Alarm Functionality After Removal
After removing a panel or keypad, restoring your alarm system’s functionality can sometimes pose a challenge. Ensure all components are correctly reconnected and that the power supply is uninterrupted.
Double-check that any newly installed devices are compatible with your existing system and that you’ve followed the synchronization or pairing process accurately. If the system doesn’t resume its functionality, consulting the system’s manual or seeking professional assistance may be necessary to troubleshoot the underlying issue.
Frequently Asked Questions
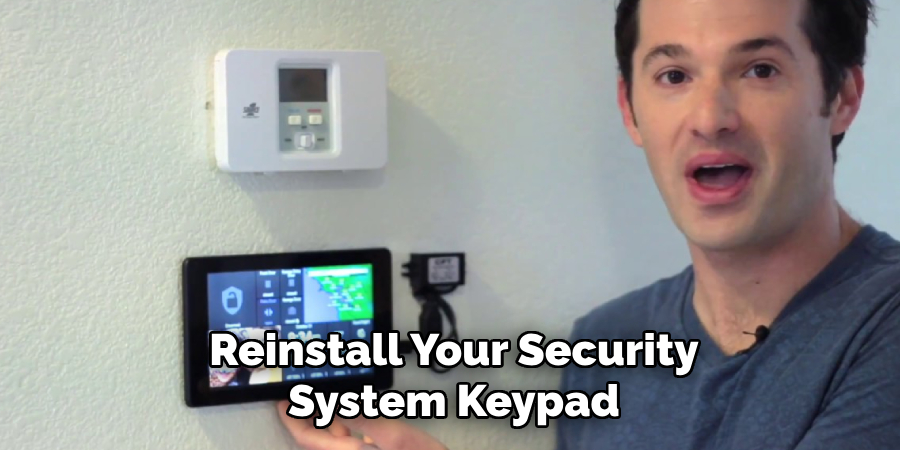
Q1: Can I Remove and Reinstall My Security System Keypad Myself?
A1: Yes, you can remove and reinstall your security system keypad yourself by carefully following the manufacturer’s instructions and the steps outlined in this guide. Ensure the system is disarmed and powered off before beginning the removal process.
Q2: What Do I Do if My Security Keypad Won’t Come Off Even After Removing Screws?
A2: If your security keypad remains stuck after removing screws, check for any hidden clips or adhesives that might still be holding it in place. Apply gentle, consistent force and consider using a flat tool like a flathead screwdriver to carefully pry it away from the surface.
Q3: How Can I Ensure the Proper Disposal of My Electronic Security Components?
A3: To ensure proper disposal, contact your local electronic waste recycling facility for specific disposal guidelines. They can help you prepare your electronic security components for recycling and provide information on drop-off locations.
Q4: What Should I Do with Functional Security Panels I No Longer Need?
A4: Functional security panels can be donated to organizations or individuals in need or sold to recoup some of the original investment. Be sure to erase all personal data and reset the system to factory settings before donating or selling the panels.
Q5: How Can I Troubleshoot Issues with Restoring Alarm Functionality After Component Removal?
A5: Make sure all components are properly reconnected and that there is a stable power supply. Confirm the compatibility of any new devices with your existing system and accurately follow any synchronization or pairing procedures. If issues persist, refer to the system’s manual or contact a professional for assistance.
Q6: Is There a Risk of Damaging the Wall or Surface when Removing a Security Keypad?
A6: If the keypad is removed carefully and according to the instructions, there is a minimal risk of damaging the wall or surface. If the keypad is adhered to the wall with adhesive strips, gently heating the adhesive with a hair dryer can help to loosen it without causing damage.
Final Thoughts
In conclusion, understanding how to remove ADT panel components is crucial for anyone looking to upgrade or relocate their alarm systems. This process, detailed throughout the guide, demystifies what could otherwise be a daunting task. It underscores the ease with which these components can be safely removed, ensuring that the security system remains intact for future use or disposal.
The importance of this endeavor cannot be overstated, as it not only facilitates system upgrades and relocations but also promotes environmental responsibility through proper disposal and recycling methods.
With a clear, step-by-step approach, homeowners and technicians alike are empowered to handle their security system components with confidence. This knowledge ensures the longevity of their investment and the continued safety of their property and the environment.
About
Safety Fic is a distinguished figure in the world of Diy design, with a decade of expertise creating innovative and sustainable Diy solutions. His professional focus lies in merging traditional craftsmanship with modern manufacturing techniques, fostering designs that are both practical and environmentally conscious. As the author of diy, Safety Fic delves into the art and science of Safety Fic-making, inspiring artisans and industry professionals alike.
Education RMIT University
(Melbourne, Australia) Associate Degree in Design (Safety Fic) Focus on sustainable design, industry-driven projects, and practical craftsmanship. Gained hands-on experience with traditional and digital manufacturing tools, such as CAD and CNC software.
Nottingham Trent University
(United Kingdom) Bachelor’s in diyfastly.com and Product Design (Honors) Specialized in product design with a focus on blending creativity with production techniques. Participated in industry projects, working with companies like John Lewis and Vitsoe to gain real-world insights.
Publications and Impact
In diy, Safety Fic his insights on indoor design processes, materials, and strategies for efficient production. His writing bridges the gap between artisan knowledge and modern industry needs, making it a must-read for both budding designers and seasoned professionals.
