

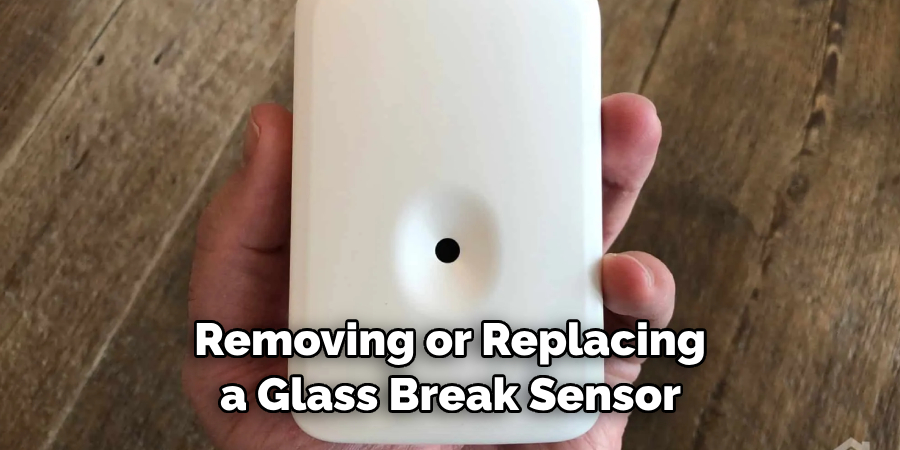
Glass Break Sensors are a great way to protect your home from intruders. Installing them on windows and doors can help provide peace of mind that someone won’t be able to break in without triggering an alarm system. However, if you need to replace the glass break sensor cover, there is a simple process.
Glass break sensors are a great way to protect your property in an emergency. However, you may need to remove the cover to access the battery or perform other maintenance tasks.
This guide will explain how to safely and effectively remove your glass break sensor’s cover so you can complete any necessary repairs or maintenance without damaging it. You can find step-by-step instructions on how to remove glass break sensor cover in this blog article.
Tools You Will Need
- Phillips screwdriver
- Safety goggles
- Flathead screwdriver
- Wire cutters
- Needle-nose pliers
- Electrical tape
- Pencil or marker
- Flashlight
- Ratchet and socket set.
Step-by-Step Processes for How to Remove Glass Break Sensor Cover
Step 1: Inspect the Glass Break Sensor Cover
Before attempting to remove the glass break sensor cover, it is best to inspect it closely for any signs of damage or corrosion. If any visible damage, such as cracking, fraying wires, or rust, the cover should be replaced immediately.
Step 2: Put on Safety Equipment

Ensure that safety equipment such as goggles and gloves are worn when handling electrical components and tools. Using a Phillips screwdriver, unscrew the screws on the back of the glass break sensor cover to remove it.
Step 3: Detach Wires from the Back Plate
Once the screws have been removed, use a flathead screwdriver or needle-nose pliers to detach the wires connected to the back plate. If the wires are too difficult to remove, use wire cutters to cut them away from the back plate safely.
Step 4: Secure Wires with Electrical Tape
Once the wires have been detached or cut, use electrical tape to secure them at both ends. This will help prevent any shorts from occurring when the cover is removed. If necessary, use a pencil or marker to mark the back plate and wires for future reference. This will help when reattaching the cover.
Step 5: Use a Flashlight to View Inside the Cover
Use a flashlight to view inside the glass break sensor cover and identify any debris causing damage or interference. If necessary, use pliers or needle-nose pliers to remove the debris. Reattach the glass break sensor cover to the back plate using screws, a ratchet, and a socket set. Ensure all wires are securely attached and not pinched by the screws or cover.
Step 6: Test the Glass Break Sensor Cover
Once the cover is reattached, test it out by ensuring the alarm will sound when triggered. If all works correctly, the cover has been successfully removed and reattached.
Removing or replacing a glass break sensor cover can be daunting for those with electrical experience. However, by following these steps and using the proper tools and safety equipment, anyone can safely remove or replace a glass break sensor cover in no time.
Precautions for How to Remove Glass Break Sensor Cover
- Always wear safety equipment such as goggles and gloves to protect yourself from injury
- Make sure the area is well-ventilated. You don’t want to risk inhaling toxins or residue from the sensor cover removal process.
- Disconnect the power source to the system before attempting to remove anything. This will ensure you won’t get a shock from any live wires.
- Secure the break sensor cover with locking pliers before removing it, as it may be stuck.
- Clean up and dispose of glass or debris left behind the break sensor cover carefully, using a vacuum cleaner if needed.
- Make sure all connections are firmly reattached when replacing the broken sensor cover. This will ensure that the system is working properly.
These precautions are important to follow when removing a glass break sensor cover safely and correctly. These steps will help you complete this task without major incidents or injuries.
Can You Clean the Inside of Your Glass Break Sensor While It is Still in the Cover?
Cleaning the inside of your glass break sensor is not recommended while it is still on its cover. Because you cannot see what is going on inside the cover, it is possible to damage the parts if you attempt to clean them with any type of liquid or chemical.
Remove the sensor from its cover before cleaning it to ensure safe and proper cleaning. Additionally, check the manufacturer’s instructions for cleaning and storing the glass break sensor. This will help ensure that your sensor remains in working order.
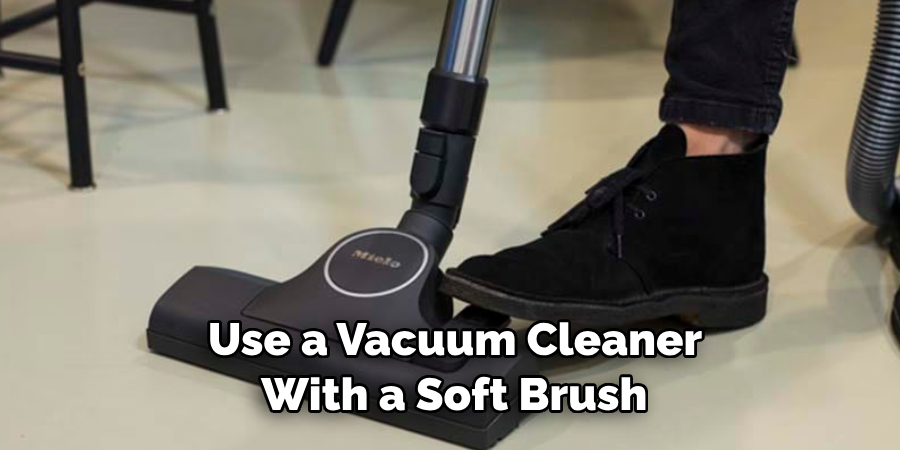
Clean the sensor with a soft cloth or brush after removing the sensor from its cover. Avoid using anything abrasive, as this could scratch or damage the delicate parts of the sensor. If necessary, you can also use a vacuum cleaner with a soft brush attachment to get into the hard-to-reach areas of the sensor. When finished cleaning, store the glass break sensor in its cover and dry place until you are ready to reinstall it.
What Are Some Common Issues With Glass Break Sensors?
Glass break sensors are designed to detect the sound of glass breaking within an area. However, they can also detect other loud noises, such as thunder or someone slamming a door.
This can lead to false alarms and reduce the effectiveness of the glass break sensor. In some cases, the sensitivity of the glass break sensor may need to be adjusted to detect glass breaking accurately.
Another common issue with glass break sensors is dirt and debris buildup on the sensor cover. This can prevent the sensor from detecting sound waves, resulting in missed or false alarms. Removing dust and debris accumulated on both sides of the sensor cover is important for optimal performance.
Is There a Specific Way to Securely Fasten the Screws on the Cover After Replacing It?
Yes. It is important to ensure that the screws on the cover of a Glass Break Sensor are securely fastened and in place once it has been replaced. To do this, tighten them firmly with a screwdriver or drill bit.
The screws should be tightened just enough so that they don’t become loose again during normal use but not so much so that they begin to strip or break, damaging the sensor.
In addition, it’s important to be sure not to over-tighten the screws as this can also cause damage. To ensure proper placement and secure tightening of the screws on the cover of a Glass Break Sensor, use a torque screwdriver or similar device to help ensure that each screw is tightened to the appropriate level.
Is it possible to purchase a replacement cover for your glass break sensor?

Yes, purchasing a replacement cover for your glass break sensor is possible. You can find these covers at any hardware or home improvement store. Make sure you purchase the correct size and type of cover, as this will ensure that your glass break sensor functions properly after installation. Additionally, be sure to follow the instructions carefully when installing a new cover so that you do not cause any damage to your sensor.
Once you have purchased and installed the cover, you should test the glass break sensor to ensure it is working correctly. To do this, simply throw a handful of small pebbles at your window or door – if the glass break sensor activates when these objects hit the window or door, then your new cover is installed correctly.
Is There Any Advice or Guidance You Can Offer to Help You Remove the Glass Break Sensor Cover Correctly?
Yes. It is important to use the correct tools and take extra precautions when removing a glass break sensor cover, as not doing so could cause damage to the device or even yourself. Before you begin, ensure the power supply is switched off and follow the manufacturer’s instructions on removing the cover.
Use only screwdrivers or Allen keys designed for your particular model, and ensure that you insert the tool into the screw head at 90 degrees. Do not over-tighten the screws when reassembling the cover, as this will cause strain on the device which could lead to malfunction.
Conclusion
In conclusion, removing a Glass Break Sensor Cover is simple enough. One must ensure they shut off the power supply, unscrew all the screws holding it, and then gently slide the glass break cover out. Keep track of where each screw is so you can put it back where it belongs when you are done
. After everything is disconnected and uninstalled, the glass break cover should be ready to remove. This article has been beneficial for learning how to remove glass break sensor cover. Make Sure the preventive measures are followed chronologically.
About
Safety Fic is a distinguished figure in the world of Diy design, with a decade of expertise creating innovative and sustainable Diy solutions. His professional focus lies in merging traditional craftsmanship with modern manufacturing techniques, fostering designs that are both practical and environmentally conscious. As the author of diy, Safety Fic delves into the art and science of Safety Fic-making, inspiring artisans and industry professionals alike.
Education RMIT University
(Melbourne, Australia) Associate Degree in Design (Safety Fic) Focus on sustainable design, industry-driven projects, and practical craftsmanship. Gained hands-on experience with traditional and digital manufacturing tools, such as CAD and CNC software.
Nottingham Trent University
(United Kingdom) Bachelor’s in diyfastly.com and Product Design (Honors) Specialized in product design with a focus on blending creativity with production techniques. Participated in industry projects, working with companies like John Lewis and Vitsoe to gain real-world insights.
Publications and Impact
In diy, Safety Fic his insights on indoor design processes, materials, and strategies for efficient production. His writing bridges the gap between artisan knowledge and modern industry needs, making it a must-read for both budding designers and seasoned professionals.