

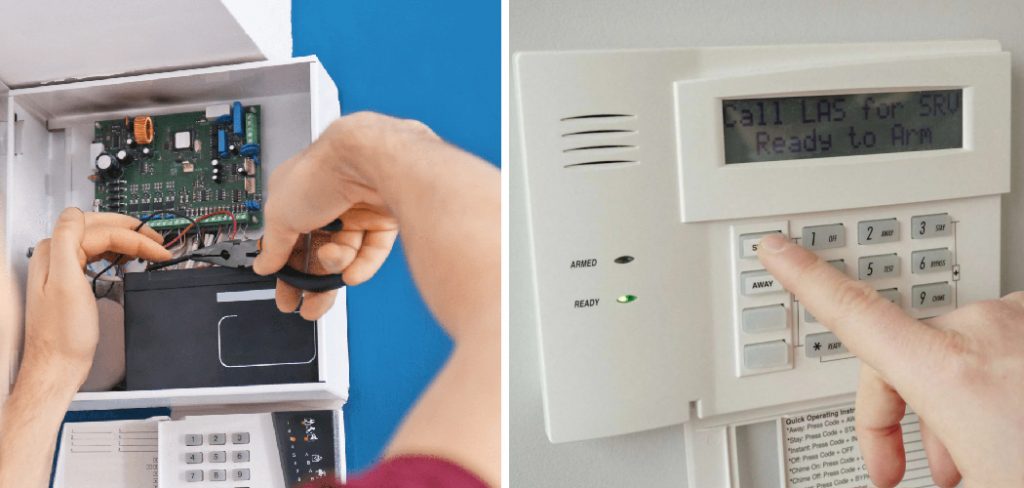
Removing an old alarm keypad from the wall may seem like a daunting task, but it’s a necessary step when upgrading or replacing your security system. Whether you’re transitioning to a more modern keypad or need to make repairs, understanding how to safely remove the existing one is crucial. In this comprehensive guide, we will delve into the step-by-step process of how to remove old alarm keypad from wall.
From preparing the workspace to disconnecting wires and dealing with mounting hardware, this article will provide you with the knowledge and instructions needed to complete the task efficiently and without causing damage. Join us as we explore the art of removing an old alarm keypad, ensuring that you can undertake this essential security system maintenance with confidence and ease.
The Need to Remove an Old Alarm Keypad
If you have an old alarm keypad in your home, chances are it’s sitting in a wall somewhere and taking up valuable space. You may not be using the keypad anymore or it could be outdated and need to be replaced with a more modern version. Whatever the reason, knowing how to safely remove an old alarm keypad from the wall is essential for keeping your family safe and secure.
The first step in removing an old alarm keypad is to locate the power switch on the device. This is usually located near the top of the unit, either inside or outside of it. Once you have found the power switch, move it to the “off” position so that no electricity will be flowing to the unit when you begin to remove it.
Next, locate the screws that hold the keypad in place. You may need a screwdriver or other tool to unscrew these screws, depending on the type of device and how it is secured. Once you have unscrewed all of the screws holding the unit in place, carefully pull the old alarm keypad away from the wall.
Be sure to check for any remaining wires attached to the unit before you dothis, as removing the alarm keypad without cutting those wires could cause a short circuit in your home’s electrical system.
Gather Necessary Tools and Materials
Before beginning the process of removing an old alarm keypad from the wall, ensure you have the necessary tools and materials at hand. This includes a screwdriver (both flathead and Phillips may be required), a voltage tester, wire nuts, and possibly a drywall patch kit and paint if you plan to repair the area after removal.
Always remember to wear safety glasses to protect your eyes from any possible debris during the removal process.
10 Steps How to Remove Old Alarm Keypad from Wall
Unplug the Alarm System

The first step in removing an old alarm keypad from the wall is to unplug the alarm system. This will ensure that it does not accidentally activate while you are working on it. Make sure to turn off any power sources that may be connected to the alarm system before attempting to remove the keypad.
Remove Batteries
Next, you will need to remove any batteries that may be in the alarm keypad. This is important as leaving them in can cause a short circuit and damage both your keypad and your wall. Once all of the batteries have been removed, you can proceed with removing the keypad from the wall.
Take a Phillips head screwdriver and use it to remove the screws that are holding your keypad in place. Once all of the screws have been removed, you can carefully pull off the keypad from the wall. Be sure to be gentle when doing this, as any sudden jerks could cause damage to either the masonry or your keypad.
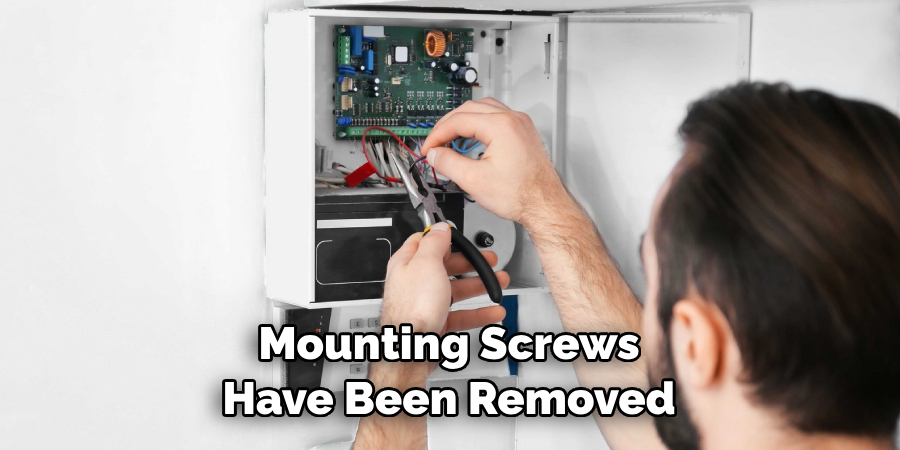
Locate Keypad Mounting Screws
Once you have unplugged and removed any batteries from the alarm keypad, you will need to locate its mounting screws. These are typically located at each corner of the keypad and can be accessed by using a Phillips head screwdriver or similar tool. Make sure to remove all the screws as this will help you easily remove the keypad from the wall.
Unscrew Keypad Mounting Screws
Once you have located all of the mounting screws, use your screwdriver to unscrew them until they are completely loose. Be sure not to over-tighten them, as this could cause damage to both your wall and your keypad. Once all of the screws are loose, you can remove them completely from their holes in the wall.
Gently Pull the Keypad Away From the Wall
Now that all of the mounting screws have been removed, gently pull away from your old alarm keypad away from its mount on the wall until it is free from its frame and brackets. It may help if you place one hand on either side of the keypad for stability while pulling it away with gentle pressure using both hands.
Once you have successfully removed the keypad, make sure to safely store it away for future use in case you ever need to reference its information. It is also important that you securely disconnect and unplug any wires or cords connected to the old alarm keypad before discarding it.
Disconnect Wires
Once your old alarm keypad has been pulled away from its mount on the wall, disconnect any wires that may still be attached to it by gently pulling them away with pliers or another tool designed for this purpose. Be careful when doing this, as some wires may be fragile and could break if handled too roughly or without proper care being taken when disconnecting them from their ports on your old alarm keypad’s back panel or circuit board.
Once all the wires have been successfully disconnected, your old alarm keypad should be free and ready to be safely removed.
Remove Old Alarm Keypads from the Back Panel
If there are still components such as buttons or other parts attached to your old alarm’s back panel, carefully remove these before proceeding with taking out its back panel itself by unscrewing any screws holding it into place and then lifting it off gently but firmly with one hand while supporting its underside with another hand or a flat surface such as a tabletop or counter top for added stability during removal. Make sure to unplug any connected wires and cables as well.
Once the back panel has been removed, it should be easy to access the alarm keypad’s mounting screws, which can then be unscrewed with a Phillips or flathead screwdriver.
Remove Circuit Board
After taking out your old alarm’s back panel, use a flathead screwdriver (or similar tool) to carefully pry out its circuit board from inside of its casing by gently pushing down on one corner at a time until it comes free from within its frame before setting aside for safe keeping until ready for disposal.
It is important to take extra caution when removing the circuit board, as it may be delicate and can easily be damaged if handled too roughly.Next, unscrew the bracket that holds the keypad in place, carefully removing it from your wall and placing it aside for disposal. Finally, gently pull out any wires connected to your keypad before discarding them with the other parts of your alarm system.
Dispose Properly
Carefully wrap up all components, including wires, buttons, circuit boards, etc., before disposing of them properly according to local regulations regarding hazardous materials disposal in order to protect yourself and others around you during the disposal process.
You may also want to consider recycling the materials, if possible. Check with your local recycling facility for availability and guidelines.
Clean Up Area Around Wall Mounted Alarm Keypads
Finally, once everything has been disposed of properly, use a damp cloth along with mild detergent (if necessary) in order to clean up the area around where the old alarm was mounted so that new equipment can easily be installed without worrying about dirt/dust particles getting into new equipment causing potential damage or malfunction later down the line.
Safety is always paramount when it comes to installing or removing alarm systems and making sure that the area around the old alarm is clean will go a long way toward ensuring your safety as you work.
Conclusion
Removing an old alarm keypad is a messy job that requires a bit of elbow grease. It may be tempting to try to take the easier option and leave it on the wall, but if you’re not careful, you can damage the wall or even make things worse and cause yourself more trouble down the road. Taking a bit of extra time to do it correctly will save you lots of headaches in the future.
If you don’t feel comfortable doing so, contact your local home security provider for help with removing your old alarm keypad from the wall. Now that you know how to remove old alarm keypad from wall, start taking steps today toward improving your home security. You’ll be glad you did!
About
Safety Fic is a distinguished figure in the world of Diy design, with a decade of expertise creating innovative and sustainable Diy solutions. His professional focus lies in merging traditional craftsmanship with modern manufacturing techniques, fostering designs that are both practical and environmentally conscious. As the author of diy, Safety Fic delves into the art and science of Safety Fic-making, inspiring artisans and industry professionals alike.
Education RMIT University
(Melbourne, Australia) Associate Degree in Design (Safety Fic) Focus on sustainable design, industry-driven projects, and practical craftsmanship. Gained hands-on experience with traditional and digital manufacturing tools, such as CAD and CNC software.
Nottingham Trent University
(United Kingdom) Bachelor’s in diyfastly.com and Product Design (Honors) Specialized in product design with a focus on blending creativity with production techniques. Participated in industry projects, working with companies like John Lewis and Vitsoe to gain real-world insights.
Publications and Impact
In diy, Safety Fic his insights on indoor design processes, materials, and strategies for efficient production. His writing bridges the gap between artisan knowledge and modern industry needs, making it a must-read for both budding designers and seasoned professionals.