

Are you tired of constantly hearing beeps and alerts from your car’s parking sensors? You may want to replace your old sensors with new ones. Either way, removing parking sensors from your bumper is a relatively simple task that can be done in just a few steps.

Parking sensors are invaluable for assisting drivers in safely navigating tight spaces, but there are times when you may need to remove them from your vehicle’s bumper. Whether replacing faulty sensors, upgrading to new technology, or performing repairs on your car, carefully removing these delicate devices is essential to avoid damage.
This guide on how to remove parking sensors from bumper will walk you through the process step by step, ensuring you can safely and efficiently remove parking sensors from your bumper without causing harm to the sensors or your vehicle.
What Are the Causes of Damaged Parking Sensors?
Parking sensors are designed to be durable and withstand normal wear and tear. However, certain situations can lead to damage, including:
- Accidents or Collisions: The most common cause of damaged parking sensors is accidents or collisions. If your car has been hit in the rear end or sides, the sensors may become dislodged or break completely.
- Corrosion: Exposure to moisture, salt, and other environmental factors can cause sensor corrosion over time. This can affect their accuracy and functionality.
- Faulty Installation: If parking sensors are not installed correctly, they may not work properly and could get damaged during use.
What Will You Need?
To replace or repair damaged parking sensors, you will need the following tools and materials:
- Replacement parking sensor(s)
- Screwdriver
- Wrench
- Electrical tape
- Wire cutters/strippers
It is vital to choose high-quality replacement sensors that are compatible with your specific make and model of car. You can purchase these from a dealership or an auto parts store.
You may also need to consult your car’s manual for specific instructions on accessing and replacing the sensors, as this process can vary depending on the vehicle.
8 Easy Steps on How to Remove Parking Sensors From Bumper
Step 1: Prepare Your Workspace
Before starting, ensure your workspace is safe, spacious, and well-lit. Park your car on a flat surface and engage the parking brake to prevent movement while working. Gather all the necessary tools mentioned above and place them within easy reach.
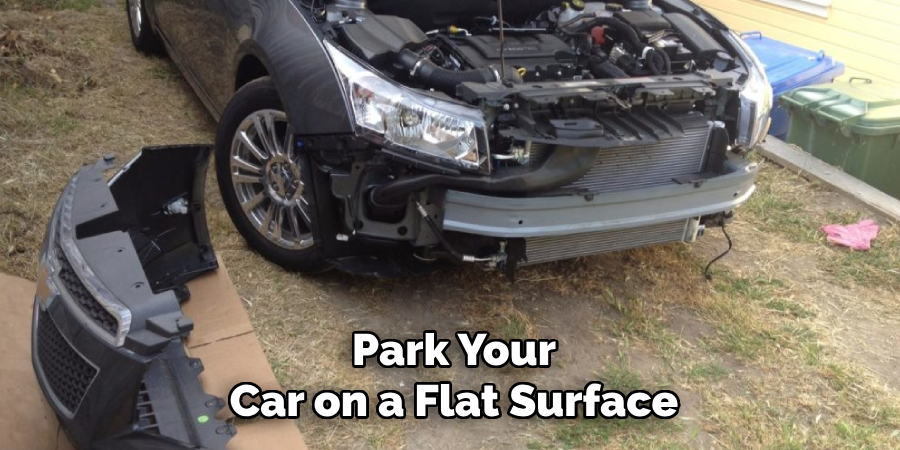
Wearing protective gloves to avoid injuries while handling sharp tools or electrical components is also a good idea. If you’re working in an area with limited light, use a portable work light or a flashlight to keep the bumper area well-illuminated. Preparing your workspace correctly will make the task easier and prevent unnecessary mistakes.
Step 2: Remove the Screws and Fasteners
Begin by locating all the screws and fasteners securing the bumper to your vehicle. These are typically found along the edges, in the wheel wells, and sometimes underneath the car. Use the appropriate screwdriver or wrench to remove them carefully one by one. Keep track of all screws and fasteners by placing them in a small container to avoid losing any pieces. Be gentle during this process to prevent stripping the screws or damaging the bumper.
Step 3: Detach the Bumper from the Vehicle
Once all the screws and fasteners have been removed, gently pull the bumper away from the vehicle. Start from one side and gradually work to the other, ensuring no clips or attachments are connected. If the bumper feels stuck, check for hidden fasteners or clips that might have been missed during the previous step. Take your time to prevent causing any damage to the bumper or the surrounding body of the vehicle.
Step 4: Inspect and Clean the Area
With the bumper removed, take a moment to inspect the exposed area for any signs of damage, rust, or wear. This is also an excellent opportunity to clean the underlying surfaces, removing any dirt, debris, or grease that may have accumulated. Use a soft cloth and a suitable cleaning solution to ensure the area is clean and ready for further repairs or adjustments.
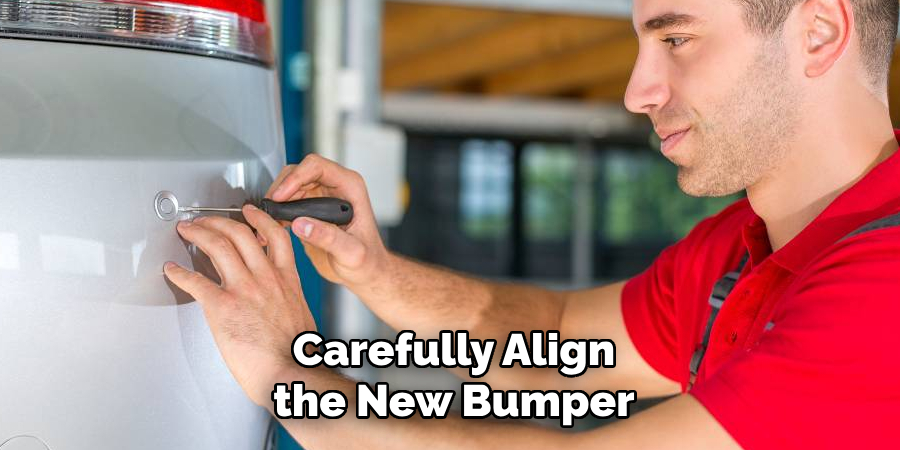
Step 5: Install the New Bumper
Carefully align the new bumper with the mounting points on the vehicle. Ensure all holes and brackets are correctly lined up before securing it. Begin by loosely attaching the screws and bolts, allowing you to make any necessary adjustments to achieve a perfect fit. Once aligned, tighten all fasteners securely, following the manufacturer’s recommended torque specifications to avoid over-tightening. Double-check that the bumper is secured correctly and aligned before the final inspection.
Step 6: Final Inspection and Testing
With the bumper securely installed, conduct a thorough final inspection to ensure everything is in place. Check for gaps, misalignments, or loose components that might need adjustment. Test the bumper’s stability by gently applying pressure at various points to confirm it is firmly attached. Verify that all related features function correctly, such as lights, sensors, or tow hooks. Address any issues before considering the installation complete.
Step 7: Maintenance and Care
Regular maintenance ensures your newly installed bumper’s longevity and optimal performance. Clean the bumper frequently to remove dirt, debris, and road salt, which can cause corrosion or damage over time.
Inspect the bumper periodically for any signs of wear, loose bolts, or damage, and address issues promptly to prevent further complications. If the bumper features additional accessories like lights or sensors, ensure they remain clean and functional through routine checks. Proper care will keep your bumper looking tremendous and performing reliably for years.
Step 8: Keep Your Vehicle Looking Great
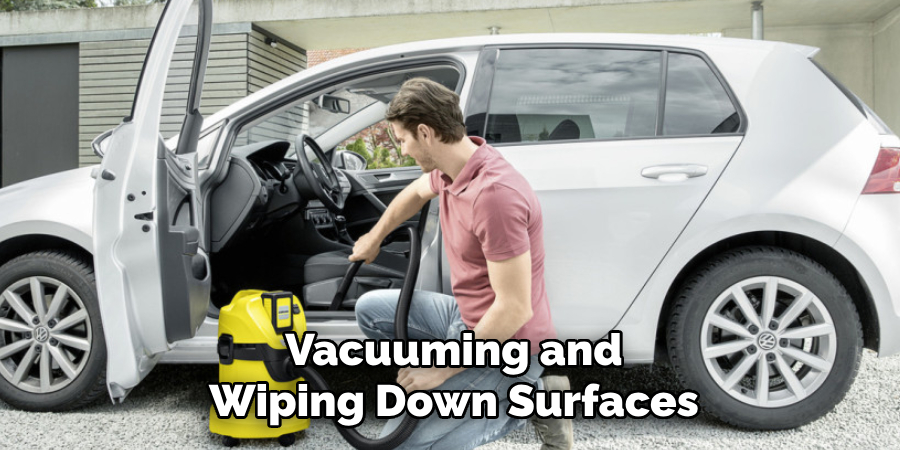
In addition to keeping your bumper clean and well-maintained, there are other ways to keep your entire vehicle looking great. Regularly washing and waxing your car or truck will help protect the paint from damage caused by dirt, debris, and environmental pollutants.
Additionally, be sure to promptly address any scratches or dents in your vehicle’s body. Leaving these issues unresolved can lead to further damage and even rust over time.
Another great way to maintain the appearance of your vehicle is by regularly cleaning the interior. Vacuuming and wiping down surfaces will not only make for a more pleasant driving experience but also help prevent wear and tear on the interior materials.
By following these simple maintenance tips, you can extend the lifespan of your vehicle and keep it looking like new for years.
5 Things You Should Avoid
- Using Excessive Force: Avoid applying excessive force when removing parking sensors. This can damage the sensors, wiring, or bumper, leading to costly repairs.
- Skipping the Manufacturer’s Instructions: Always consult the vehicle’s manual or manufacturer’s instructions before removing parking sensors. Ignoring these guidelines can result in improper removal and potential harm to the system.
- Not Disconnecting the Battery: Failing to disconnect the car battery before starting can lead to electrical issues or short circuits. Always ensure the battery is disconnected to prevent any complications.
- Pulling on Wires Directly: Never tug the wiring to remove the sensors. This can disconnect or damage internal connections, making the sensors inoperative and causing avoidable expenses.
- Neglecting to Label Wires and Connections
Avoid removing sensors without labeling the wires and connections. This can confuse reinstallation and may result in improperly functioning sensors. Always mark each connection for easy identification.
Can Car Sensors Be Cleaned?
Yes, car sensors can be cleaned to improve their performance. Over time, sensors can get dirty or covered in residue from the engine oil and other fluids. This buildup can affect the accuracy of the readings and cause malfunctioning of the sensor.
To clean car sensors, follow these steps:
- Locate the Sensor: The first step is to locate the sensor that needs cleaning. Most modern cars have multiple sensors for various systems, such as oxygen, mass air flow, and throttle position sensors.
- Remove any Debris: Before cleaning the sensor, remove debris or loose dirt using a soft cloth or compressed air.
- Use Appropriate Cleaner: Specialized cleaners are available to clean car sensors. Make sure to use the appropriate cleaner recommended by the manufacturer.
- Spray and Wipe: Spray the cleaner on the sensor and let it sit for a few minutes. Then, gently wipe away any dirt or grime using a clean cloth.
- Reinstall Sensor: After cleaning, carefully reinstall the sensor and return it to its original position.
- Test your Vehicle: Turn it on and take it for a test drive to ensure the sensor functions correctly.

It is essential to clean car sensors as they can get clogged with debris over time, affecting their performance and causing various issues in your vehicle’s systems.
Conclusion
How to remove parking sensors from bumper requires patience, attention to detail, and proper tools.
You can ensure the process is smooth and damage-free by following the outlined steps, such as disconnecting sensors carefully, labeling wires and connections, and avoiding unnecessary force. Proper preparation and handling will protect the sensors and the bumper and save time and money in the long run.
Refer to your vehicle’s manual for specific instructions and seek professional assistance if needed.