

Are you looking for a way to remove that pesky Safety First Door Knob Lock? It’s not as difficult as it may seem – with the right tools and straightforward instructions, you can finally know your home or office is secure.
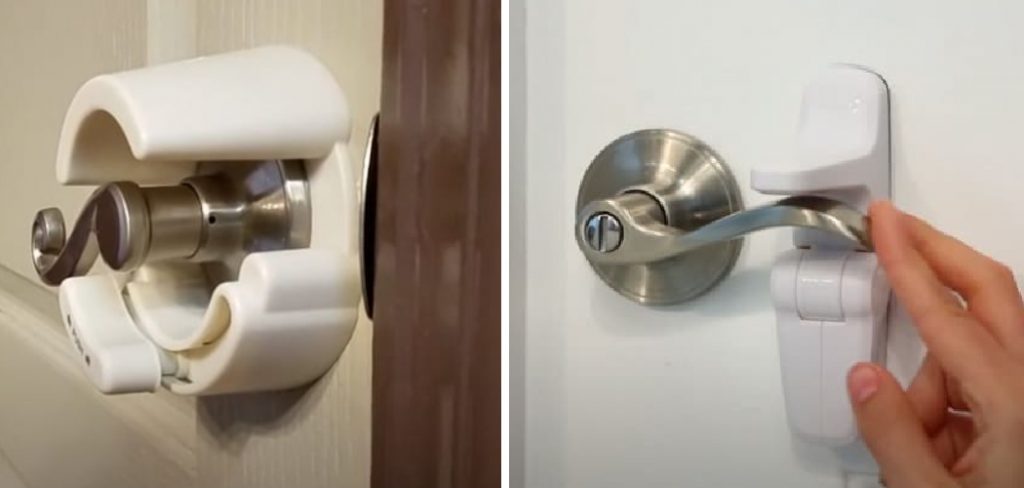
Whether you’re looking to replace an existing lock or just need to remove the current one, we’ll help walk you through the process. Just follow these simple steps, and you’ll be ready to go.
In this blog post, we will cover what you need to get started on how to remove the Safety First Door Knob Lock properly. If you’re ready, keep reading to learn more about how to remove safety first door knob lock.
What Will You Need?
Before you get started, make sure to gather the necessary tools for this job. You will need the following:
- Phillips head screwdriver
- Safety First door knob lock
- Hammer
- Pen or Paperclip
- Replacement door knob lock (if necessary)
- Silicone lubricant (optional)
Now that you have all the tools let’s move on to how to remove the Safety First Door Knob Lock from your door.
10 Easy Steps on How to Remove Safety First Door Knob Lock
Step 1. Look for a Small Hole:
The first thing you need to do is locate the small hole in the grip of the door knob. Use a pen or paperclip to push into this hole, and you should hear a click. This indicates that you have released the locking mechanism of the knob.
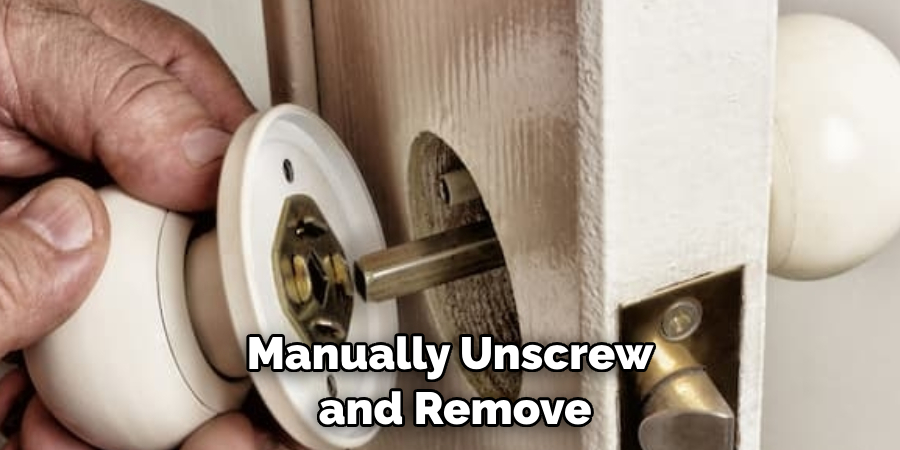
Step 2. Unscrew the Door Knob:
Next, grab your Phillips head screwdriver. Look for two screws on either side of the doorknob. Start by turning the screws counterclockwise to loosen them. Once they are loose enough, you can manually unscrew and remove them. Remember to keep these screws safe, as you may need them later. When both screws are out, the doorknob will loosen, and you can pull the two sides of the knob apart.
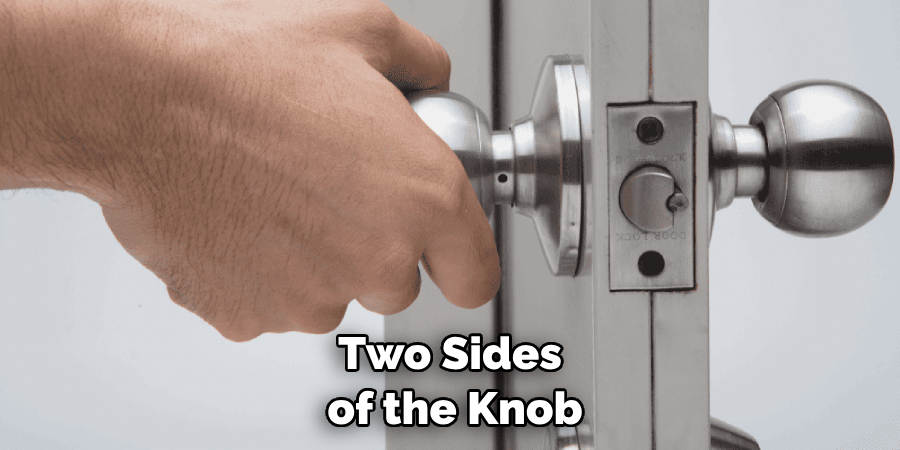
Step 3. Remove the Door Knob:
With the screws removed, gently pull on both sides of the door knob to separate them from the door. If the knob is stuck, gently wiggle it while pulling to help free it. Be careful not to damage the door in the process. Once you have removed the knob, you will see a square metal shaft – this is the spindle.
Step 4. Remove the Spindle:
Once the door knob has been removed, you’ll be left with a square metal piece, the spindle. This is an essential part of a door knob system. To remove it, gently turn the spindle counterclockwise while pulling it out from the latch assembly. If it’s a little stuck, you can use a hammer to tap it out gently. Be careful not to damage the spindle or the latch, as you may need them for the new knob installation.
Step 5. Remove the Latch Assembly:
After successfully removing the spindle, the next step is to disassemble the latch. Start by locating the screws on the edge of the door that hold the latch in place. Using your Phillips head screwdriver, carefully unscrew these and set them aside. Once the screws are removed, you can easily pull out the latch assembly. Handle it gently to avoid damaging the door or the latch assembly.
Step 6. Clean the Door Knob Hole:
Once the latch assembly is out, you’ll be left with an empty hole where the door knob used to be. This is a good opportunity to clean any dirt or grease that may have built up over time. Using a clean cloth or paper towel, gently clean the hole and surrounding area. If necessary, you can apply a little bit of silicone lubricant to help remove any stubborn grime. The goal is to have a clean, smooth surface for installing a new knob or lock.
Step 7. Prepare the New Door Knob:
If you plan to install a new door knob, now is the time to prepare it according to the manufacturer’s instructions. Ensure you have all parts ready and understand how they fit together. Typically, there will be two sides of the knob, the latch assembly, a new spindle, and the necessary screws.
Step 8. Install the New Latch Assembly:
Start by sliding the new latch assembly into the hole in the edge of the door, ensuring it’s facing the correct direction. The flat side of the latch should face the direction the door closes. Once it’s properly positioned, secure the latch with the provided screws using your Phillips head screwdriver.
Step 9. Install the Spindle and Door Knob:
Once the latch assembly is secure, insert the new spindle into the square hole. After this, attach one side of the door knob to the spindle and ensure it’s in the right orientation. Then, attach the other side of the knob, ensuring the spindle goes through the appropriate hole. Secure both sides of the knob with the provided screws.
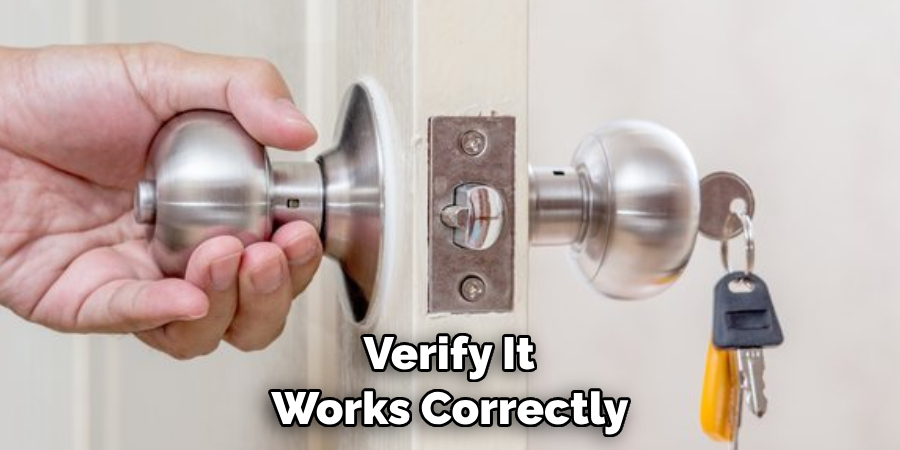
Step 10. Test the New Door Knob:
Now that the new door knob is installed, give it a few turns to ensure it operates smoothly. Test the lock to verify it works correctly, and make sure the door can close and latch properly. If everything functions as expected, congratulations! You have successfully removed your Safety First Door Knob Lock and installed a new one. If you encounter any problems, refer to the manufacturer’s instructions or seek professional help.
By following these steps, you can remove a Safety First Door Knob Lock and replace it with ease. This process should only take 10-15 minutes to complete, so you’ll be back to enjoying the security of your home or office in no time!
5 Additional Tips and Tricks
- If you’re having trouble getting the safety first door knob lock off, use a pair of locking pliers to help. Just put the jaws around the shank and turn counterclockwise.
- Another trick is to try spraying some WD-40 or lubricant on the locking mechanism and then attempting to remove it again. This can help loosen any leftover gunk or rust.
- If you’re still having trouble, try using a hammer and chisel to remove the lock. Just carefully tap the end of the chisel around the edges of the shank until it works loose.
- You can also try heating the lock with a heat gun or blow dryer to weaken it and make removing it easier.
- Lastly, you can always call a locksmith to help remove the safety first door knob lock if all else fails. A professional locksmith will have the necessary tools and experience to do the job quickly and safely.
With these tips and tricks in mind, you can remove any safety first door knob lock quickly and easily.
5 Things You Should Avoid
- Avoid forcing the lock to turn or using excessive force, as this can cause the lock mechanism to break, making it even more difficult to remove.
- Do not use corrosive substances or harsh chemicals to dissolve the lock, as these can harm the door and possibly even pose a health risk.
- Do not use sharp objects or tools unsuitable for the job, as these can damage the lock and make the removal process more challenging.
- Try not to rush the process. Take your time and work steadily to avoid causing unnecessary damage to the door or lock.
- Do not attempt to remove the lock if you’re unsure of the process. It’s always better to call a professional locksmith to avoid potential damage or harm.
Avoiding these five key mistakes can help ensure that you’ll be able to remove a safety first door knob lock without any issue.
How Do You Remove a Doorknob Cover?
The process is relatively simple if you’re trying to remove a doorknob cover from an existing door handle. You’ll need to start by removing the screws that are holding the cover in place. These can usually be found on either side of the doorknob.
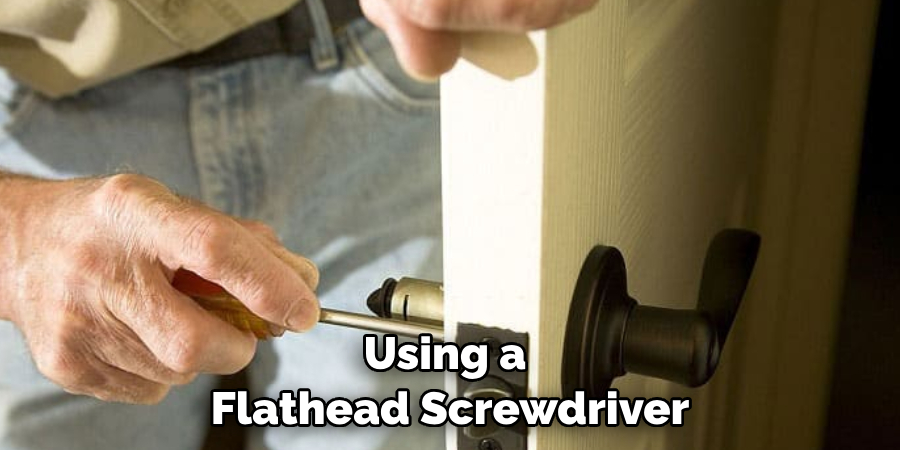
Once all the screws have been removed, you can take off the cover easily. If the cover still won’t come off, try using a flathead screwdriver to pry it off gently. Once the cover has been removed, you can remove the safety first door knob lock as described above.
With these helpful tips and tricks in mind, you can easily and safely remove your safety first door knob lock with minimal effort.
Conclusion
To sum it up, how to remove safety first door knob lock is not a difficult task as long as you are patient and have the right tools. Make sure to consult the manual before attempting to remove the lock so that you do not damage the mechanism of your door. After completing the process, double check that all screws and components are tightly secured and that everything is back where it belongs.
Don’t forget to test if the lock still works correctly before leaving. With this in mind, even novices can safely replace or repair their locks.
So go ahead, take the steps in this post today, follow the instructions carefully, and don’t forget to try out your new security system when you’re done!
About
Safety Fic is a distinguished figure in the world of Diy design, with a decade of expertise creating innovative and sustainable Diy solutions. His professional focus lies in merging traditional craftsmanship with modern manufacturing techniques, fostering designs that are both practical and environmentally conscious. As the author of diy, Safety Fic delves into the art and science of Safety Fic-making, inspiring artisans and industry professionals alike.
Education RMIT University
(Melbourne, Australia) Associate Degree in Design (Safety Fic) Focus on sustainable design, industry-driven projects, and practical craftsmanship. Gained hands-on experience with traditional and digital manufacturing tools, such as CAD and CNC software.
Nottingham Trent University
(United Kingdom) Bachelor’s in diyfastly.com and Product Design (Honors) Specialized in product design with a focus on blending creativity with production techniques. Participated in industry projects, working with companies like John Lewis and Vitsoe to gain real-world insights.
Publications and Impact
In diy, Safety Fic his insights on indoor design processes, materials, and strategies for efficient production. His writing bridges the gap between artisan knowledge and modern industry needs, making it a must-read for both budding designers and seasoned professionals.