

Are you the proud owner of a Simplisafe Smart Lock? While installing one of these locks in your home can provide much-needed peace of mind, you may eventually run into situations where you’ll need to remove it. Whether this means replacing it with an updated model or moving it to a new location, uninstalling a Simplisafe lock is surprisingly straightforward once you know how to remove simplisafe smart lock.
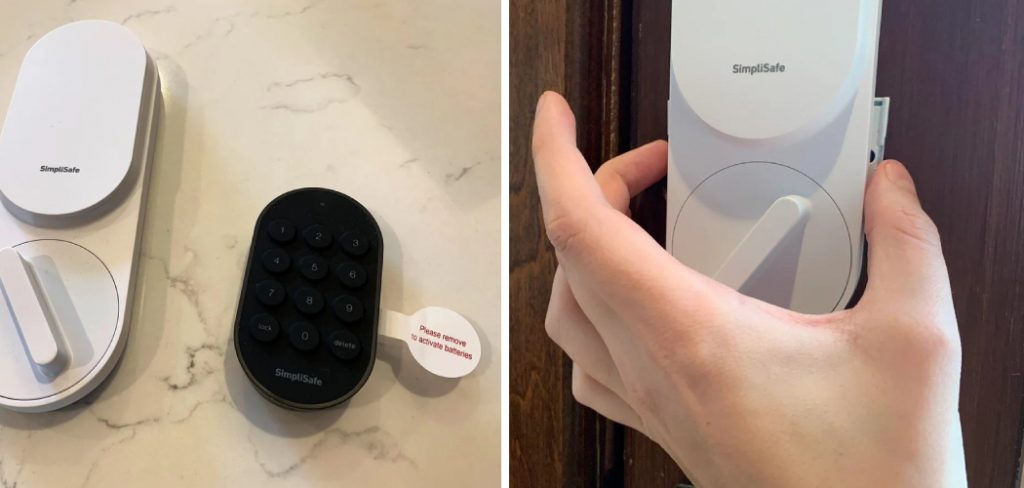
Simplisafe smart lock systems are designed to be user-friendly and easy to install and remove. However, following the proper steps is essential to ensure a smooth process and avoid any damage.
In this blog post, we will guide you through the process step-by-step so that removing your Smart Lock doesn’t become an all-day project!
What Will You Need?
Before we dive into the steps, let’s first gather all the necessary tools you’ll need to make removing your Simplisafe Smart Lock a breeze:
- A screwdriver (either Phillips-head or flathead, depending on your lock)
- An adjustable wrench
- New batteries (optional, in case you need to replace them)
Once you have all these items on hand, you’re ready to begin the removal process!
10 Easy Steps on How to Remove Simplisafe Smart Lock
Step 1. Disable the lock:
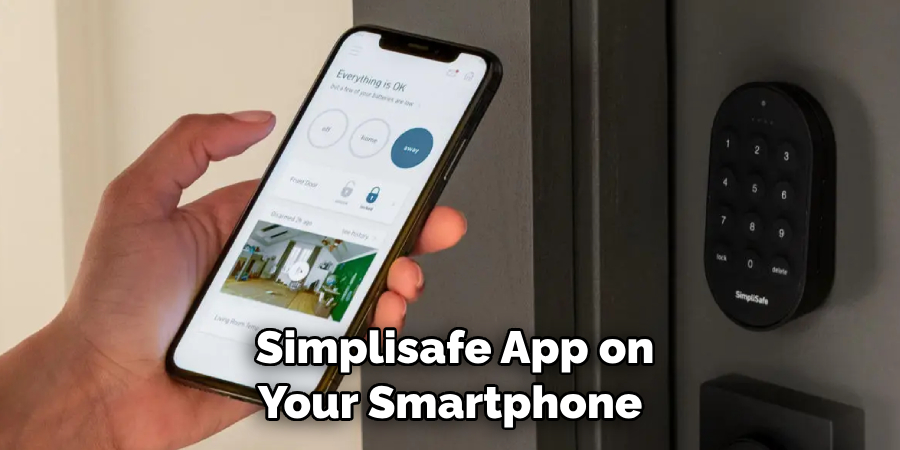
Start by disabling the Simplisafe Smart Lock from your SimpliSafe account. This can be done via the SimpliSafe app on your smartphone. Navigate to the ‘Locks’ section and select the lock you want to remove. Click on ‘Settings,’ then ‘Remove lock.’
Step 2. Unscrew the Thumb Latch:
Once the lock is disabled, you must remove the thumb latch (the part you turn to open the lock from the inside). Hold the lock on one side, and on the other side, use your screwdriver to unscrew the two screws holding the thumb latch in place. Be sure to keep these screws safe as you’ll need them to install a new lock or to re-install this one.
Step 3. Remove the Front Assembly:
After removing the thumb latch, the front assembly (the part of the lock with the keyhole) should be loose. Hold the front assembly with one hand, and with the other, begin to pull it away from the door gently. Do this carefully to avoid damaging the assembly or the door. Once removed, keep it in a safe place if you plan to reinstall it later or need it for reference.
Step 4. Unscrew the Mounting Plate:
Now that the front assembly is removed, you will see a mounting plate attached to the door with two screws. Use your screwdriver to unscrew these and keep the screws along with the mounting plate in a safe place. Be careful while doing this, as the wires connected to the Smart Lock run through this plate. Ensure not to pull or stretch these wires as they could cause damage.
Step 5. Disconnect the Wires:
Once the mounting plate is removed, two wires connect the lock to the door. These wires communicate power and data between the lock and the SimpliSafe system. Carefully disconnect these wires by gently pulling the connectors apart. It’s crucial not to pull on the wires themselves to avoid causing any damage.
Step 6. Remove the Back Assembly:
After disconnecting the wires, it’s time to remove the back assembly. This part of the lock contains the batteries and the key cylinder. It is held in place by two screws. Using your screwdriver, carefully unscrew these and keep them in a safe place. Once the screws are removed, gently pull the back assembly off the door. Remember to handle it carefully to avoid damage, particularly to the key cylinder.
Step 7. Remove the Strike Plate and Deadbolt:
The last components to remove are the strike plate and deadbolt. The strike plate is attached to the door frame, and the deadbolt slides into it when locked. Use your screwdriver to remove the screws securing the strike plate to the door frame. Then, slide out the deadbolt. Be sure to store these parts safely if you plan on reusing them.
Step 8. Clean and Prepare the Door:

With all parts of the SimpliSafe Smart Lock removed, thoroughly clean the area on and around the door where the lock was installed to ensure no debris is left behind. If you are installing a new lock, make sure the door is prepared according to the new lock’s installation instructions.
Step 9. Check the Door’s Functionality:
Before installing a new lock, make sure the door opens and closes correctly without any obstruction. This is an essential step because any issues with the door’s functionality can affect the performance of the newly installed lock.
Step 10. Installation of the New Lock:
If you’re replacing the SimpliSafe Smart Lock with a new one, you can now proceed with the installation process as per the new lock’s instruction manual. Always follow the manufacturer’s instructions to ensure a secure and efficient installation. If you’re not installing a new lock, consider hiring a professional to put in a filler plate to cover the hole left by the SimpliSafe Smart Lock.
By following these ten easy steps, you know how to remove simplisafe smart lock. Remember always to take safety precautions and carefully handle the lock during the removal process.
5 Additional Tips and Tricks

- Check the Battery Level: Before attempting to remove your SimpliSafe smart lock, it is important to check the battery level. If the batteries are low, it may be difficult to remove the lock, or you may risk damaging it. To check the battery level, open the SimpliSafe app and navigate to “Device Settings.”
- Use Correct Tools: To remove the SimpliSafe Smart Lock, it’s essential to use the correct tools. Generally, a screwdriver is sufficient.
- Backup Power Source: Ensure you have an alternative power source handy. This will avoid any disruption during the removal process due to low battery power.
- Resetting to Factory Settings: If you plan on reinstalling the lock later or at a different location, resetting your Smart Lock to factory settings before removal can be beneficial.
- Contact Customer Support: If you encounter difficulties or uncertainties during the removal process, don’t hesitate to contact SimpliSafe’s customer support. They can provide valuable assistance and ensure your Smart Lock removal is successful.
With these additional tips and tricks, you can confidently remove your SimpliSafe Smart Lock without hassle. Always take necessary precautions and follow the instructions carefully for a smooth removal process.
5 Things You Should Avoid
- Avoid Using Force: Never attempt to force the lock off, as this could damage both the lock and the door. Always use the correct tools and follow the removal process carefully.
- Avoid Ignoring Low Battery Warnings: If your smart lock warns you of low battery, do not ignore it. Trying to remove the lock when the battery is low could result in the lock malfunctioning.
- Avoid Disregarding Manufacturer’s Instructions: Always follow the manufacturer’s instructions for removal. They are there to guide you and ensure the safety of your home.
- Avoid Neglecting to Reset the Lock: If you plan to reinstall the lock elsewhere, reset it to factory settings before removal. This removes all previous settings and user data, ensuring a clean setup when re-installed.
- Avoid Hesitating to Contact Support: If you need clarification on any step in the removal process, feel free to contact SimpliSafe’s support team. They are there to help you and ensure the process is done correctly and safely.

By avoiding these common mistakes, you can ensure a smooth and hassle-free removal process for your SimpliSafe Smart Lock. Always take precautions and follow the instructions carefully for a successful removal.
How Do You Reset Your Simplisafe Door Lock Keypad?
To reset your SimpliSafe door lock keypad, follow these steps:
- Press and hold the “Lock” button on the keypad for 20 seconds.
- The lights on the keypad will flash, indicating that it has been reset.
- Release the “Lock” button and wait for the lights to stop flashing.
- Your SimpliSafe smart lock will now be reset to factory settings and ready for removal.
If you encounter any issues during this process, refer to the manufacturer’s instructions or contact customer support for assistance. Always follow precautions and use the correct tools when removing your SimpliSafe Smart Lock. So, these are some additional tips and tricks that can help you easily remove your SimpliSafe smart lock.
Conclusion
To sum it all up, how to remove SimpliSafe smart lock is not a difficult task and can easily be done in just a few easy steps. However, there are some safety tips to remember, such as wearing gloves or being mindful of sharp edges. Taking your time and following the steps outlined above, the process of removing your Simplisafe smart lock is easier than you may have anticipated.
If anything seems to need to be corrected during the unlocking process, reach out to a professional who can provide help and advice. Making sure your doors are free from unnecessary locks is critical to enjoying complete security in your home. These simple steps to remove your Simplisafe smart lock will ensure that this process happens seamlessly and stress-free.
So why wait? Unlock your door today and start being one step closer to more secure living!
About
Safety Fic is a distinguished figure in the world of Diy design, with a decade of expertise creating innovative and sustainable Diy solutions. His professional focus lies in merging traditional craftsmanship with modern manufacturing techniques, fostering designs that are both practical and environmentally conscious. As the author of diy, Safety Fic delves into the art and science of Safety Fic-making, inspiring artisans and industry professionals alike.
Education RMIT University
(Melbourne, Australia) Associate Degree in Design (Safety Fic) Focus on sustainable design, industry-driven projects, and practical craftsmanship. Gained hands-on experience with traditional and digital manufacturing tools, such as CAD and CNC software.
Nottingham Trent University
(United Kingdom) Bachelor’s in diyfastly.com and Product Design (Honors) Specialized in product design with a focus on blending creativity with production techniques. Participated in industry projects, working with companies like John Lewis and Vitsoe to gain real-world insights.
Publications and Impact
In diy, Safety Fic his insights on indoor design processes, materials, and strategies for efficient production. His writing bridges the gap between artisan knowledge and modern industry needs, making it a must-read for both budding designers and seasoned professionals.