
Removing a Vivint motion sensor can feel like a daunting task, but with the right steps, it can be done easily and safely.

Whether you’re replacing it, relocating it, or no longer need it, understanding the process is key to avoiding any potential damage to the sensor or your home. This guide will walk you through the necessary steps of how to remove vivint motion sensor.
Common Reasons for Removing It
There are several reasons why you might need to remove a Vivint motion sensor. One common reason is upgrading your system to newer or more advanced equipment. Sometimes, users choose to relocate the sensor to a different area to improve coverage or eliminate blind spots in their security setup. Another reason could be home renovations or changes in the interior layout, which might require temporary or permanent removal of the device. Additionally, if the motion sensor is malfunctioning or no longer needed, removal might be necessary to maintain the efficiency of your security system. Understanding your reason for removal can help you determine the best course of action.
Tools and Materials You May Need
Before removing a motion sensor, gather the necessary tools and materials to ensure the process is smooth and safe. Here is a list of commonly required items:
- Screwdriver (Phillips or flathead, depending on the sensor’s screws)
- Step ladder (if the sensor is mounted at a height)
- Voltage tester (to ensure the power is off for wired sensors)
- Replacement screws or mounting hardware (if reinstallation elsewhere is planned)
- Adhesive remover (for sensors mounted with adhesive strips)
- Protective gloves (to handle sensitive components carefully)
Having these items ready will make the removal process efficient and help you avoid damage to the sensor or surrounding surfaces.
Safety Precautions Before Removing the Sensor
- Turn Off Power Sources: Before working on wired sensors, ensure that the power supply to the sensor is completely turned off to avoid electrical hazards. Use a voltage tester to confirm there is no live current.
- Wear Protective Gear: Utilize protective gloves to prevent accidental contact with sensitive components or sharp edges. This will also minimize any risk of injury or contamination.
- Inspect the Surrounding Area: Check for potential hazards such as unstable surfaces, nearby wiring, or obstructive objects that could pose safety risks during the removal process.
- Use Proper Tools: Make sure you are using the appropriate tools for the task to avoid accidental damage to the sensor or the mounting surface. Avoid using makeshift tools as they can compromise safety and effectiveness.
- Follow Manufacturer Guidelines: Always refer to the specific removal instructions provided by the sensor’s manufacturer. This ensures safety and proper handling of the device.
Adhering to these precautions will protect both you and the sensor, allowing for a smooth and secure removal process.
10 Methods How to Remove Vivint Motion Sensor
Method 1: Powering Down the Security System
Before removing any component of the Vivint system, always power it down to avoid accidental alarms or tampering alerts. Disarm the system using the control panel or the mobile app.
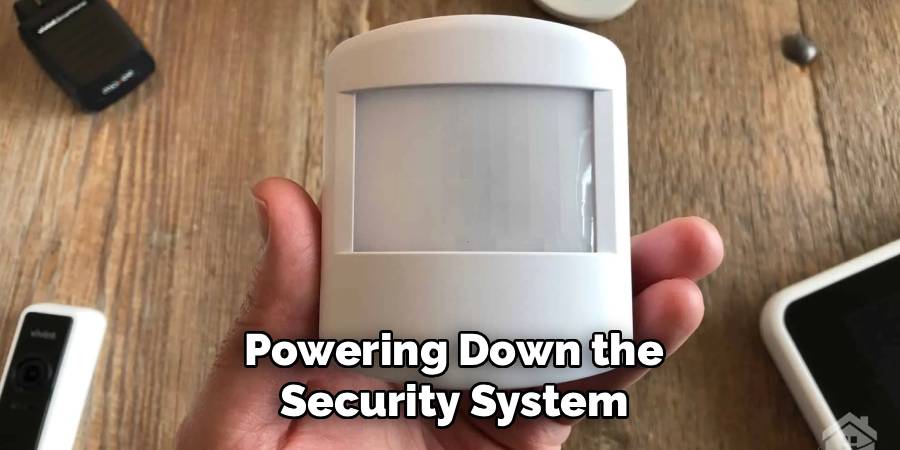
If needed, place the system in “test mode” through your Vivint account, which prevents unnecessary notifications to the monitoring center. Turning off the system ensures that the motion sensor can be handled without triggering false alarms or interfering with the rest of the security equipment.
Method 2: Identifying the Sensor Placement
Vivint motion sensors are usually mounted on walls, corners, or ceilings for optimal coverage. Before attempting removal, identify where the sensor is located and examine how it is mounted. Some sensors are attached using screws, while others may be fixed with adhesive backing. Understanding the mounting style helps you prepare the right tools and avoid applying unnecessary force that could damage the sensor housing or the wall surface.
Method 3: Gathering the Right Tools
Having the proper tools makes removal easier and safer. Depending on the mounting method, you may need a screwdriver, putty knife, adhesive remover, or pliers. For adhesive-mounted sensors, a heat gun or hairdryer can also be useful to soften the sticky backing. Keeping these tools handy ensures a smoother process and prevents accidents like stripping screws or cracking the sensor casing. A well-prepared toolkit saves time and minimizes the risk of errors during removal.
Method 4: Removing Adhesive-Mounted Sensors
If your Vivint motion sensor is installed with adhesive strips, carefully loosen it without damaging the wall. Start by gently prying one side of the sensor with a flat tool like a putty knife. If the adhesive is strong, warm the area with a hairdryer to soften it.
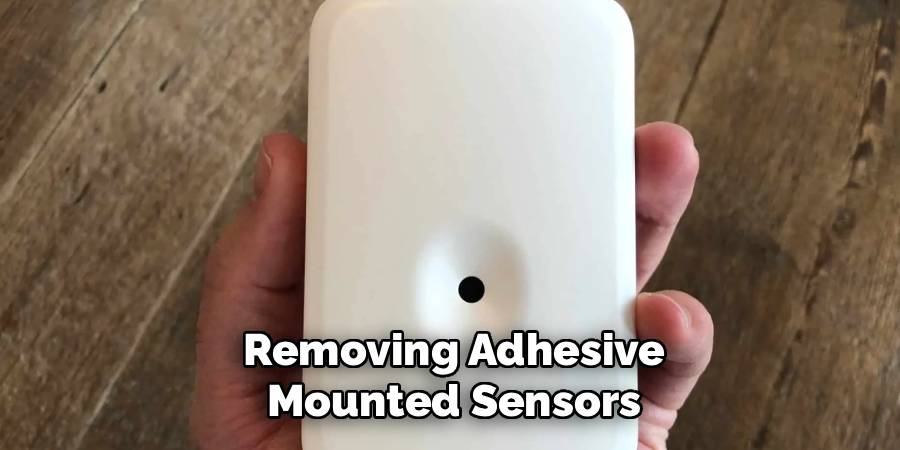
Slowly peel the sensor away from the wall, applying steady pressure instead of pulling abruptly. Once the sensor is removed, clean off any leftover adhesive residue with rubbing alcohol or adhesive remover. This method protects both the sensor and the wall surface.
Method 5: Unscrewing Wall-Mounted Sensors
For motion sensors fixed with screws, begin by locating the screw holes, which are often hidden under a removable cover or at the base of the sensor. Use a screwdriver to loosen the screws carefully, supporting the sensor with your other hand so it does not fall when detached. Once the screws are removed, gently pull the sensor away from the wall or bracket. Keep the screws in a safe place if you plan to reinstall the sensor later. This method ensures secure and damage-free removal.
Method 6: Disconnecting the Power Source
Vivint motion sensors are typically battery-operated, but some may be connected to a wired power supply. After detaching the sensor from the wall, open the back cover to access the battery compartment or wiring. If it is battery-powered, remove the batteries to fully disable the sensor.
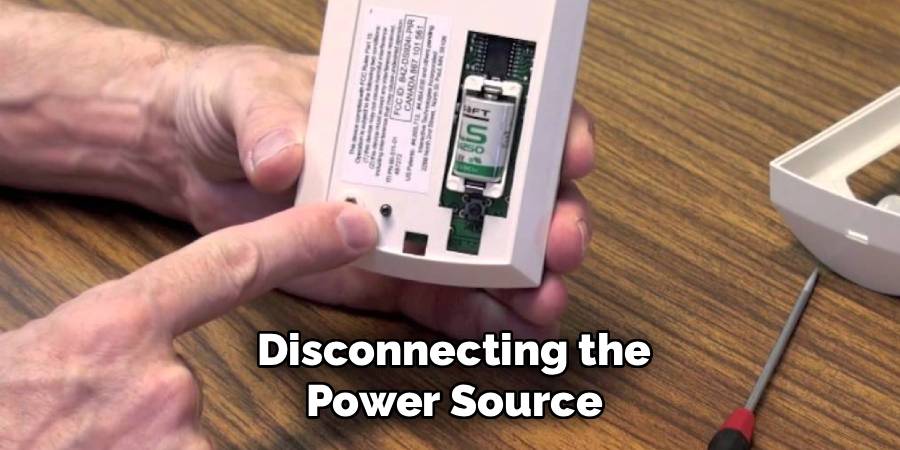
For wired sensors, carefully disconnect the wires, taking note of their placement in case you need to reconnect them in the future. Properly disconnecting the power prevents accidental activation and ensures safety during handling.
Method 7: Deactivating the Sensor from the System
Removing the physical device is only part of the process. You must also deactivate the sensor from the Vivint control panel or app. Log in to your account and navigate to the device settings. Select the specific motion sensor and choose the option to remove or delete it from the system. This prevents the panel from displaying false alerts or errors related to a missing device. Proper deactivation ensures the entire security network continues to function smoothly without disruptions.
Method 8: Labeling and Storing the Sensor
If you plan to reuse the motion sensor in a new location, label it after removal for easy identification later. Place the device, screws, mounting brackets, or adhesive strips in a small storage bag or container. Keep it in a dry, safe place until you reinstall it. Organizing the removed sensor prevents misplacement and ensures you have all the necessary components when you need them again. Proper storage also protects the delicate internal parts from damage.
Method 9: Repairing the Wall or Mounting Surface
After removing the sensor, you may be left with screw holes, adhesive marks, or slight wall damage. To restore the wall, patch screw holes with spackle, sand the area smooth, and repaint if necessary. For adhesive residue, gently clean the surface with warm soapy water or a mild adhesive remover. This step is especially important if you are moving out of a rented property or redecorating the space. Restoring the wall ensures that the area looks clean and well-maintained after sensor removal.
Method 10: Consulting Vivint Support if Needed
If you encounter difficulties while removing the sensor, such as issues with disarming the system, deactivating the device, or dealing with stubborn wiring, do not hesitate to contact Vivint customer support.

They can provide step-by-step guidance specific to your model of motion sensor. In some cases, they may even send a technician to assist with safe removal. Consulting support ensures that the process is done correctly without jeopardizing the integrity of the security system.
Maintenance and Upkeep
Proper maintenance of your Vivint motion sensor is crucial to ensure optimal performance and longevity. Regularly check the sensor for dust, dirt, or any obstructions that may affect its ability to detect motion accurately. Clean the surface of the sensor gently with a soft, dry cloth to avoid damage to the components. Additionally, test the sensor periodically by walking through its detection zone to confirm it is functioning as expected. If the sensor is battery-powered, monitor the battery level using the Vivint app or control panel and replace the batteries promptly when needed. Keeping your motion sensor well-maintained helps enhance the security of your home and prevents potential issues in the future.
Conclusion
Removing a Vivint motion sensor may seem intimidating at first, but with the right approach, it can be done safely and efficiently. By powering down the system, identifying the mounting style, using the correct tools, and carefully handling both the device and the wall, you can complete the task without damage. Deactivating the sensor from the system and properly storing it ensures that it remains useful for future installations. Follow these simple instructions outlined in this blog post about how to remove vivint motion sensor, and you’ll be able to get the job done with ease.