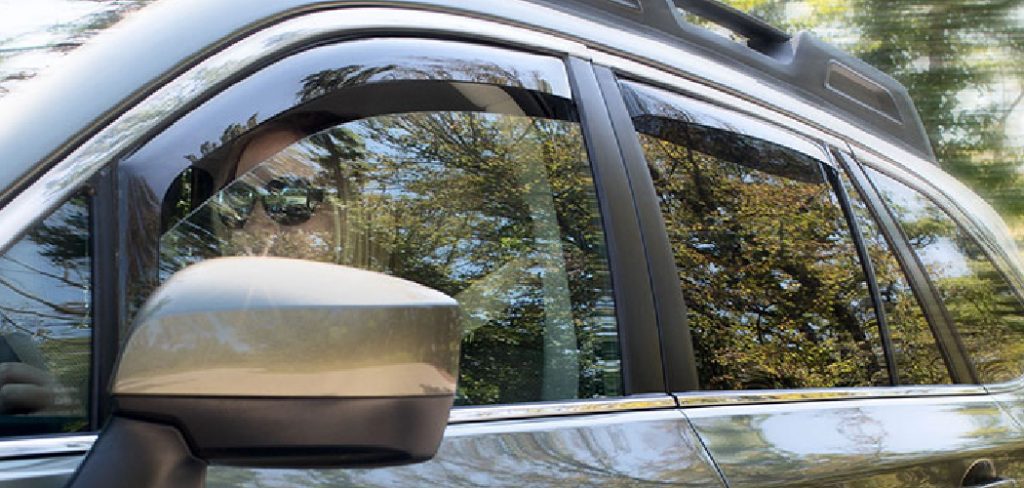
Window deflectors, also known as rain guards or wind visors, are a practical accessory for many vehicles, offering benefits like reduced wind noise and rain protection when windows are slightly open.

However, there may come a time when you need to remove them, whether due to damage, replacement, or a change in vehicle aesthetics. Proper removal is crucial to avoid damaging the vehicle’s paint or bodywork.
In this guide on how to remove window deflectors, we’ll explore the steps required to safely and effectively remove window deflectors, ensuring you can tackle this task with confidence.
Why Remove Window Deflectors?
There are several reasons why you might consider removing window deflectors from your vehicle. Firstly, if the deflectors are cracked, broken, or no longer provide a snug fit, they may need replacement to maintain their functionality and aesthetic appeal. Secondly, changes in personal style or vehicle upgrades might make the existing deflectors seem outdated or mismatched with the new look you want to achieve.
Additionally, as window deflectors age, they can become discolored or faded, potentially detracting from the visual appeal of your car. Finally, removing them might also be necessary if you are planning to sell your vehicle and the potential buyer prefers not to have them installed. Understanding these motivations can help guide your decision on whether to remove or replace window deflectors.
Needed Materials
Soft Cloth or Microfiber Towel:
A soft cloth or microfiber towel is essential when removing window deflectors, as it will help protect the vehicle’s paint and bodywork from scratches and other damage during the removal process.
Plastic Pry Tool:
A plastic pry tool is a crucial tool for removing window deflectors without causing any damage. Using a metal tool can increase the risk of scratching or denting the vehicle’s surface, so opt for a plastic one instead.

Adhesive Remover (Optional):
If your window deflectors were installed using adhesive tape, you may need an adhesive remover to help loosen the bond and make removal easier.
8 Steps on How to Remove Window Deflectors
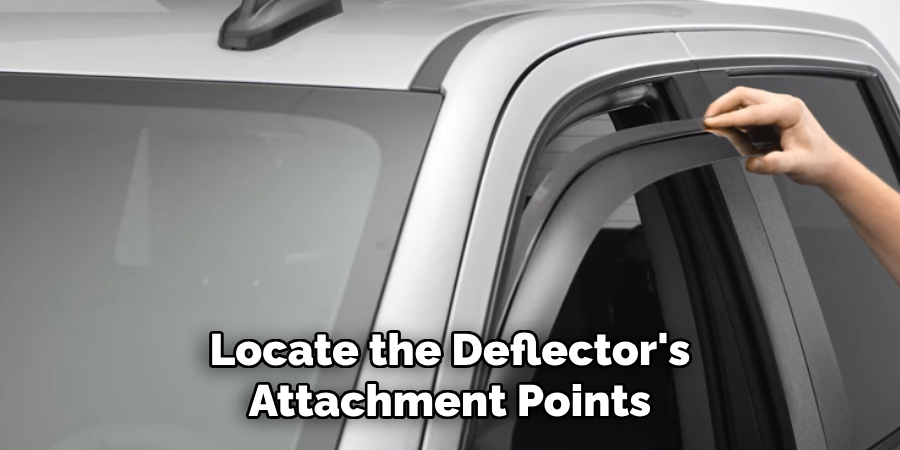
Step 1: Locate the Deflector’s Attachment Points
Begin by closely examining the window deflectors to identify where they are attached to the vehicle. These attachment points are usually found along the edge of the window frame or door.
Look for any visible clips or adhesives, as these are commonly used methods for securing window deflectors. Understanding how your deflector is fastened will help you determine the best approach for removal and ensure you gather the necessary tools and supplies for the task.
Step 2: Prepare the Vehicle and Tools
Before you begin removing the window deflectors, it’s essential to prepare both your vehicle and the tools you’ll be using. Start by parking your vehicle on a level surface and engaging the parking brake to ensure stability throughout the process. Gather all the necessary tools and materials, including the soft cloth, plastic pry tool, and adhesive remover, if applicable.

It’s also a good idea to clean the area around the deflectors with mild soap and water to remove any dirt or debris that might interfere with the removal process. Ensuring your tools are within easy reach and your vehicle is in a stable position will help streamline the task and prevent potential damage.
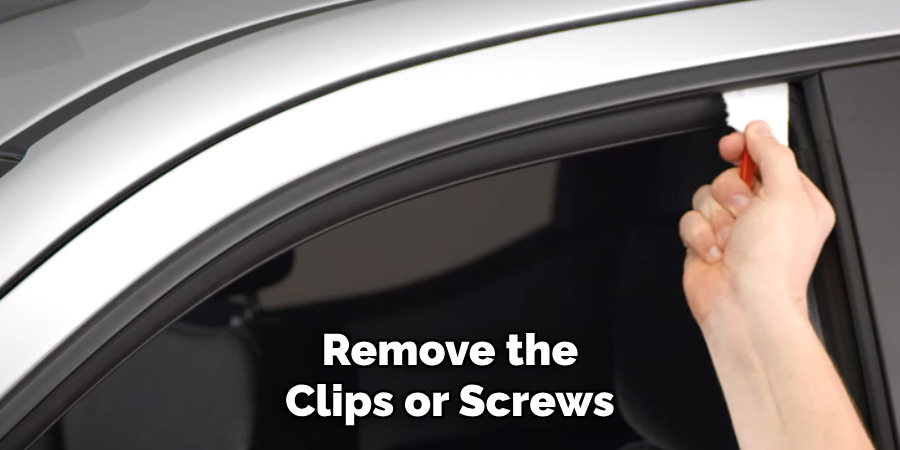
Step 3: Remove the Clips or Screws
If the window deflectors on your vehicle are secured with clips or screws, carefully unfasten them using the appropriate tools. Start by identifying the type of fasteners used; you might need a Phillips head screwdriver, a flathead screwdriver, or a specific tool designed for clips. Gently unscrew or unclip these fasteners, keeping them in a safe place if you plan to reinstall the deflectors later. Exercise caution to avoid scratching the vehicle’s surface or damaging the clips.
If some clips are stubborn, use the plastic pry tool to gently lift them without exerting excessive force. Once all clips or screws are removed, the deflector should start to loosen, allowing you to proceed to the next steps for complete removal.

Step 4: Remove Adhesive Tape
For window deflectors secured with adhesive tape, use a plastic pry tool or your fingers to gently lift one edge of the deflector. If you encounter resistance, use an adhesive remover to loosen the bond and make it easier to peel off the tape.
Be patient and work slowly to avoid damaging the vehicle’s paint or bodywork. Continue peeling away the adhesive tape until you can fully remove the deflector from the vehicle. The tape may leave behind some residue, which you can clean off with the adhesive remover or a mild solvent.
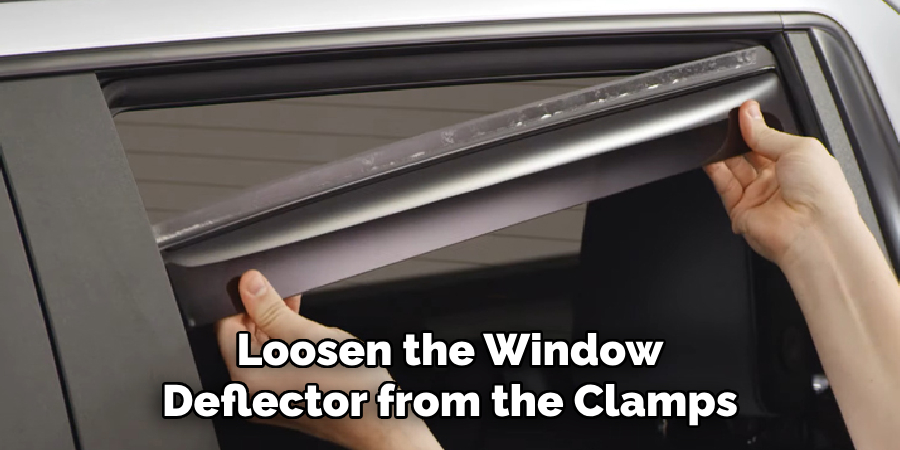
Step 5: Loosen the Window Deflector from the Clamps
If your window deflectors are attached with clamps, gently work to loosen them without causing any damage to the vehicle’s bodywork. Begin by examining the clamps for any signs of how they engage with the deflector, then use your plastic pry tool to carefully pry the deflector away from the clamps. Ensure you are not applying excessive force; instead, aim for consistent and even pressure to avoid any damage. Move along the deflector gradually, loosening each clamp slowly.
In some cases, you may need to wiggle the deflector a little to free it from the clamps successfully. Taking your time with this step helps prevent potential scratches or bending of the vehicle’s edge where the deflectors attach.

Step 6: Remove the Deflector from the Vehicle
With all clips, screws, tape, and clamps loosened or removed, gently pull the deflector away from the window frame. Move slowly and steadily to avoid causing any scratches or damage to your vehicle’s surface. You may need a little bit of force if adhesive was used; in this case, continue peeling off until you can fully remove the deflector without resistance.
Once the deflector is detached from the vehicle, place it on a clean and soft surface to prevent any dust or debris from sticking to it.
Step 7: Clean Window Frame
After removing the deflectors, use a mild detergent and water to clean the window frame thoroughly. This helps remove any residue or dirt that may have accumulated under the deflector and also prepares the surface for reinstallation if desired. Make sure to dry the area completely before proceeding with the next steps.
Otherwise, any remaining moisture could interfere with the installation of the new deflector.
Step 8: Reinstall or Replace Deflectors
If you have removed your window deflectors to clean and maintain them, now is the time to reinstall them following the manufacturer’s instructions. If you are replacing old deflectors with new ones, ensure they are compatible with your vehicle and follow the same steps for installation as outlined in this guide. Make sure all clips, screws, tape, or clamps are securely fastened before finishing up.
Following these steps on how to remove window deflectors will help you successfully remove window deflectors from your vehicle without causing any damage or complications. With the right tools and a patient approach, this task can be completed quickly and efficiently, leaving your vehicle looking clean and well-maintained. Remember to always exercise caution and take your time to ensure the best results.
Frequently Asked Questions
Q: Can I Remove Window Deflectors Without Any Tools?
A: It’s not recommended to attempt removing window deflectors without proper tools. Using the wrong method or tool can cause damage to your vehicle and make the removal process more challenging. It’s best to have the necessary tools on hand before starting the task.
Q: Do I Need to Remove My Window Deflectors Before Going Through a Car Wash?
A: This will depend on the type of car wash you are using and the type of window deflectors you have installed. Some car washes may not be compatible with window deflectors, so it’s always best to remove them beforehand to avoid any potential damage. Additionally, if your window deflectors are secured with adhesive tape, it’s essential to remove them before going through a car wash as the water and soap can weaken the bond and cause them to fall off.
Q: How Often Should I Clean or Replace My Window Deflectors?
A: It’s recommended to clean your window deflectors at least once a month to remove any dirt or grime that may have accumulated. If you notice any damage, such as cracks or breaks, it’s best to replace them immediately for optimal performance and protection against the elements. Overall, regular maintenance and inspection of your window deflectors will help prolong their lifespan and functionality.
Q: Can I Reuse Adhesive Tape When Reinstalling My Window Deflectors?
A: It’s not recommended to reuse adhesive tape when reinstalling window deflector, as the effectiveness of the tape may have weakened over time. It’s best to use new adhesive tape or a different type of fastener recommended by the manufacturer for secure and long-lasting installation. So, it is better to use proper equipment for your car so that you can protect your vehicle from scratches or damage.
Conclusion
Removing window deflectors can seem like a daunting task, but by following these eight simple steps on how to remove window deflectors and using the right tools and materials, you can safely remove the deflectors from your vehicle. Remember to prepare both your vehicle and tools, identify the fasteners holding the deflectors in place, work slowly and carefully, and clean the area thoroughly before reinstalling or replacing them.
With patience and attention to detail, you can successfully remove window deflectors without any hassle. So go ahead and give your vehicle a fresh new look by removing those old window deflectors today!
About
Safety Fic is a distinguished figure in the world of Diy design, with a decade of expertise creating innovative and sustainable Diy solutions. His professional focus lies in merging traditional craftsmanship with modern manufacturing techniques, fostering designs that are both practical and environmentally conscious. As the author of diy, Safety Fic delves into the art and science of Safety Fic-making, inspiring artisans and industry professionals alike.
Education RMIT University
(Melbourne, Australia) Associate Degree in Design (Safety Fic) Focus on sustainable design, industry-driven projects, and practical craftsmanship. Gained hands-on experience with traditional and digital manufacturing tools, such as CAD and CNC software.
Nottingham Trent University
(United Kingdom) Bachelor’s in diyfastly.com and Product Design (Honors) Specialized in product design with a focus on blending creativity with production techniques. Participated in industry projects, working with companies like John Lewis and Vitsoe to gain real-world insights.
Publications and Impact
In diy, Safety Fic his insights on indoor design processes, materials, and strategies for efficient production. His writing bridges the gap between artisan knowledge and modern industry needs, making it a must-read for both budding designers and seasoned professionals.
