

A mortise lock is a reliable and durable locking mechanism commonly used in doors for added security. However, over time, the internal components, such as the spring, may wear out or break, impacting the lock’s functionality.

Repairing a mortise lock spring may seem complex, but with the right tools and guidance, it can be a straightforward process. This guide will walk you through the steps of how to repair mortise lock spring.
What Is a Mortise Lock Spring?
A mortise lock spring is a crucial internal component found within a mortise lock mechanism. It is responsible for applying tension to certain parts of the lock, such as the latch or bolt, ensuring smooth operation when the handle or key is used. The spring plays a vital role in returning the latch or bolt to its default position after it has been engaged or disengaged.
Over time, due to frequent usage or natural wear and tear, this spring can weaken or break, leading to issues such as a loose handle or difficulty in locking and unlocking the door. Understanding the function of the mortise lock spring is essential for effectively diagnosing and repairing any problems.
Tools and Materials Needed
To repair or replace a mortise lock spring, you will need the following tools and materials:
- Screwdriver Set: To remove screws securing the lock and its components.
- Needle-nose Pliers: For handling small components and springs within the lock mechanism.
- Replacement Spring: A suitable spring that matches the specifications of the mortise lock.
- Lubricant: To ensure smooth operation of the lock after reassembly.
- Cleaning Cloth: For wiping away dust, debris, or old lubricant from the lock components.
- Work Gloves: To protect your hands during the repair process.
- Magnifying Glass (optional): Useful for examining small parts closely during reassembly.
Having these items on hand will help simplify the repair process and ensure a successful outcome.
10 Methods How to Repair Mortise Lock Spring
1. Understanding the Mortise Lock Mechanism
Before attempting any repairs, it’s essential to understand the basic mechanics of a mortise lock. These locks contain a complex assembly of levers, springs, and a latch bolt housed within a rectangular mortise pocket. The spring in question typically works to return the latch or handle to its neutral position after turning.

If this spring breaks or weakens, the latch may stick or the handle may sag. Familiarizing yourself with the mechanism will make the disassembly and repair process more straightforward.
2. Diagnosing the Spring Issue
Accurate diagnosis is crucial to effective repair. Start by observing the problem: does the handle droop, fail to return to its position, or does the latch not retract when the handle is turned? In most cases, these symptoms indicate a broken or dislodged spring. To verify, remove the lock from the door and carefully examine the internal assembly.
If the spring is visibly broken, bent, or out of place, you’ve identified the issue. Understanding the exact problem will help you choose the most appropriate repair method.
3. Gather the Necessary Tools
Repairing a mortise lock spring requires specific tools. You will need:
- A screwdriver (flathead and Phillips)
- Needle-nose pliers
- Tweezers
- Replacement spring (matching size and tension)
- Lubricant (like graphite powder or silicone spray)
- Cleaning cloth
Having these tools on hand before starting the repair ensures a smoother process. Additionally, having a replacement spring ready is crucial, as attempting to reuse a broken or overly worn spring can lead to recurring issues.
4. Removing the Mortise Lock from the Door
Begin by unscrewing the lock from the door, starting with the handles or knobs. Next, remove the faceplate, which typically has screws on either side. Carefully pull the lock body out of the mortise pocket. Be gentle, as forcing it can damage the wood or the lock itself.
Once removed, place the lock on a clean, flat surface to proceed with the repair. Proper removal minimizes the risk of damage and helps you access the internal components more efficiently.
5. Disassembling the Lock Mechanism
Carefully open the lock casing by removing the screws that hold it together. Once open, take note of the spring’s positioning before removing it. Taking a photo can be helpful for reassembly. Gently remove the broken or malfunctioning spring using needle-nose pliers.
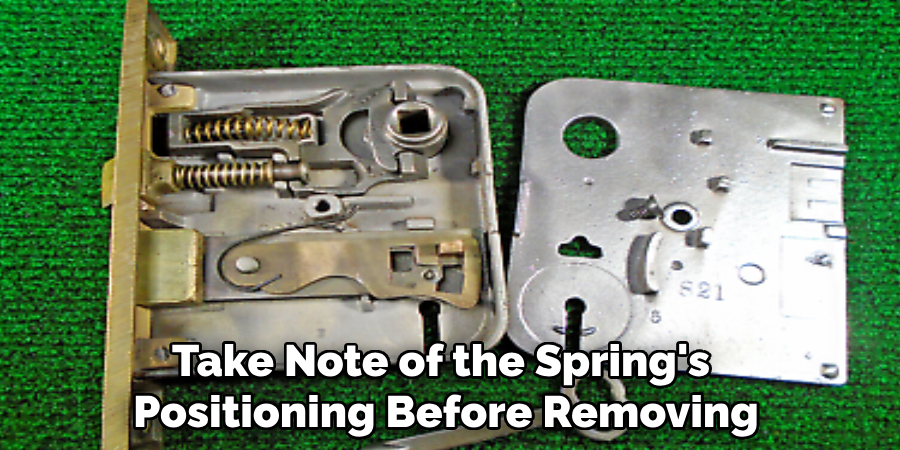
Be cautious not to disturb other internal parts, as mortise locks contain many small components that need to remain in place. This careful disassembly will make reassembly much easier and reduce the chances of losing parts.
6. Choosing the Right Replacement Spring
Selecting the correct spring is crucial for a successful repair. Mortise lock springs vary in size, tension, and shape. Take the broken spring to a hardware store to find a matching replacement. If the exact match is not available, opt for a spring that closely resembles the original in terms of coil tightness and length.
An incorrect spring can result in poor lock performance or a handle that does not return properly. Ensuring a precise match guarantees smooth operation after the repair.
7. Installing the New Spring
Place the new spring in the same position as the old one, ensuring it is properly seated. Use tweezers or needle-nose pliers to guide the spring into place without stretching or deforming it. The spring should fit snugly and maintain tension without slipping.
Once installed, manually test the handle and latch mechanism to ensure the spring responds correctly. If the movement feels smooth and the latch returns as expected, the spring is correctly positioned. Proper installation is vital for the lock’s long-term reliability.
8. Lubricating the Mechanism
After installing the new spring, lubricate the moving parts to reduce friction and prolong the spring’s life. Use a dry lubricant like graphite powder to avoid attracting dust and debris. Apply a small amount to the spring, latch, and pivot points.
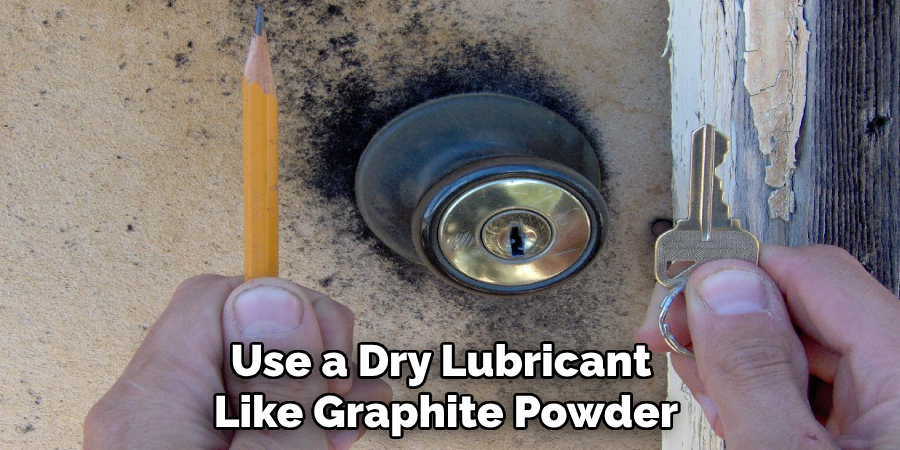
Test the lock several times to work the lubricant through the mechanism. Lubrication not only helps the spring function more efficiently but also prevents the buildup of grime that could hinder movement over time.
9. Reassembling and Reinstalling the Lock
Carefully reassemble the lock casing, ensuring that no parts are misaligned or pinched. Tighten the screws evenly to avoid warping the lock body. Once assembled, reinstall the lock into the door, securing the faceplate and handle. Test the lock by operating the handle multiple times, both from the inside and outside, to ensure consistent performance.
If the lock functions smoothly and the handle returns properly, the repair is successful. Taking your time with reassembly helps maintain alignment and functionality.
10. Testing and Final Adjustments
After installation, thoroughly test the lock under normal usage conditions. Try locking and unlocking from both sides and observe how the latch responds. If the handle still feels loose or doesn’t return fully, check the spring tension and ensure all components are correctly seated.
In some cases, slight adjustments to the spring position or additional lubrication may be necessary. Continuous testing ensures that any minor issues are resolved before the lock is put back into regular use.
Maintenance and Upkeep
To ensure the longevity and reliable performance of your lock, regular maintenance is essential. Periodically clean the lock mechanism with a dry cloth to remove any dust or debris that could hinder its functionality. Lubricate the moving parts, such as the latch and internal springs, with a high-quality silicone-based lubricant to prevent wear and reduce friction.
Avoid using oil-based products, as they can attract dirt and gum up the mechanism over time. Additionally, inspect the lock for any signs of rust or corrosion, especially in outdoor or high-humidity environments, and address these issues promptly. Proper maintenance not only extends the lifespan of the lock but also ensures smooth operation and optimal security.
Safety Considerations
When working with locks, always prioritize safety to avoid accidents or damage. Use appropriate tools that are free from defects, and ensure you have a stable working surface if disassembling a lock for maintenance. If lubricating or cleaning, avoid using flammable products near open flames or heat sources.
For locks in electrical systems, ensure the power supply is completely turned off before performing any maintenance. Additionally, if you’re uncertain about a repair or maintenance task, consult a professional locksmith to prevent causing unintentional harm to the lock or compromising its security. A cautious approach ensures both safety and proper functionality.

Common Mistakes to Avoid
When performing lock maintenance or repairs, there are several common mistakes that can lead to complications. One frequent error is using excessive force to open or repair a lock, which can cause internal components to break or misalign.
Another mistake is applying the wrong type of lubricant, as certain substances, such as oil-based lubricants, can attract dirt and debris, leading to clogging over time. Neglecting to clean the lock before lubrication is another oversight, as accumulated grime can interfere with the lock’s mechanism. Additionally, failing to use proper tools for the job may damage the lock or result in ineffective repairs.
Lastly, attempting advanced repairs without adequate knowledge or training can increase the risk of worsening the issue. Avoiding these pitfalls can help extend the life of your locks and maintain their functionality.
Conclusion
Repairing a mortise lock spring requires a methodical approach, from diagnosing the problem to reassembling the mechanism. By thoroughly inspecting the internal components, choosing the right replacement spring, and correctly reinstalling the lock, you can restore smooth, reliable function to your door.
Regular maintenance, including lubrication and periodic inspections, can prevent future issues and extend the lock’s lifespan. Thanks for reading our blog post on how to repair mortise lock spring! We hope you found it helpful and informative.