

Replacing a window tilt latch is an essential skill for maintaining the functionality and safety of your windows. Over time, tilt latches can wear out or break, making it difficult to properly secure or tilt the window for cleaning or ventilation.

Fortunately, replacing a tilt latch is a straightforward process that requires minimal tools and can be completed in a few quick steps. This guide will walk you through everything you need to know about how to replace a window tilt latch efficiently.
What is a Window Tilt Latch?
A window tilt latch is a small but crucial component found on many types of double-hung and single-hung windows. Typically made of plastic or metal, the tilt latch is installed on the top edges of the window sash and serves two primary purposes.
First, it allows the sash to be tilted inward for easy cleaning and maintenance. Second, it helps to secure the sash in place, ensuring the window remains safely closed and properly aligned. Without a functioning tilt latch, the window may lose its stability, potentially compromising both its usability and safety.
Understanding the role of this component is the first step in recognizing when a replacement may be necessary.
When to Replace a Window Tilt Latch
Over time, window tilt latches can wear out, become damaged, or break entirely due to regular usage or exposure to the elements. Common signs that a tilt latch needs replacement include difficulty securing the window sash, excessive movement or wobbling of the sash, or noticeable cracks and visible wear on the latch itself.
Another indication is when the sash no longer tilts inward smoothly or stays in the proper position during operation. It’s important to address these issues promptly, as a faulty tilt latch can compromise the overall functionality and safety of the window. Routine inspection and timely replacement are key to maintaining your windows in optimal condition.
Tools and Materials Needed
To replace or repair a faulty tilt latch, you will need the following tools and materials:
- Screwdriver (Flathead or Phillips, depending on the specific screws used)
- Replacement Tilt Latch (ensure it matches the specifications of the existing latch)
- Measuring Tape (to verify the dimensions of the latch)
- Putty Knife (for prying and removing the old latch, if necessary)
- Cleaning Cloth (to clean the window sash area before installing the new latch)
- Lubricant (optional, for smoother operation after installation)
Having these items ready will ensure a seamless and efficient latch replacement process.
10 Methods How to Replace a Window Tilt Latch
1. Identify the Type of Window Tilt Latch
The first step in replacing a window tilt latch is to identify the specific type of latch you are dealing with. There are several types of window tilt latches, including single and double-hung window latches, and they may vary in design depending on the manufacturer or the age of the window.
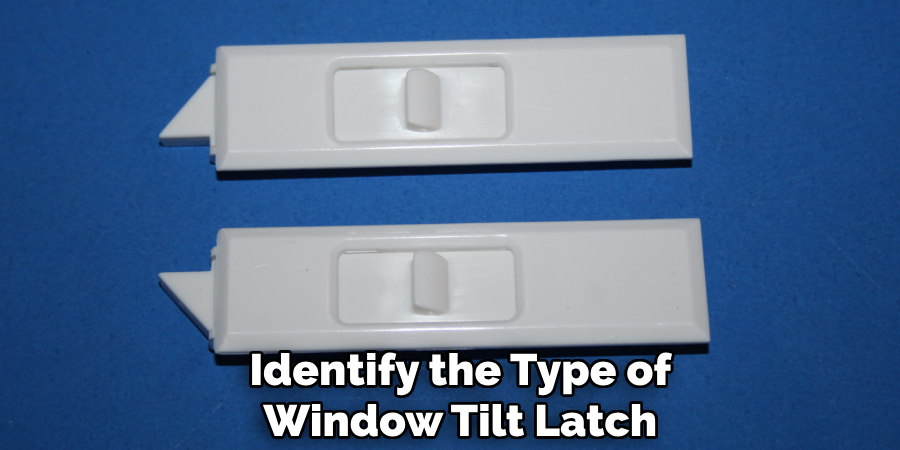
Take a close look at the latch to determine whether it is a simple push-button latch, a latch with a locking mechanism, or a more complex tilt-and-turn latch. By understanding the type of latch you are working with, you can ensure you order the correct replacement part.
2. Purchase the Correct Replacement Latch
Once you’ve identified the type of latch, the next step is to acquire the correct replacement. You can typically find the right part at a hardware store, window supply shop, or online.
It’s essential to match the latch to the manufacturer’s specifications, as even slight differences in size or design can prevent the latch from fitting properly. If you are unsure, take the old latch to the store or contact the manufacturer for guidance. Make sure the replacement latch is compatible with your window model and brand.
3. Gather the Necessary Tools
Before beginning the replacement process, gather the tools you’ll need. Generally, you will need a small screwdriver, a flathead or Phillips screwdriver (depending on the screws in use), a pair of pliers, and possibly a utility knife or a drill if the latch requires additional adjustments.
Having all your tools at hand will ensure the replacement process goes smoothly without interruptions. It’s also a good idea to wear safety gloves and glasses to protect yourself from any glass shards or sharp edges.
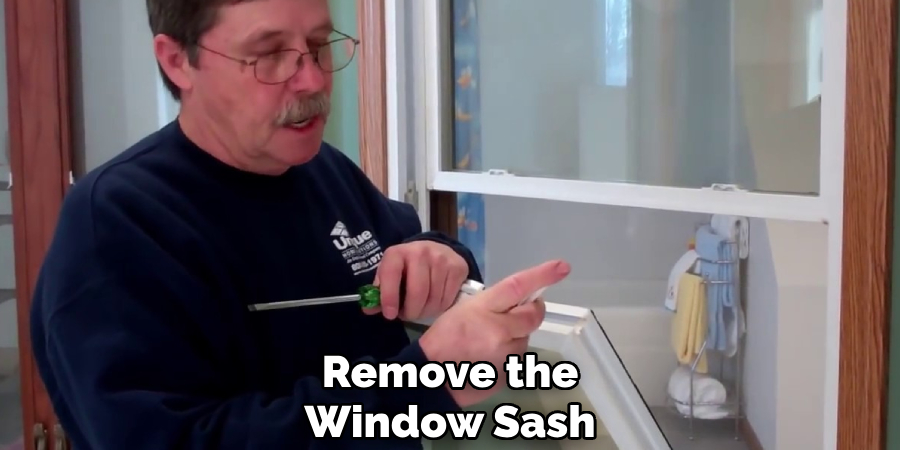
4. Remove the Window Sash (If Necessary)
In some cases, especially with double-hung or more complex windows, you may need to remove the window sash to access the latch properly. To do this, gently lift the sash and tilt it inward. You might need to disengage any securing pins or stops holding the window in place.
Once the window is safely removed, place it on a soft surface to prevent damage. This step is not always necessary for simpler window designs, but it can provide easier access for replacing the latch.
5. Locate and Remove the Broken Latch
With the window sash in place or tilted inward, locate the broken or malfunctioning latch. Most tilt latches are held in place with screws, which can be removed using a screwdriver. Unscrew the latch carefully, noting the position of any washers or small components that may be attached. In some cases, the latch may also be held in place with clips or retaining tabs, which you will need to release by gently prying them away with a flathead screwdriver. Take care not to damage the window frame or the surrounding components during this process.
6. Clean the Window Frame
Before installing the new latch, it’s a good idea to clean the window frame and surrounding areas where the latch sits. Dust, dirt, and debris can accumulate over time and interfere with the smooth operation of the new latch. Use a damp cloth to wipe down the frame, and if necessary, a mild cleaning solution to remove any buildup. Allow the area to dry completely before proceeding with the installation of the new latch.
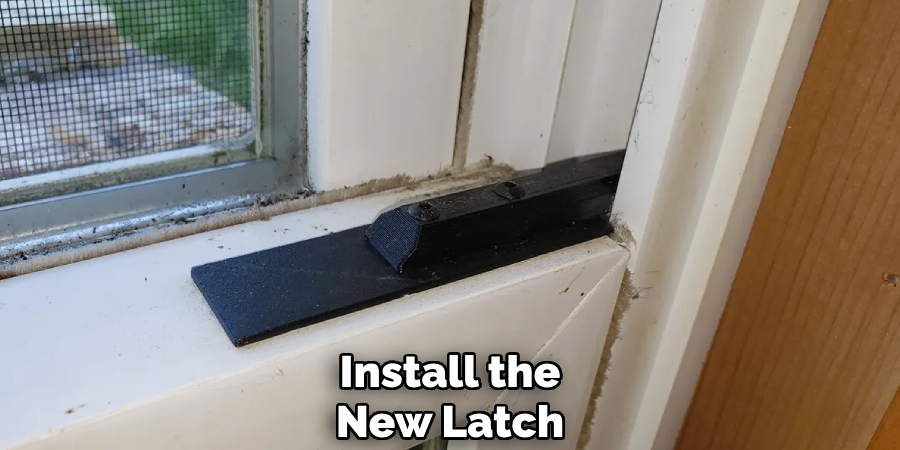
7. Install the New Latch
Now it’s time to install the new tilt latch. Align the replacement latch with the screw holes or clips where the old latch was attached. If the latch uses screws, carefully position the latch and insert the screws through the designated holes. Tighten the screws just enough to secure the latch in place, but avoid overtightening, as this can damage the latch or window frame. If the latch uses clips or retaining tabs, gently push the latch into place until it clicks or locks securely. Ensure that the latch moves smoothly and aligns properly with the window frame before proceeding.
8. Test the New Latch
After installing the new tilt latch, it’s important to test its functionality. Close the window and attempt to engage the latch, ensuring it locks into place as expected. Then, tilt the window open slightly to check if the latch releases smoothly. If the latch does not engage or disengage properly, it may be misaligned or not fully secured.
In this case, adjust the position of the latch slightly and test it again. It may take a few tries to get it right, but make sure the latch is fully functional before continuing.
9. Reinstall the Window Sash (If Removed)
If you had to remove the window sash to replace the latch, now is the time to reinstall it. Carefully lift the sash back into place, ensuring it is aligned with the window frame. Re-engage any pins, locks, or stops that were removed earlier to secure the sash. Test the window by tilting it open and closed a few times to make sure everything is functioning correctly. If the window does not open or close smoothly, check the latch alignment and adjust as necessary.
10. Perform a Final Check
Once the new latch is installed and the window is operating properly, perform a final check to ensure everything is secure. Ensure that all screws are tightened and that the latch operates smoothly without resistance. Inspect the window frame for any visible damage or misalignment that might have occurred during the process. Additionally, check the overall condition of the window’s other components, such as the weatherstripping or balance system, to ensure that the window remains in good working condition.
Maintenance and Upkeep
Regular maintenance ensures that your window remains functional and lasts for years to come. Start by cleaning the window frame, glass, and tracks with a mild detergent and a soft cloth to prevent the buildup of dirt and debris.
Lubricate any moving parts, such as hinges or the balance system, to keep them operating smoothly. Periodically inspect the weatherstripping for wear or damage and replace it as necessary to maintain an effective seal against drafts and moisture. It’s also important to check for signs of corrosion, warping, or other structural issues that could compromise the window’s integrity.
Addressing minor problems promptly can prevent them from turning into larger, more costly repairs.

Conclusion
Replacing a window tilt latch may seem like a daunting task, but with the proper steps and tools, it can be completed easily and efficiently. By identifying the correct type of latch, obtaining a suitable replacement, and carefully following the steps outlined above, you can restore the functionality of your window in no time.
Whether you’re dealing with a broken latch or simply upgrading to a more durable version, replacing a tilt latch is a manageable DIY project that can enhance your window’s performance and security. Thanks for reading, and we hope this has given you some inspiration on how to replace a window tilt latch!