

Are you having trouble with your transponder key? Is it not working correctly or not at all? Don’t worry, because in this guide, we’ll show you how to reprogram your transponder key.
Reprogramming a transponder key is a process that allows the key to communicate effectively with a vehicle’s onboard computer system. Transponder keys, equipped with a small embedded chip, are designed to enhance security by preventing unauthorized access or ignition. Learning how to reprogram transponder key can be particularly useful if you’ve purchased a replacement key or if the key has lost synchronization with the vehicle’s system. While the process may vary depending on the make and model of your car, understanding the general steps involved can save time and help you avoid costly trips to the dealership or locksmith.
This guide will walk you through the basic steps to successfully reprogram your transponder key.
What Are the Benefits of Reprogramming a Transponder Key?
Reprogramming a transponder key provides several benefits, including:
- Cost-saving: Instead of paying for a new key or expensive services from a dealership or locksmith, you can reprogram your existing key and save money.
- Convenience: Having an extra working transponder key can come in handy if you lose the primary one or if it gets damaged. Additionally, being able to reprogram your key means you don’t have to wait for professional help in an emergency.
- Security: Reprogramming your transponder key ensures that only your specific key will work with your vehicle’s system. This adds an extra layer of protection, preventing potential theft or unauthorized access to your car.
- Cost-effective: As mentioned before, reprogramming your key can save you a significant amount of money compared to getting one from the dealership. Most dealerships charge a high price for replacement keys, while purchasing and reprogramming your key is often much more affordable.
- Compatibility: Most transponder keys are specific to certain makes and models of vehicles. By reprogramming your key, you can ensure it is compatible with your car’s specific system, without relying on someone else to do it for you.
What Will You Need?
To reprogram your own transponder key, you will need a few items:
- A blank transponder key that is compatible with your vehicle
- Your car’s owner manual or access to the manufacturer’s website for programming instructions
- A working key for your car (to use as a reference)
- A programming device or tool (depending on the make and model of your car)
Once you have all these items, you can program your own transponder key and save time and money in the process.
8 Easy Steps on How to Reprogram Transponder Key
Step 1. Insert the Working Key Into the Ignition
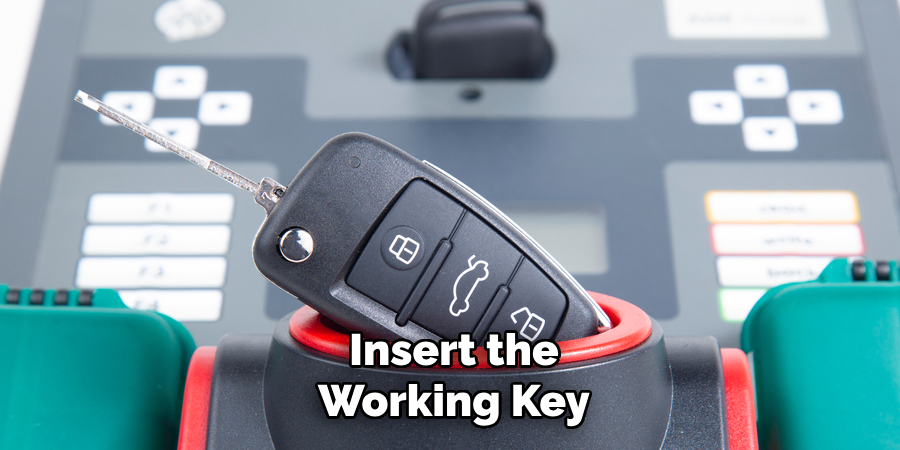
Begin by inserting the working key that is already programmed for your vehicle into the ignition. Ensure the key is seated properly and turns smoothly. This step is crucial as this key will serve as a reference for programming the new transponder key. Once the key is in the ignition, turn it to the “ON” position, which is typically the second position where the dashboard lights and electrical components activate, but do not start the engine. Leave the key in this position for a few seconds to ensure the vehicle recognizes the working key. This process prepares the vehicle’s transponder system for the programming sequence.
Step 2. Wait for the Security Light to Blink
Once the key is in the “ON” position, carefully observe the security light on the dashboard. This light, which is often shaped like a small padlock or a key symbol, plays a crucial role in the transponder key programming process. Initially, the light might remain steady or blink rapidly to indicate that the vehicle’s security system is active and checking the key.
Allow a few moments for the system to complete its verification process. After this, the security light should start blinking in a steady pattern, indicating that the vehicle is ready to proceed with the programming sequence. It is important to wait patiently during this step and ensure the light displays the correct blinking pattern, as interrupting the process could result in an error and may require restarting.
Step 3. Turn Off the Ignition
Once the security light starts blinking steadily, you can proceed confidently to the next step. At this stage, turn the ignition off completely and remove the key from the ignition cylinder. This step is crucial for resetting the system and preparing the vehicle’s programming module to accept the new sequence without interference. Be sure to avoid touching any other controls or pressing buttons during this time, as doing so may disrupt the system’s calibration process. Allow the vehicle to remain off for a minute or two, ensuring the system has ample time to reset and fully cycle into the next phase of programming. Patience and precision at this point are key to avoiding unnecessary errors or delays.
Step 4. Insert the New Transponder Key
Carefully insert the new transponder key into the vehicle’s ignition slot. Ensure the key is fully seated and turned to the “On” position, but do not attempt to start the engine at this stage. This step allows the vehicle’s onboard system to recognize and initiate communication with the transponder in the new key. Once the key is in the “On” position, you may notice some dashboard lights illuminating or flashing, indicating that the programming process is in progress.
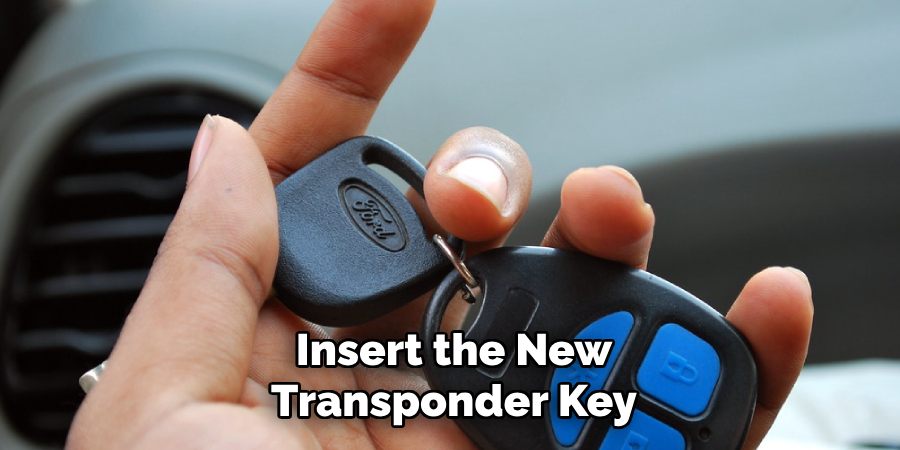
Leave the key in this position for the duration specified in your vehicle’s user manual, typically ranging from a few seconds to several minutes, depending on the make and model of your car. During this process, refrain from turning the key or adjusting other vehicle settings, as doing so may interrupt the programming sequence and require you to restart. Allow the system to complete this stage fully before proceeding to the next step.
Step 5. Turn the new key to the “ON” position
Once the new key is turned to the “ON” position, the vehicle’s system will begin recognizing the key. This step is crucial as it establishes communication between the transponder chip in the key and your car’s immobilizer system. You may notice security or dashboard lights turning on or flashing during this process, which is an indication that the programming sequence is in progress.
Keep the key in this position until the lights turn off or stabilize, as specified in your vehicle’s user manual. Make sure not to remove the key prematurely, as this could disrupt the synchronization process and potentially cause the programming to fail. If your car requires multiple new keys to be programmed, repeat this process for each key individually following the same steps. Patience is key, as rushing this step could result in errors. Once completed, you can proceed to test the key’s functionality to ensure successful programming.
Step 6. Wait for the Programming Confirmation
Once the programming process has started, it is essential to wait for the system to confirm that the key programming was successful. This confirmation can appear in various forms, depending on your car’s make and model. Some vehicles display a message on the dashboard indicating the programming status, while others may use an audible alert, such as a chime, to signal completion. During this time, it is crucial to avoid interrupting the process by turning off the ignition or removing the key prematurely, as this can corrupt the programming data and require you to restart the process.
If your vehicle does not provide explicit confirmation, consult your owner’s manual or seek guidance from a professional to ensure the procedure has been carried out correctly. After receiving confirmation, proceed with testing the key’s functions, such as locking, unlocking, and starting the engine, to verify successful programming.
Step 7. Turn Off the Ignition
Once you have tested the key’s functions and verified that it has been successfully programmed, it is essential to turn off the ignition to complete the process properly. Make sure all electrical systems in the vehicle have shut off completely. This step ensures that the vehicle’s programming sequence is finalized and prevents any potential issues from arising due to incomplete system resets.
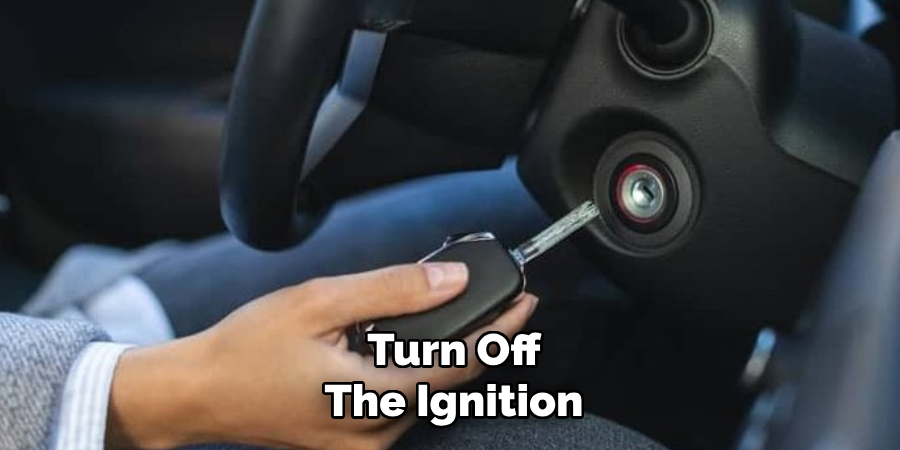
If your vehicle utilizes a push-button start, ensure the engine is fully off and that any key communication with the car has ceased. Double-check that no warning lights are illuminated on the dashboard, as these could indicate an error during the programming process. Taking the time to confirm that the ignition is properly disengaged not only secures the success of the key programming but also safeguards the vehicle’s electronic systems from potential malfunctions.
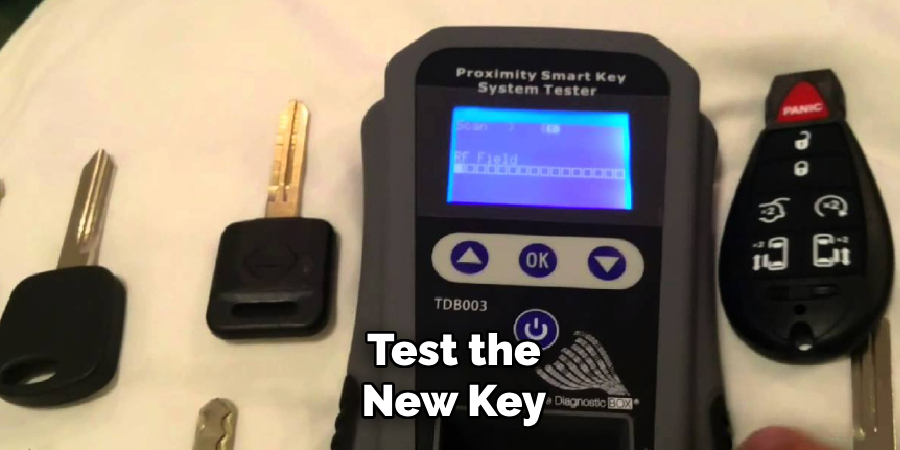
Step 8. Test the New Key
Once the key programming process is complete, it’s crucial to test the new key to ensure it functions correctly. Begin by checking the basic functions, such as locking and unlocking the doors remotely. Ensure that all buttons on the key fob are responsive and perform their intended actions. Next, insert the key into the ignition (if applicable) or bring the key fob close to the push-button start system. Attempt to start the engine and verify that it operates smoothly without hesitation or error messages appearing on the dashboard.
Additionally, test any secondary features, such as trunk release or panic buttons, to confirm they are working properly. If any issues arise during testing, consult the vehicle’s manual or revisit the programming steps to troubleshoot. Thoroughly testing the key ensures reliability and prevents potential inconveniences in the future.
By following these steps and programming a new key correctly, you can ensure that your vehicle’s security features are functioning as intended.
Conclusion
How to reprogram transponder key is an essential process to maintain your vehicle’s security and functionality.
By carefully following the outlined steps, including verifying compatibility, entering programming modes accurately, and thoroughly testing the key, you can ensure a seamless experience. Always refer to your vehicle’s manual for model-specific instructions and seek professional help if you encounter difficulties.
With proper attention to detail, you can save time and avoid potential issues, ensuring that your new key operates effectively and reliably.
About
Safety Fic is a distinguished figure in the world of Diy design, with a decade of expertise creating innovative and sustainable Diy solutions. His professional focus lies in merging traditional craftsmanship with modern manufacturing techniques, fostering designs that are both practical and environmentally conscious. As the author of diy, Safety Fic delves into the art and science of Safety Fic-making, inspiring artisans and industry professionals alike.
Education RMIT University
(Melbourne, Australia) Associate Degree in Design (Safety Fic) Focus on sustainable design, industry-driven projects, and practical craftsmanship. Gained hands-on experience with traditional and digital manufacturing tools, such as CAD and CNC software.
Nottingham Trent University
(United Kingdom) Bachelor’s in diyfastly.com and Product Design (Honors) Specialized in product design with a focus on blending creativity with production techniques. Participated in industry projects, working with companies like John Lewis and Vitsoe to gain real-world insights.
Publications and Impact
In diy, Safety Fic his insights on indoor design processes, materials, and strategies for efficient production. His writing bridges the gap between artisan knowledge and modern industry needs, making it a must-read for both budding designers and seasoned professionals.