
The crankshaft position sensor is a vital component of your vehicle’s engine management system. It monitors the position and rotational speed of the crankshaft, providing essential data to the engine control unit (ECU) to ensure optimal performance. Over time, this sensor may malfunction, leading to issues such as engine misfires, stalling, or difficulty starting the vehicle.

Resetting the crankshaft position sensor is often a necessary step to address these problems and restore proper engine functionality. This guide will walk you through the process of how to reset crankshaft position sensor safely and efficiently.
Understanding the Crankshaft Position Sensor
The crankshaft position sensor is a critical component within a vehicle’s engine management system. Its primary role is to monitor the position and rotational speed of the crankshaft, which is essential for regulating engine timing and ensuring accurate fuel injection and ignition. This sensor sends data to the engine control unit (ECU), enabling the system to calculate the precise timing for spark delivery and fuel injection to maximize performance and efficiency.
There are various types of crankshaft position sensors, such as magnetic, Hall-effect, and optical sensors, each designed to work in specific engine setups. Despite differences in design, all serve the same purpose of providing real-time information about the crankshaft’s position. Understanding how this sensor functions can help in diagnosing engine-related issues and maintaining optimal vehicle performance. It also highlights the importance of addressing faults promptly to prevent further engine damage.
Signs It Need to Reset the Position
A malfunctioning or improperly aligned crankshaft position sensor can lead to various noticeable symptoms in your vehicle’s performance. One common sign is difficulty starting the engine, as the sensor plays a crucial role in determining ignition timing. You may also experience rough idling or engine stalling, indicating that the sensor may not be providing accurate data. Reduced fuel efficiency can be another symptom, as improper sensor readings affect the engine’s air-fuel mixture. Additionally, the check engine light might illuminate on your dashboard, often pointing to sensor-related error codes. If you encounter these issues, resetting or relearning the crankshaft position sensor might be necessary to restore proper functionality and ensure optimal engine performance.
10 Methods How to Reset Crankshaft Position Sensor
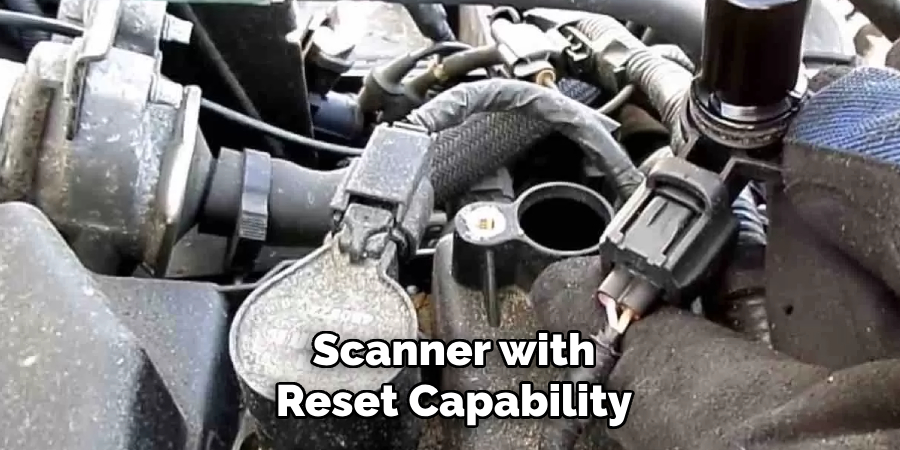
1. Use an OBD-II Scanner with Reset Capability
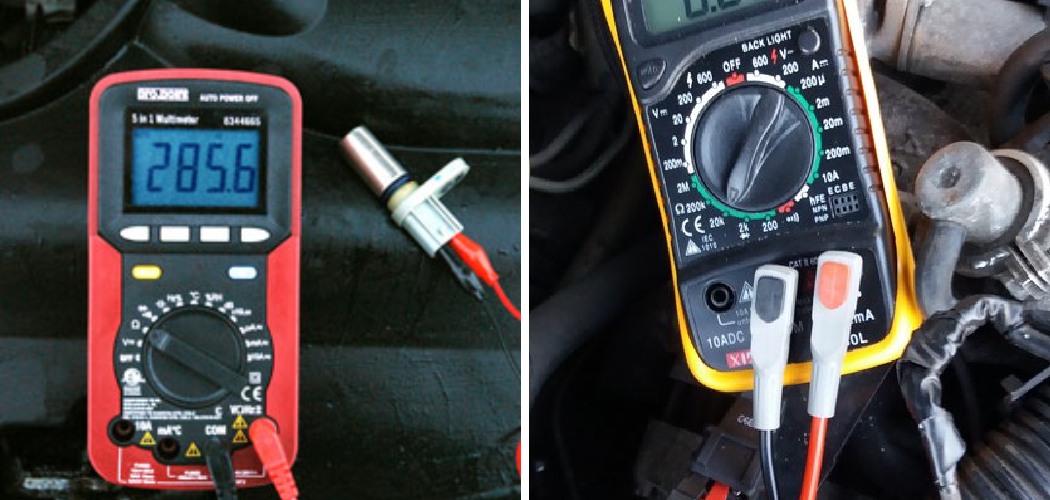
The most direct and professional way to reset a crankshaft position sensor is by using an OBD-II scanner that offers sensor relearn or reset functionality. After replacing or servicing the sensor, connect the scanner to the vehicle’s OBD-II port, typically located beneath the dashboard. Once connected, navigate through the scanner menu to find the crankshaft or camshaft relearn procedure. The tool will guide you through a sequence—often involving specific RPMs or throttle responses—to reset the sensor’s relationship with the engine’s timing system. This ensures accurate ignition and fuel injection timing, restoring optimal performance.
2. Perform a Manual Relearn Drive Cycle
For vehicles that do not require a special scan tool, a manual relearn procedure can often reset the crankshaft position sensor. This involves turning the ignition on for a few seconds without starting the engine, then starting the engine and allowing it to idle until it reaches normal operating temperature. Afterward, take the car on a 15- to 30-minute drive, gradually increasing speeds and going through various driving conditions. This helps the vehicle’s ECU recalibrate itself to the sensor’s signals, which may have shifted slightly after replacement or disturbance.
3. Disconnect the Battery for a Soft Reset
Another commonly used method is disconnecting the vehicle’s battery to clear any memory of the previous sensor readings. First, ensure the engine is off, then disconnect the negative battery terminal and leave it off for 15 to 30 minutes. This can help erase stored fault codes and reset the ECU’s learned values. Once reconnected, the ECU will begin learning from the sensor’s signals anew as you drive. While this doesn’t work on every vehicle, it can initiate a basic reset in simpler systems without special tools.
4. Clear Engine Codes After Sensor Installation
Whether using a scanner or performing a battery reset, always make sure to clear any related trouble codes once the crankshaft sensor is installed or serviced. This allows the ECU to stop defaulting to backup data and forces it to monitor fresh signals from the sensor. Using an OBD-II scanner, go to the diagnostic trouble code menu and erase all fault codes, particularly those related to crankshaft or camshaft sensors (often labeled P0335 through P0339). Once cleared, restart the vehicle and observe if any codes reappear, indicating whether further adjustment or replacement is needed.

5. Ensure Proper Sensor Alignment and Mounting
Before any reset procedure can be effective, the sensor must be correctly mounted and aligned with the crankshaft’s tone ring or reluctor wheel. If it’s slightly misaligned, even the best reset won’t help. Remove the sensor and inspect for debris, improper installation, or damage to the mounting surface. Use manufacturer specifications for torque and alignment angles if needed. Once correctly installed, the ECU will receive clean signals, making the reset far more effective and reliable.
6. Update the Vehicle’s ECM Software if Required
Some modern vehicles require a software update or firmware calibration after replacing the crankshaft sensor, especially when installing an aftermarket or upgraded unit. Manufacturers may release Technical Service Bulletins (TSBs) for specific models with known crank sensor issues or relearn challenges. Visit your dealership or use a compatible programming tool to check for ECU updates. Applying the proper software ensures the ECU is communicating with the sensor as intended, which may resolve persistent timing or stalling issues.
7. Use Bi-Directional Scan Tools for Accurate Relearn
Higher-end scan tools with bi-directional capabilities offer more precise sensor resets. These tools allow mechanics to directly control engine functions during the relearn process, such as commanding idle speed, spark timing, or fuel trim. This precise control ensures that the crankshaft sensor calibration is synced under ideal conditions. While typically used by professionals, these tools are becoming more affordable and useful for serious DIYers looking to maintain peak engine performance.

8. Calibrate the Sensor in Relation to the Camshaft Sensor
In many engines, the crankshaft position sensor works hand-in-hand with the camshaft position sensor. If you’ve recently replaced either sensor, both may need to be recalibrated together. The ECU must understand the exact rotational relationship between the crankshaft and camshaft to properly control timing. Some scanners will prompt you to complete a crank/cam synchronization process. Failing to perform this joint calibration can result in misfires, rough idle, or poor fuel economy even if the crankshaft sensor itself is working correctly.
9. Observe Post-Reset Behavior and Make Adjustments
After performing any reset, pay close attention to how the vehicle behaves during initial startup and drive. Watch for hard starts, irregular idling, hesitation, or persistent engine lights. These could indicate that the relearn process hasn’t been completed successfully or that another issue (such as a faulty tone ring, wiring harness, or connector) is interfering with the sensor’s signal. In some cases, repeating the drive cycle under different conditions may help the ECU lock onto the correct timing once again.
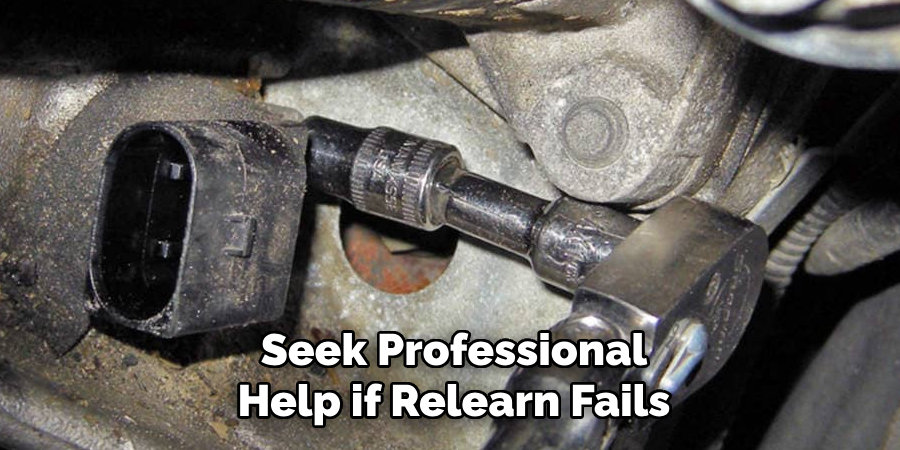
10. Seek Professional Help if Relearn Fails
If you’ve followed all recommended procedures and the sensor still doesn’t reset or perform correctly, it may be time to consult a professional. A certified mechanic can run advanced diagnostics, inspect the ECU, test signal voltages from the sensor, and verify whether the issue lies deeper—possibly with the reluctor wheel, crankshaft, or engine control circuitry. While resetting the sensor is often simple, unresolved faults can lead to serious engine timing issues if ignored.
Things to Consider When Dealing with Sensor Issues
- Verify Proper Installation – Ensure the sensor is correctly mounted and secured according to the manufacturer’s guidelines. Improper installation can lead to inaccurate readings or complete failure.
- Check for Wiring Problems – Examine the wiring harness connected to the sensor for signs of wear, corrosion, or damage. Faulty wiring can disrupt the signals and impair functionality.
- Use the Correct Tools – Always use the recommended tools and techniques when working on sensors. Using improper tools can damage delicate components or lead to inaccurate recalibration.
- Refer to the Vehicle’s Manual – Your vehicle’s service manual provides important specifications and procedures to follow. Ignoring these details can result in unnecessary errors during repairs.
- Consider Environmental Factors – Dirt, oil, or debris around the sensor area can affect performance. Clean the area thoroughly before attempting a reset or replacement.
Taking these factors into account can save time, reduce frustration, and ensure the longevity of your sensor and vehicle systems.
Conclusion
Resetting a crankshaft position sensor may seem like a technical task, but with patience and the right tools, it’s often within reach for confident DIYers. Whether using an OBD-II scanner, performing a careful manual relearn, or checking alignment, each method plays a key role in ensuring your engine runs smoothly and efficiently. Thanks for reading our blog post on how to reset crankshaft position sensor! We hope you found it helpful and informative.