

Are you having trouble with your door lock actuator? Don’t worry, you’re not alone. This common car problem can be frustrating and inconvenient, especially unexpectedly.
The door lock actuator is a crucial component of a vehicle’s locking system, responsible for automatically locking and unlocking car doors. Over time, this part may experience malfunctions or connectivity issues, leading to inconsistent performance or complete failure. Resetting the door lock actuator can often resolve such problems without requiring a complete replacement. Additionally, it is a relatively simple process that can be done at home with just a few tools.
This guide on how to reset door lock actuator will provide a step-by-step approach to resetting the door lock actuator, ensuring your vehicle’s locking system operates smoothly once again. Let’s get started!
What Are the Causes of Door Lock Actuator Malfunctions?
Before we dive into the reset process, it’s essential to understand what might be causing your door lock actuator to malfunction. Here are some common reasons why your door lock actuator may need a reset:
- Faulty wiring or poor electrical connections
- The build-up of dirt and debris in the locking mechanism
- Worn-out or damaged internal components
- Corrosion due to exposure to moisture and environmental elements
If you’re experiencing any issues with your car’s locking system, these could be potential causes. Resetting the door lock actuator often addresses these problems, but if they persist, seeking professional help or considering a replacement may be necessary.
What Will You Need?
Before starting the reset process, gather the following tools and materials:
- Flathead screwdriver
- Socket wrench or pliers
- Cleaning cloth
- Lubricant spray (optional)
Once you have everything ready, you can begin the reset process.
10 Easy Steps on How to Reset Door Lock Actuator
Step 1. Turn Off the Ignition
Ensure your vehicle is turned off by removing the key from the ignition or turning off the engine if you have a push-start button. This step is crucial to prevent electrical interference while working on the locking system. Powering down the vehicle safeguards you from potential electrical shocks and avoids accidental triggering of the locking mechanism during the reset process.
Additionally, it allows the system to discharge fully, ensuring a clean slate when the reset is performed. After providing the ignition is off, proceed to the next step with caution and focus. If you have an aftermarket alarm system, it is recommended that you disconnect the battery before attempting any work on the door lock actuator.
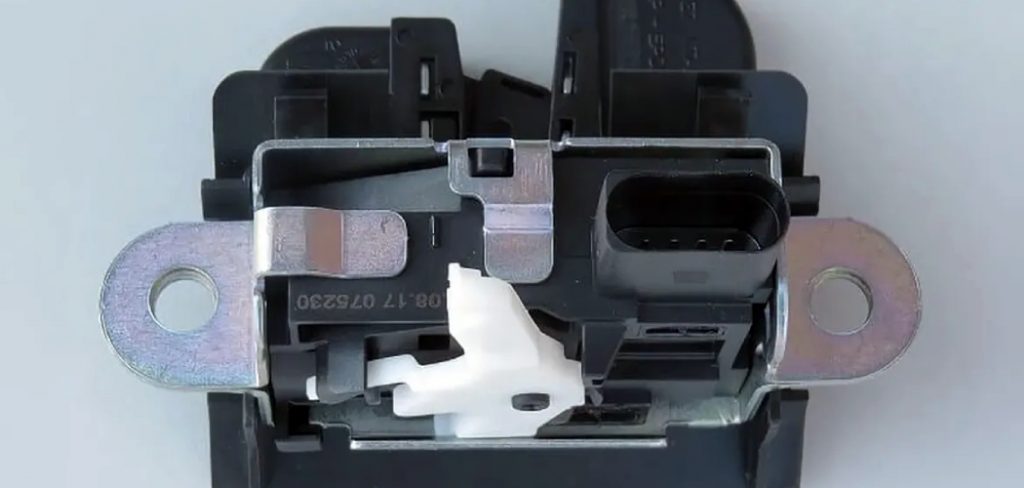
Step 2. Locate the Door Lock Actuator
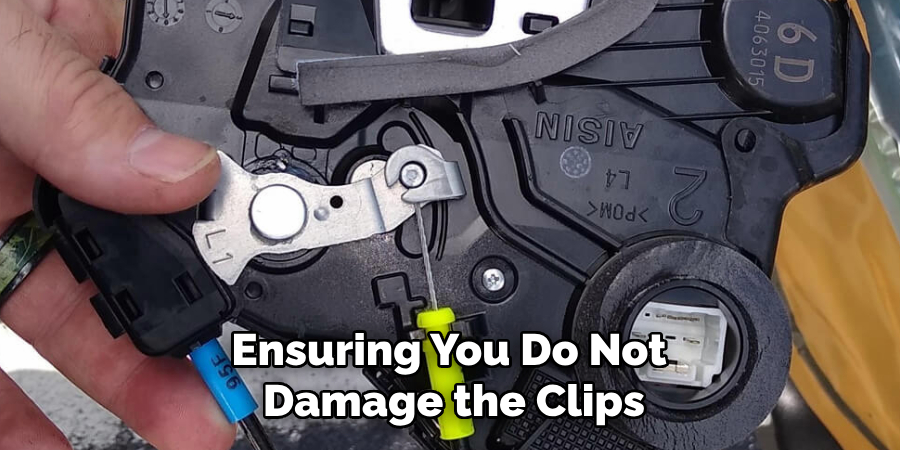
Identify the specific door lock actuator you need to reset. This usually involves removing the interior door panel of the affected door to access the actuator. Use a flathead screwdriver to carefully pry off the panel, ensuring you do not damage the clips or surrounding materials. Once the panel is removed, locate the actuator, typically a small motor connected to the locking mechanism. Familiarizing yourself with its position will make the following steps more effortless and more efficient.
Step 3. Disconnect and Inspect the Actuator
Carefully disconnect the wiring harness connected to the door lock actuator. Examine the actuator and surrounding components for visible wear, damage, or corrosion. If the actuator appears damaged, it may need to be replaced rather than reset. Additionally, check the wiring for loose connections or frayed wires, as these could interfere with proper functioning. Ensuring everything is in good condition before proceeding will help avoid further complications during resetting.
Step 4. Reset the Actuator
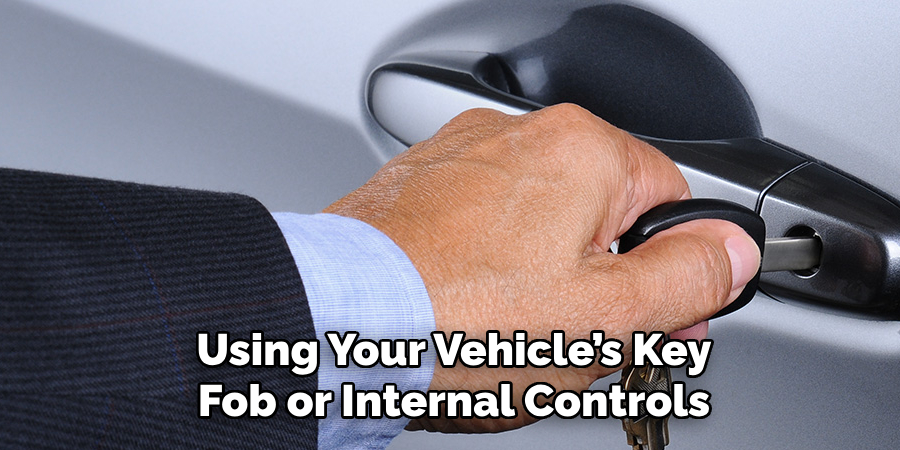
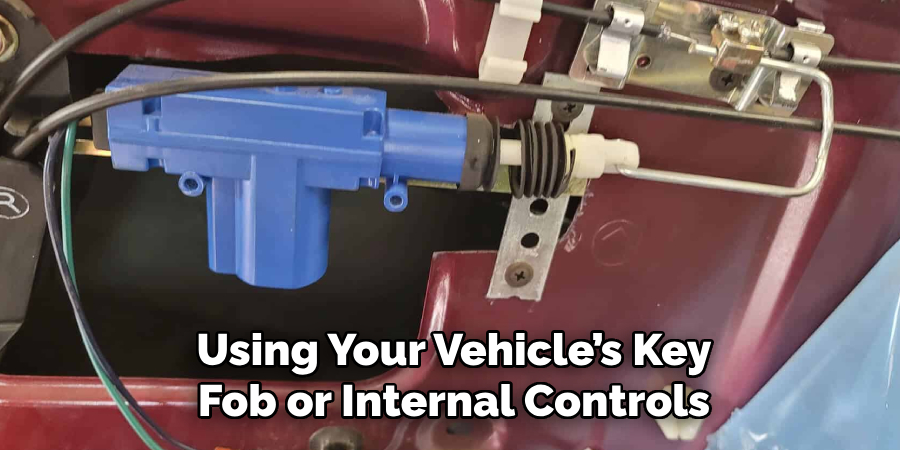
To reset the door lock actuator, reconnect the wiring harness securely, ensuring all connections are tight and properly aligned. Once connected, manually operate the locking mechanism to verify smooth movement. Next, test the actuator by locking and unlocking the door using your vehicle’s key fob or internal controls. The reset process will likely resolve the issue if the actuator responds correctly and without delay. If the problem persists, you may need to replace the actuator entirely.
Step 5. Test the Door Lock System
After resetting the actuator, it’s essential to test the entire door-locking system to confirm everything is working as expected. Lock and unlock all doors using the key fob and the internal lock controls multiple times. Pay attention to any unusual noises, delays, or failures in the locking mechanism. Additionally, check if all doors lock and unlock uniformly, as inconsistencies might indicate unresolved issues. If everything operates smoothly, the repair is complete, and your door lock actuator functions correctly. If problems remain, further inspection or professional assistance may be required.
Step 6. Seek Professional Assistance if Needed
If troubleshooting and resetting the door lock actuator does not resolve the issue, it may be time to consult a professional mechanic. A certified technician can diagnose complex electrical or mechanical problems that may not be easily identified. They can also ensure proper replacement of the actuator or other faulty components to avoid further damage to the vehicle’s door locking system. Seeking professional assistance can save time and provide peace of mind, knowing the issue is resolved correctly.
Step 7. Prevent Future Issues
Regular maintenance is essential to avoid future problems with your door lock actuator. Periodically clean the door locks and surrounding components to prevent dirt and debris buildup, which can interfere with the actuator’s function. Lubricate the locking mechanisms with a manufacturer-recommended lubricant to ensure smooth operation. Additionally, promptly address any signs of wear or malfunction, such as unusual noises or delayed locking, to prevent more significant issues. Staying proactive can extend the lifespan of your door lock actuator and maintain the overall reliability of your vehicle’s locking system.
Step 8. Test the Door Lock System
After completing repairs or maintenance on the door lock actuator, it’s crucial to test the system to ensure everything is functioning correctly and thoroughly. Begin by locking and unlocking the doors using both the key fob and interior controls. Pay attention to the speed and sound of the locking mechanism. Ensure that all the doors respond appropriately and that there are no delays or strange noises. Additionally, verify the functionality of any related features, such as child locks or central locking, to confirm adequate repairs. Testing ensures full functionality and provides confidence in the reliability of your door-locking system.
Step 9. Reassemble the Door Panel
Once you have confirmed that the door lock actuator is functioning correctly, reassemble the door panel. Carefully align the panel with the door frame and ensure that all clips and screws are properly secured. Reconnect any wiring harnesses or components that were detached during disassembly. Take care to avoid pinching wires or damaging any internal components. After reassembly, check that the door panel is flush and firmly attached. This step restores the appearance and usability of your vehicle’s interior while protecting the lock mechanism from dirt and debris.
Step 10. Final Inspection and Testing
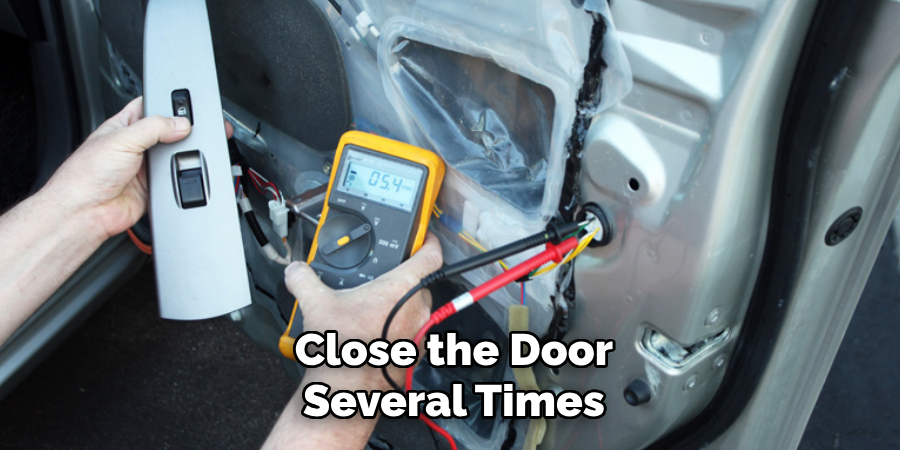
After reassembling the door panel, perform a final inspection to ensure everything is adequately secured and functioning as intended. Test the door lock actuator again using the key fob and the internal locking controls. Open and close the door several times to confirm smooth operation and that no components are loose or misaligned. Check for proper door panel alignment and verify that all electrical components, such as window controls or speaker connections, are working correctly. Completing a thorough inspection ensures that the repair is successful and provides peace of mind before taking your vehicle back on the road.
By following these steps, you can successfully reset a faulty door lock actuator and restore full functionality to your vehicle’s locking system.
5 Things You Should Avoid
- Forcing the Lock Mechanism: Avoid applying excessive force to the lock mechanism during the reset process. This can damage the actuator or other components, leading to costly repairs.
- Skipping the User Manual: Do not bypass the instructions provided in the vehicle’s manual. Ignoring these guidelines can result in improper handling of the actuator and potential malfunctions.
- Using Incorrect Tools: Avoid using tools not designed for the job. Improper tools can cause damage to both the actuator and surrounding parts.
- Ignoring Electrical Connections: Do not neglect the electrical connectors while resetting the actuator. Failing to inspect and adequately reconnect them can disrupt the lock system.
- Skipping Testing After Reset: Always test the door locks after completing the reset. Skipping this step can result in overlooked problems that persist or worsen over time.
By following these simple yet essential guidelines, you can ensure a successful and safe reset process for your vehicle’s door lock actuator.
Conclusion
How to reset door lock actuator is a task that requires careful attention to detail and adherence to proper procedures.
By following the outlined steps and avoiding common mistakes, you can effectively restore your vehicle’s door lock functionality without unnecessary complications. Always prioritize safety by using the appropriate tools, consulting the user manual, double-checking all electrical connections, and testing the locks after the reset, ensuring that the process is successful and that the actuator is operating correctly.
You can handle this task efficiently and keep your vehicle’s locking system in optimal condition with patience and diligence.
About
Safety Fic is a distinguished figure in the world of Diy design, with a decade of expertise creating innovative and sustainable Diy solutions. His professional focus lies in merging traditional craftsmanship with modern manufacturing techniques, fostering designs that are both practical and environmentally conscious. As the author of diy, Safety Fic delves into the art and science of Safety Fic-making, inspiring artisans and industry professionals alike.
Education RMIT University
(Melbourne, Australia) Associate Degree in Design (Safety Fic) Focus on sustainable design, industry-driven projects, and practical craftsmanship. Gained hands-on experience with traditional and digital manufacturing tools, such as CAD and CNC software.
Nottingham Trent University
(United Kingdom) Bachelor’s in diyfastly.com and Product Design (Honors) Specialized in product design with a focus on blending creativity with production techniques. Participated in industry projects, working with companies like John Lewis and Vitsoe to gain real-world insights.
Publications and Impact
In diy, Safety Fic his insights on indoor design processes, materials, and strategies for efficient production. His writing bridges the gap between artisan knowledge and modern industry needs, making it a must-read for both budding designers and seasoned professionals.