

Resetting a garage door keypad can be a straightforward process if you follow the right steps. Whether you’ve forgotten your code, need to update security settings, or just want to change your current code for convenience, knowing how to reset your garage door keypad is essential.

In this guide on how to reset garage door key pad, we will walk you through the necessary steps to effectively reset your keypad, ensuring your garage remains secure and operational.
Why Reset Your Garage Door Key Pad?
Resetting your garage door keypad can enhance security and provide peace of mind. Over time, multiple people may learn your garage access code, increasing the risk of unauthorized entry. Regularly updating your keypad code ensures that only those who should have access to your garage can enter. Additionally, if you’ve moved into a new home or lost your current keypad code, resetting it can help you regain control over your garage security.
Whether for practical reasons like upgrading to a new code or mitigating potential security threats, knowing how to reset your garage door keypad is a vital aspect of maintaining a secure home.
Needed Tools and Materials
Before starting the process of resetting your garage door keypad, gather the following tools and materials:
- Ladder (If Needed)
- Screwdriver
- New Access Code (If Desired)
- Safety Gloves (Optional)
8 Steps on How to Reset Garage Door Key Pad
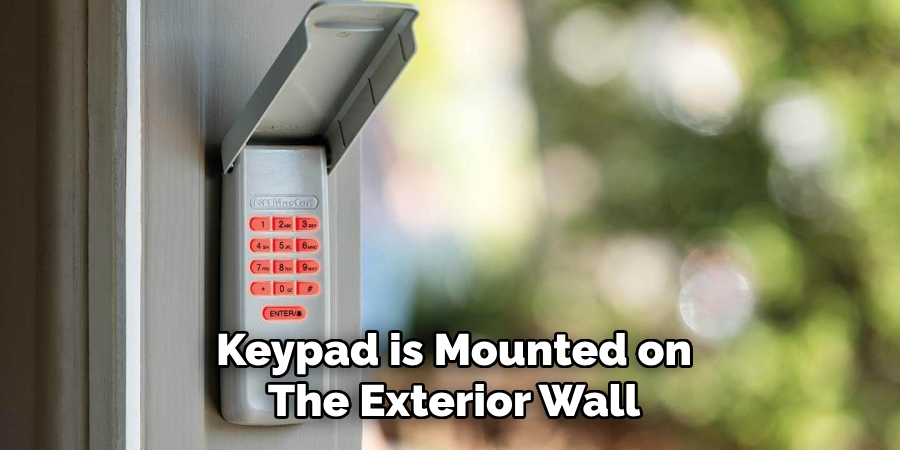
Step 1: Locate the Keypad
The first step in resetting your garage door keypad is to locate the keypad itself. Typically, the keypad is mounted on the exterior wall of your garage, near the garage door. It is usually a small, weatherproof box with a numerical keypad and possibly a cover to protect it from the elements. If you’re having trouble finding it, trace the wire from your garage door opener; this can often lead you to the keypad.
Ensuring that you know exactly where your keypad is situated will make the rest of the reset process smoother and more efficient.
Step 2: Remove the Cover
Once you have located the keypad, the next step is to remove its cover. Start by examining the keypad to identify how the cover is secured. Many keypads have a simple snap-on cover that can be easily lifted off, while others may require you to unscrew a few screws to access the internal components. If your keypad has screws, use the screwdriver from your gathered tools to carefully remove them.
Keep the screws in a safe place so they don’t get lost during the process. Gently lift the cover away from the keypad to expose the buttons and internal mechanisms. Removing the cover will grant you access to reset buttons or switches inside the keypad, which are essential for the reset process.
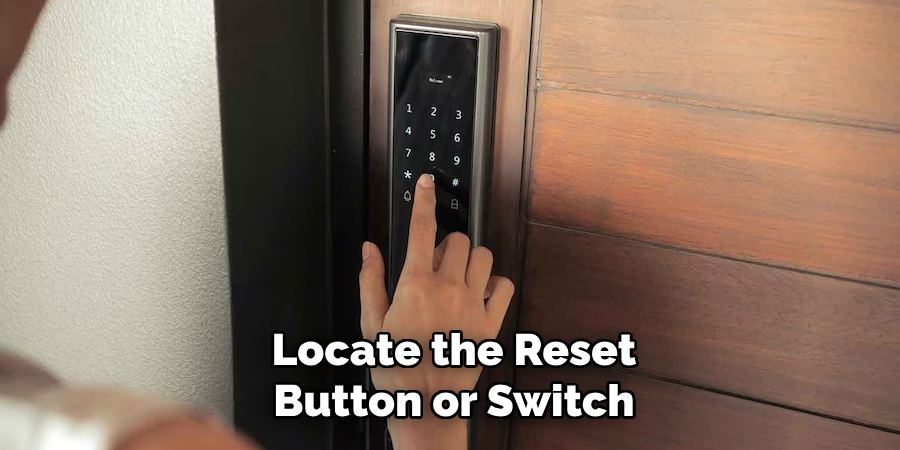
Step 3: Locate the Reset Button or Switch
After removing the cover, locate the reset button or switch inside the keypad. The position of these buttons may vary depending on your specific keypad model. However, they are usually located near the battery compartment or under a small flap inside the keypad. If you don’t see any reset buttons or switches inside your keypad, refer to its instruction manual for assistance.
It’s important to note that some keypads may not have a reset button at all. In such cases, the manufacturer may have provided alternate methods for resetting the keypad.
Step 4: Press and Hold the Reset Button or Switch
Once you’ve located the reset button or switch press and hold it for a few seconds. This action will typically erase any existing access codes and revert your keypad to its default factory settings. If there is a specific code you want to use, now is the time to enter it into the keypad before releasing the reset button or switch.
You may need to use a small tool, like a paperclip or pen, to press and hold the reset button or switch if it’s not easily accessible. Make sure you are pressing firmly but gently to avoid any damage to the keypad.
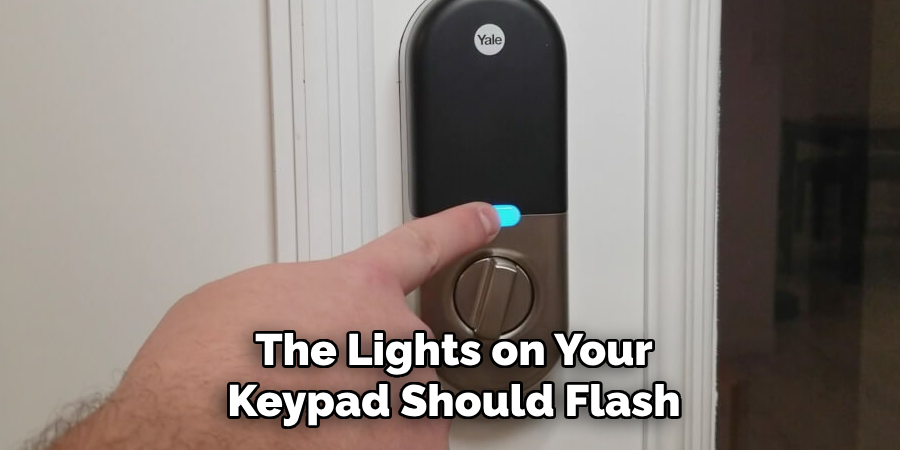
Step 5: Wait for the Keypad to Reset
After holding down the reset button or switch for a few seconds, release it and wait for the keypad to reset. The lights on your keypad should flash, indicating that the reset process is complete. This resetting process should only take a few seconds.
If your keypad doesn’t have any visible lights, try entering your desired access code into the keypad; if successful, this means that the resetting process was a success.
Step 6: Test the Keypad
After resetting your keypad, it’s crucial to test if it is functioning correctly. Ensure that the cover of the keypad is securely back in place before testing. Enter your desired access code into the keypad and see if the door opens. If successful, congratulations, you have successfully reset your garage door keypad!
If the garage door doesn’t open or something seems off, repeat steps 3-6 to ensure that you followed each step correctly.
Step 7: Update Your Access Code (Optional)
If you want to change your current access code for security reasons or convenience, now is the time to do so. With most keypads, you can simply enter the new code in the keypad and press a designated button to confirm it. Refer to your specific keypad’s instruction manual for assistance with updating access codes.
Step 8: Secure the Keypad Cover
After testing that your new access code works, securely put the cover back on the keypad. If you have to unscrew any screws, make sure they are tightly secured before considering the job complete.
Congratulations! You have successfully reset and updated your garage door keypad, providing enhanced security for your home.
Following these steps on how to reset garage door key pad regularly, such as every time you move into a new home or every few years, will ensure that your garage door access remains secure and only accessible to those with the proper code. Remember to safely store your new access code in a secure location, away from potential intruders.
Additional Tips
- It’s always helpful to refer to your specific keypad’s instruction manual for detailed resetting instructions.
- Regularly changing your garage door keypad code is a good security practice to deter potential intruders.
- Consider using a combination of numbers and letters for your access code, as this increases the complexity and makes it harder for someone to guess or crack the code.
- If you’re having trouble with resetting your keypad, refer to a professional garage door technician for assistance. They have the expertise and tools necessary to help you reset your keypad safely and efficiently.
- Don’t forget to regularly maintain and clean your garage door keypad to ensure its long-term functionality. Check for any debris that may interfere with the buttons or cover of the keypad.
- In addition to your garage door keypad, it’s important to also regularly check and update other access points to your home, such as front and back door locks. This provides added security for your property.
- If you have multiple keypads for different access points, it’s recommended to reset them all simultaneously for added convenience and consistency in access codes.
- Consider using a smart garage door opener or keypad that allows for remote control and monitoring of your garage door activity. This can provide an extra layer of security and convenience for your home.
Frequently Asked Questions
Q: How Often Should I Reset My Garage Door Keypad?
A: It is recommended to reset your garage door keypad every time you move into a new home or every few years for added security. It’s also a good idea to reset it if you suspect someone has gained unauthorized access to your garage.
Q: Can I Reset My Garage Door Keypad Without Accessing the Inside?
A: In some cases, yes. Some keypads have a designated reset button on the outside that can be used without accessing the inside of the keypad. Refer to your specific keypad’s instruction manual for more information.
Q: What Should I Do If My Keypad Doesn’t Have a Reset Button or Switch?
A: If your keypad doesn’t have a visible reset button or switch, refer to its instruction manual for alternative resetting methods. You may need to contact a professional technician for assistance in certain cases.

Q: Will Resetting My Garage Door Keypad Affect My Remote Controls?
A: No, resetting your garage door keypad should not affect any remote controls you have programmed for your garage door opener. However, it’s always a good idea to test your remotes after resetting the keypad to ensure they are still functioning correctly.
Conclusion
Resetting your garage door keypad is a straightforward process that enhances the security of your home. By following the steps outlined in this guide on how to reset garage door key pad, you can ensure that only authorized individuals have access to your garage. Regularly updating your access codes and performing maintenance on your keypad are essential practices for maintaining overall security.
Should you encounter any difficulties, seeking the assistance of a professional technician can be beneficial. Remember, a well-maintained and secure garage door keypad not only protects your vehicle and belongings but also contributes to the overall safety of your home.
Check it out to Adjust Gate Hinge Tension
About
Safety Fic is a distinguished figure in the world of Diy design, with a decade of expertise creating innovative and sustainable Diy solutions. His professional focus lies in merging traditional craftsmanship with modern manufacturing techniques, fostering designs that are both practical and environmentally conscious. As the author of diy, Safety Fic delves into the art and science of Safety Fic-making, inspiring artisans and industry professionals alike.
Education RMIT University
(Melbourne, Australia) Associate Degree in Design (Safety Fic) Focus on sustainable design, industry-driven projects, and practical craftsmanship. Gained hands-on experience with traditional and digital manufacturing tools, such as CAD and CNC software.
Nottingham Trent University
(United Kingdom) Bachelor’s in diyfastly.com and Product Design (Honors) Specialized in product design with a focus on blending creativity with production techniques. Participated in industry projects, working with companies like John Lewis and Vitsoe to gain real-world insights.
Publications and Impact
In diy, Safety Fic his insights on indoor design processes, materials, and strategies for efficient production. His writing bridges the gap between artisan knowledge and modern industry needs, making it a must-read for both budding designers and seasoned professionals.