

Kwikset’s SmartKey Security is a great feature that allows you to rekey your lock in seconds without removing it from your door. Whether you’ve lost a key, moved into a new home, or simply want to use one key for all your locks, resetting your SmartKey lock is a straightforward process you can easily handle yourself.

This guide on how to reset smart key kwikset will walk you through everything you need to know about resetting your Kwikset lock. By following these steps, you can restore your lock’s functionality and secure your home quickly and efficiently, saving you the time and expense of calling a locksmith for a simple rekeying task.
Tools and Materials You’ll Need
- A Functioning Key for the Lock (the Current Key)
- The New Key You Want the Lock to Use
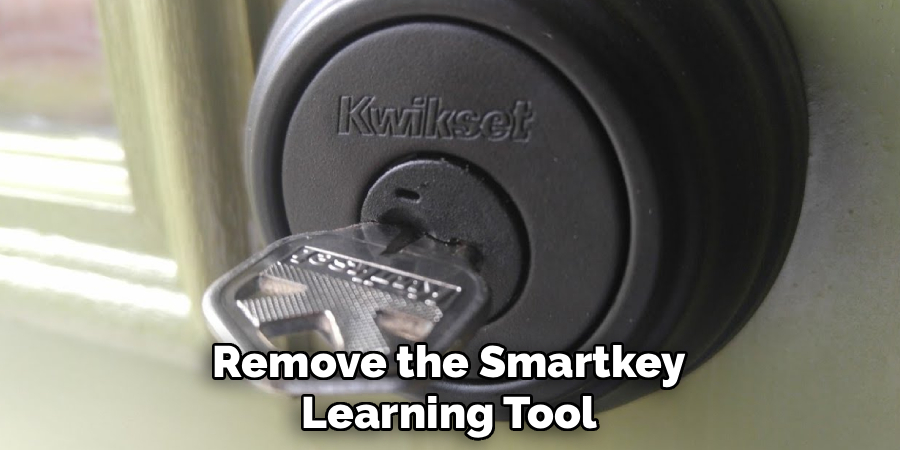
- The Smartkey Learning Tool (This Small, Notched Tool Comes With the Lockset)
- A Paperclip (Optional, for Troubleshooting)
8 Simple Step-By-Step Guidelines on How to Reset Smart Key Kwikset
Step 1: Ensure the Lock Is Functioning Correctly with the Current Key
Before you begin the rekeying process, it is essential to confirm that your lock is in good working order with the key you are currently using. Insert the existing key into the lock cylinder and ensure you can smoothly turn it 90 degrees clockwise to a horizontal position.

The lock should operate without sticking, grinding, or any unusual resistance. This initial check confirms that the lock’s internal mechanism is properly aligned and ready for the rekeying sequence.
If you encounter any difficulty turning the key or if the lock feels jammed, do not proceed with the reset. A problem at this stage could indicate an internal issue that rekeying will not fix and might even worsen. Attempting to force the key or the rekeying tool can cause permanent damage to the lock cylinder.
Instead, you may need to troubleshoot the lock’s installation or contact Kwikset support for assistance before attempting to reset the key.
Step 2: Insert the SmartKey Learning Tool
With the current key still in the lock and turned 90 degrees to the horizontal position, locate the small, narrow slot next to the keyway. This is the SmartKey tool hole. Take the SmartKey learning tool that came with your lock package and insert it firmly and fully into this slot. You should feel a distinct click as the tool engages the internal mechanism of the lock. This click is a critical indicator that the lock is now in its “learning mode” and ready to be reset to a new key.
It is important to push the tool straight in until it is fully seated. An incomplete insertion will prevent the rekeying process from working correctly. If you have misplaced the original tool, you can often use a sturdy paperclip or a similar small, rigid object, but the official tool is designed for a perfect fit and is recommended for best results. Keep firm pressure on the tool as you move to the next step to ensure the lock remains in learning mode.
Step 3: Remove the Current Key
While keeping the SmartKey learning tool fully inserted and maintaining firm pressure, carefully remove the current, original key from the lock cylinder. The key should slide out smoothly without any force. Do not turn the key back to the vertical position before removing it; it must remain in the horizontal orientation throughout this step. The lock’s cylinder should stay in its 90-degree rotated position after the key has been taken out.
The successful removal of the old key while the learning tool is engaged is a crucial part of the process. It effectively erases the lock’s memory of the old key’s pin configuration, preparing the internal tumblers to be mapped to a new key. If the key does not come out easily, double-check that the learning tool is pushed in all the way. Releasing pressure on the tool before the key is out will exit learning mode, and you will need to start the process over from the beginning.
Step 4: Insert the New Key
Now that the old key has been removed, you can program the lock to the new key. Take the new key that you wish to use for the lock and insert it completely into the keyway. It should slide in smoothly all the way until it stops. Be careful not to force it; if you feel resistance, it may not be a compatible Kwikset key blank or there could be an issue with the cylinder. The key must be fully inserted for the lock to learn the new pin configuration correctly.

This step is where the magic of SmartKey technology happens. As you insert the new key, the internal pins and side-bar mechanism adjust to match its unique cuts. The lock is essentially creating a new blueprint for itself based on this key. Ensure the key is seated all the way into the cylinder before proceeding. An incompletely inserted key will result in a failed rekeying attempt and may leave the lock in an inoperable state until it is properly reset.
Step 5: Turn the New Key to the Vertical Position
With the new key fully inserted into the lock, turn the key 90 degrees counter-clockwise, moving it from the horizontal position back to the vertical, upright position. This action locks in the new key’s configuration, effectively setting the new combination within the lock’s cylinder. You might feel a slight click or sense the mechanism settling as you complete the turn. This rotation is what finalizes the rekeying process, making the new key the only one that will now operate the lock.
It is important that this turn is smooth and completes the full 90-degree rotation. If the key feels stuck or will not turn back to vertical, do not force it. This could indicate the new key was not fully inserted or is not compatible. In such a case, you would need to re-verify the previous steps. Successfully turning the key back to its starting position confirms that the internal tumblers have accepted the new pattern.
Step 6: Remove the SmartKey Learning Tool
After you have successfully turned the new key back to the vertical position, you can now remove the SmartKey learning tool. It should pull out easily from the tool slot without any resistance. The removal of this tool disengages the lock’s “learning mode” and returns it to its standard operational state. The lock is now officially rekeyed to your new key, and the previous key will no longer work.
Once the tool is removed, the process is nearly complete. Make sure you store the SmartKey learning tool in a safe and memorable place for future use. Many people choose to tape it to the inside of a cabinet near the door or keep it in a drawer with other household tools. Losing this tool can make future rekeying more difficult, so having it readily available will save you potential hassle later on.
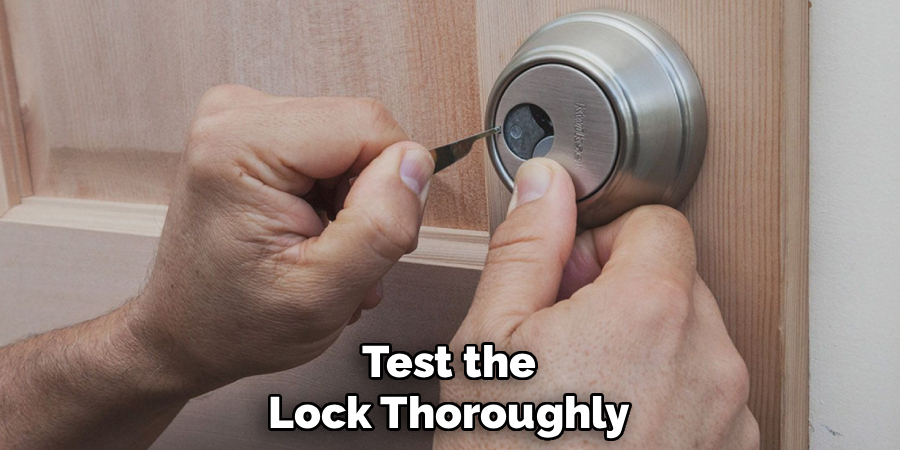
Step 7: Test the New Key
The most important final step is to test the lock thoroughly to ensure the rekeying process was successful. With the door open, use the new key to operate the lock. Turn the key to lock and unlock the deadbolt several times. The operation should be smooth and without any hesitation or grinding. This confirms that the lock is working correctly from both the inside and outside with its new key configuration.
This test is not just about confirming success; it’s also a critical safety check. You want to be absolutely certain the lock is functioning reliably before you close the door and depend on it for security. If the lock operates as expected, you have successfully reset your Kwikset SmartKey lock. If it does not work smoothly, you will need to revisit the steps to identify what may have gone wrong during the process.
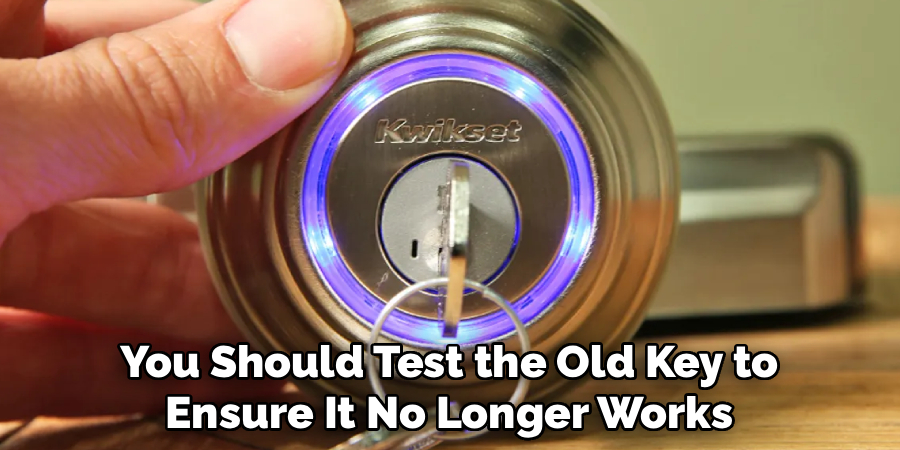
Step 8: Test the Old Key
As a final confirmation, you should test the old key to ensure it no longer works. Insert the old key into the lock and try to turn it. The key should not turn at all. This verifies that the lock has successfully been rekeyed and that the old key has been securely locked out, which is the primary goal of the rekeying process. This step gives you peace of mind that your home is secure and that only the new key has access.
If the old key still operates the lock, the rekeying process was not successful, and you must start over from Step 1. The most common reason for this failure is not inserting the SmartKey tool or the new key fully, or releasing pressure on the tool prematurely. Carefully following each step precisely is the key to a successful reset on the first try and ensuring your home’s security is updated as intended.
Following these steps on how to reset smart key kwikset locks can save you time, money, and potential safety concerns. Remember to keep your old key on hand until the new one has been fully tested and confirmed to work with your lock.
Frequently Asked Questions
Q1: What Do I Do if I lose the Original Key?
A1: If you have lost the original, functioning key for your SmartKey lock, you cannot use the standard rekeying procedure. The process requires the current key to turn the cylinder to the learning position. In this situation, you will need to contact a professional locksmith. They have specialized tools that can reset the lock cylinder without the original key, which is a more complex and delicate procedure than the standard homeowner reset.
Q2: Why Is My New Key Not Working After Rekeying?
A2: If your new key isn’t working, the most common reason is that a step was missed or performed incorrectly. Common errors include not inserting the SmartKey tool or the new key all the way, or turning the key before it is fully inserted. To fix this, you may need to carefully re-insert your old key, turn it back to horizontal, and restart the entire 8-step process from the beginning, paying close attention to each detail.
Q3: Can I Rekey Multiple Kwikset Locks to Use the Same Key?
A3: Yes, this is one of the primary benefits of the SmartKey system. As long as all your locks are Kwikset SmartKey compatible, you can rekey all of them to work with a single key. You simply perform the rekeying process on each lock individually, using the same “new” key for every lock. This allows you to conveniently secure your entire home with just one key.
Q4: How Many Times Can a Smartkey Lock Be Rekeyed?
A4: Kwikset SmartKey locks are designed to be rekeyed as many times as you need. There is no set limit to the number of times you can change the key. The technology uses a side-bar mechanism instead of traditional pins and tumblers, which allows it to be reconfigured repeatedly without wearing out the lock. This makes it a flexible and long-lasting security solution for your home.
Conclusion
Resetting your Kwikset SmartKey lock is a simple and empowering skill for any homeowner. By following the steps outlined in this guide on how to reset smart key kwikset, you can change your locks in seconds without the need for professional help.
This process not only saves you money but also gives you immediate control over your home’s security whenever you need it. With just your old key, a new key, and the learning tool, you can ensure your peace of mind is just a few quick turns away.
About
Safety Fic is a distinguished figure in the world of Diy design, with a decade of expertise creating innovative and sustainable Diy solutions. His professional focus lies in merging traditional craftsmanship with modern manufacturing techniques, fostering designs that are both practical and environmentally conscious. As the author of diy, Safety Fic delves into the art and science of Safety Fic-making, inspiring artisans and industry professionals alike.
Education RMIT University
(Melbourne, Australia) Associate Degree in Design (Safety Fic) Focus on sustainable design, industry-driven projects, and practical craftsmanship. Gained hands-on experience with traditional and digital manufacturing tools, such as CAD and CNC software.
Nottingham Trent University
(United Kingdom) Bachelor’s in diyfastly.com and Product Design (Honors) Specialized in product design with a focus on blending creativity with production techniques. Participated in industry projects, working with companies like John Lewis and Vitsoe to gain real-world insights.
Publications and Impact
In diy, Safety Fic his insights on indoor design processes, materials, and strategies for efficient production. His writing bridges the gap between artisan knowledge and modern industry needs, making it a must-read for both budding designers and seasoned professionals.