

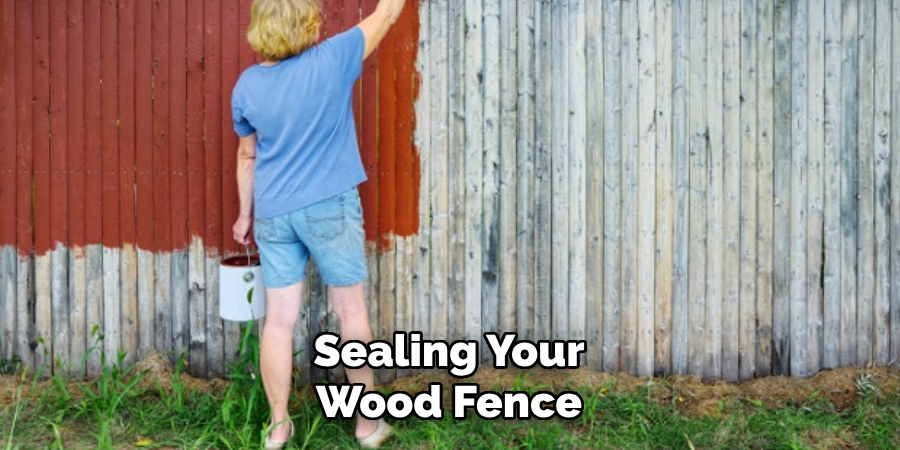
Sealing a wood fence is a crucial step in preserving its beauty and ensuring long-lasting durability against the elements. Wood fences are susceptible to weathering, rot, and deterioration over time, making proper sealing an essential maintenance task.

In this article, we will explore the step-by-step process of how to seal a wood fence effectively. From surface preparation and choosing the right sealant to the actual application techniques, this guide aims to empower homeowners and DIY enthusiasts with the knowledge needed to protect their investment.
By sealing your wood fence, you not only enhance its resistance to moisture, sunlight, and pests but also contribute to a more visually appealing and structurally sound outdoor space. Join us on this informative journey to discover the key methods for sealing a wood fence and promoting its longevity and aesthetic appeal.
The Importance of Sealing a Wood Fence
Sealing a wood fence is not merely a recommendation; it’s a vital step to ensure the longevity and health of your outdoor wooden structures. Wood, as a natural material, is inherently vulnerable to the ravages of weather and time.
Moisture, UV rays, insects, and even fungi find untreated wood an inviting target, leading to decay, discoloration, and structural weakness. By applying a high-quality sealant, you create an effective barrier that protects the wood from these damaging elements.
This preventative measure not only extends the life of your fence by years but also maintains its aesthetic appeal, ensuring that it remains a beautiful boundary for your property. Additionally, sealing a wood fence can significantly reduce maintenance efforts and costs over time, making it a wise investment for any homeowner.
Benefits of Sealing Your Wood Fence
Sealing your wood fence offers a multitude of benefits that go beyond mere aesthetic preservation. Firstly, it significantly enhances the fence’s durability, effectively guarding against the common issues of rot, mildew, and wood warping caused by exposure to water. This waterproof barrier protects the fence not only from rain and humidity but also from the damaging effects of snow and ice in colder climates.
Additionally, a sealed fence is less susceptible to the fading and discoloration caused by the sun’s harmful UV rays, maintaining its color and finish for a longer period. Another important benefit is the increased resistance to insect infestations, as the sealant helps to deter termites, carpenter ants, and other wood-destroying pests from damaging the fence.
By investing in the sealing process, homeowners can save significant money and effort in the long run by avoiding costly repairs and replacements, thereby ensuring that the fence remains an attractive and functional part of the outdoor landscape for years to come.
Types of Sealers Available for Wood Fences
When it comes to protecting your wood fence, choosing the right type of sealer is a critical decision that can significantly affect its longevity and appearance. There are several types of sealants available, each designed to meet various needs and preferences.
- Water-Based Sealers: These sealers are environmentally friendly and easy to clean, requiring only soap and water. They dry quickly and do not emit strong odors, making them a popular choice for DIY projects. Water-based sealers are also less likely to yellow over time, ensuring the wood maintains its natural color.
- Oil-Based Sealers: Known for their deep penetration into the wood, oil-based sealers offer enhanced durability and protection against moisture. They’re particularly effective in preserving the wood’s natural grain and texture, but they require more time to dry and can emit strong odors during application.
- Clear Sealers: Clear sealers are ideal for those looking to protect their wood fence without altering its natural color or appearance. They offer a basic level of protection against moisture and UV rays but may need to be reapplied more frequently to maintain efficacy.
- Tinted Sealers: These sealers provide all the protective benefits of clear sealers but with the added advantage of UV protection due to the inclusion of pigments. Tinted sealers can help in maintaining the wood’s color for a longer period and are available in various shades to enhance the wood’s natural hue or impart a new color.
- Staining Sealers: These products combine the color transformation properties of a stain with the protective qualities of a sealer. They are a great option for aging fences that need a color boost in addition to protection from the elements.
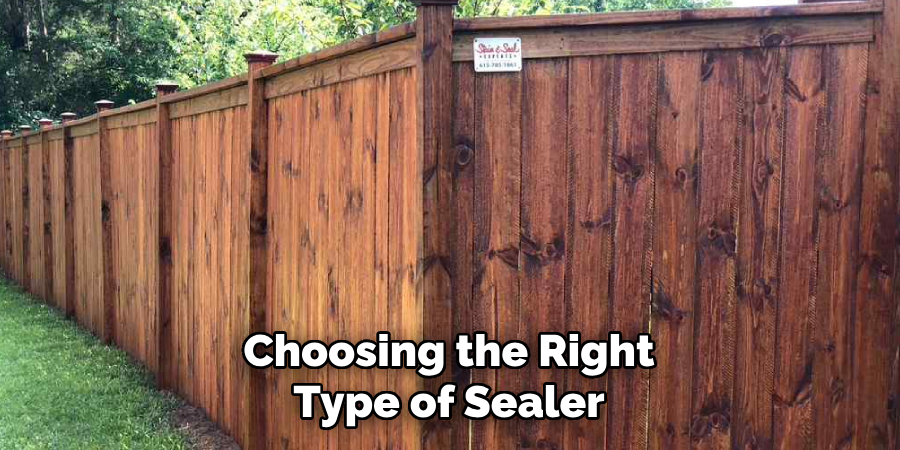
Choosing the right type of sealer for your wood fence depends on the specific conditions it faces, including climate, wood type, and desired aesthetic. Regardless of the choice, applying a high-quality sealer is a crucial step in ensuring the longevity and beauty of your wood fence.
10 Methods How to Seal a Wood Fence
1. Inspect and Clean the Fence:
Before sealing, thoroughly inspect the wood fence for any damage, mildew, or dirt. Clean the surface using a mild detergent, a stiff brush, or a pressure washer to remove any debris, mold, or old sealant. Ensure the fence is completely dry before proceeding.
It is important to take the time to properly inspect and clean your fence before sealing it. This will not only ensure that the sealant adheres properly, but also helps prolong the life of your fence.
When inspecting your fence, look for any signs of damage such as rotting wood, loose boards, or broken hardware. These issues should be addressed and repaired before sealing to prevent further damage.
In addition, check for any mildew or mold growth. These can be removed using a solution of equal parts water and bleach. Simply spray the mixture onto the affected area, let it sit for 10 minutes, and then scrub with a stiff brush before rinsing off with clean water.
2. Sand the Wood Surface:

Sanding the wood surface helps to smooth out any rough spots, opens up the wood pores, and promotes better penetration of the sealant. Use fine-grit sandpaper or a power sander to achieve a smooth and even finish. Wipe away the dust with a clean cloth.
Sanding is an important step in preparing wood for finishing. It not only helps to create a smooth and even surface, but it also opens up the pores of the wood, allowing for better absorption of the sealant. This results in a more durable and long-lasting finish.
When sanding, it’s important to choose the right grit sandpaper for the job. A higher grit number indicates a finer sandpaper, which is ideal for smoothing out the wood surface without leaving any scratches or marks. For most projects, a 120 to 150 grit sandpaper is recommended.
3. Choose the Right Sealant:
Select a high-quality wood sealant suitable for the type of wood used in your fence. Consider factors such as the wood species, desired finish (clear, tinted, or stained), and the level of UV protection. Oil-based and water-based sealants are common options, each with its advantages.

Oil-based sealants provide a durable and long-lasting finish, but they may take longer to dry and emit strong fumes during application. They also require mineral spirits or turpentine for cleanup. Water-based sealants have a quicker drying time and emit fewer fumes, making them more environmentally friendly. However, they may not offer as much protection against UV rays.
It is important to read and follow the instructions on the sealant label carefully. Some sealants may require multiple coats, while others only need one. Make sure to also check the recommended temperature and humidity range for application.
4. Test in a Small Area:
Before applying the sealant to the entire fence, test it in a small, inconspicuous area to ensure compatibility and achieve the desired finish. This allows you to assess the color, penetration, and overall appearance of the sealant on your specific wood type.
When testing in a small area, be sure to follow the same preparation and application steps as you would for the entire fence. This includes cleaning and drying the area, applying the sealant evenly with a brush or roller, and allowing it to dry completely before making a decision.
It is important to note that the color of the sealant may vary slightly depending on the type and condition of the wood. This is why testing in a small area is crucial, as it allows you to make any necessary adjustments or choose a different sealant if needed.
In addition to color, testing in a small area also allows you to assess the level of penetration the sealant has on your specific wood type. Some woods may require multiple coats for optimal protection and appearance, while others may only need one coat.
5. Apply a Wood Preservative:
For additional protection, especially in humid or insect-prone areas, consider applying a wood preservative before sealing. This extra layer helps prevent rot, decay, and termite damage, enhancing the longevity of your wood fence.
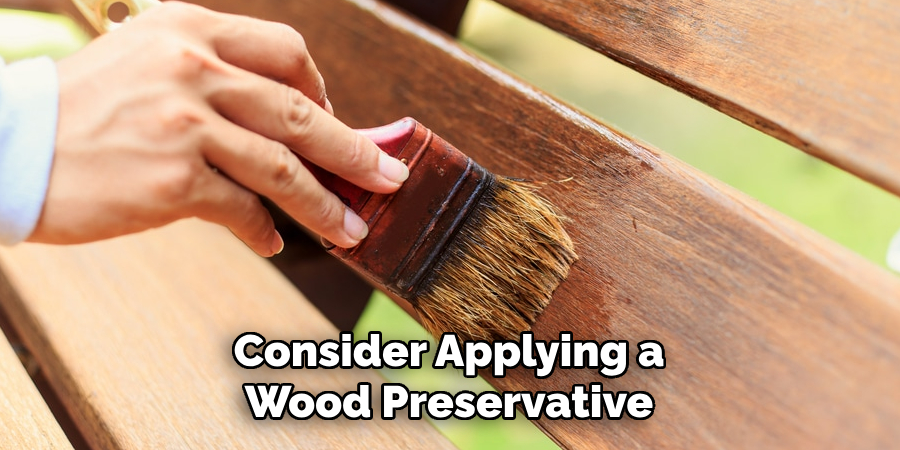
Wood preservatives come in different forms, such as oil or water-based solutions and penetrating or surface coatings. It is essential to choose an appropriate type for your specific needs and follow the manufacturer’s instructions for application.
Additionally, make sure to select a wood preservative that is safe for outdoor use and non-toxic to plants, animals, and humans. Some products may contain harmful chemicals, so always read the label and wear protective gear when applying.
It is recommended to apply the wood preservative on all sides of the wood, including the ends, before sealing. This ensures complete protection against moisture and pests. Be sure to allow enough time for the preservative to dry before proceeding with sealing.
6. Use a Brush, Roller, or Sprayer:
Choose the appropriate application method for your wood fence and the type of sealant used. A brush provides precision, a roller covers larger areas efficiently, while a sprayer is ideal for even coverage on intricate fence designs. Follow the manufacturer’s recommendations.
When choosing the right application method for your wood fence, there are a few factors to consider. The type of sealant being used, the size and intricacy of your fence design, and personal preference will all play a role in determining which method is best for you.
A brush is a commonly used tool for applying sealant to a wood fence. Brushes come in various sizes and can be found in both natural and synthetic materials. They provide excellent precision, allowing for a controlled application of the sealant to specific areas that may need more attention. This is especially useful when dealing with intricate fence designs or hard-to-reach areas.
7. Apply Multiple Thin Coats:
Instead of applying one thick coat, opt for multiple thin coats of sealant. This ensures better absorption and penetration into the wood fibers. Allow each coat to dry completely before applying the next, typically following the manufacturer’s recommended drying times. This method will also prevent bubbles and pooling, resulting in a smoother and more even finish.

Thin coats also allow for better control of the sealant application. It’s easier to spot missed spots or areas that need touch up when working with thin coats. Additionally, if you accidentally apply too much sealant in one area, it’s easier to wipe off excess before it dries with a thinner coat.
Another benefit of using multiple thin coats is that it helps to build up a stronger and more durable protective layer on the wood surface. This can be especially beneficial for outdoor projects where the wood will be exposed to harsh weather conditions.
8. Pay Attention to End Grain:
End grain, where the wood fibers are exposed at the cut ends of boards, is more susceptible to moisture absorption. Pay extra attention to these areas during the sealing process. Apply an additional coat or use an end-grain sealer for enhanced protection. Additionally, when constructing outdoor furniture or structures, it’s important to orient the end grain in a way that minimizes its exposure to moisture.
When working with wood, it’s important to know how different types of cuts and grains can affect the durability and longevity of your project. End grain is especially vulnerable because it allows moisture to easily penetrate the wood fibers, leading to swelling, warping, and potential rotting.
To protect against these issues, it’s important to properly seal the end grain of your wooden pieces. This can be done by applying an additional coat of sealant specifically to the end grain or by using a specialized end-grain sealer. These products are designed to penetrate deep into the wood fibers and create a protective barrier against moisture.
9. Seal Both Sides of the Fence:
For optimal protection, seal both sides of the wood fence. While the side facing outward is more exposed to the elements, sealing the interior side helps maintain overall balance, preventing uneven weathering and potential damage.
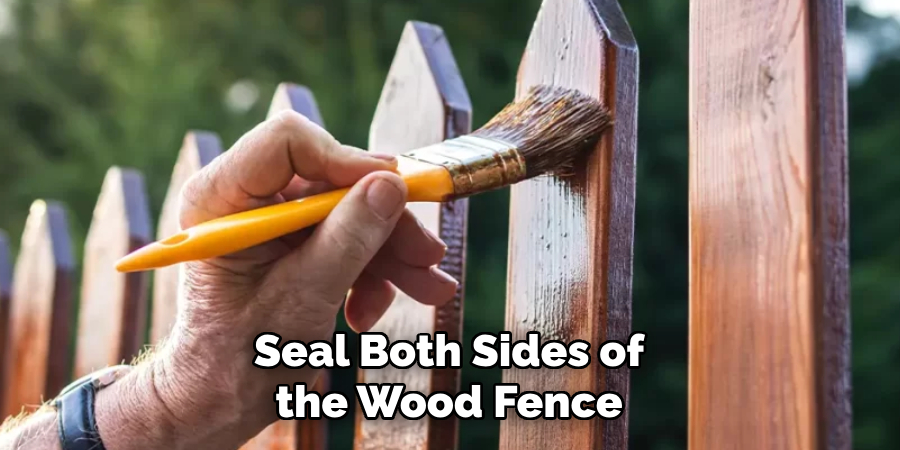
Additionally, sealing both sides of the fence serves as an added layer of protection against pests and insects. This extra step can also prolong the lifespan of your fence, saving you time and money in the long run.
To seal your fence, start by thoroughly cleaning it with a pressure washer or a stiff-bristle brush and water. This will remove any built-up dirt, mildew, or other debris from the surface. After cleaning, let the fence dry completely before applying a water repellent sealant.
Choose a high-quality, waterproof sealant specifically designed for wood fences. Apply it evenly on both sides of the fence using a paintbrush, roller, or sprayer. Pay special attention to any cracks or crevices in the wood and make sure to cover them thoroughly. It is recommended to apply at least two coats for maximum protection.
10. Regular Maintenance:
After sealing your wood fence, establish a routine maintenance schedule. Regularly inspect the fence for signs of wear, damage, or water penetration. Touch up any areas that may need additional sealant, and address issues promptly to maintain the fence’s longevity. However, proper maintenance is not limited to just sealing and repairing.
Cleaning and Maintenance
Regular cleaning and maintenance are crucial for prolonging the lifespan and ensuring the safety of any equipment used in outdoor activities. After each use, it’s essential to clean any dirt, mud, or debris from your gear to prevent wear and tear. For items such as bicycles, camping gear, and hiking boots, use appropriate cleaning solutions and ensure they are completely dry before storage to prevent mold and mildew growth.
Additionally, periodic checks for damage or wear, such as inspecting bike brakes or tent seams, are necessary to maintain the equipment’s functionality and safety. Proper maintenance not only extends the life of your gear but also enhances your overall outdoor experience.
Conclusion
In conclusion, sealing a wood fence is essential for preserving its beauty and prolonging its lifespan. By following the outlined steps, homeowners can effectively protect their fence against weathering, moisture, and other environmental factors.
Proper preparation of the fence surface, selection of the right sealer, and thorough application ensure comprehensive coverage and optimal protection. Allowing for adequate drying and curing time is crucial to achieve the desired results and enhance the durability of the seal.
Additionally, regular maintenance, including cleaning and periodic reapplication of sealer, helps maintain the fence’s appearance and integrity over time. Hopefully, this article gave you some helpful tips about successfully, so now that you have the proper knowledge on how to get the job done, why not give it a try today?