Securing a trampoline during a hurricane is crucial to prevent damage to your property and to ensure the safety of your family and neighbors. High winds can easily turn a trampoline into a dangerous projectile, causing significant damage and potential injury.
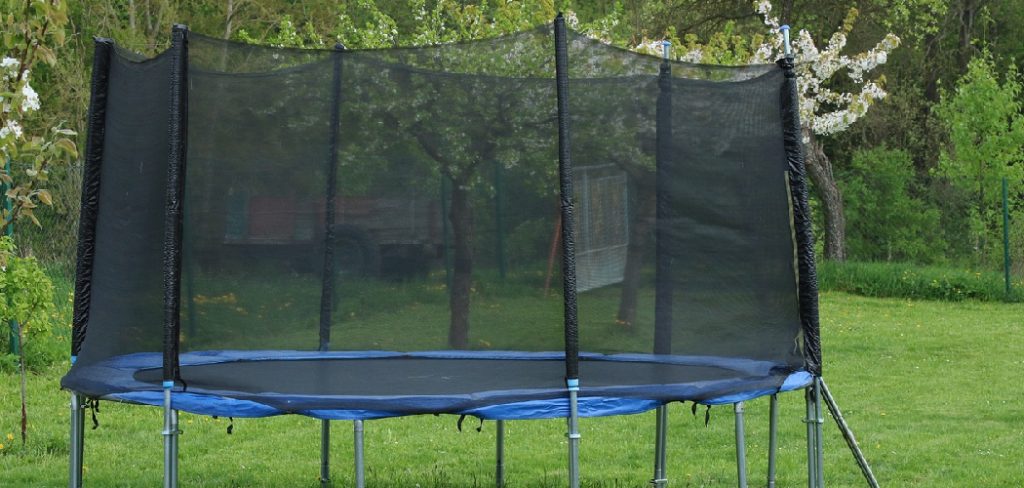
This guide provides step-by-step instructions on how to secure a trampoline in a hurricane, mitigate risks, and maintain safety during severe weather conditions. By taking the appropriate precautions, you can minimize the risks associated with hurricanes and keep your trampoline, home, and surrounding areas safe.
What is a Trampoline?
A trampoline is a recreational equipment consisting of a strong fabric sheet that is stretched over a metal frame with coiled springs. It is designed to bounce users into the air for fun and exercise. While trampolines bring joy and entertainment to families, they can also pose hazards if not adequately secured during severe weather conditions.
It is essential to understand the different parts of a trampoline before securing it. This will help you identify potential weak spots that need reinforcement and ensure proper installation.
Why Secure Your Trampoline in a Hurricane?
In recent years, hurricanes have become more frequent and powerful, causing significant damage to properties and endangering lives. With winds reaching up to 150 mph or higher, these storms can easily lift unsecured trampolines off the ground and turn them into dangerous projectiles.
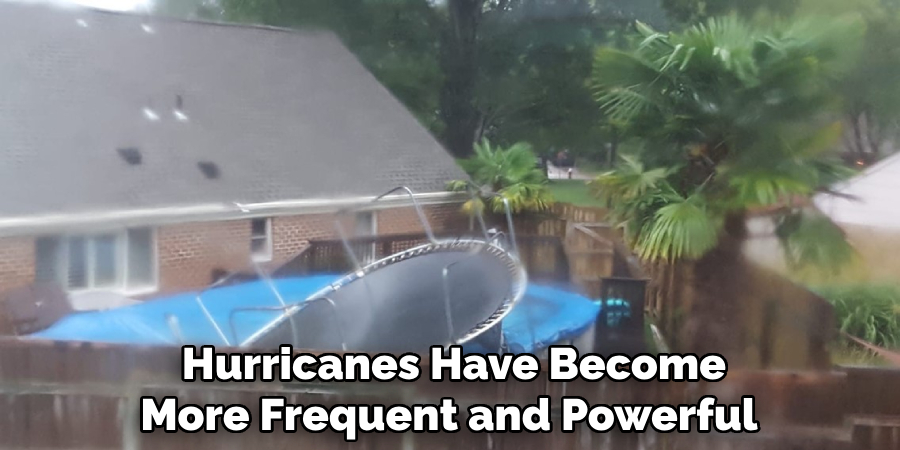
Not only can an unsecured trampoline cause damage to your property, but it can also injure people if they are hit by flying debris. Securing your trampoline during a hurricane is crucial for the safety of your loved ones and your community.
Needed Materials
Bungee Cords or Clamps:
Bungee cords are elastic ropes that can stretch and adapt to different shapes, making them ideal for securing trampolines. Alternatively, you can use clamps to secure the legs of your trampoline to the ground. Both options provide a stronger hold than traditional stakes and straps.
Rope or Tie-Down Straps:
Rope or tie-down straps are essential for securing the enclosure net of your trampoline. These materials should be strong enough to withstand high winds and properly secured to prevent damage.
Ground Anchors:
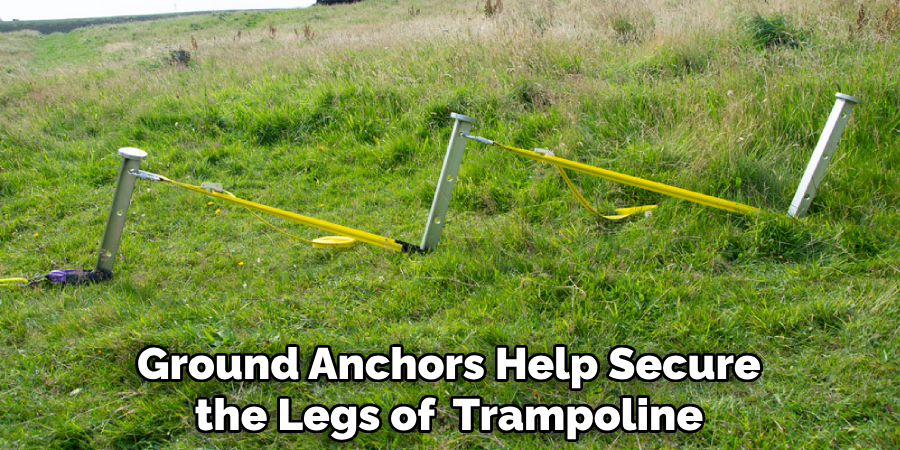
Ground anchors help secure the legs of your trampoline firmly into the ground. They come in various shapes and sizes, such as corkscrew anchors and auger anchors. Choose the right type of ground anchor depending on your trampoline’s size and the soil in your area.
Duct Tape:
Duct tape can be used to reinforce weak points or tears in the fabric of your trampoline. It is a quick fix that can provide extra stability during a hurricane.
8 Step-by-step Guidelines on How to Secure a Trampoline in a Hurricane
Step 1: Check Your Local Building Codes
Before you begin securing your trampoline, it is essential to check your local building codes and regulations regarding outdoor structures during severe weather conditions. Different regions may have specific requirements or recommendations that you need to adhere to when securing large outdoor items like trampolines. Contact your local government office or visit their website to find out any pertinent information.
Compliance with these regulations ensures that your measures are legally sound and effective in mitigating risks associated with hurricanes. By understanding and following local guidelines, you can take the first step towards ensuring the safety of your trampoline and surrounding property.
Step 2: Disassemble the Trampoline
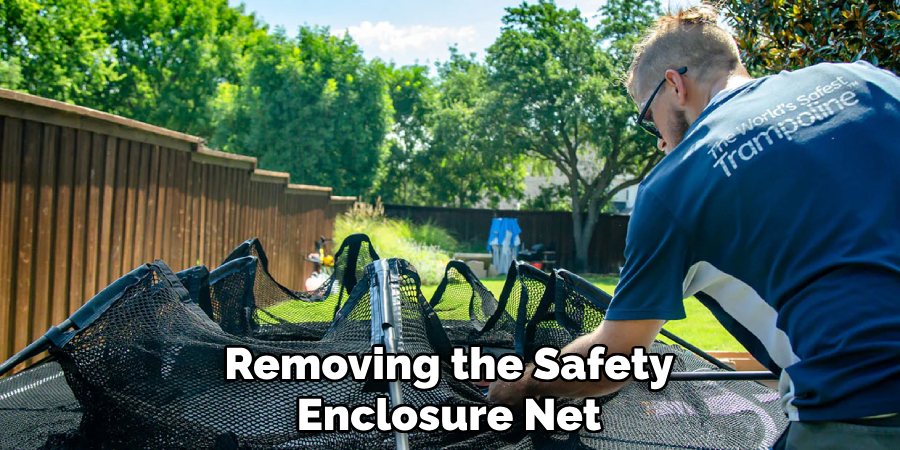
The next step in securing your trampoline is to disassemble it. It may sound like a daunting task, but taking your trampoline apart can significantly reduce the risk of its becoming a hazard during a hurricane. Start by removing the safety enclosure net if your trampoline has one. Carefully detach the net from the poles and store it in a safe location.
Next, remove the springs that connect the fabric sheet to the metal frame. Use a spring puller or another suitable tool to make this process easier and safer. Once the springs are removed, take the fabric sheet off and fold it neatly. Finally, the metal frame is disassembled, starting with the legs and then moving to the circular frame. Each piece should be stored in a secure, dry area such as a garage or shed.
Step 3: Prepare the Ground Anchors
Once you have safely disassembled your trampoline, the next crucial step is to prepare the ground anchors. Ground anchors are vital for securing the trampoline’s frame and keeping it firmly in place during high winds. Begin by selecting the appropriate type of ground anchors for your trampoline and soil type. Corkscrew anchors are suitable for most soils, offering a strong and stable hold, while auger anchors are ideal for softer, sandy soils.
To install the ground anchors, position them around the area where the trampoline legs will sit once reassembled. Space them evenly to ensure balanced support; typically, at least four anchors, one for each corner, are required. Twist or drill the anchors deeply into the ground until only the top loop or hook is visible. Ensure they are securely embedded; test their stability by tugging on them firmly. Properly installed ground anchors will provide a robust foundation to tie down your trampoline, preventing it from becoming airborne during a hurricane.
Step 4: Reassemble the Trampoline
After preparing the ground anchors, you can now begin reassembling your trampoline. Follow the manufacturer’s instructions and use any necessary tools to put the metal frame back together. Be sure to check for any missing or damaged parts before proceeding.
Once the frame is assembled, place it on top of the ground anchors using caution and assistance if needed. Ensure that each leg fits securely into its anchor before moving on to the next step.
Step 5: Secure Legs with Bungee Cords or Clamps
With the trampoline legs in place, secure them firmly to the ground anchors using bungee cords or clamps. Start at one corner and attach the cord or clamp from the leg to the anchor, pulling tightly to create a stronghold. Repeat this process for each leg until all are secured.
Bungee cords can be attached by wrapping them around the trampoline legs and looping them through the anchor’s top loop or hook. Clamps, on the other hand, can be easily affixed with screws or bolts to provide a more permanent hold.
Step 6: Tie Down Enclosure Net
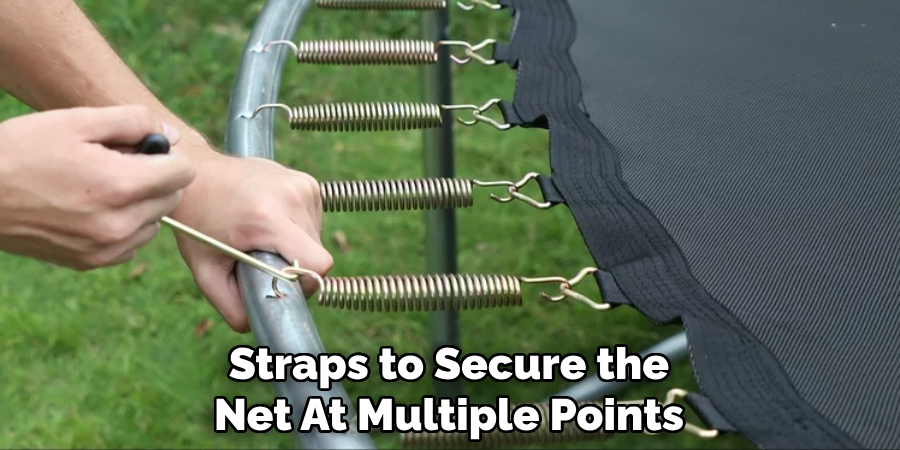
Once the trampoline legs are securely fastened with bungee cords or clamps, the next step is to tie down the enclosure net. This is crucial to prevent the net from catching wind and causing additional strain on the trampoline structure. Begin by positioning the enclosure net around the trampoline as per the manufacturer’s instructions.
Use rope or tie-down straps to secure the net at multiple points along the frame. Start at the top of each pole, tying the net tightly to prevent any movement. Work your way down each pole, ensuring the net is taut and evenly distributed. Once all the poles are secured, check the bottom edge of the net, making sure it is firmly attached to the trampoline’s base. It may be beneficial to tie the net to the ground anchors for additional stability.
Step 7: Apply Duct Tape as Necessary
As mentioned earlier, duct tape can be a useful tool in reinforcing any weak points or tears in the fabric of your trampoline. Take a close look at the fabric sheet and repair any holes or rips using strips of duct tape. This added layer of protection will help prevent further damage during high winds.
Additionally, if you have any concerns about specific areas of your trampoline, such as joints or connections on the frame, consider applying extra layers of duct tape for added reinforcement. Do not rely solely on duct tape to secure your trampoline; it should only be used as a supplementary measure.
Step 8: Regular Maintenance and Inspections
Even with all the necessary precautions in place, it is essential to regularly inspect your trampoline and its supporting structure for any signs of wear or damage. Check the ground anchors, ties, bungee cords, and clamps to ensure they are still secure and functional.
Inspect the fabric sheet for tears or holes that may need repair. Look for any bending or rusting in the metal frame, which could compromise its stability. If you notice any issues, address them immediately before a severe weather event occurs.
Following these steps on how to secure a trampoline in a hurricane will help ensure the safety of your trampoline and the surrounding area. Remember to always put safety first and take all necessary precautions to protect your trampoline from high winds. With proper preparation and regular maintenance, you can enjoy your trampoline for years to come without worrying about hurricane season. Happy bouncing!
Frequently Asked Questions
Q: Is It Necessary to Disassemble a Trampoline Before a Hurricane?
A: Yes, it is highly recommended to disassemble and secure your trampoline before a hurricane to prevent any potential damage or harm. A fully assembled trampoline can easily become airborne and pose a danger during high winds.
Q: Can I Use Sandbags to Secure my Trampoline?
A: While sandbags may seem like a convenient solution, they are not as effective as ground anchors. Sandbags can shift or leak during heavy rain, making them unreliable in securing your trampoline. It is best to use proper ground anchors specifically designed for trampolines.
Conclusion
Securing a trampoline in preparation for a hurricane is a critical task that requires a methodical approach and careful attention to detail. By following the outlined steps on how to secure a trampoline in a hurricane—disassembling the trampoline, preparing and installing ground anchors, reassembling the structure, and securing it with bungee cords or clamps—you can significantly reduce the risk of damage or injury caused by strong winds.
Regular inspections and maintenance are also essential to ensure the ongoing safety and stability of your trampoline. Remember, safety should always be your top priority. With the right precautions and diligent care, you can protect your trampoline and enjoy it safely for many hurricane seasons to come.
You Can Check It Out to Secure a Picnic Table to the Ground.
About
Safety Fic is a distinguished figure in the world of Diy design, with a decade of expertise creating innovative and sustainable Diy solutions. His professional focus lies in merging traditional craftsmanship with modern manufacturing techniques, fostering designs that are both practical and environmentally conscious. As the author of diy, Safety Fic delves into the art and science of Safety Fic-making, inspiring artisans and industry professionals alike.
Education RMIT University
(Melbourne, Australia) Associate Degree in Design (Safety Fic) Focus on sustainable design, industry-driven projects, and practical craftsmanship. Gained hands-on experience with traditional and digital manufacturing tools, such as CAD and CNC software.
Nottingham Trent University
(United Kingdom) Bachelor’s in diyfastly.com and Product Design (Honors) Specialized in product design with a focus on blending creativity with production techniques. Participated in industry projects, working with companies like John Lewis and Vitsoe to gain real-world insights.
Publications and Impact
In diy, Safety Fic his insights on indoor design processes, materials, and strategies for efficient production. His writing bridges the gap between artisan knowledge and modern industry needs, making it a must-read for both budding designers and seasoned professionals.
