

Securing safety glass with adhesive is a straightforward yet crucial process that ensures durability and safety in various applications, from home installations to industrial settings. Properly applying adhesive not only helps the glass stay in place under normal conditions but also reinforces its resistance to impact and environmental factors.

This guide on How to secure safety glass with adhesive will walk you through the necessary steps and best practices to achieve a secure and reliable bond, ensuring optimal performance and safety.
Why Use Adhesive for Safety Glass?
Safety glass, also known as tempered or toughened glass, is designed to be stronger and safer than regular glass. It undergoes a specialized heating and cooling process that increases its strength and makes it shatter into small, safe fragments when broken.
However, even with these properties, safety glass still needs to be secured, especially in applications where it may be exposed to external forces or high impact. This is where adhesive comes into play. Unlike mechanical fastening methods such as screws or clips, adhesive distributes stress and weight evenly across the surface of the glass, providing a stronger and more secure bond.
Moreover, adhesives also offer flexibility in bonding different types of surfaces together, making them suitable for various safety glass applications, including automotive windshields, shower enclosures, and bulletproof windows.
Needed Materials
Before we dive into the steps of securing safety glass with adhesive, it’s essential to gather all the necessary materials. Here’s a list of items you’ll need for this process:
Safety Glass:
Ensure that the safety glass you’re using is clean and free from any dirt or debris. Any particles left on the surface can compromise the adhesive’s bond, leading to a weaker hold.
Adhesive:
When it comes to choosing an adhesive for safety glass, it’s crucial to select a high-quality product specifically designed for bonding glass. Silicone-based adhesives are commonly used for this purpose due to their excellent bonding strength and flexibility.
Isopropyl Alcohol:
This will help clean and remove any residue or contaminants on the glass surface before applying the adhesive.
Razor Blade or Glass Cutter:
These tools will come in handy if you need to trim the edges of your safety glass to fit the desired area or shape.
8 Step-by-step Guidelines on How to Secure Safety Glass With Adhesive
Step 1: Clean and Prepare the Surface
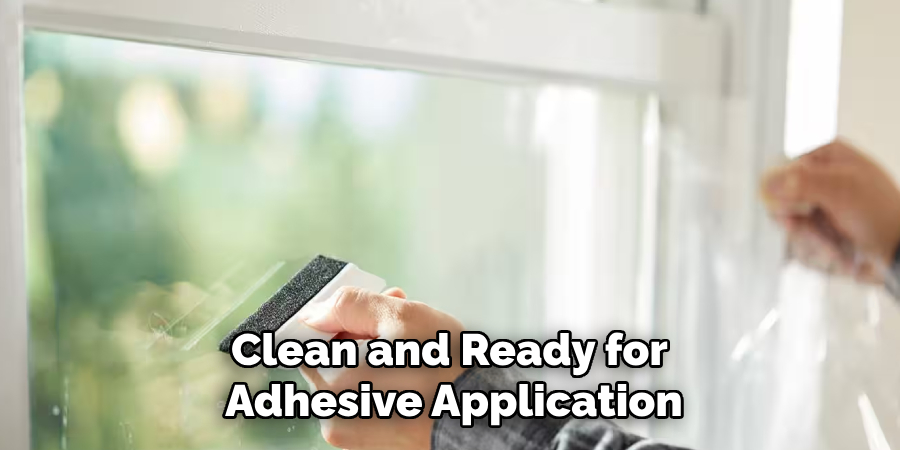
The first and most crucial step in securing safety glass is to ensure that both the glass and the surface it will bond to are clean and ready for adhesive application. Begin by wiping down the safety glass with a clean, lint-free cloth soaked in isopropyl alcohol. This will remove any dirt, grease, or residue that could interfere with the adhesive’s effectiveness.
Next, inspect the surface where the glass will be installed and clean it using the same method. Pay close attention to any crevices or corners where contaminants might accumulate. If there are any stubborn residues or uneven areas, use a razor blade to lightly scrape them away, being careful not to damage the surface. Allow both the safety glass and the bonding surface to dry completely before proceeding to the next step. A clean and properly prepared surface is essential for achieving a strong, long-lasting bond.
Step 2: Measure and Cut the Safety Glass
Measure the area where you will be installing the safety glass, and transfer those measurements onto the glass, marking it with a marker or tape. Use a razor blade or glass cutter to score along the marked lines, then carefully break off any excess glass using light pressure. If your safety glass requires more precise cuts or holes for hardware, consider seeking professional help from a glazing specialist.
But if you’re confident in your cutting skills, ensure that the edges of the glass are smooth and free from any sharp protrusions before moving on to the next step.
Step 3: Apply Primer (Optional)
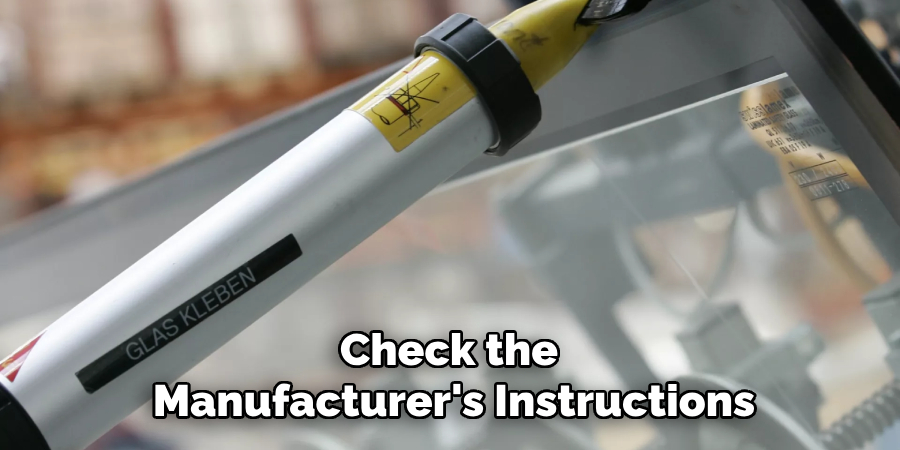
Applying a primer is an optional but highly recommended step, as it can significantly enhance the bonding strength between the adhesive and the surfaces. If the adhesive product you’re using specifies the use of a primer, follow the manufacturer’s instructions carefully.
Begin by applying a thin, even layer of primer to the edges of the safety glass and the corresponding bonding surface using a brush or applicator provided with the primer. Allow the primer to dry completely, which typically takes a few minutes but may vary depending on the specific product. Ensure that the primed surfaces remain clean and free from dust or debris during this stage. Using a primer can make a noticeable difference in achieving a secure, long-lasting bond, particularly in high-stress or demanding applications.
Step 4: Apply the Adhesive
Now, it’s time to apply the adhesive. Begin by loading a suitable caulking gun with the appropriate adhesive product and cutting off the tip of the nozzle at a 45-degree angle, leaving an opening that is slightly larger than the gap between your safety glass and the bonding surface.
Start applying the adhesive along the edges of your safety glass, then continue inwards until you have made two complete rows of beads around its perimeter. Be sure to cover all corners and joints thoroughly.
Step 5: Install the Safety Glass
Carefully place the safety glass onto the prepared bonding surface, ensuring that you align it correctly according to your measurements. Press down gently but firmly to evenly distribute the adhesive and remove any air pockets.

If excess adhesive oozes out of the edges, wipe it away with a cloth dampened with soap and water before it dries.
Step 6: Secure in Place
To prevent the safety glass from slipping or shifting while the adhesive cures, secure it in place using clamps or tape. Apply even pressure along all edges using clamps, making sure not to overtighten them, as this may cause uneven stress on the glass. Alternatively, you can use tape to hold down the edges until the adhesive sets.
It’s essential to refer to the adhesive product’s instructions for the recommended curing time before removing any clamps or tape. The curing process may take anywhere from a few hours to a full day, depending on the type of adhesive and environmental conditions.
Step 7: Clean Up
Once the adhesive has fully cured and the safety glass is securely in place, it’s time to clean up any remaining residue or excess adhesive. Begin by checking the edges of the safety glass for any dried adhesive that may have seeped out during installation. Use a razor blade or scraper with a steady hand to carefully remove any hardened adhesive from the glass surface without scratching it.
For a final touch, clean the safety glass with a glass cleaner and a lint-free cloth to remove fingerprints, smudges, or any other marks left during installation. Ensure the adhesive and surrounding area are completely clean and visually inspect the installation to confirm that the safety glass is securely bonded and free from defects. Proper cleanup not only enhances the appearance but also ensures a professional finish to your project.
Step 8: Allow Time to Fully Cure
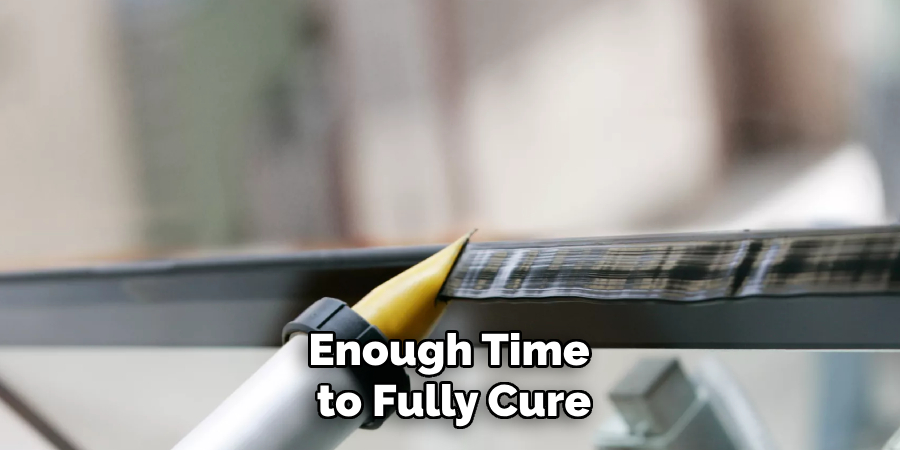
Finally, allow the adhesive enough time to fully cure before using or putting any stress on the safety glass. Follow the adhesive product’s instructions for proper curing time, which typically ranges from 24-48 hours. While it may be tempting to use the safety glass sooner, allowing ample curing time will ensure maximum bonding strength and durability.
Following these steps on How to secure safety glass with adhesive and using the right adhesive product for your specific application will result in a secure, long-lasting bond for your safety glass installation. Remember to always prioritize safety and follow all manufacturer’s instructions for best results.
Frequently Asked Questions
Q: Can I Use Regular Glass Adhesive for Safety Glass?
A: No, it’s important to use a specialized safety glass adhesive as it is specifically designed to provide the required strength and durability for securing safety glass fail, compromising the safety of your installation.
Q: What Should I Do If the Safety Glass Doesn’t Fit Perfectly?
A: If your safety glass does not fit perfectly, it’s essential to consult a professional glazing specialist for assistance. Attempting to trim or adjust the glass yourself could result in uneven stress on the glass and adhesive, causing potential failure or breakage.
Q: How Long Do I Need to Wait Before Using the Safety Glass?
A: It’s crucial to follow the recommended curing time provided by the adhesive product before using or putting any stress on your safety glass. This ensures that the adhesive has fully cured and reached its maximum bonding strength. Rushing this step may result in a weak bond and potential safety hazards.
Q: Can I Use Adhesive to Secure Other Types of Glass?
A: Yes, adhesive can be used to secure various types of glass, but it’s essential to select the appropriate adhesive for the specific type of glass and application. Always check the manufacturer’s instructions for compatibility and proper usage guidelines.
Conclusion
By following these step-by-step guidelines on How to secure safety glass with adhesive, you can successfully secure safety glass with adhesive in various applications, including home renovations, DIY projects, and commercial installations. Remember always to prioritize safety when working with adhesives and glass and refer to the manufacturer’s instructions for specific products and techniques. With proper installation and curing time, safety glass can provide a strong, durable, and aesthetically pleasing solution for your project.
So go ahead and confidently incorporate safety glass into your next project! Keep exploring the endless possibilities of using adhesive to create strong bonds, whether it’s for safety purposes or other applications. Happy bonding!