

Blink Security Systems, a prominent figure in the realm of home security, offers an array of innovative products designed to enhance the safety of your living space. These systems employ cutting-edge technology to provide real-time surveillance, leveraging wireless cameras that are both easy to install and use. The intuitive nature of Blink systems enables homeowners to monitor their properties remotely, ensuring peace of mind regardless of their location.
In the digital age, instant notifications are critical to any effective home security strategy. They act as the first line of defense, alerting homeowners immediately to any unusual activity detected within their premises.
This instantaneous information allows for quick reaction, be it verifying the alert through a camera feed or directly contacting authorities, thereby significantly reducing the window of opportunity for any potential intrusion or theft.
Understanding how to set up Blink notifications is essential for maximizing the efficacy of your Blink Security System. This guide aims to provide a detailed walkthrough on configuring your Blink app to send timely alerts directly to your smartphone or chosen device.
This comprehensive overview will ensure you’re well-equipped to keep your home safe and secure, covering everything from installation and enabling motion detection to customizing notification preferences and integrating with smart home devices.
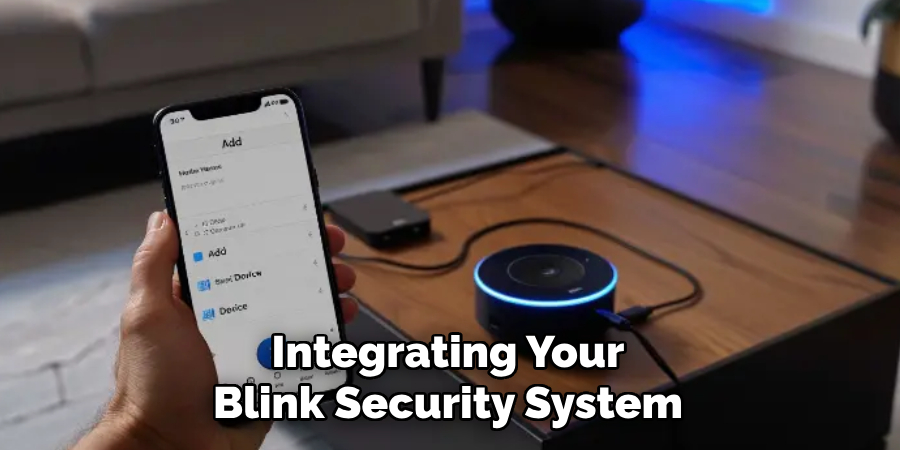
Installing the Blink App
A. Downloading and Installing the Blink App on Your Smartphone
The first step in leveraging the full potential of Blink Security Systems involves downloading the Blink app onto your smartphone. The app is available for free in the Apple App Store for iOS users and the Google Play Store for Android users.
Simply search for “Blink Home Monitor” and select the download or install option. Once the download is complete, open the app to begin the installation process, following the on-screen instructions to successfully install the app on your device.
B. Creating a Blink Account or Logging In
Upon successfully installing the Blink app, the next vital step is creating a new Blink account or logging into an existing one. If you’re a new user, select the option to create a new account and provide the required information, including a valid email address and a strong password.
For existing users, simply enter your credentials to log in. Remember, this account will be your central point for managing your Blink devices, receiving notifications, and accessing your camera feeds.
C. Accessing Notification Settings Within the App
Once logged in, accessing the notification settings within the app is straightforward. Navigate to the “Settings” menu, usually symbolized by a gear icon. Within this menu, you’ll find the “Notification” section, where you can customize how and when you receive alerts from your Blink cameras.
This is a crucial step in the setup process, as it allows you to tailor notification preferences to meet your specific security needs, ensuring that you’re always informed without being overwhelmed by unnecessary alerts.
How to Set up Blink Notifications: Enabling Motion Detection Notifications
A. Accessing Camera Settings in the Blink App
Accessing the camera settings is pivotal to tapping into the core functionality of your Blink Security System. In the Blink app, this can easily be accomplished by selecting your device from the main dashboard.
Look for the “Camera Settings” option, often represented by a cogwheel icon adjacent to your camera’s name. This section is the control room for your device, allowing you to adjust many settings tied to camera operation, including motion detection, video recording preferences, and system status.
B. Enabling Motion Detection for Each Camera
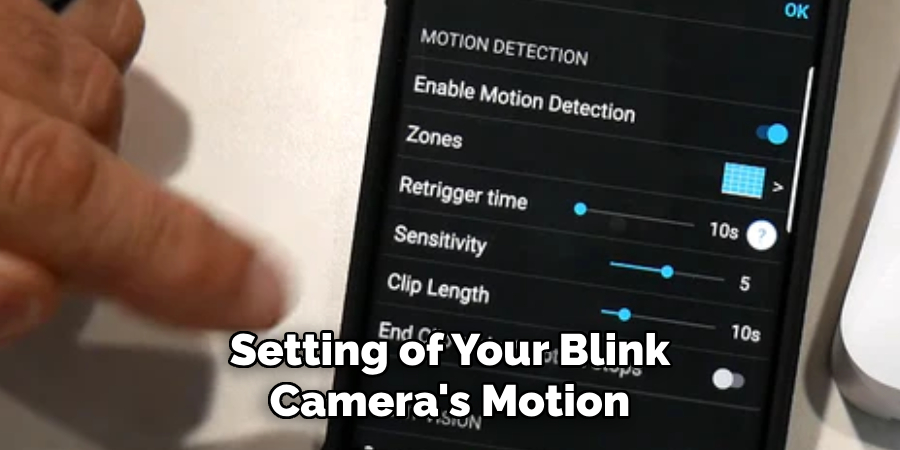
The essence of receiving timely alerts revolves around activating motion detection for each of your Blink cameras. Within the Camera Settings menu, locate the “Motion Detection” toggle and ensure it is switched to the ‘On’ position.
This action arms your cameras to monitor and report any detected movement within their field of view, serving as an indispensable component of your home security apparatus. For households with multiple cameras, repeat this process for each device to guarantee comprehensive coverage and responsiveness to potential security incidents.
C. Adjusting Sensitivity and Detection Zones
Customizing the efficacy of motion detection requires fine-tuning both the sensitivity settings and defining specific detection zones. Sensitivity adjustments dictate how readily your cameras identify movement, which can be accessed through a slider within the Motion Detection settings.
Moving the slider towards ‘High’ makes the camera more responsive to smaller movements, whereas a ‘Low’ setting helps reduce false alarms from incidental triggers.
Furthermore, by delineating motion detection zones, you can focus your surveillance on key areas of interest while excluding others, thereby optimizing your Blink system’s alertness to genuine security threats. This tailored approach helps maximize the system’s efficiency, ensuring that you receive relevant alerts that merit your attention.
How to Set up Blink Notifications: Customizing Notification Settings
Customizing how you receive notifications from your Blink Security System enhances your overall security experience and ensures that you stay informed in a way that suits your lifestyle and preferences.
The following sections will guide you through choosing your notification sounds and vibration preferences, selecting the most convenient delivery methods, and setting a notification schedule that aligns with your daily routine.
A. Choosing Notification Sound and Vibration Preferences
Within the Blink app, you can personalize the sound and vibration patterns for the notifications you receive. This can be particularly useful in distinguishing Blink alerts from other notifications on your device. To customize these settings, go to the “Settings” menu and look for the “Notification” section.
Here, you can select a specific sound from a range of options provided by the app. Additionally, you can enable or disable vibration alerts depending on your preference. Adjusting these settings ensures you recognize when a notification is from your Blink system, allowing immediate attention to potential security alerts.
B. Selecting Notification Delivery Methods
The Blink app offers flexibility in how you receive notifications, including options for push notifications and email alerts. Push notifications are real-time alerts sent directly to your smartphone, ensuring immediate awareness of any activity detected by your cameras.
On the other hand, email notifications provide a more detailed account of the event, which can be useful for record-keeping purposes. To configure your preferred delivery methods, visit the “Notification” section in the app’s settings menu. You can choose one or both options based on your need for immediate and detailed information on receiving security alerts.
C. Setting Notification Schedule
For added convenience, the Blink app allows you to schedule when you wish to receive notifications. This feature is incredibly beneficial for those wishing to limit alerts during certain hours, such as during work meetings or at night. To set a notification schedule, access the “Notification” settings and select “Schedule.”
From here, you can specify your preferred times for receiving alerts, choosing from options like “All Day,” “Specific Hours,” or custom timeframes that best fit your daily routine. This customization ensures that your Blink Security System works seamlessly with your lifestyle, providing peace of mind without unnecessary interruptions.
Fine-Tuning Motion Detection
Fine-tuning your Blink Security System’s motion detection capabilities ensures your setup is optimized for security and efficiency. This section guides you through testing camera placement, adjusting detection sensitivity, and creating specific motion detection zones.
A. Testing Camera Placement for Optimal Motion Detection
Choosing the right placement for your Blink cameras is crucial for maximizing their effectiveness. To determine the best position, it’s recommended that tests be conducted by placing the camera in various locations and observing the area it covers through the Blink app’s live view feature.
Ideal placement is usually elevated, with the camera pointing slightly downwards, ensuring a wide field of view and minimal obstructions. Pay attention to areas where movement is most likely to occur and adjust the camera’s angle to ensure these areas are within view. Avoid pointing the camera directly towards light sources or reflective surfaces to reduce false alarms.
B. Adjusting Motion Detection Sensitivity Based on Environment
The sensitivity setting of your Blink camera’s motion detection can be adjusted to suit the environment in which it operates. High-traffic areas may require a lower sensitivity to prevent constant alerts, while areas with minimal movement might benefit from a higher sensitivity setting to catch subtle activities.
The Blink app allows you to modify this setting via a slider in the Motion Detection menu. Experiment with different sensitivities to find the perfect balance that minimizes false positives while alerting you to genuine movements.
C. Creating Motion Detection Zones to Focus on Specific Areas
Motion detection zones allow you to designate specific areas within the camera’s field of view to monitor for movements, effectively ignoring activity outside these zones. This is particularly useful for focusing on entry points, valuable possessions, or restricted areas while excluding busy streets, neighborhood footpaths, or areas with frequent non-threatening movement.
Set up these zones through the Blink app by accessing the Motion Detection settings and selecting the ‘Activity Zones’ option. Here, you can draw or select the areas you want to focus on. Tailoring these zones helps to significantly reduce unnecessary notifications and ensures that your attention is directed toward significant security events within your designated areas.
Setting Up Activity Zones
Creating defined activity zones within your Blink Security System is a strategic way to enhance the efficiency and effectiveness of your home security. By carefully selecting specific areas for monitoring, you can focus on the most sensitive or vulnerable parts of your property while minimizing irrelevant alerts.
A. Defining Activity Zones Within Camera View
To define activity zones within the camera view, first, ensure that your camera is positioned to capture the desired area clearly. Through the Blink app, access the camera settings and choose ‘Activity Zones.’ Here, you can outline or select the portions of the camera’s field of view that you want to monitor.
This might include front doors, windows, or any area where you expect activity that should trigger an alert. Defining these zones ensures that your system focuses its monitoring efforts where they are most needed, improving the overall security of your space.
B. Customizing Alerts for Activity Within Specific Zones
Once your activity zones are established, you can customize how you receive alerts for detected movements within these areas. Through the app’s notification settings, specify the type of alerts you want for activity within each zone.
For example, you may choose to receive immediate push notifications for movements detected at your front door while opting for less urgent email alerts for activity in less critical zones. By customizing your alert settings, you ensure that you’re notified in a manner that reflects the significance of the movement detected in each zone.
C. Minimizing False Alarms and Notifications
One of the key advantages of setting up activity zones is the significant reduction in false alarms and unnecessary notifications. By excluding areas where movement is frequent but not indicative of a security threat, such as a busy street visible from a window, you can focus your monitoring on areas with meaningful activity.
Additionally, adjusting the sensitivity setting within each activity zone can help minimize alerts triggered by small animals or other insignificant movements. This tailored approach enhances your security and ensures that you’re only alerted when necessary, saving time and reducing the potential for alarm fatigue.
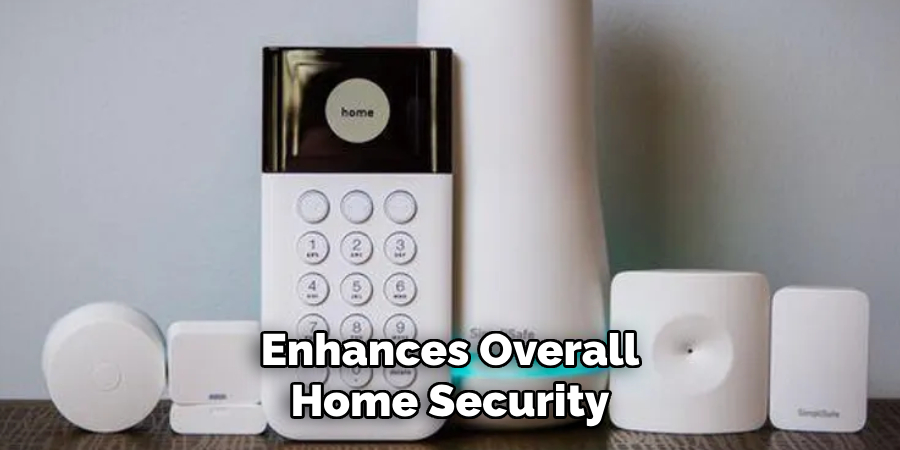
Integrating with Other Smart Home Devices
Integrating your Blink Security System with other smart home devices expands its functionality and enhances overall home security. This seamless connectivity allows for a more unified home automation experience, enabling you to control multiple devices through a single platform.
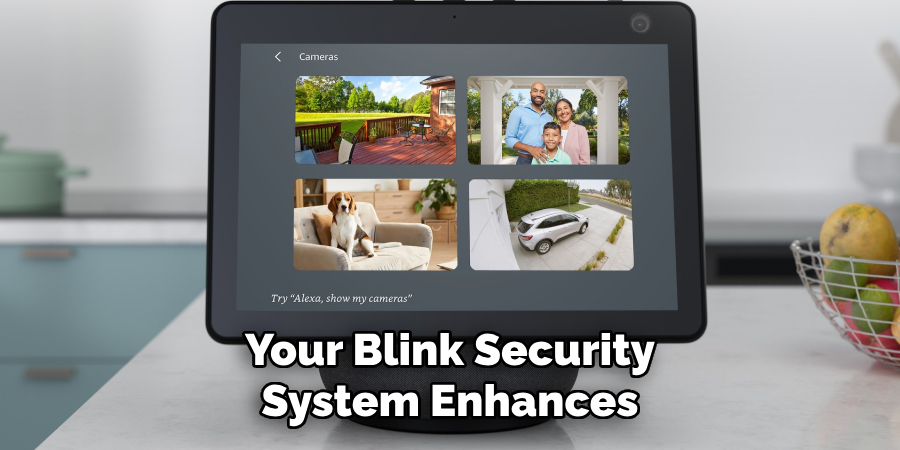
A. Exploring Integration Options with Smart Home Platforms (e.g., Amazon Alexa, Google Assistant)
The Blink Security System is compatible with major smart home platforms, including Amazon Alexa and Google Assistant. This integration allows for voice-controlled commands, such as arming your security cameras or viewing live footage on compatible smart displays. Setting up this connection typically involves adding your Blink system as a skill in the Alexa app or linking it through the Google Home app.
Once connected, you can create routines that include your Blink cameras, such as turning on lights when motion is detected, offering a more cohesive and responsive smart home ecosystem.
B. Enabling Cross-Device Notifications for Enhanced Security
For enhanced security, you can enable cross-device notifications. This feature ensures that you receive alerts on all your connected devices whenever your Blink cameras detect motion or other security events. For instance, if your smartphone is not immediately accessible, a smart speaker or smartwatch could alert you to potential security threats.
Enabling this feature usually involves adjusting the notification settings within your chosen smart home platform or the Blink app, providing you with real-time security alerts, no matter which device you use.
C. Syncing Blink Notifications with Other Smart Home Devices
Beyond receiving alerts on different devices, integrating your Blink Security System allows for syncing notifications with the actions of other smart home devices. For example, you can set up your system so that lights automatically turn on when a camera detects movement during the night or a smart lock secures your doors if unexpected activity is observed.
This proactive approach to home security, facilitated by the Blink app and your smart home platform’s routines or automation feature, creates a more vigilant and responsive security system that actively works to deter potential intruders.
Testing and Troubleshooting Notifications
Ensuring your Blink Security System effectively notifies you of real-time events is crucial for maintaining vigilant home security. Regular testing and troubleshooting can help identify and rectify any issues with motion detection notifications swiftly.
A. Conducting Test Motion Detection Events
To ensure your system’s responsiveness, periodically conduct test motion detection events. This involves manually triggering motion in the predefined activity zones to see if the system correctly identifies the activity and sends out alerts as expected. It’s a straightforward yet effective way to check if cameras and sensors are optimally positioned and functioning properly.
B. Verifying Notification Delivery on Smartphone and Other Devices
After conducting test motion detection events, verify that notifications are being delivered to your smartphone and any other connected devices. Check that the notification settings in the Blink app are correctly configured to push alerts to your devices. Ensure that your smartphone and other devices do not have Do Not Disturb modes activated, which could prevent notifications from appearing.
C. Troubleshooting Common Notification Issues
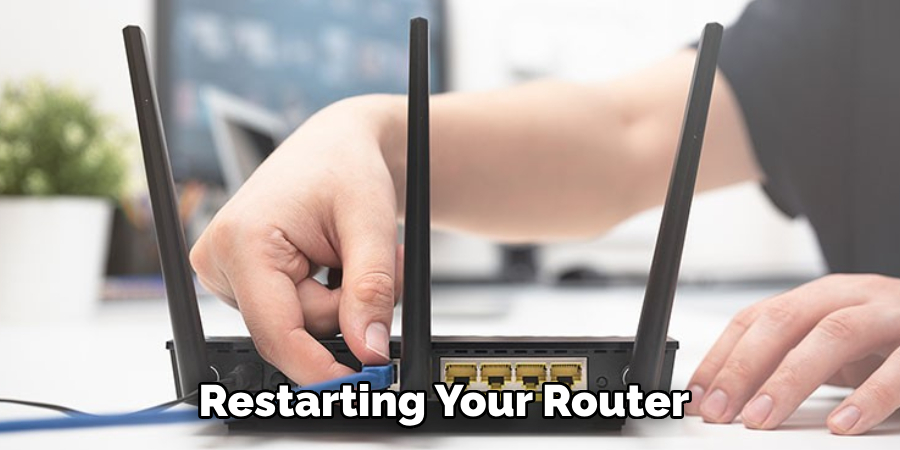
Common issues, such as delayed notifications or failure to receive alerts, often stem from connectivity problems. Ensure that your Blink Security System and all connected devices receive a strong and stable Wi-Fi signal.
Restarting your router and checking for Wi-Fi interference can be beneficial when connectivity seems to be the issue. Additionally, ensuring that the Blink app is updated on all devices is crucial, as outdated software can lead to performance glitches, including notification delays or failures.
By systematically testing, verifying, and troubleshooting, you can maintain an efficient and reliable notification system within your Blink Security System, ensuring your home’s security is never compromised.
Privacy and Security Considerations
Ensuring the privacy and security of your Blink Security System is paramount. With smart home devices increasingly becoming targets for cyberattacks, taking proactive steps to protect your personal information and home security infrastructure is essential.
A. Reviewing Privacy Settings Within the Blink App
Regularly reviewing and adjusting the privacy settings in the Blink app can greatly enhance your system’s security. This includes customizing who has access to your live feed and recorded videos and managing the permissions for each user. It’s crucial to periodically check these settings to ensure they align with your privacy preferences and security needs.
B. Securing Your Blink Account with Strong Passwords
One of the simplest yet most effective ways to protect your Blink account is by using strong, unique passwords and changing them regularly. Consider using a reputable password manager to generate and store complex passwords. Additionally, enabling two-factor authentication (2FA) adds an extra layer of security, requiring a secondary verification step before accessing your account.
C. Being Mindful of Data Sharing and Security Risks
While integrating Blink with other smart home devices increases convenience, it also introduces potential security risks. Be cautious about granting third-party apps and services access to your Blink system.
Always review these platforms’ privacy policies and security measures to understand how your data will be used and protected. Limiting unnecessary data sharing and being selective about integrations can minimize the risk of security breaches and ensure that your home remains a safe haven.
Conclusion
This guide has walked you through the essential steps on how to set up Blink notifications, ensuring that you’re promptly informed of any security events detected by your Blink Security System. Starting with enabling push notifications on your smartphones and extending alerts to other smart devices, we’ve covered the bases to guarantee you’re never out of the loop.
Customizing your notification settings is not just about convenience; it plays a pivotal role in the effectiveness of your home security system. Tailoring alerts based on time, location, and type of activity can significantly enhance your ability to respond swiftly to potential security breaches. This level of customization ensures that you are alerted to genuine threats, minimizing false alarms and enhancing your overall security posture.
In optimizing your Blink notification settings, remember the key is balancing being informed and overwhelmed. Regularly review and adjust your settings to align with your current security needs. Use features like activity zones and motion scheduling to reduce unnecessary alerts.
Ensure that your Blink app and all connected devices are always updated to benefit from the latest security features and fixes. Remember, understanding how to set up Blink notifications and taking the time to customize them can make a remarkable difference in your home security effectiveness.
About
Safety Fic is a distinguished figure in the world of Diy design, with a decade of expertise creating innovative and sustainable Diy solutions. His professional focus lies in merging traditional craftsmanship with modern manufacturing techniques, fostering designs that are both practical and environmentally conscious. As the author of diy, Safety Fic delves into the art and science of Safety Fic-making, inspiring artisans and industry professionals alike.
Education RMIT University
(Melbourne, Australia) Associate Degree in Design (Safety Fic) Focus on sustainable design, industry-driven projects, and practical craftsmanship. Gained hands-on experience with traditional and digital manufacturing tools, such as CAD and CNC software.
Nottingham Trent University
(United Kingdom) Bachelor’s in diyfastly.com and Product Design (Honors) Specialized in product design with a focus on blending creativity with production techniques. Participated in industry projects, working with companies like John Lewis and Vitsoe to gain real-world insights.
Publications and Impact
In diy, Safety Fic his insights on indoor design processes, materials, and strategies for efficient production. His writing bridges the gap between artisan knowledge and modern industry needs, making it a must-read for both budding designers and seasoned professionals.